 by
by Sure! Here’s a detailed, beginner-friendly guide on “How to Make a New Cute Pattern for You – This is a Beautiful Crochet Pattern”. This explanation includes inspiration ideas, steps for designing, selecting stitches, and finishing your project. It’s ideal if you’re looking to create your own crochet pattern with a cute and beautiful style.
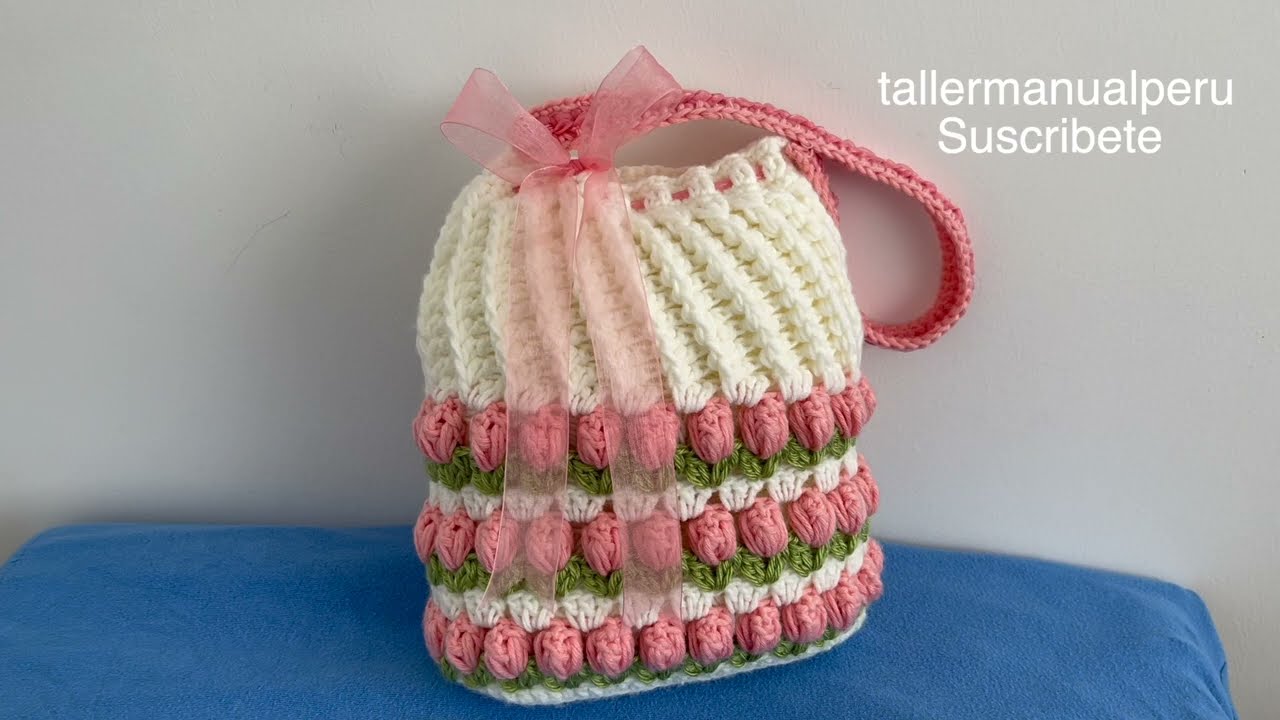
How to Make a New Cute Pattern for You – This is a Beautiful Crochet Pattern
Designing your own crochet pattern may sound challenging, but it’s a creative and rewarding process! Here’s a step-by-step breakdown to help you bring your cute idea to life.
Step 1: Get Inspired – Choose Your Theme
Before you start stitching, decide what kind of “cute” pattern you want to create. Ask yourself:
-
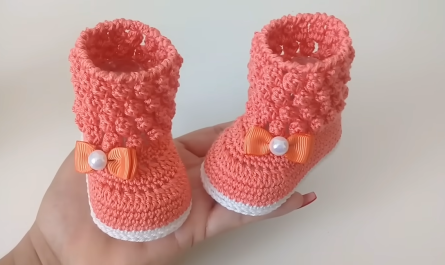
Do you want it to be whimsical (flowers, bunnies, hearts)?
-
Do you want a textured pattern (bobbles, popcorn stitches, lace)?
-
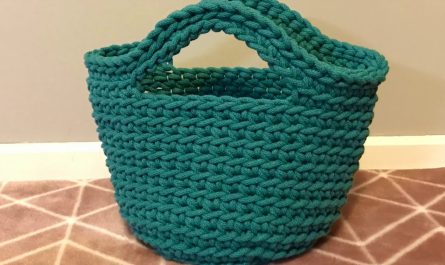
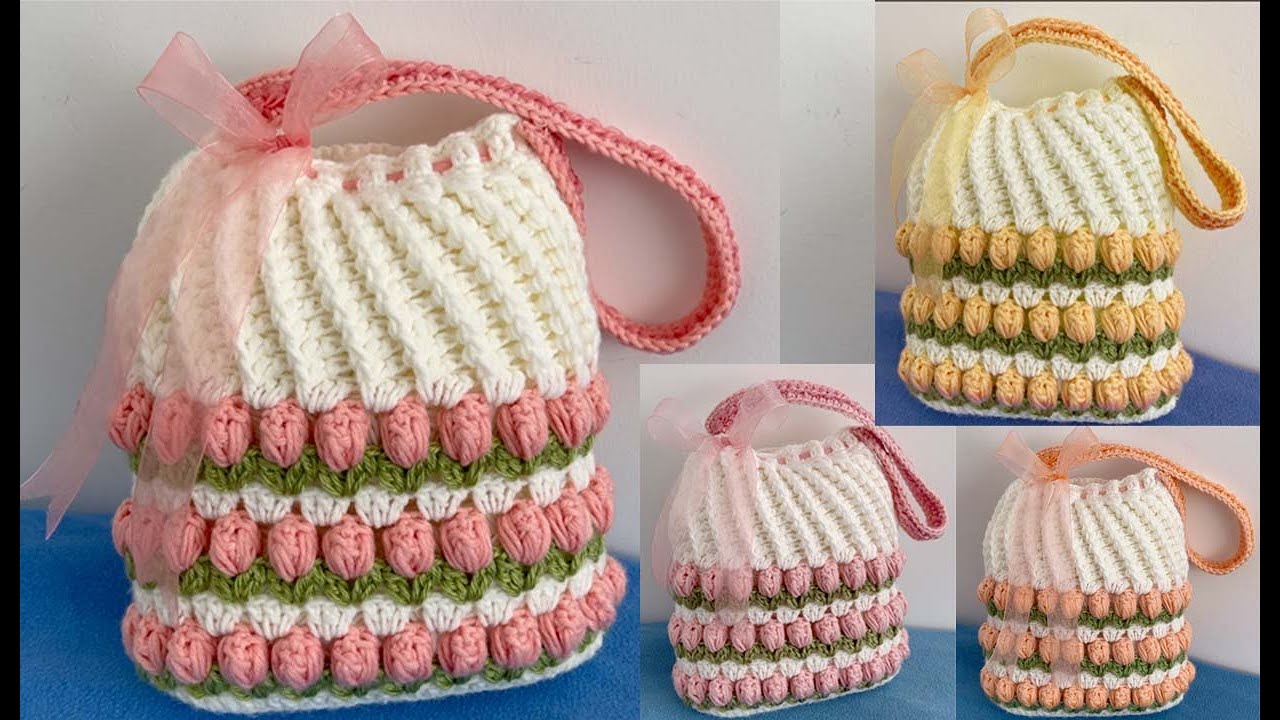
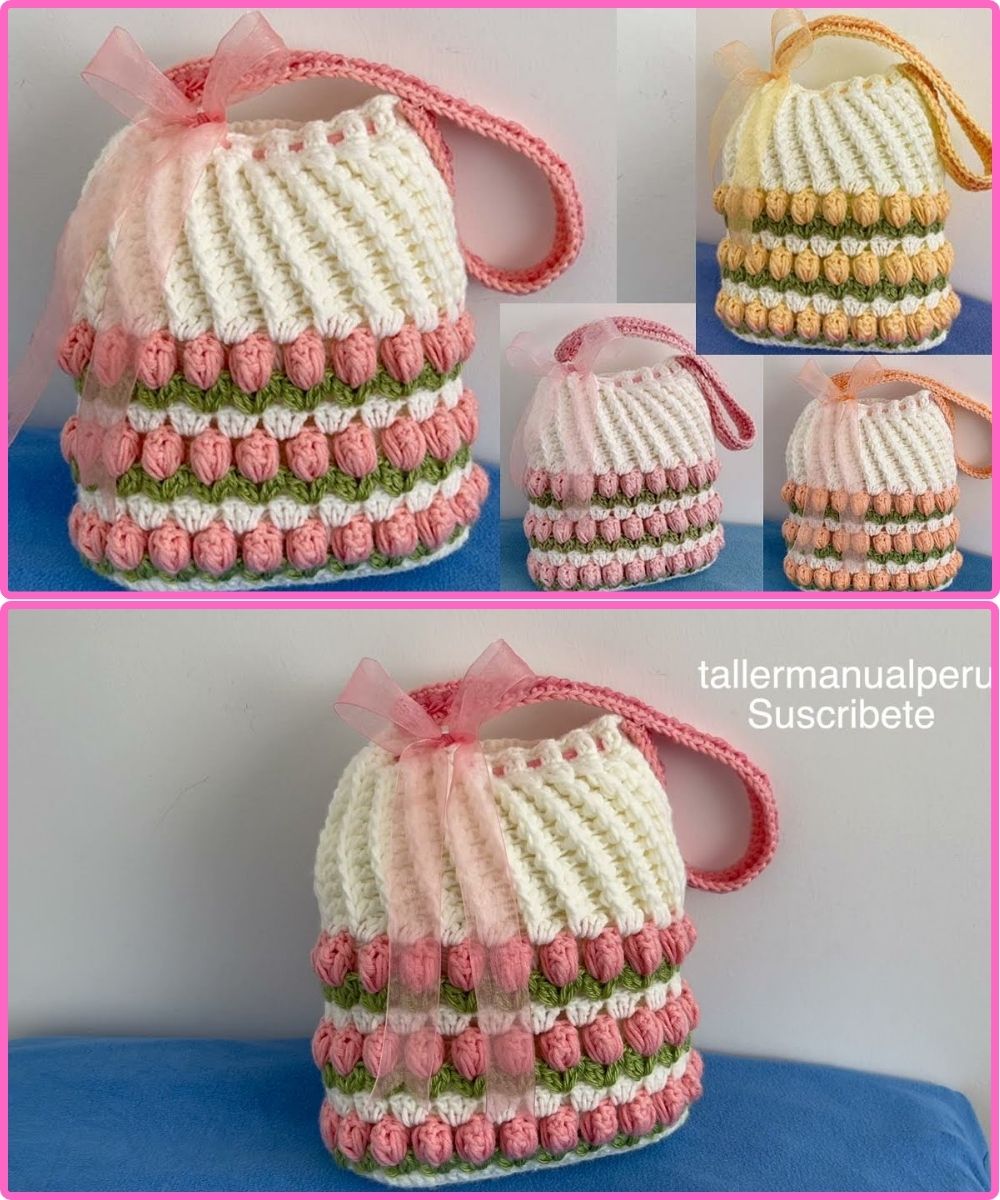
Is it for a blanket, coaster, bag, scarf, amigurumi, or something else?
Example Inspiration Ideas:
-
A floral granny square with soft pastel colors
-
A heart-shaped coaster using puff stitches
-
A mini amigurumi bear with oversized ears
Step 2: Choose the Yarn & Hook
Pick materials that suit the “cute and beautiful” aesthetic:
-
Yarn: Soft cotton or acrylic blends in pastel, bright, or soft neutral tones
-
Hook size: Follow yarn label, but using a slightly smaller hook makes stitches tighter and neater (especially for amigurumi)
Example: For a dainty coaster pattern, use a DK-weight cotton yarn and a 3.5 mm hook.
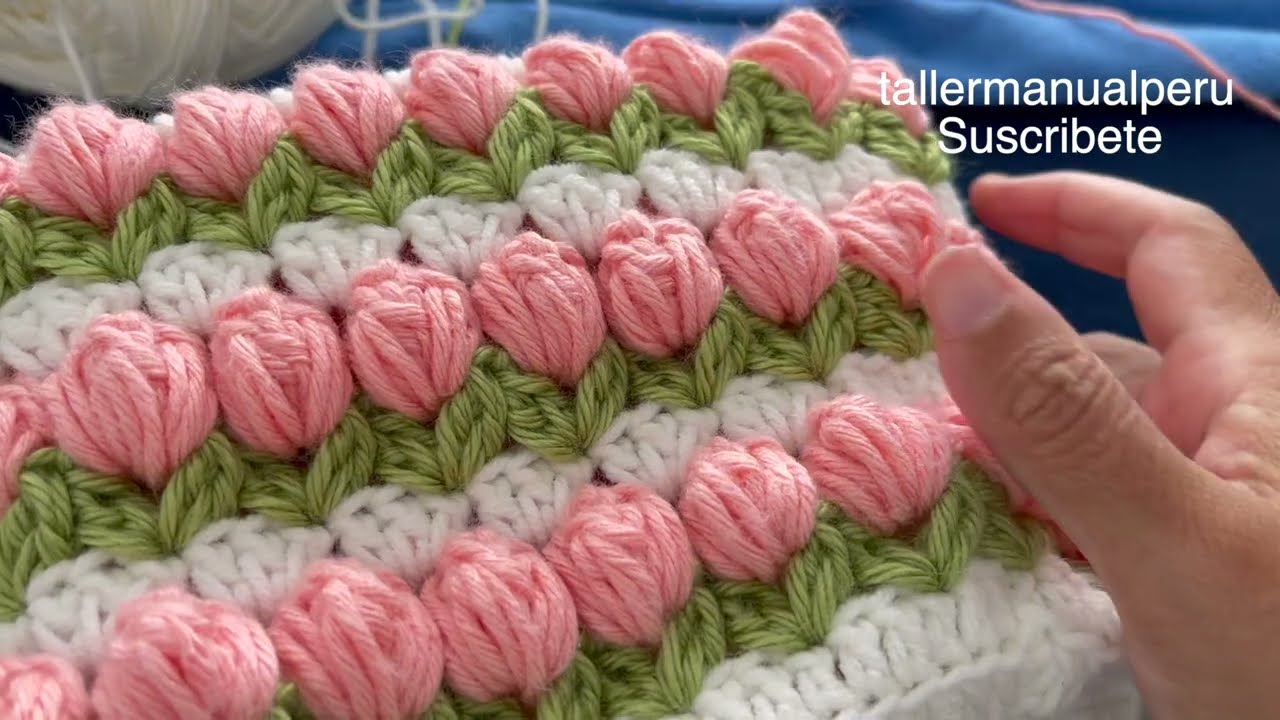
Step 3: Choose Stitches That Add Character
A beautiful pattern is usually built on creative stitch combinations. Try experimenting with:
-
Basic stitches: Single crochet (sc), half double crochet (hdc), double crochet (dc)
-
Cute texture stitches:
-
Puff Stitch – soft and puffy
-
Bobble Stitch – great for polka dots or hearts
-
Shell Stitch – elegant and girly
-
Picot – nice for edging
-
Example Combo: Shell stitch + picot = a scalloped, frilly design

Step 4: Sketch or Write the Pattern
Now that you have your idea and materials:
-
Draw or plan your layout. For example, if it’s a square, visualize each round.
-
Write down each round/row clearly.
-
Use standard abbreviations to make it easier to share later.
Sample pattern beginning:
Step 5: Add a Unique Element
What makes your pattern “you”? Try one of these:
-
A unique color combo (like soft pink + cream + mint)
-
A hand-stitched detail like embroidery
-
A personal label/tag sewn onto the piece
-
Add a button, pom-pom, or crochet flower
Step 6: Finish & Block
Once finished:
-
Weave in all ends with a yarn needle
-
Block the piece with light steam or wet blocking to make it neat and even
Optional: Write & Share Your Pattern
If you’re happy with it, you can write a formal pattern to share on:
-
Ravelry
-
Etsy
-
Pinterest
-
Instagram
-
Your own blog
Make sure to include:
-
Materials list
-
Gauge
-
Abbreviations
-
Step-by-step instructions
-
Photos or diagrams
Final Tips for Creating a Cute Crochet Pattern
✅ Choose soft colors
✅ Use simple, neat stitches
✅ Add texture and small embellishments
✅ Keep it small and sweet if you’re just starting
Watch tutorial: