by
by Below is a quick, easy, step-by-step crochet pattern for a baby jumpsuit, written so even a confident beginner can follow it. You can adjust the size by simply adding or subtracting chains and rows.
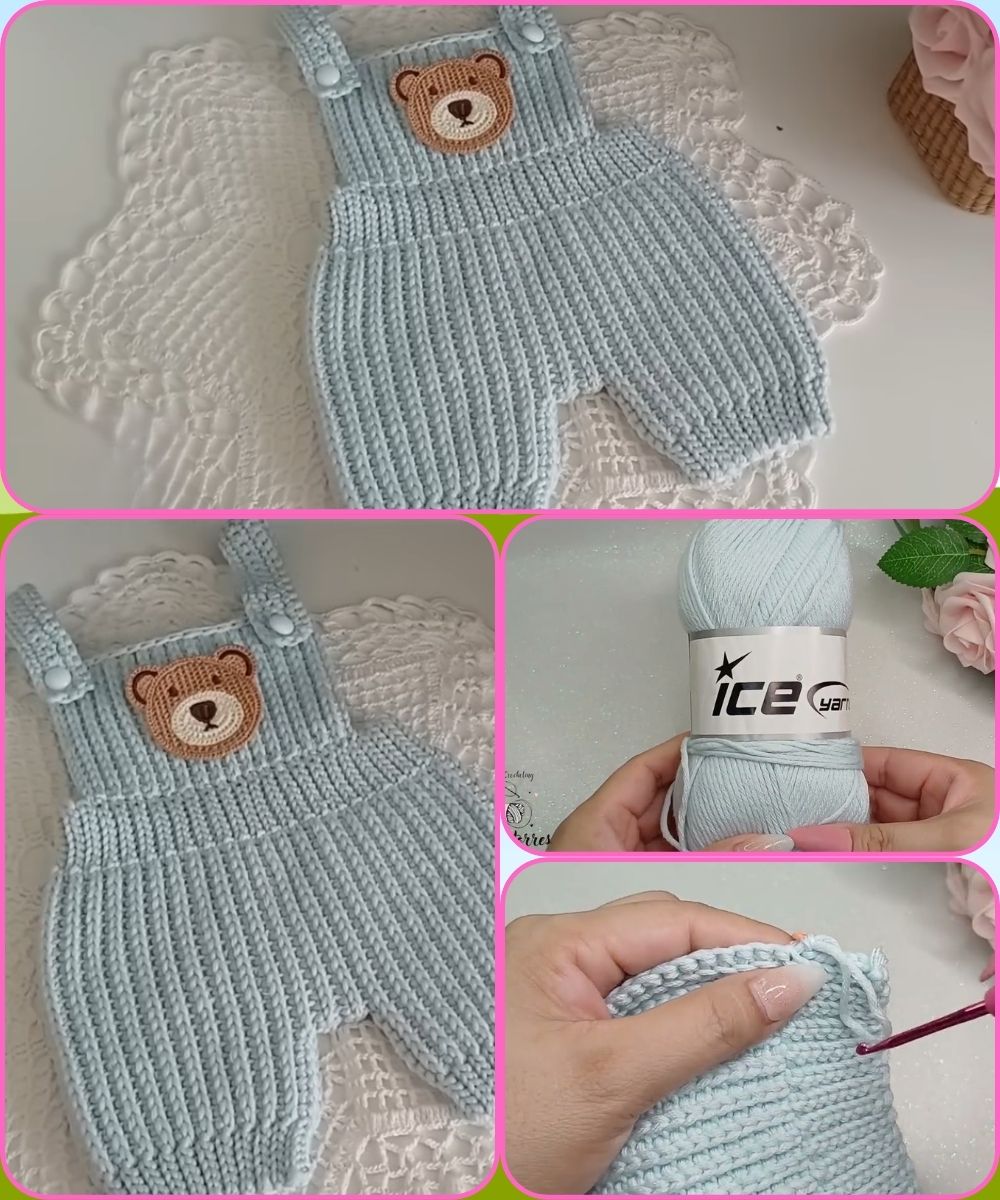
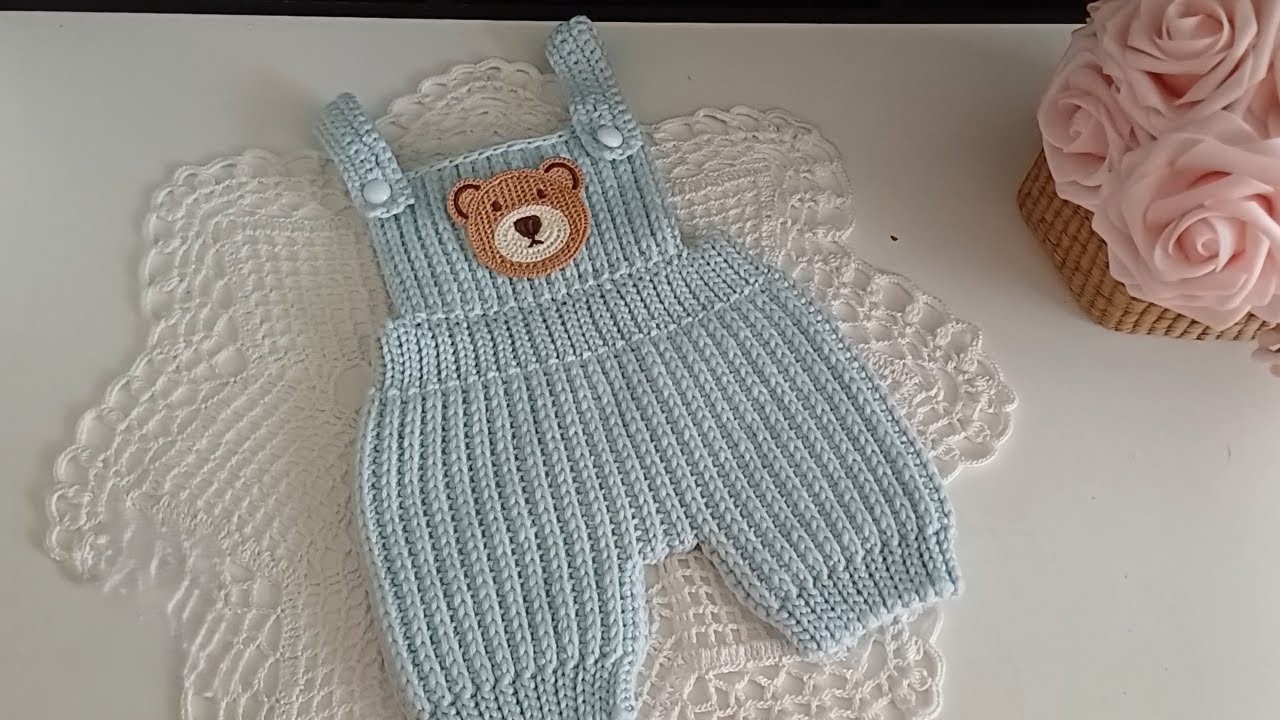
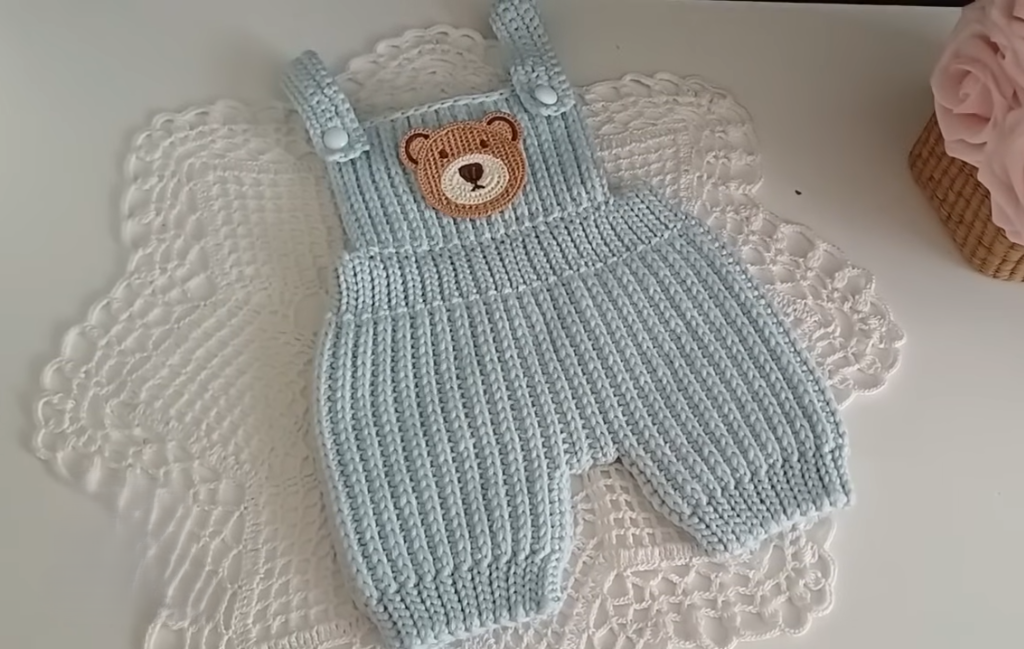
🧶 Easy Crochet Baby Jumpsuit Pattern (0–3 months)
Skill level: Beginner – Easy
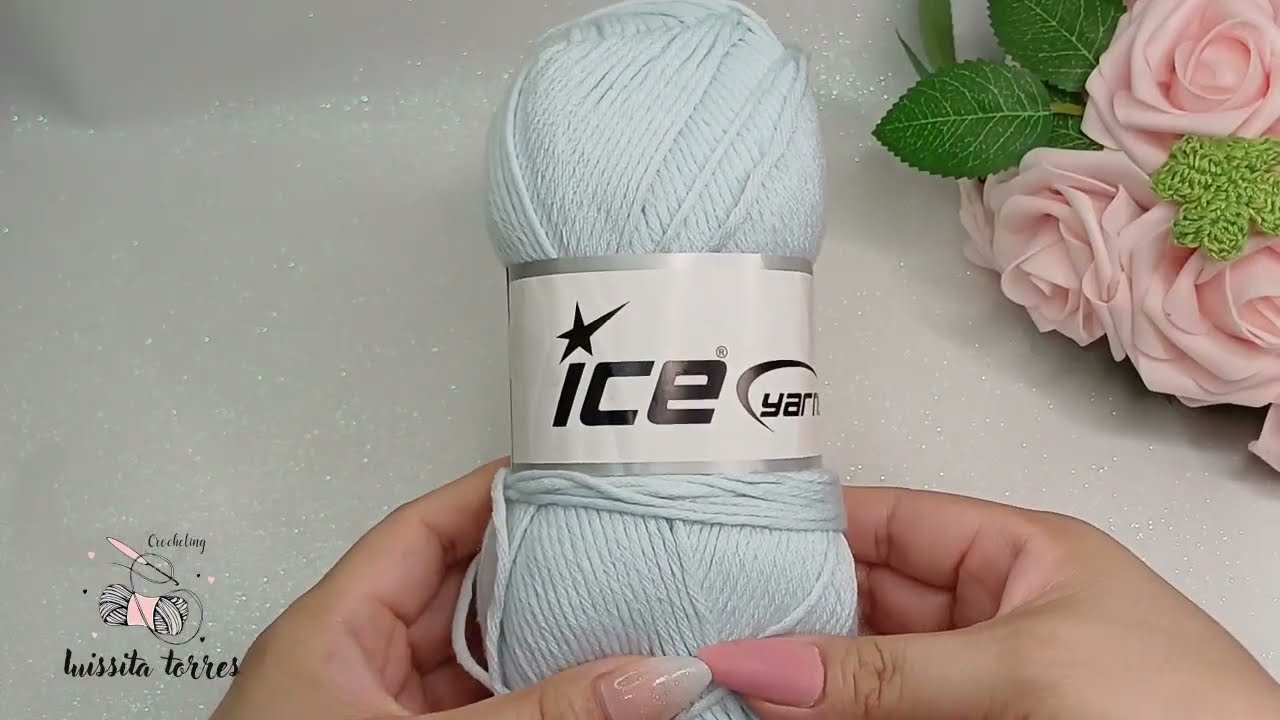
Yarn: DK (Light #3) or Soft Baby Acrylic
Hook: 4.0 mm (G)
Stitches used:
-
ch = chain
-
sc = single crochet
-
dc = double crochet
-
hdc = half-double crochet
-
sl st = slip stitch
-
st(s) = stitch(es)
-
inc = increase (2 stitches in same stitch)
-
dec = decrease (crochet 2 stitches together)
⭐ CONSTRUCTION OVERVIEW
This jumpsuit is worked in four main parts:
-
Top bodice (front and back combined)
-
Leg separation
-
Two pant legs worked in the round
-
Straps + edging + optional buttons
This is one of the simplest constructions for a baby romper.
🪡 STEP 1: Make the Bodice
Row 1:
Ch 42.
(Row count gives a chest width of approx. 18–20 cm.)
Row 2:
Sc in 2nd ch from hook, sc across. (41 sc)
Ch 1, turn.
Rows 3–15:
Sc across.
(You should have a rectangle about 4.5 in / 12 cm tall.)
Fasten off and weave ends.
👉 This forms a flat chest panel.
🩳 STEP 2: Shape the Bottom (Start of the Pants Area)
Reattach yarn at Row 1 right corner.
Row 1:
Sc 41 across, ch 1, turn.
Row 2–6:
Sc across each row to make a longer rectangle.
Piece now should measure about 18–20 cm tall total.
👶 STEP 3: Divide for Legs
You will now split the bottom width into two legs.
Count 20 stitches, place a stitch marker.
This divides:
-
20 stitches = Left leg
-
21 stitches = Right leg
LEFT LEG
Attach yarn at the left side.
Round 1:
Sc in each of the 20 stitches.
At the end of row, join to first sc with sl st to work in the round.
Rounds 2–12:
Sc around (20 sts).
(Length: about 10–12 cm or desired.)
Round 13 (optional cuff):
Hdc in each stitch to form a stretchy cuff.
Fasten off.
RIGHT LEG
Attach yarn to the first stitch after the marker.
Repeat exactly the same instructions as the left leg.
🩵 STEP 4: Add Shoulder Straps
Turn the jumpsuit upside down so the top bodice is facing you.
Strap 1:
Attach yarn 2 stitches from the left corner at the top.
Row 1: Ch 1, sc in next 6 stitches.
Row 2–22: Sc across 6 sts, ch 1, turn.
(Length approx. 12–14 cm. Adjust if needed.)
Fasten off.
Strap 2:
Repeat on the right side.
(Optional: Add decreases at strap tips to taper them.)
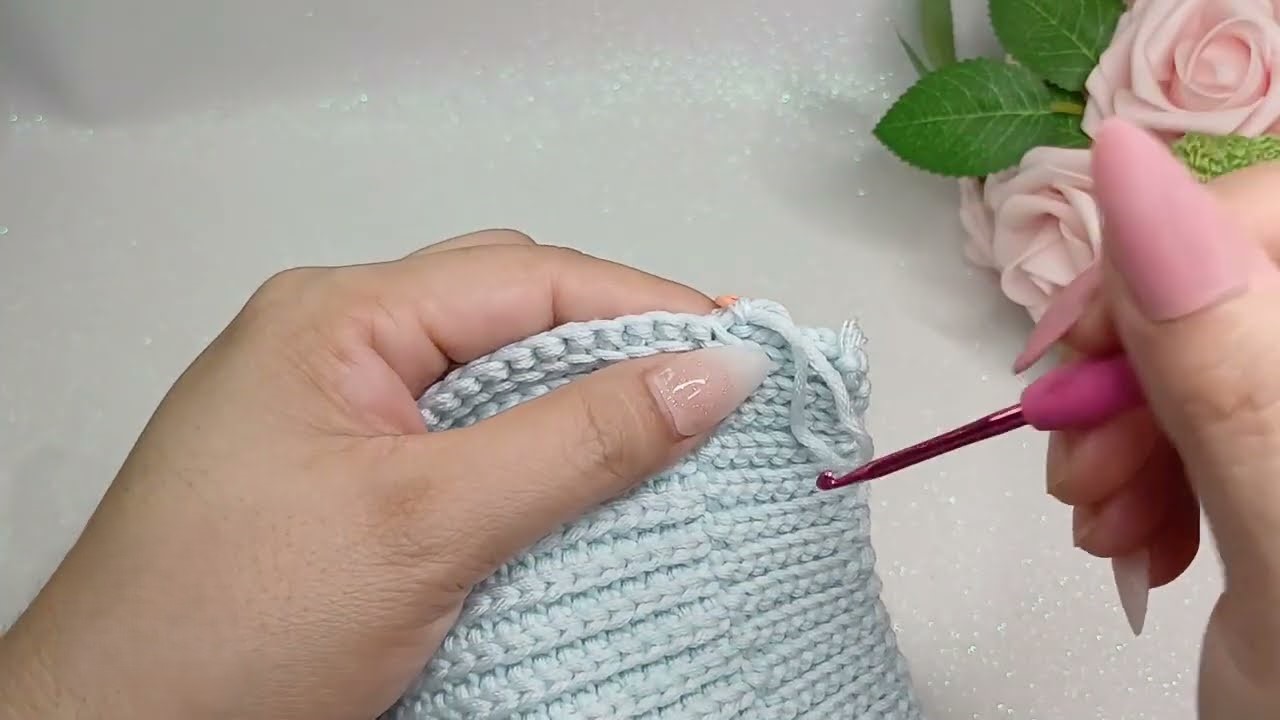
🧵 STEP 5: Add Edging (Optional but neat)
With yarn, work sc all around the top edge, including strap sides.
At corners: place 2 sc for smooth rounding.
🧷 STEP 6: Add Buttons or Ties
At the front top edge, sew 2 cute wooden or plastic baby-safe buttons.
Mark the spot on each strap and create buttonholes:
-
Ch 2
-
Skip 2 sts
-
Continue sc across strap
Or for no buttons:
Make a small chain tie and knot.
🎀 OPTIONAL DECORATIONS
-
Little pockets
-
Small appliqué (hearts, stars, bear face)
-
Ribbed edging (front post/back post stitches)
-
Stripes
-
Cute bow at the front
📏 TO ADJUST FOR DIFFERENT SIZES
Chest width:
-
Newborn → start with ch 38
-
0–3 months → ch 42
-
3–6 months → ch 46
-
6–12 months → ch 52
Leg length:
Add more rounds before the cuff.
Strap length:
Add or subtract rows.
✔️ If you’d like, I can also create:
✅ A printable PDF-style pattern
✅ A diagram or chart
✅ A version using double crochet instead of single crochet (faster!)
✅ A larger baby size (6–12 months or 1–2 years)
✅ A matching hat, booties, or cardigan
Watch tutorial: