by
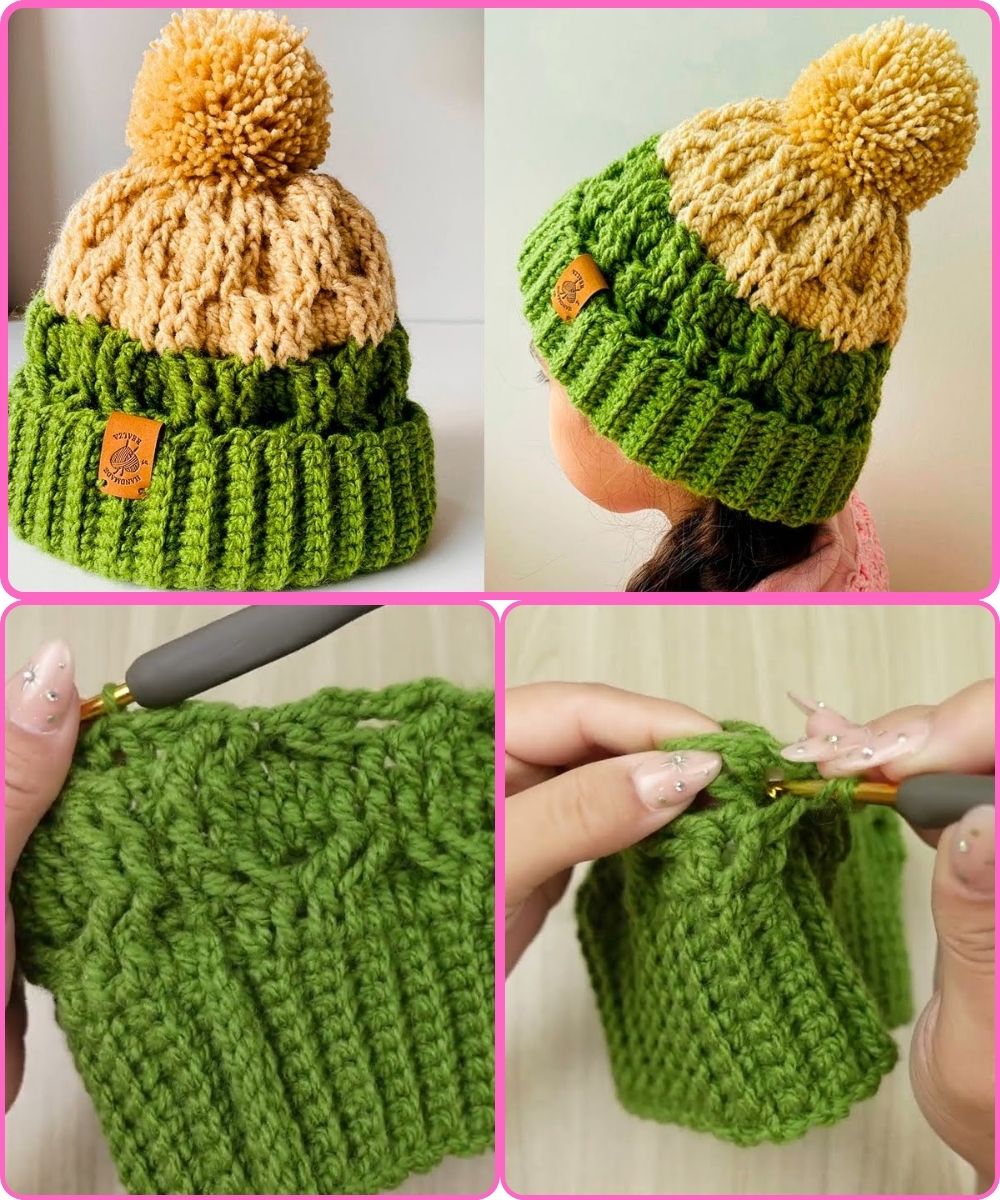
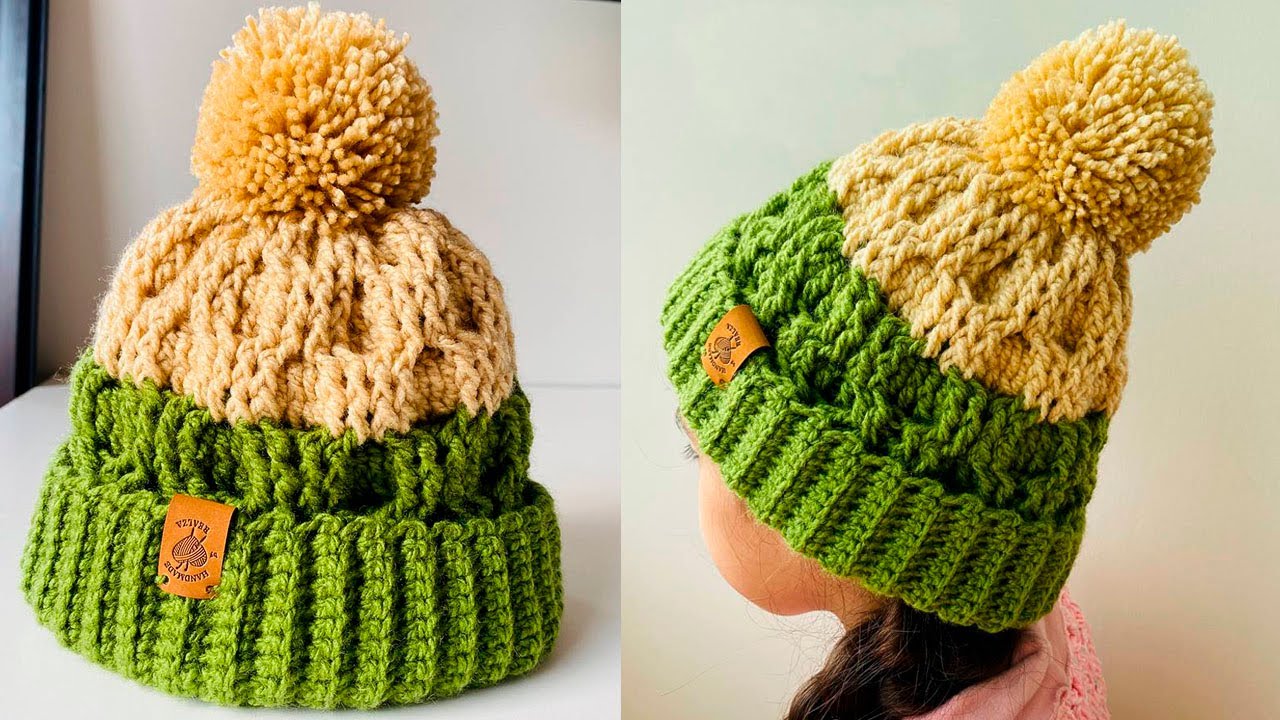
by Hey there, fellow yarn enthusiasts! Are you ready to dive into a super satisfying crochet project that will leave you with a beautiful, cozy hat perfect for chilly days? I recently stumbled upon a fantastic tutorial that inspired me to share this detailed pattern with you. Whether you’re a seasoned pro or just starting your crochet journey, this guide will walk you through every stitch to create your very own stylish headwear.
Let’s grab our hooks and get started!
What You’ll Need:
- Two skeins of yarn (the tutorial suggests 3mm thickness, but feel free to experiment with your favorite weight!)
- A 4.0 mm crochet hook (or the size recommended for your chosen yarn)
Part 1: Crafting the Perfect Elastic Band
The foundation of a great hat is a comfortable and well-fitting band. Here’s how we’ll make it:
- Start Strong: Begin with a classic slip knot.
- Chain Up: Chain 10 stitches. Then, add one more chain. This extra chain is just for height and won’t count as a stitch, so don’t worry about it affecting your stitch count.
- First Row of Single Crochet: Go back into the previous chain and single crochet in each stitch until you reach the end of your chain.
- Building Height: Chain one for height, then turn your work. Now, single crochet into the entire first stitch.
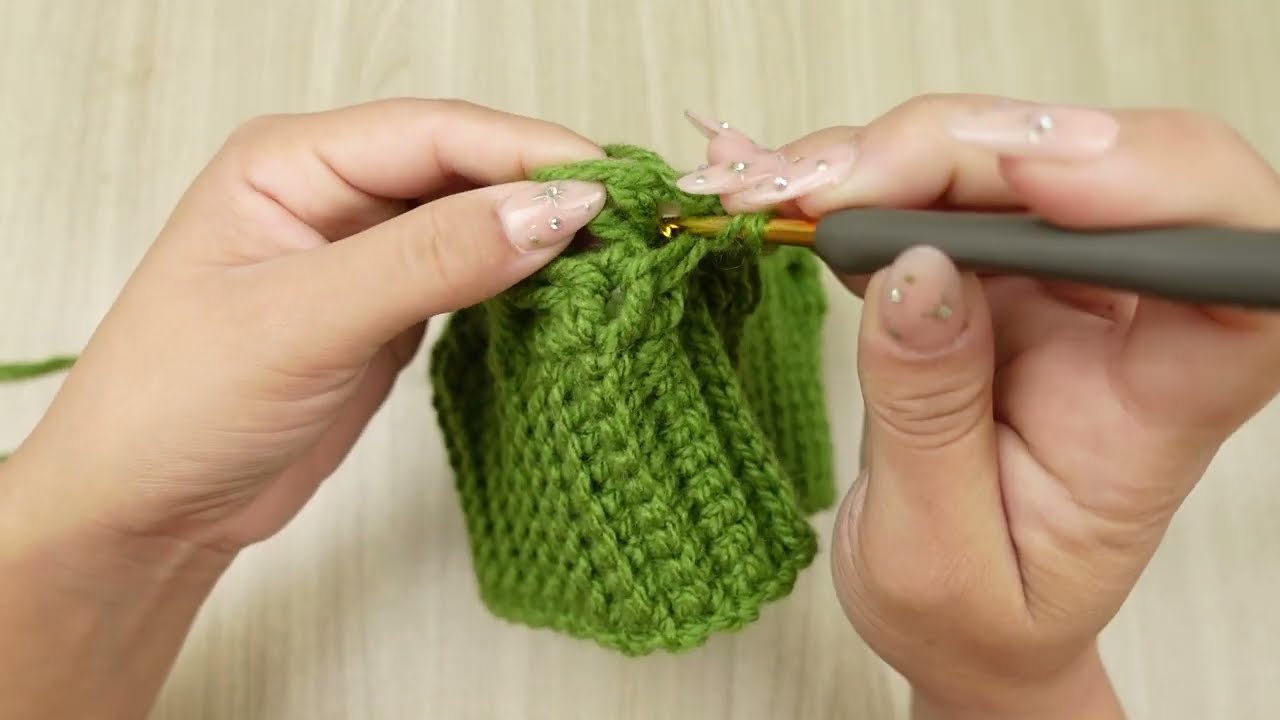
- Back Loop Magic: For the remaining stitches in this row, you’ll single crochet into the back loop only. This creates a lovely ribbed effect that gives your band its stretch!
- Repeat and Measure: Continue this pattern (single crochet into the entire first stitch, then back loop only for the rest) until your band measures 55 cm when stretched. This ensures a good fit!
- Count Your Rows: A little tip from the pros: make sure your total number of rows is a multiple of eight. The video’s creator used 82 rows, which is a great reference.
- Join the Circle: To close your elastic band and form a loop, slip stitch the two ends together.

Part 2: Beginning the Hat Body (Your First Color!)
Now for the exciting part – shaping your hat! We’ll start with your first chosen yarn color.
- Right Side Up: Turn your elastic band so you’re working on the wrong side.
- First Round of Double Crochet: Chain one, then double crochet in each stitch around the entire band. This sets up the base for our beautiful pattern.
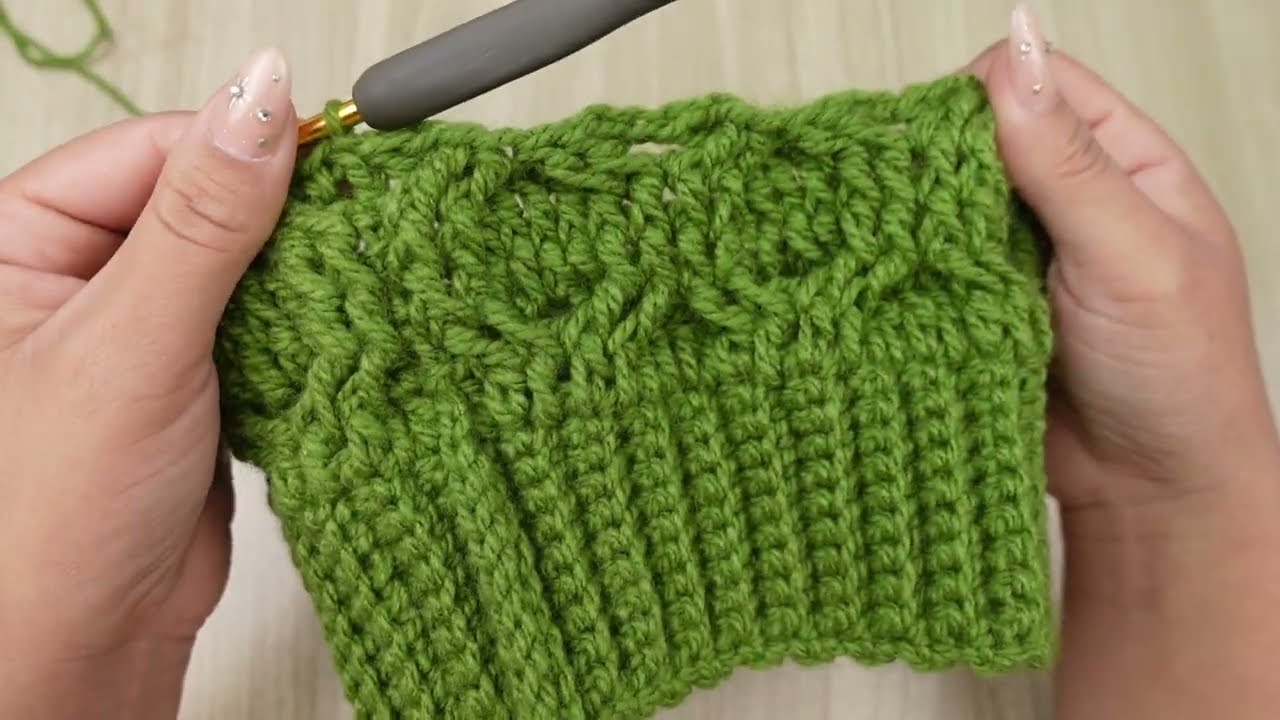
The Pattern Rows: Creating Texture and Style
This pattern uses a combination of front post double crochets and regular double crochets to create a unique, textured look.
- Row 1 (Pattern Row):
- Chain three (this counts as your first double crochet).
- Skip two stitches.
- Make a front post double crochet in the third and fourth stitches.
- Now, here’s the clever part: go back and make a double crochet in the two stitches you skipped, working from behind to create a beautiful crossed effect.
- Skip two stitches.
- Make a double crochet in the third and fourth stitches.
- Then, make a front post double crochet in the two stitches you just worked.
- Repeat this sequence (two front post double crochets, two double crochets worked from behind, two double crochets, two front post double crochets) around the entire row.
- Row 2 (Relief Stitches):
- Chain three.
- Make a front post double crochet in each stitch around the entire row. Yes, even those stitches that were worked from behind in the previous row! This creates a lovely “relief” texture.
- Row 3 (More Relief!):
- Repeat Row 2, making another row of front post double crochets.
- Row 4 (Closing the Squares):
- Chain three.
- Make a double crochet in the first two stitches.
- Make a front post double crochet in the next two stitches.
- Make a front post double crochet in the next two stitches.
- Now, make a double crochet in the two stitches that were worked from behind in the previous pattern row.
- Repeat this pattern around the row.
- Row 5 (Final Relief):
- Chain three.
- Make a front post double crochet in each stitch around the entire row.
Continue the Pattern: Repeat the pattern from Row 1 to Row 5 until your hat measures 11 cm from the elastic band.
Part 3: Color Change and Decreasing for the Crown
Time to add a new pop of color and start shaping the top of your hat!
- Switch Colors: Change to your second yarn color (the video uses a lovely beige).
- Maintain the Pattern: Continue working the established pattern, making sure you start your color change on a row where you make front post double crochets in every stitch.
- Reach Your Height: Keep crocheting until your hat reaches approximately 16 cm in total height.
- Decreasing Rows (Shaping the Top!):
- Now, we’ll start decreasing to close the top of the hat. You’ll be making a front post double crochet decrease over two stitches. Here’s how:
- Yarn over, insert hook into the first stitch, pull up a loop.
- Yarn over, pull through two loops (you’ll have two loops on your hook).
- Yarn over, insert hook into the next stitch, pull up a loop.
- Yarn over, pull through two loops (you’ll have three loops on your hook).
- Yarn over, pull through all three loops. That’s one decrease!
- Repeat this decrease around the entire row.
- Make two more rows of decreases in the same manner. This will gradually close the top.
- Now, we’ll start decreasing to close the top of the hat. You’ll be making a front post double crochet decrease over two stitches. Here’s how:
Part 4: The Grand Finale!
You’re almost there! Just a few more steps to finish your beautiful hat.
- Cut and Tail: Cut your yarn, leaving a long tail (about 6-8 inches is good).
- Thread Your Needle: Thread this tail onto a yarn needle.
- Close the Top: Weave your needle through the remaining stitches at the very top of the hat in a zigzag pattern. This will gather the opening.
- Secure It: Pull tightly to close the hole, and then pass the needle through several times to secure it firmly. Weave in any remaining ends.
- Pompom Perfection: For that extra touch of cuteness and warmth, attach a pompom to the top of your hat!
And there you have it! Your very own hand-crocheted hat, made with love and skill. I hope you enjoyed this journey as much as I did. Happy crocheting!
Watch tutorial:
https://www.youtube.com/watch?v=MiveWhX2vtw