 by
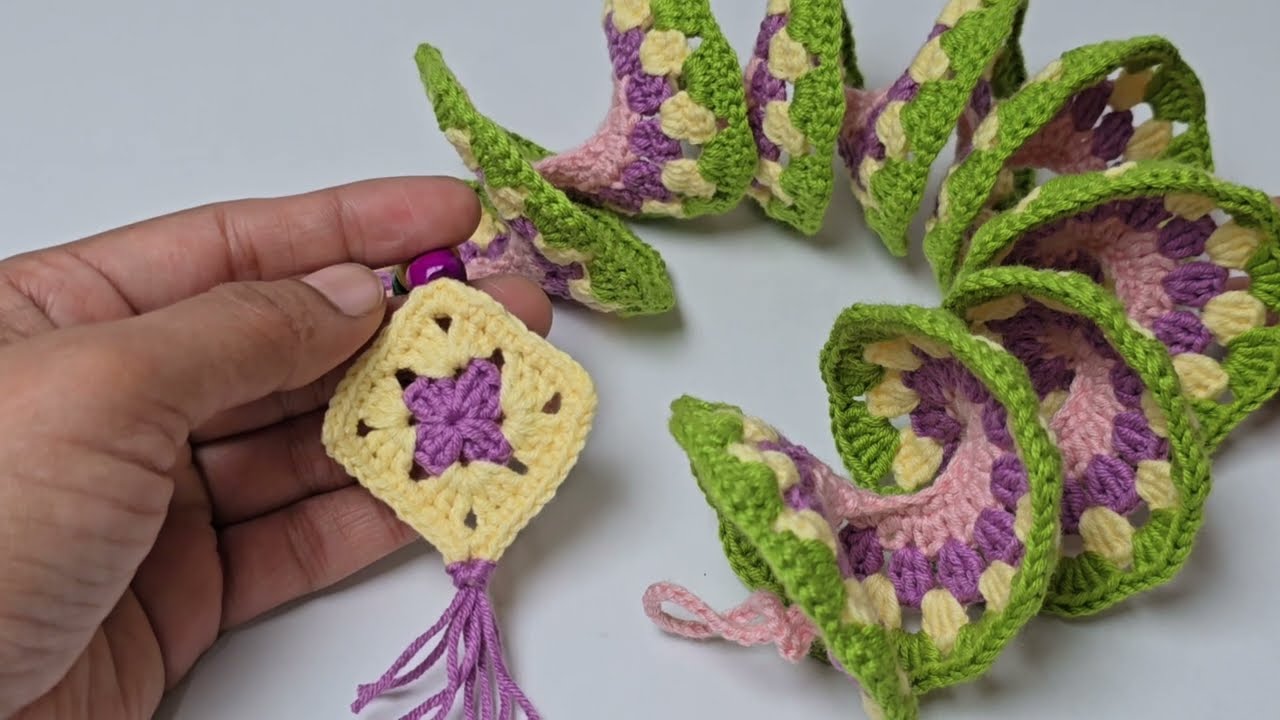
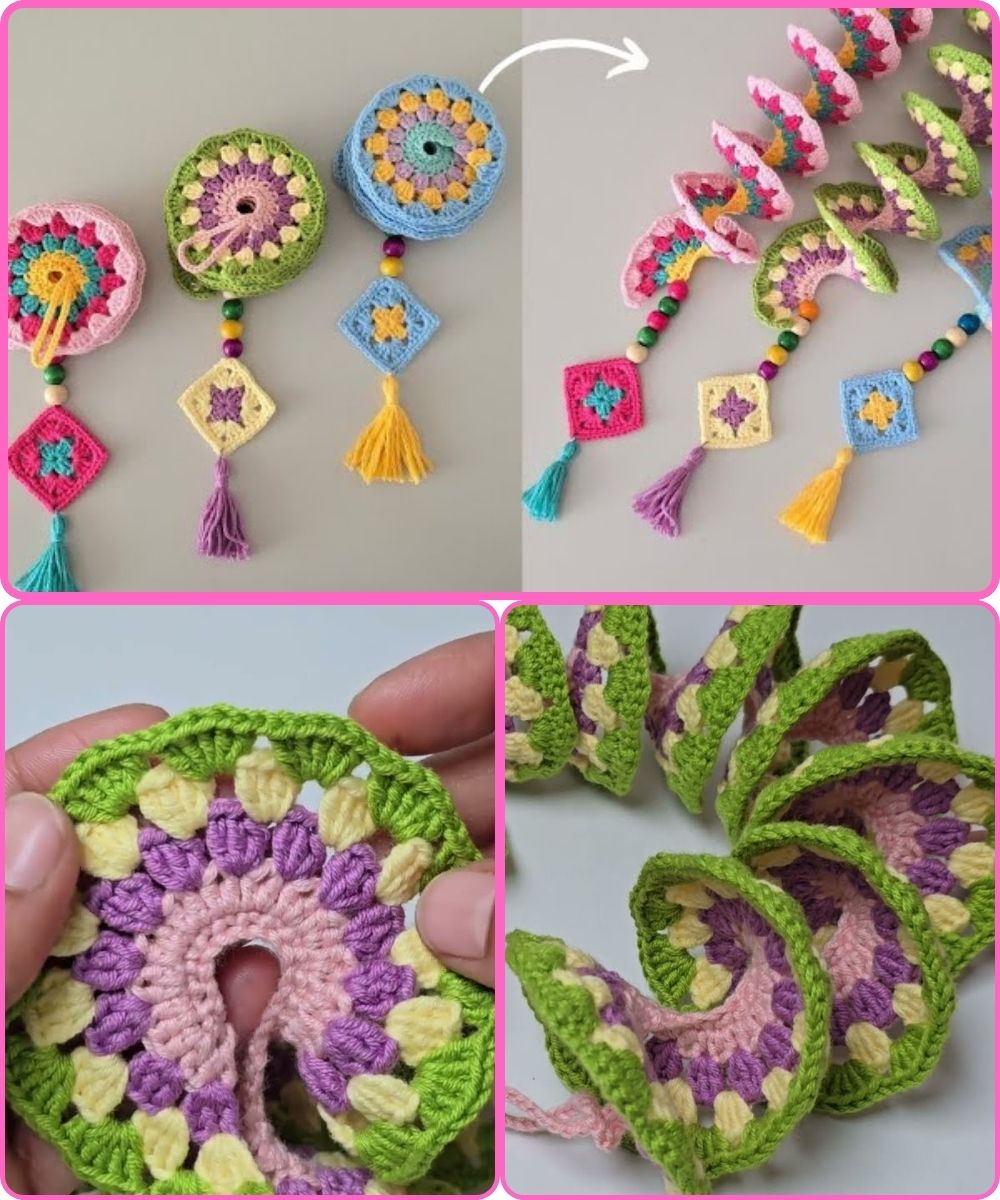
by Looking to infuse your outdoor spaces with a unique, handcrafted touch? This delightful crochet wind spinner, crafted with an easy and quick granny pattern, is the perfect project! Imagine gentle breezes catching the delicate spins of your own creation, adding a stylish, bohemian flair to your garden, balcony, or patio. This tutorial will guide you through each step, making it accessible for crocheters of all levels.
Materials You’ll Need:
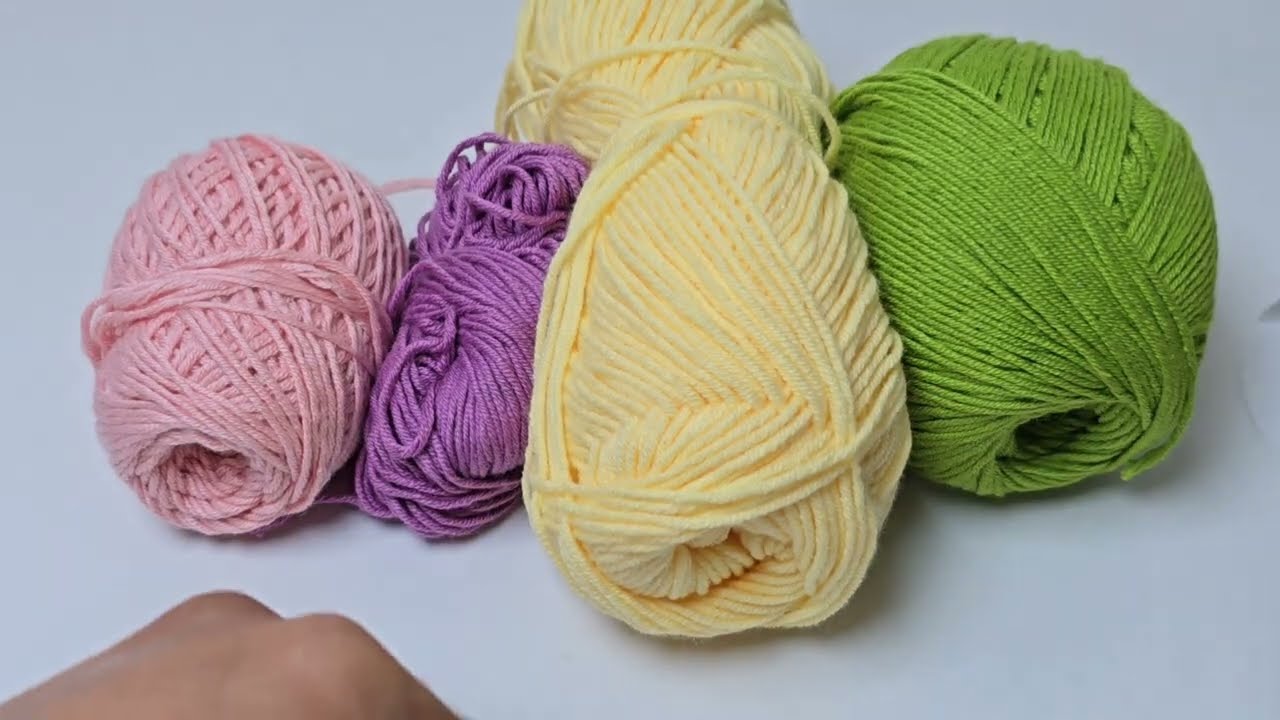
Before we begin, gather your essentials. For this project, you will need:
- Yarn: 5-ply thread (50% acrylic, 50% cotton, medium thickness)
- Crochet Hook: 2.50 mm
- Beads: Small decorative beads (optional, for embellishment)
- Tapestry Needle: For weaving in ends and sewing
- Scissors
Step-by-Step Instructions:
Follow these detailed instructions to create your beautiful wind spinner:
- Making the Base Chain:
- Begin by creating a foundation chain of 100 stitches. This will result in a length of approximately 35 cm. Remember, you can adjust this initial chain length to make your spinner longer or shorter, depending on your preference.
- Crochet Rows – Building the Foundation:
- Row 1: Single Crochet
- Work a single crochet into each chain across the entire base chain. This forms a sturdy foundation for your spinner.
- Row 2: Half Double Crochet
- For the second row, work a half double crochet into each stitch from the previous row. This adds a bit more height and texture.
- Row 3: Double Crochet with Chain Spaces
- In this row, you’ll start introducing spaces. Work double crochets with chain spaces in between, following a pattern that will allow for the “granny” effect later on.
- Row 4: 4 Double Crochets in Chain Spaces
- Work 4 double crochets into each of the chain spaces created in the previous row. This begins to build out the solid sections of your design.
- Row 5: 5 Double Crochets in Chain Spaces
- Expand on the previous row by working 5 double crochets into each chain space. This creates a denser fabric in these sections.
- Row 1: Single Crochet


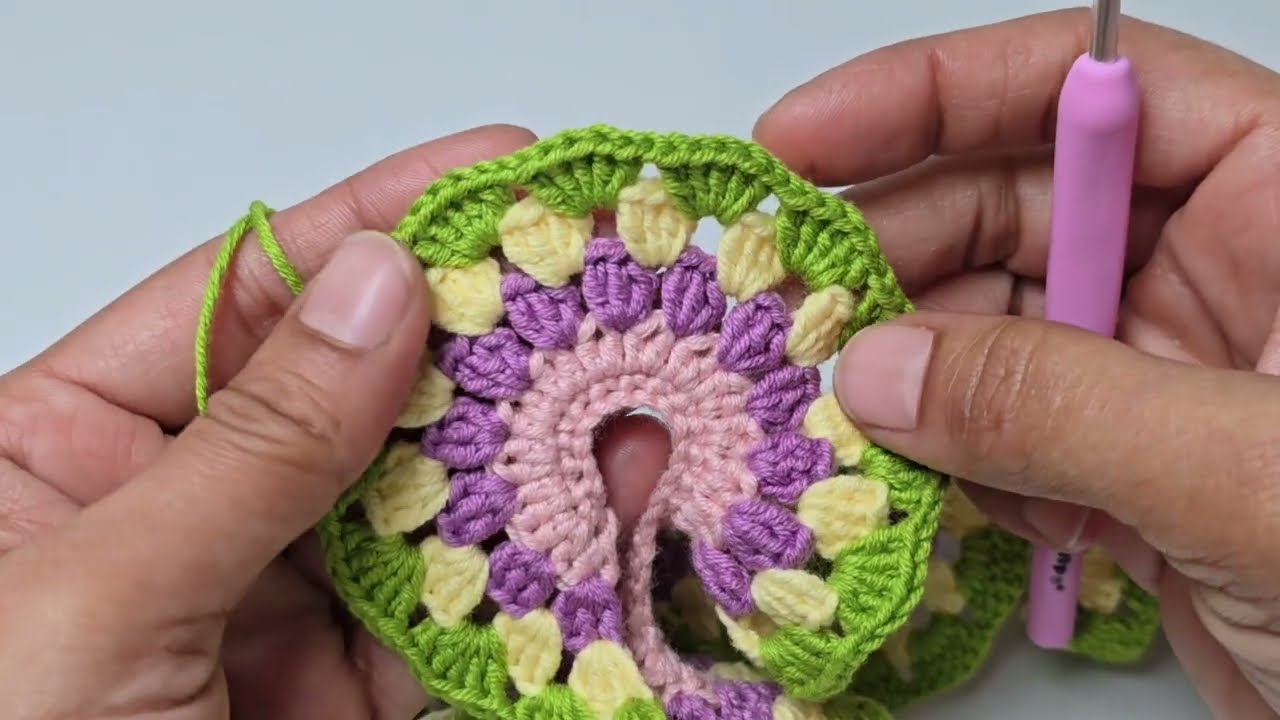
- The Granny Square Pattern – The Heart of Your Spinner:
- Now, you’ll work on creating the classic granny square pattern that gives this wind spinner its distinctive look. This typically involves two rows of crochet groups, forming clusters of stitches separated by chain spaces. Pay close attention to the stitch placement to ensure the characteristic granny square design emerges.
- Finishing Touches – Bringing It All Together:
- Adding Beads (Optional): If you wish to add a touch of sparkle, now is the time to string decorative beads onto your work.
- Sewing the Ornament: Carefully sew the edges of your crocheted piece together to form the cylindrical shape of the wind spinner. Ensure your seams are neat and secure.
- Hiding Threads: Weave in all loose ends using your tapestry needle for a clean and professional finish.
- Making a Hanging Chain: Create a sturdy chain loop at the top of your spinner, long enough to hang it securely from your desired spot.
- Adding a Tassel (Optional): For an extra bohemian flourish, consider creating and attaching a tassel to the bottom of your granny square section.
The Grand Reveal:
Once finished, gently rotate your crocheted piece. You’ll marvel as the granny pattern comes to life, creating a mesmerizing spiral effect that captures the essence of a wind spinner. This stylish addition is perfect for enhancing the beauty of your balcony or garden.
Conclusion:
We hope you enjoyed crafting this unique crochet wind spinner! It’s a rewarding project that combines the charm of handmade artistry with the tranquility of outdoor decor. Share your creations with us in the comments below, and don’t forget to subscribe for more exciting patterns and tutorials!
Watch video: