by
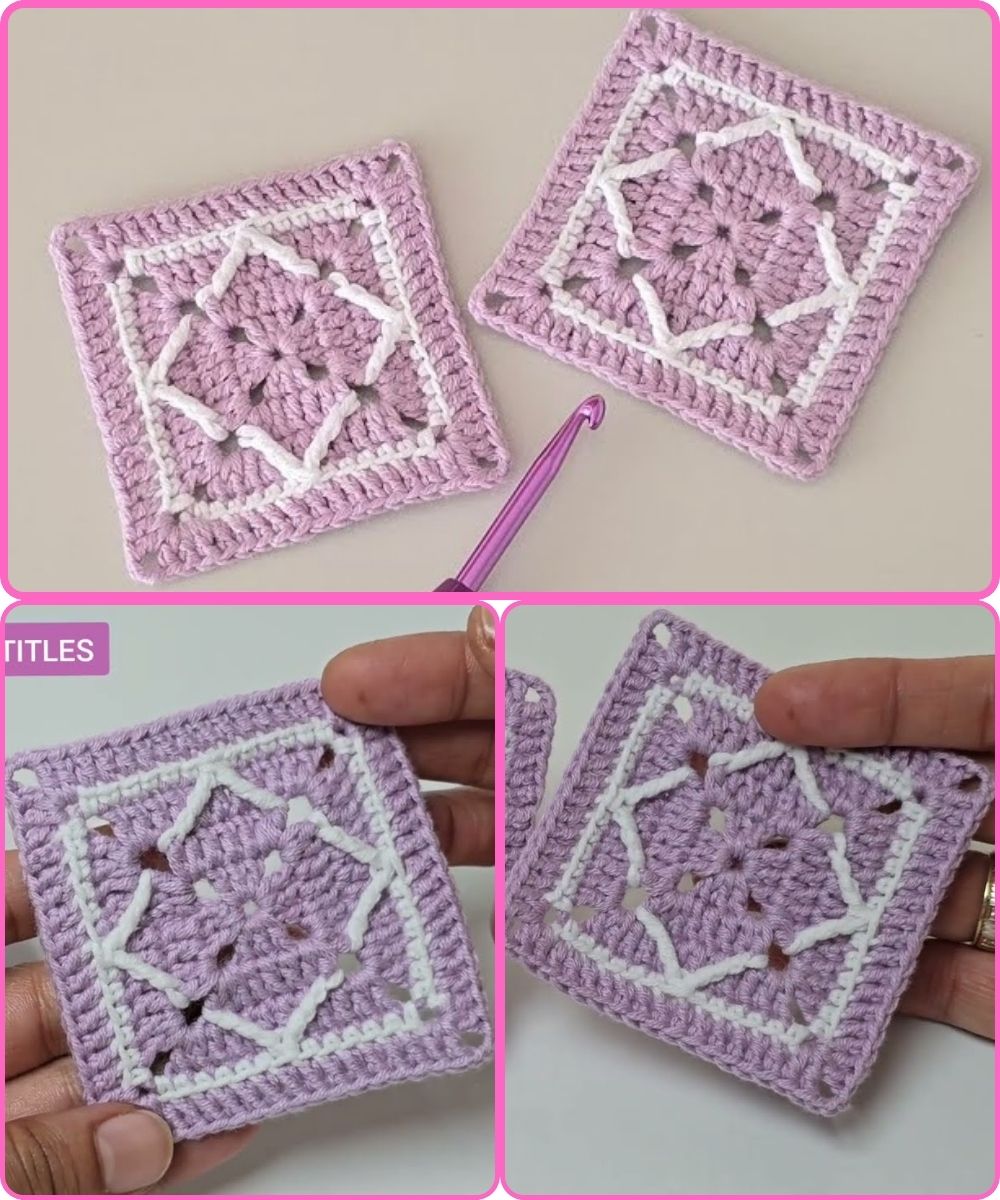
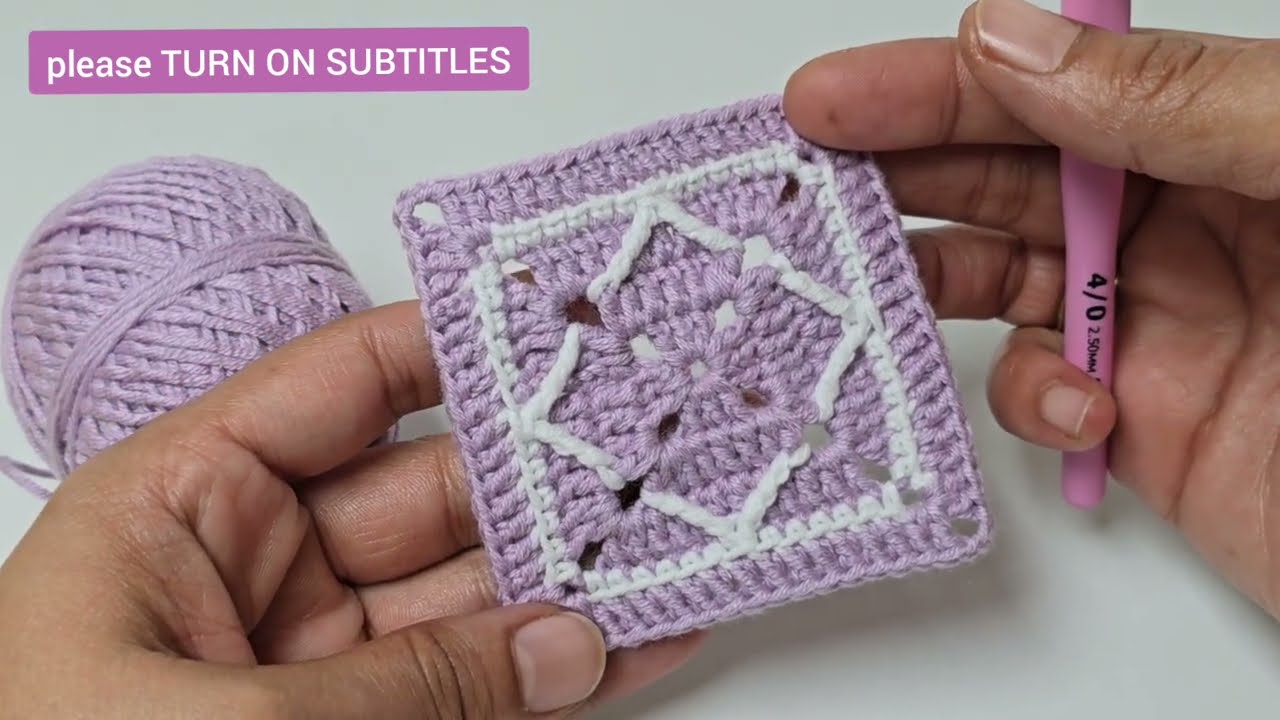
by Unleash your creativity with this captivating large granny square featuring a stunning light geometric pattern! This versatile square isn’t just a standalone piece; it’s a foundation for countless projects, from blankets and cushions to bags and garments. Whether you’re a seasoned crocheter or looking to expand your skills, this tutorial will guide you through creating a beautiful and functional granny square that will elevate your crafting.
Materials You’ll Need:
Before diving into this exciting project, make sure you have the following materials ready:
- Yarn: Medium-thickness yarns (50% cotton, 50% acrylic) in at least two contrasting colors (one main color and one for the geometric pattern). The tutorial specifically uses a five-layer square pattern yarn.
- Crochet Hook: 2.50 mm
- Scissors
- Tapestry Needle: For weaving in ends
Step-by-Step Instructions:
Follow these detailed instructions to crochet your striking geometric granny square:
- Starting with the Magic Ring and First Row:
- Begin by creating a magic ring. This provides a neat and tight center for your granny square.
- Work your first row into the magic ring, typically consisting of groups of double crochets and chain spaces, forming the initial shape of your square.

- Second Row – Defining the Corners:
- As you progress to the second row, your focus will be on establishing the corners of your granny square. These corners are crucial for maintaining the square shape and often involve clusters of stitches separated by chain spaces.
- Third Row – Building the Body:
- Continue with the third row, working double crochets into the spaces from the previous row. Repeat the corner operations as established in the second row, ensuring your square grows evenly.
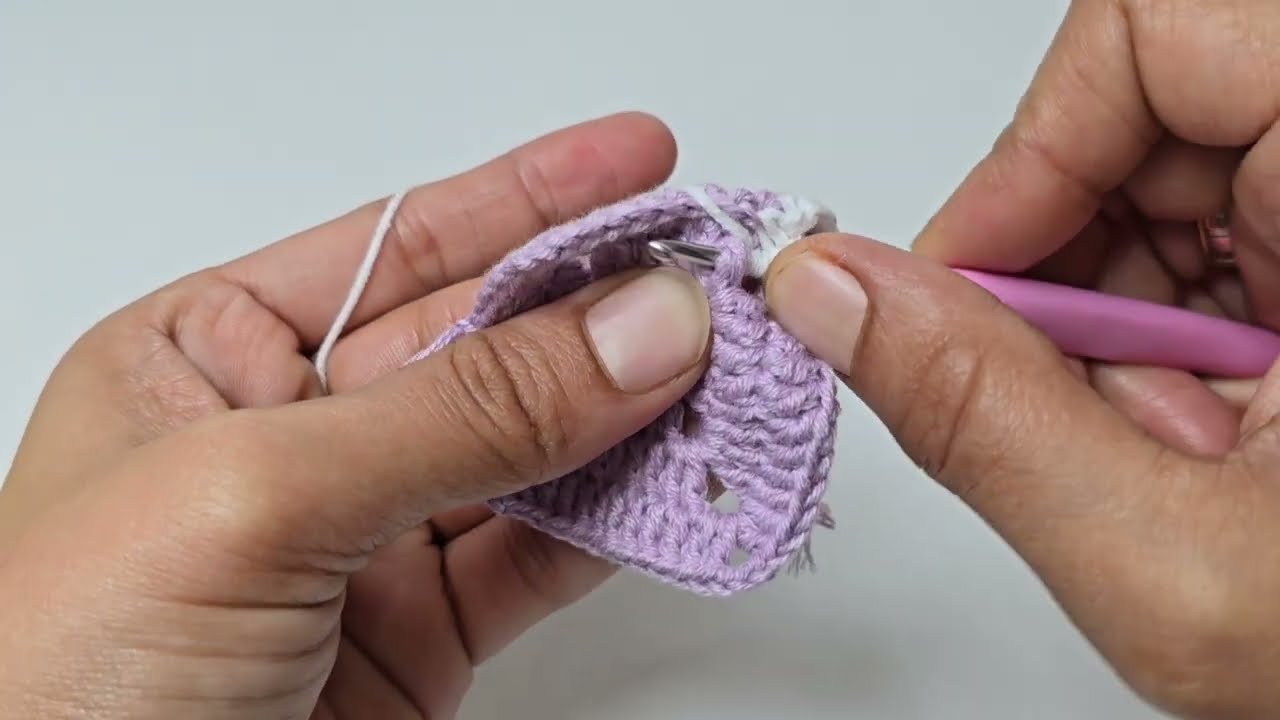
- Fourth Row – Introducing the Geometric Pattern (Second Color):
- This is where the magic happens! Introduce your second color. This row will involve a combination of single crochets and triple crochets, carefully placed to form a distinct white triangle pattern or your chosen geometric design. Pay close attention to the stitch counts and placement to achieve the desired effect.
- Fifth Row – Returning to the Main Color:
- Switch back to your main color for the fifth row. In this row, you’ll work double crochets, often using the back loops of the stitches from the previous row to create a textured effect. Continue to create the corners as you have in the earlier rows.
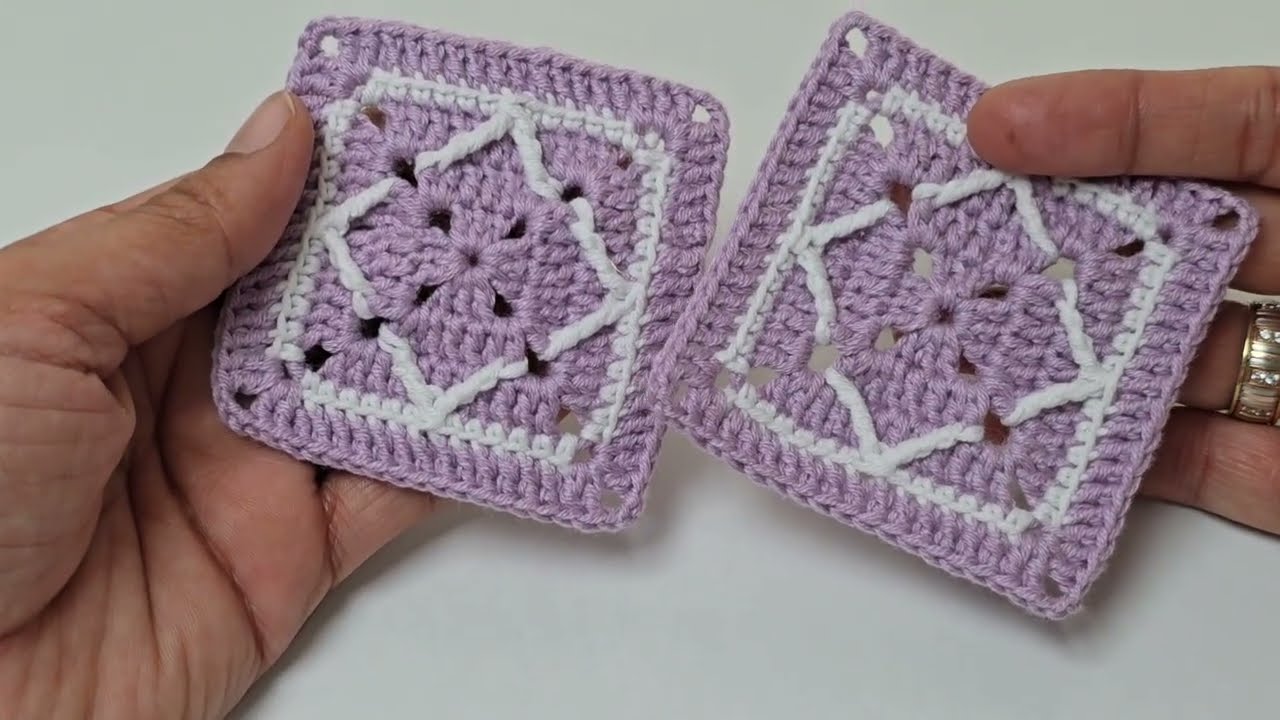
Beyond the Square:
Once you’ve completed your stunning large geometric granny square, the possibilities are endless! Here are just a few ideas for what you can create:
- Blankets: Join multiple squares to create a beautiful and cozy blanket.
- Cushion Covers: Use a single square or a combination to make stylish cushion covers.
- Bags: Incorporate these squares into unique and eye-catching tote bags or purses.
- Garments: Use them as panels for cardigans, tops, or scarves.
Conclusion:
Congratulations on crocheting your large geometric granny square! This project not only enhances your crocheting skills but also provides a versatile piece for countless creative endeavors. We encourage you to experiment with different color combinations and see where your imagination takes you. Share your finished squares and project ideas in the comments below – we’d love to see what you create!
Watch tutorial:
https://www.youtube.com/watch?v=HPNHuABVuLw