by
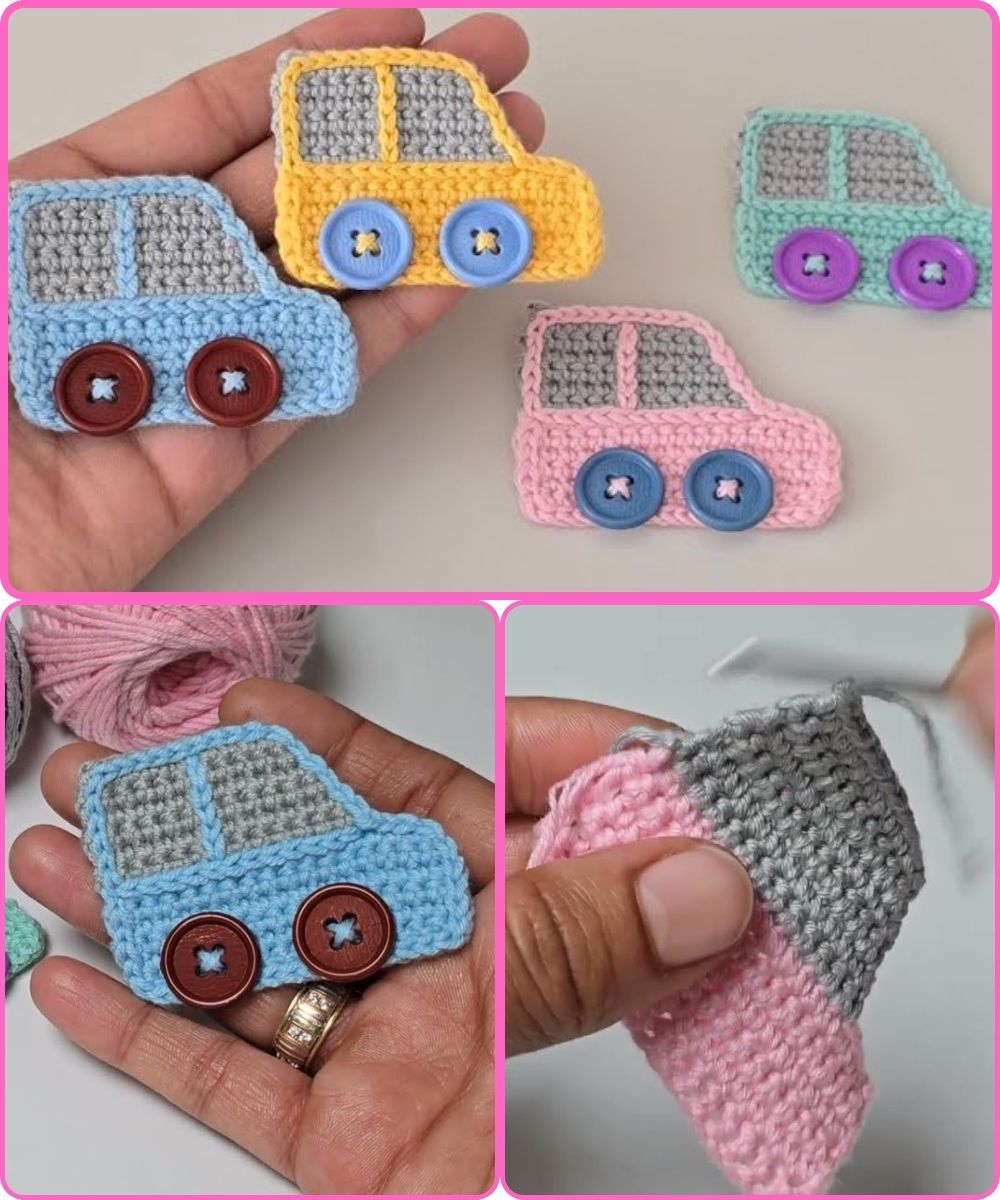
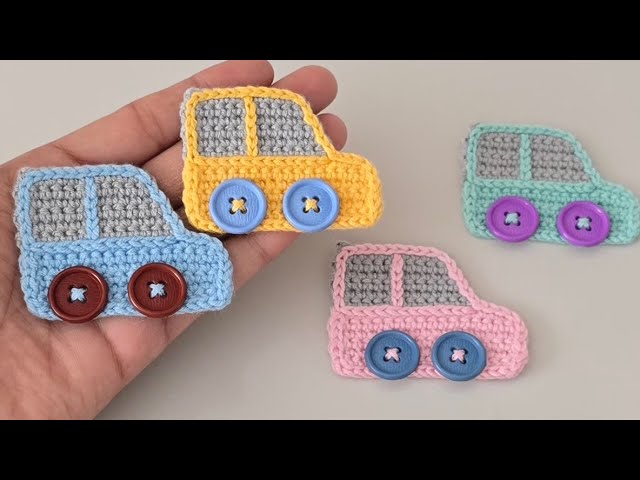
by Ready to rev up your crochet skills and create something truly charming? This tutorial will guide you through crocheting an adorable car applique, perfect for embellishing blankets, clothing, bags, or even creating a playful garland for a child’s room. With step-by-step instructions, you’ll be cruising through this project in no time, adding a personalized touch to your crafts.
Materials You’ll Need:
Before we hit the road, gather your supplies:
- Yarn: 5-ply, 50% acrylic, 50% cotton, medium thickness threads in your desired car body color and a contrasting color for windows (e.g., gray).
- Crochet Hook: 2.50 mm
- Buttons: Two small buttons for the wheels.
- Tapestry Needle: For sewing and weaving in ends.
- Scissors
Step-by-Step Instructions:
Let’s get started on your crochet car!
- Starting the Applique – The Foundation:
- Begin by making a chain of 17 stitches. This will measure approximately 7 cm and form the base length of your car. Remember, you can adjust the number of initial chains to make your car larger or smaller.
- Crocheting the Car Body:
- Rows 1-5: Work 17 single crochets in each of these five rows. This creates the main rectangular body of your car.
- Row 6: Decrease to 16 single crochets. This slight decrease will start to shape the top of the car.
- Making the Window Sections (Using Contrasting Color – e.g., Gray):
- Row 7 (1st Gray Row): Switch to your contrasting color. Work 13 single crochets. This will begin to form the first window section.
- Row 8 (2nd Gray Row): Decrease to 12 single crochets.
- Row 9 (3rd Gray Row): Maintain 12 single crochets across this row.
- Row 10 (4th Gray Row): Decrease to 11 single crochets.
- Row 11 (5th Gray Row): Maintain 11 single crochets.
- Row 12 (6th Gray Row): Decrease to 10 single crochets. This completes the shaping of the window area.

- Edging and Details – Bringing the Car to Life:
- Edging with Slip Stitch: Using your main car body color (e.g., pink thread as shown in the video), work a slip stitch around the entire edge of the car applique. This creates a neat border and defines the shape.
- Creating the Window Outline: Use slip stitches in your contrasting color to outline the window part you just created. This adds definition and a realistic touch.
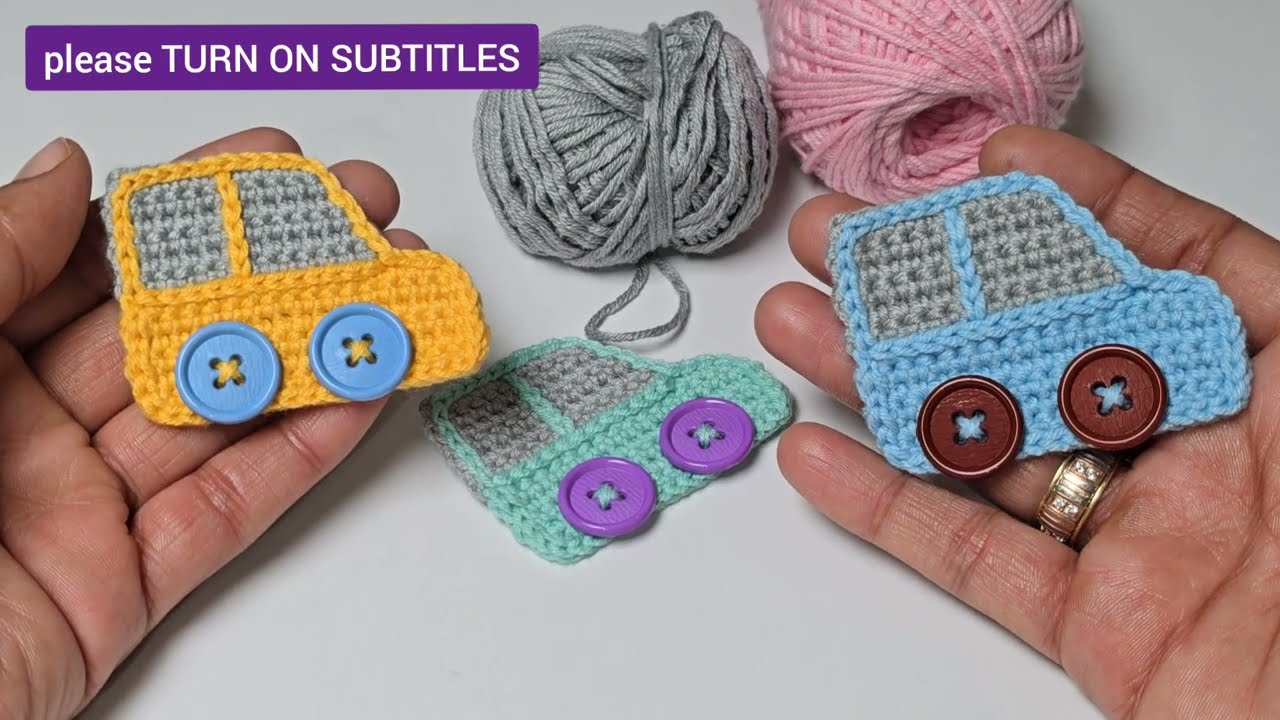
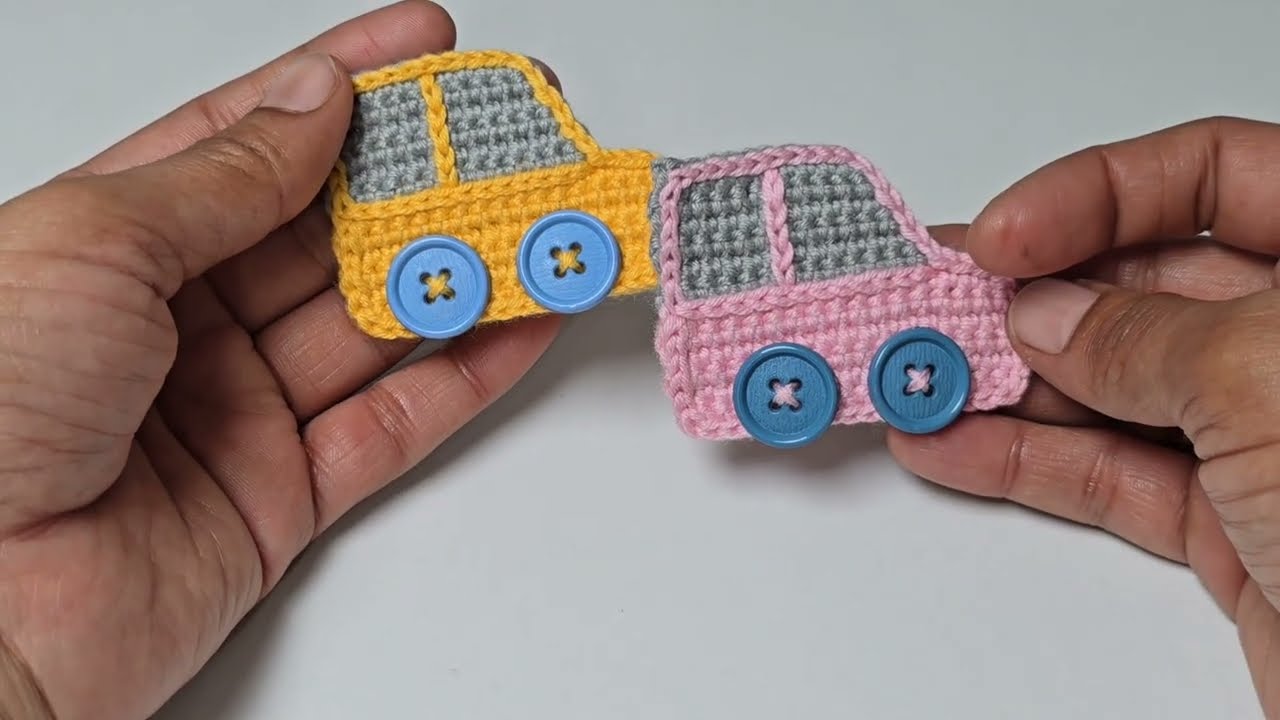
- Adding the Wheels – The Finishing Touch:
- The final step is to sew two buttons onto the bottom of your car applique to represent the wheels. Position them evenly for a balanced look.
Your Finished Car Applique!
And there you have it – a charming crocheted car applique ready to add a touch of whimsy to any project! This little vehicle is perfect for personalizing gifts, decorating nurseries, or simply adding a playful element to your handmade items.
Conclusion:
We hope you enjoyed this fun and easy crochet car applique tutorial! Don’t hesitate to experiment with different color combinations to create a fleet of unique cars. Share your creations with us in the comments below, and be sure to subscribe for more exciting crochet patterns and ideas!
Watch tutorial:
https://www.youtube.com/watch?v=LvrvEyDrctY