 by
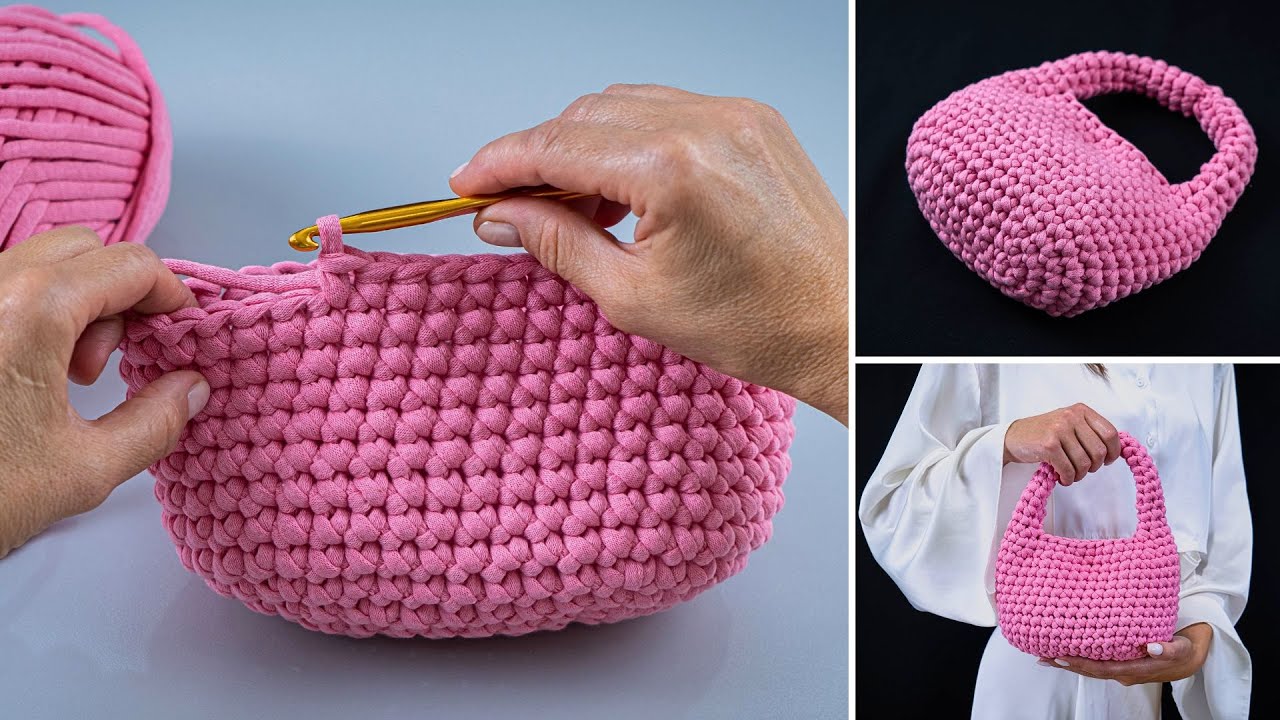
by Absolutely! Making a crochet bag out of knitted yarn is a fun and rewarding beginner-friendly project. Even if you’re new to crochet, this guide will walk you through everything step-by-step—from choosing materials to finishing your stylish bag.
How to Make a Crochet Bag Out of Knitted Yarn (For Beginners)
✨ What You’ll Learn:
-
Basic crochet stitches
-
How to crochet a simple rectangular bag
-
How to use knitted yarn
-
How to add a strap and finishing touches
Materials You’ll Need:
-
Knitted Yarn (or Yarn from a Knitted Garment)
-
Type: Medium-weight yarn (like cotton, acrylic, or recycled yarn from old sweaters).
-
Note: If you’re unraveling a knitted sweater, wind the yarn into a ball before starting.
-
-
Crochet Hook
-
Use the size recommended for your yarn (usually 5mm–6.5mm for medium weight).
-
Check the yarn label or experiment for tightness/looseness.
-
-
Scissors
-
Tapestry Needle
-
For weaving in ends and sewing parts together.
-
-
Measuring Tape (optional)
-
Button or Magnetic Snap (optional)
Step-by-Step Instructions:
Step 1: Prepare Your Yarn
If you’re using knitted yarn from a sweater:
-
Unravel it gently.
-
Remove kinks by soaking in lukewarm water, then let it dry flat.
-
Wind it into a ball.
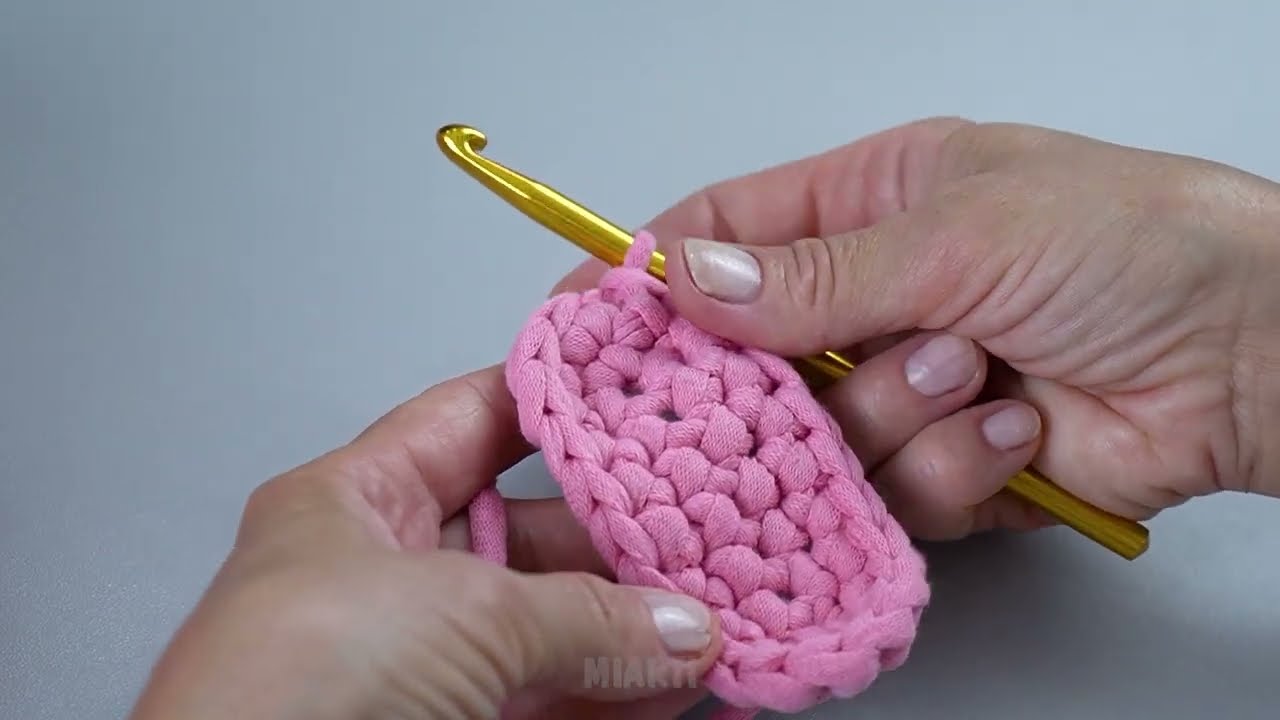
Step 2: Make a Chain (Foundation Row)
-
Start with a slip knot on your hook.
-
Chain about 30–40 stitches depending on how wide you want your bag (this forms the base).
-
For a small handbag, ~30 chains.
-
For a tote, ~40–50.
-
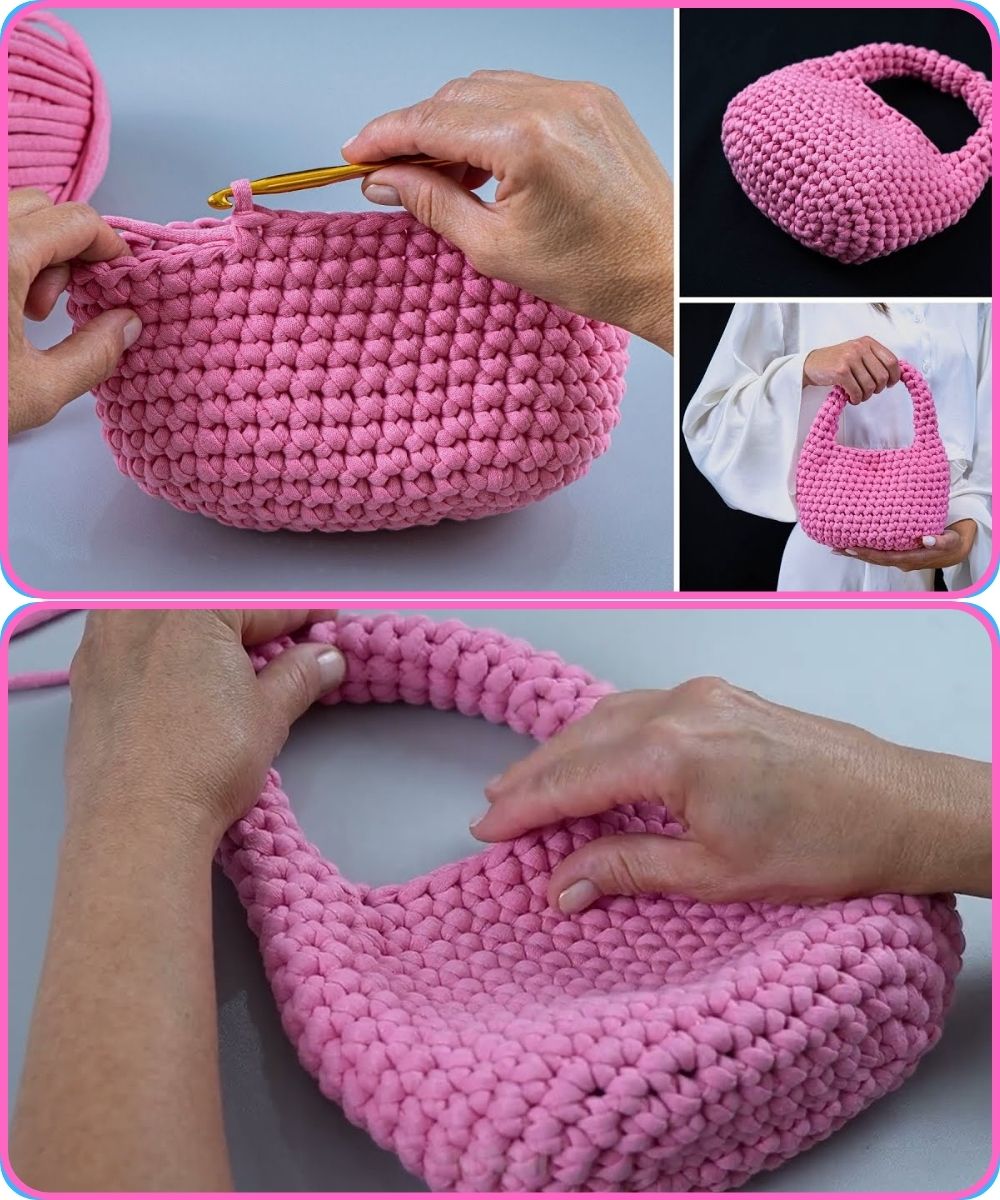
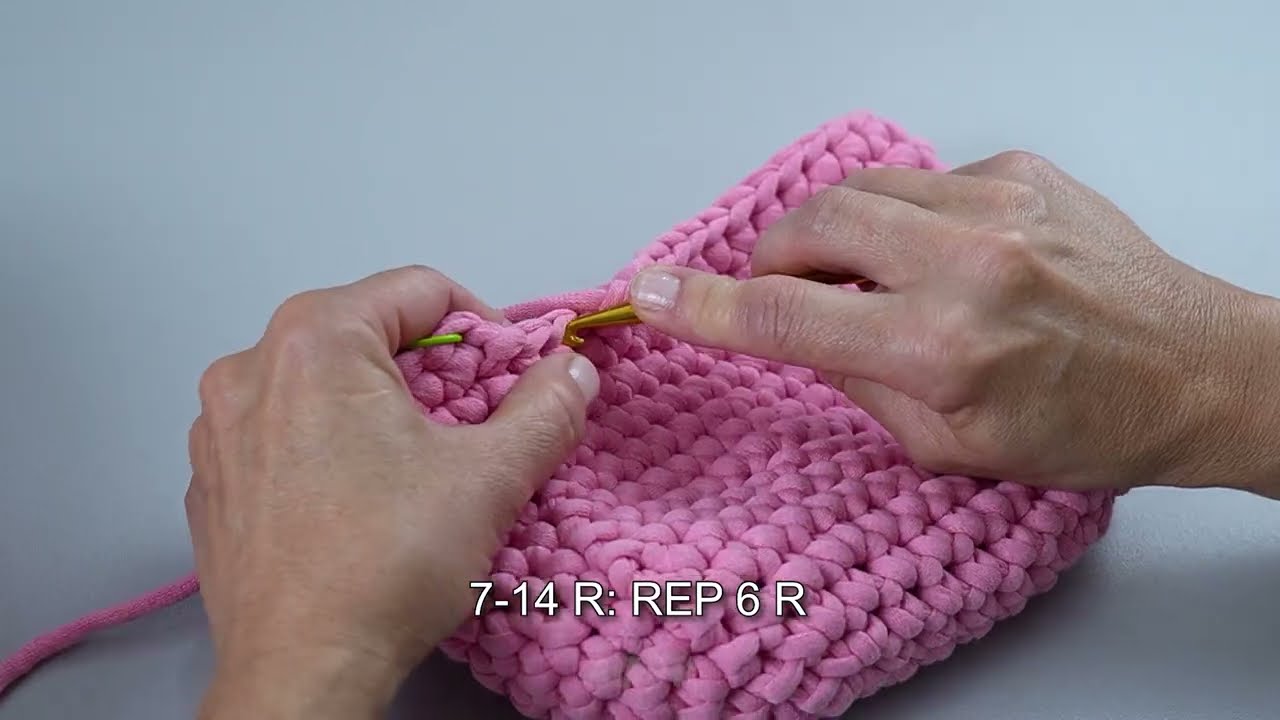
Step 3: Crochet the Body of the Bag
Use a single crochet (sc) stitch for a sturdy texture:
-
Insert your hook into the second chain from the hook.
-
Yarn over, pull through (2 loops on hook).
-
Yarn over again, pull through both loops.
Repeat to the end of the row. Chain 1 and turn.
➡️ Repeat rows until your rectangle is twice as tall as you want the bag (you’ll fold it in half).
Alternative stitches:
-
Half-double crochet (hdc) = more height, slightly faster
-
Double crochet (dc) = looser texture (not ideal if you don’t want holes)
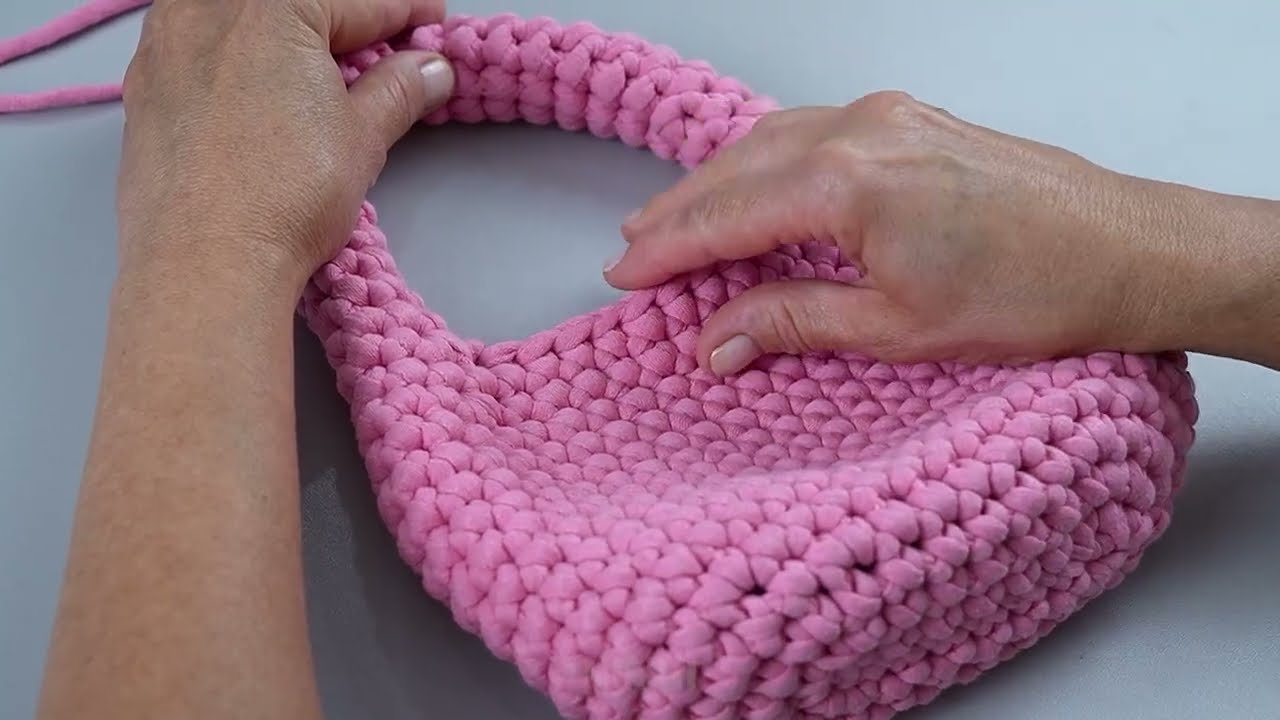
Step 4: Fold and Seam the Sides
-
Fold your rectangle in half (width-wise).
-
Use single crochet or whip stitch up the sides to create the bag shape.
-
Leave the top open.
Tip: Use the same yarn and a tapestry needle or your hook to sew.
Step 5: Make the Strap
Option A: Crochet Strap (Easiest)
-
Chain 70–100 (depending on desired strap length).
-
Work 1–2 rows of single crochet or slip stitch for thickness.
-
Attach both ends to the inside edges of the bag using your tapestry needle.
Option B: Use a Fabric or Leather Strap
-
Sew it securely to the bag with thick thread or yarn.
-
You can also use metal rings or clips.
Step 6: Finishing Touches
✅ Weave in all loose ends with your tapestry needle.
✅ Optional: Add a button, magnetic snap, or even a zipper.
✅ You can line your bag with fabric (sew by hand or machine) for durability.
Bonus Tips:
-
Add color changes or stripes by switching yarn mid-project.
-
Use a stitch marker if you’re crocheting in the round or for shaping.
-
For a firmer structure, crochet two rectangles and sandwich cardboard or interfacing in between with a fabric liner.
Easy Crochet Bag Variations:
-
Granny square bag (combine small crochet squares)
-
Mesh market bag (use chain spaces for open patterns)
-
Mini pouch (follow same steps but smaller)
Beginner Crochet Stitches Quick Recap:
| Stitch | Abbr. | How to Use |
|---|---|---|
| Chain | ch | Foundation |
| Single Crochet | sc | Dense, tight fabric |
| Half Double Crochet | hdc | Taller than sc, still sturdy |
| Slip Stitch | sl st | Joining, finishing |
️ Want a Visual?
Look for YouTube tutorials like:
-
“Easy Crochet Bag for Beginners”
-
“How to Crochet a Tote Bag Step-by-Step”
(If you’d like, I can find the latest or best-rated video for you too!)
You Did It!
You’ve created your own stylish crochet bag from knitted yarn—eco-friendly, handmade, and totally customizable.
Watch tutorial: