 by
by Absolutely! Here’s a step-by-step detailed guide on how to make a crochet bag, written in a beginner-friendly way, so even if you’ve never picked up a hook before, you can follow along.
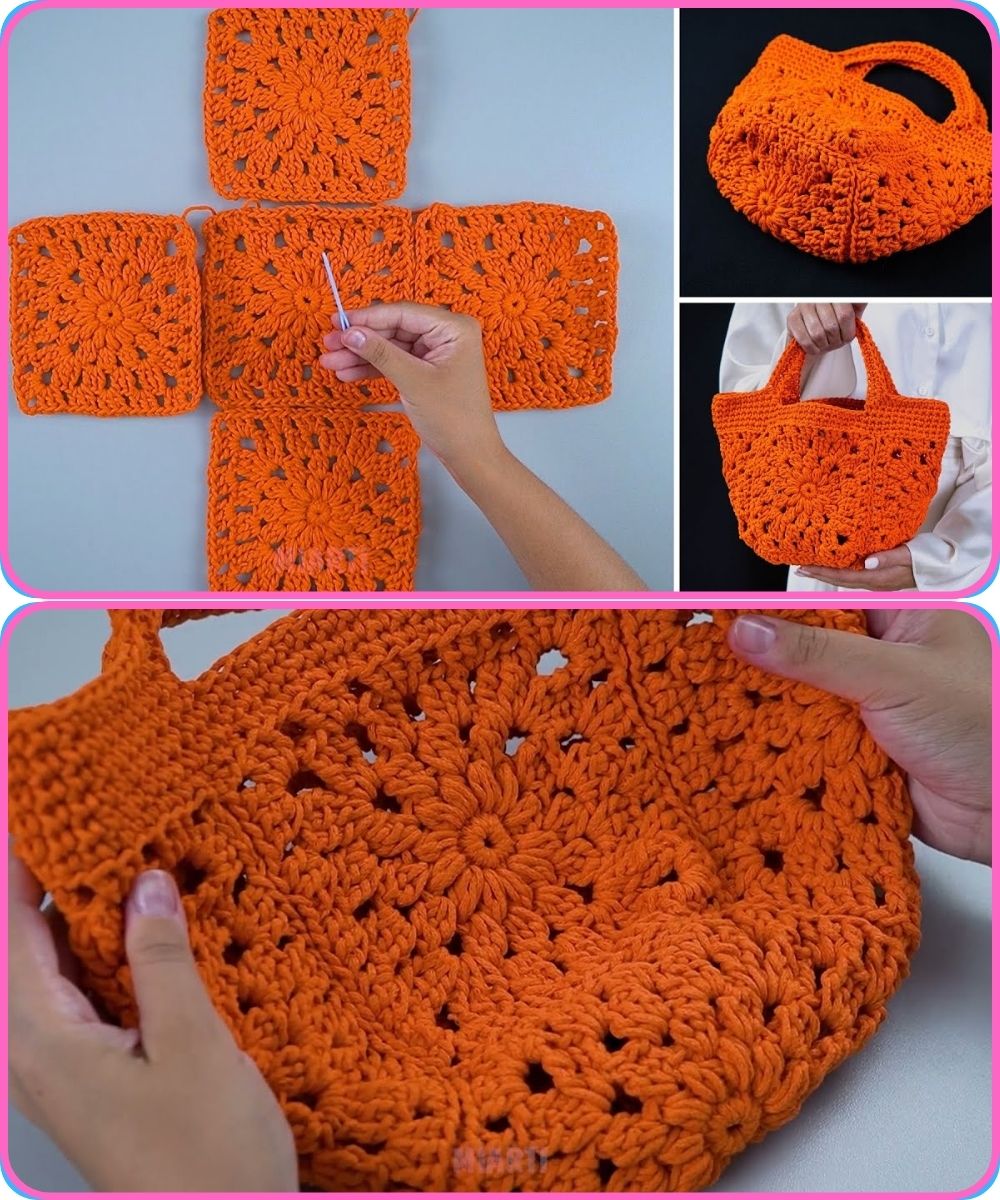
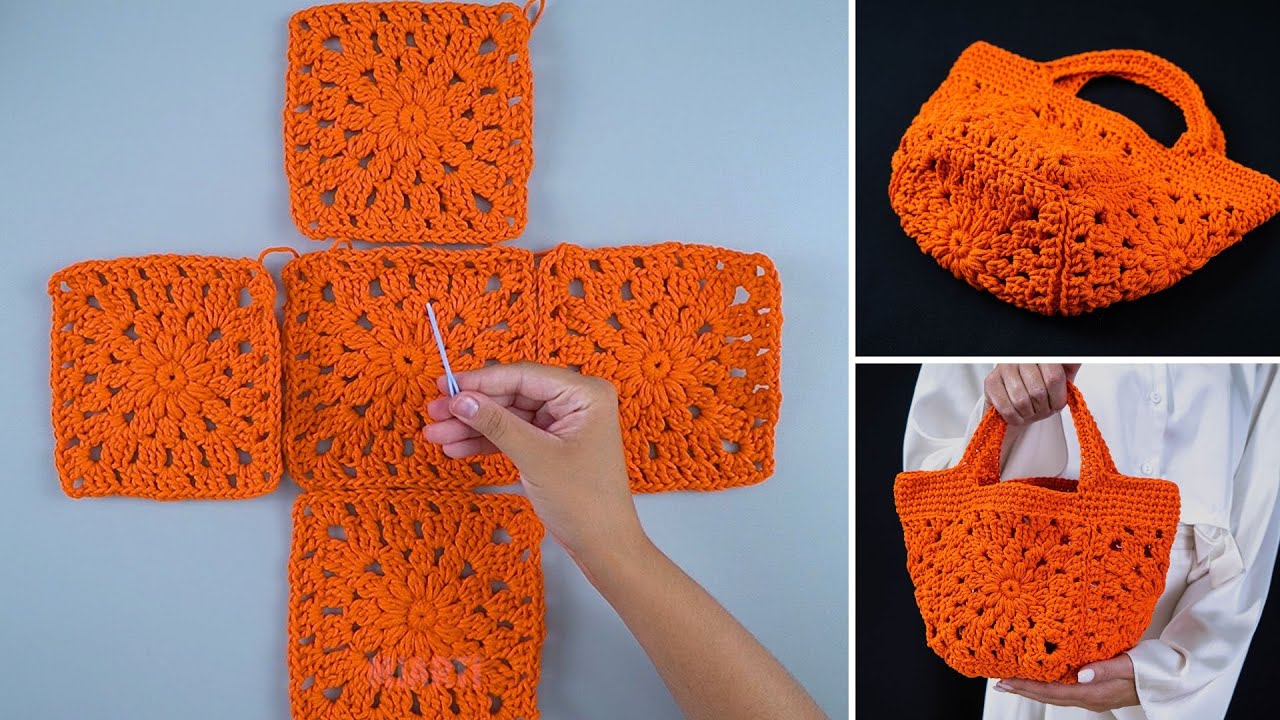
How to Make a Crochet Bag – Even a Beginner Can Handle It!
✨ What You’ll Be Making:
A simple tote-style crochet bag – sturdy enough for everyday use, customizable, and stylish. You’ll use basic stitches only!
Materials You’ll Need:
| Item | Description |
|---|---|
| Yarn | Medium (Worsted Weight #4 cotton yarn) – sturdy & washable |
| Hook | 5.0 mm (H-8) crochet hook – or size recommended on yarn label |
| Tapestry Needle | For weaving in the ends |
| Scissors | For trimming yarn |
| Stitch Markers | Optional, but helpful for marking rounds |
| Measuring Tape | For sizing your bag |
Tip: Cotton yarn holds its shape better than acrylic for bags.
Stitches You Need to Know:
Only three basic stitches!
-
Chain (ch)
-
Single Crochet (sc)
-
Slip Stitch (sl st)
Don’t know these yet? No problem! Look them up on YouTube—just search:
“How to chain in crochet” or “How to single crochet” – tons of tutorials available.
Finished Size:
Approximately 12 inches wide x 10 inches tall, with handles. You can easily adjust the size by chaining more/less.
️ Step-by-Step Instructions
STEP 1: Make the Base (Flat Oval or Rectangle)
You’ll crochet the bottom of the bag first.
Pattern:
-
Chain 25 (this will be the length of your bag base).
-
Row 1: In the 2nd chain from the hook, sc. Continue sc in each chain across. (24 sc)
-
At the end, make 3 sc in the last chain to turn around.
-
Now, continue single crocheting down the other side of the chain (the opposite side).
-
At the other end, make 2 more sc in the last stitch (so both ends have 3 sc).
-
You’ve made an oval!
Now continue working in rounds:
-
Use single crochet all the way around.
-
Increase at both ends in the 3 corner stitches (i.e., do 2 sc in those end stitches).
-
Continue for about 5–6 rounds until your base is the desired size.
You can stop increasing when it’s as wide as you want the bag to be.
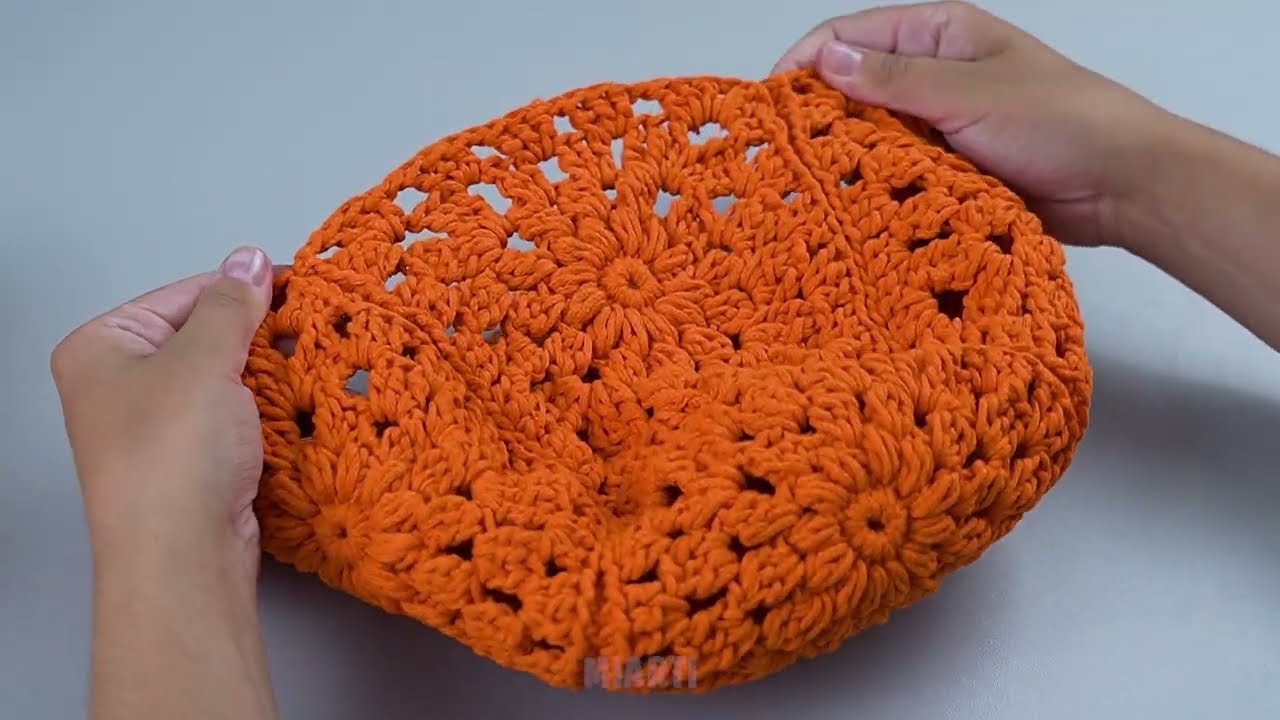
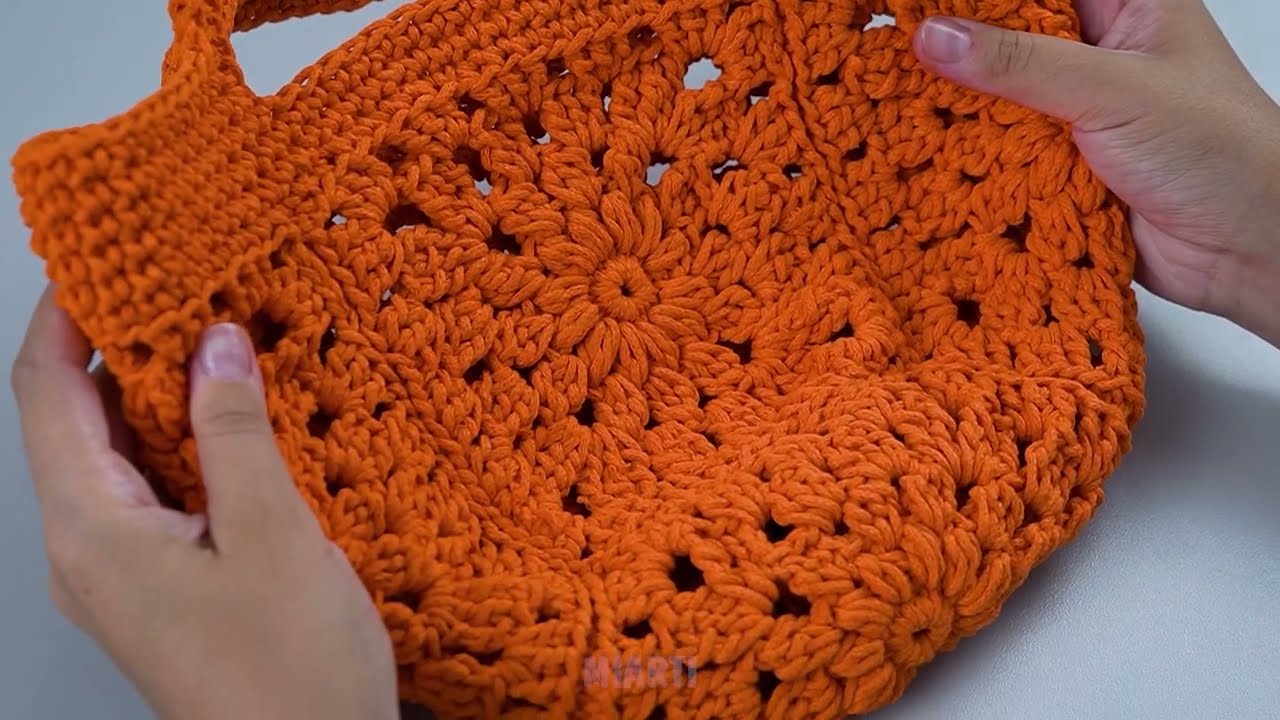
STEP 2: Build Up the Sides
Now you’ll crochet without increasing, which makes the bag go upward.
Pattern:
-
Work 1 sc in each stitch around – no more increases.
-
Keep going in rounds until your bag is 10 inches tall, or as tall as you like.
-
You can switch yarn colors for stripes or patterns if you want!
STEP 3: Make the Handles
Time to add handles so you can carry it.
Pattern:
-
Decide where you want the handles (usually about 4 inches in from each edge).
-
From where you are in the round:
-
Sc to the handle start spot.
-
Chain 20 (or adjust to desired handle length).
-
Skip the next 10 stitches, and sc into the 11th (this creates the handle).
-
-
Repeat on the other side for the second handle.
-
Do 1 more round of sc all the way around, including across the handle chains (sc into each chain stitch).
-
Fasten off and weave in all ends with the tapestry needle.

Optional: Lining Your Bag (Beginner Level – Optional)
If you want extra strength or a clean look inside:
-
Cut a piece of fabric to fit the inside.
-
Sew it in using a needle & thread or fabric glue.
Ideas to Customize:
-
Add a button and loop for closure.
-
Crochet a flap for extra security.
-
Sew on a pocket or key ring holder inside.
-
Add color changes or striped rows.
✅ Quick Recap:
| Step | What You Do |
|---|---|
| 1 | Crochet base (oval or rectangle) |
| 2 | Build up the sides in sc rounds |
| 3 | Add handles with chain spaces |
| 4 | Optional finishing touches |
Helpful Video Tutorials (Search These):
-
“Easy beginner crochet tote bag tutorial”
-
“How to crochet an oval base”
-
“How to attach handles to a crochet bag”
Final Notes:
-
This bag is super forgiving—don’t worry if your stitch count isn’t perfect.
-
Once you’ve made one, you’ll be ready to get creative with shapes, textures, and colors.
Watch tutorial: