 by
by Sure! Here’s a detailed guide on how to make an original crochet bag easily and quickly, perfect for beginners or intermediate crocheters who want a stylish, functional bag without too much hassle.
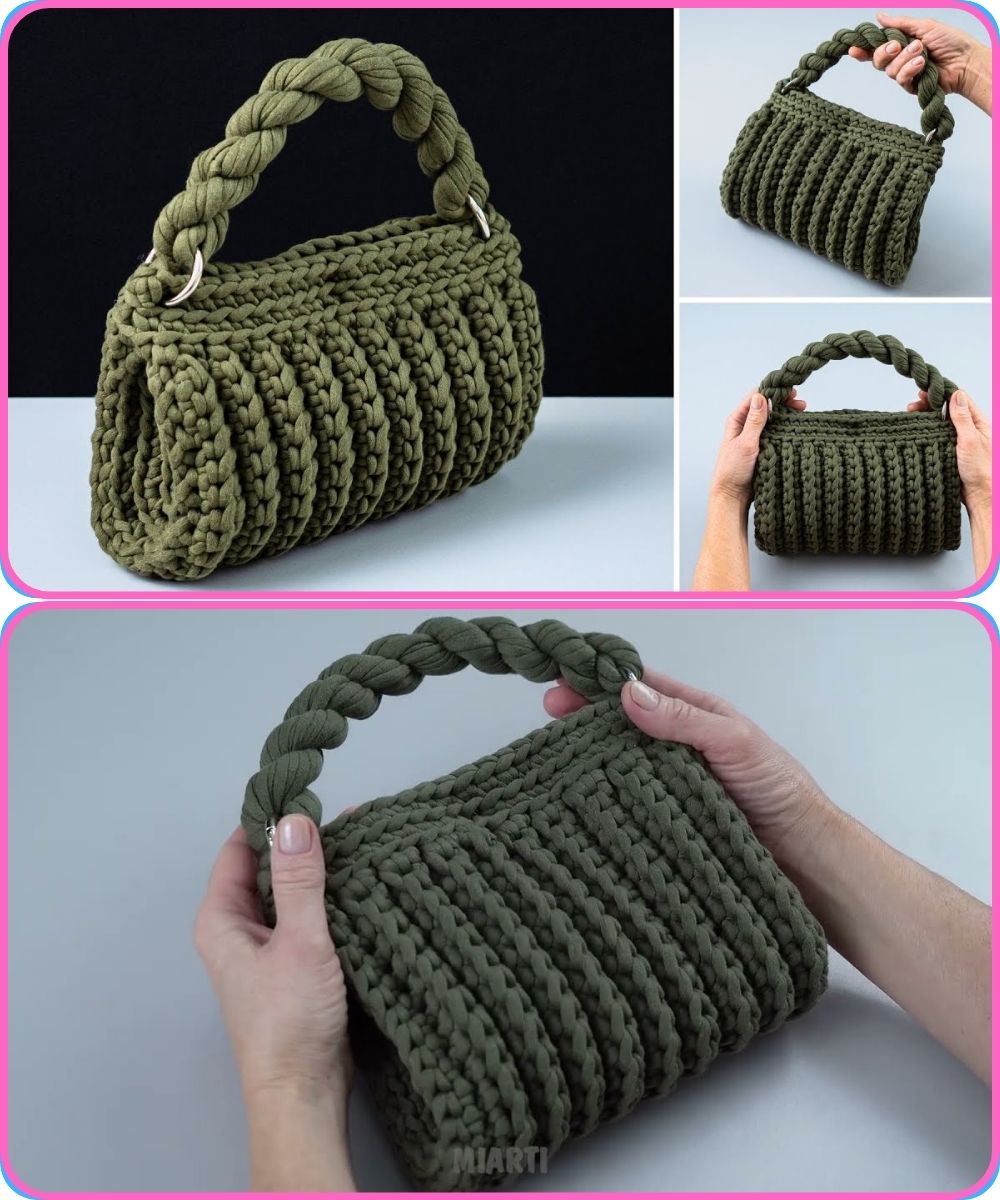
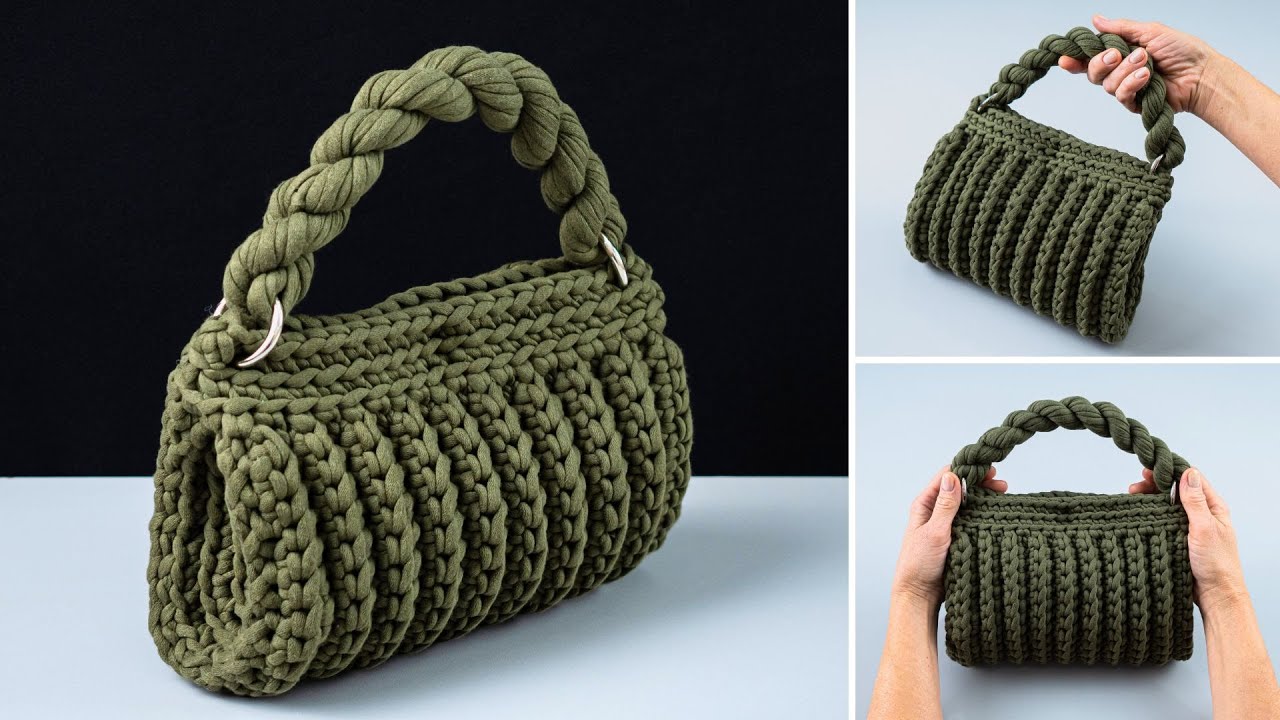
How to Make an Original Crochet Bag Easily and Quickly!
✨ Overview
This crochet bag is simple yet unique. We’ll make a basic tote-style bag with sturdy handles, optional lining, and an optional flap or button closure. It uses basic stitches, works up fast, and can be customized with colors or embellishments.
Materials Needed:
| Item | Details |
|---|---|
| Yarn | 2 skeins of medium weight (worsted weight #4) cotton or acrylic yarn |
| Crochet hook | Size 5.0 mm (H-8) or as per yarn label |
| Tapestry needle | For weaving in ends |
| Scissors | For cutting yarn |
| Stitch markers | (Optional) Helpful to mark beginning of rounds/rows |
| Lining fabric | (Optional) For inner bag structure |
| Sewing needle & thread | (Optional) For sewing lining or buttons |
| Buttons / Zippers | (Optional) For closure |
Step-by-Step Instructions
Step 1: Make the Bag Base (Rectangle)
This is the flat bottom of your bag.
-
Foundation Chain:
-
Chain 31 (or adjust based on how wide you want your bag).
-
-
Row 1:
-
SC (Single Crochet) in the 2nd ch from hook and in each ch across. (30 SC)
-
Ch 1, turn.
-
-
Rows 2-8:
-
SC in each stitch across. (Repeat for 8 rows or until desired base depth)
-
You’ve now made a solid rectangle base.
-

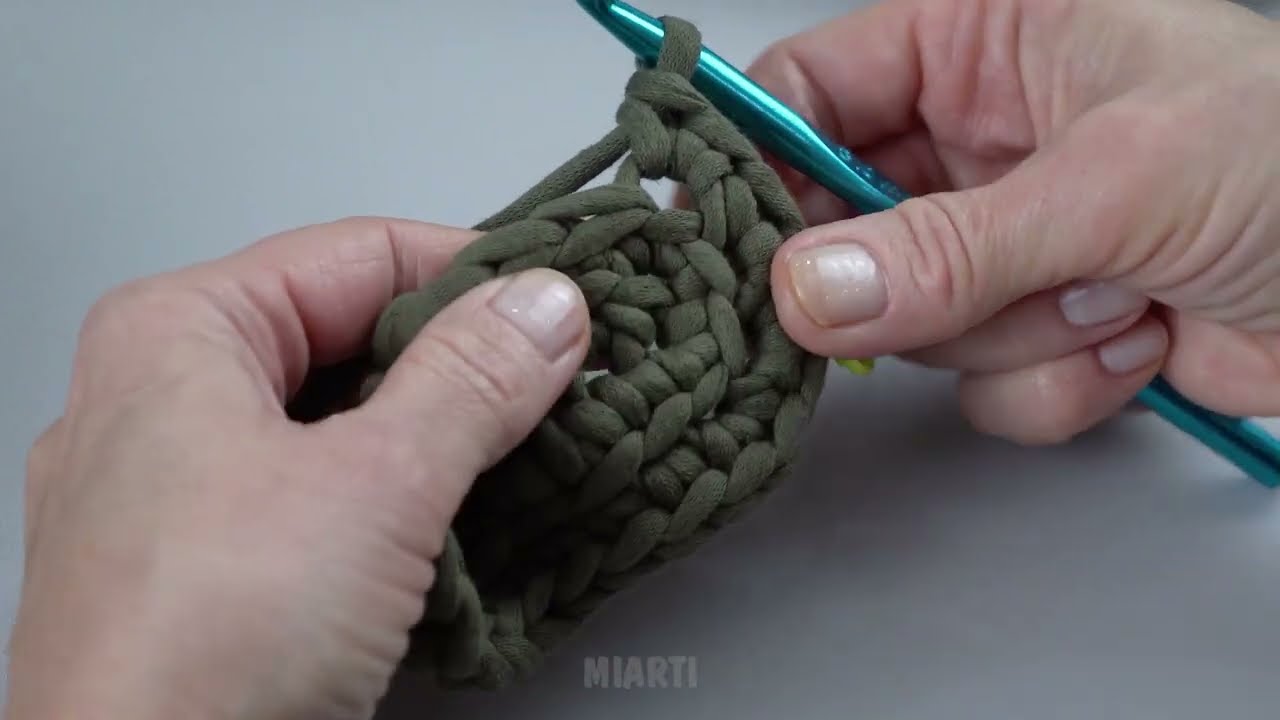
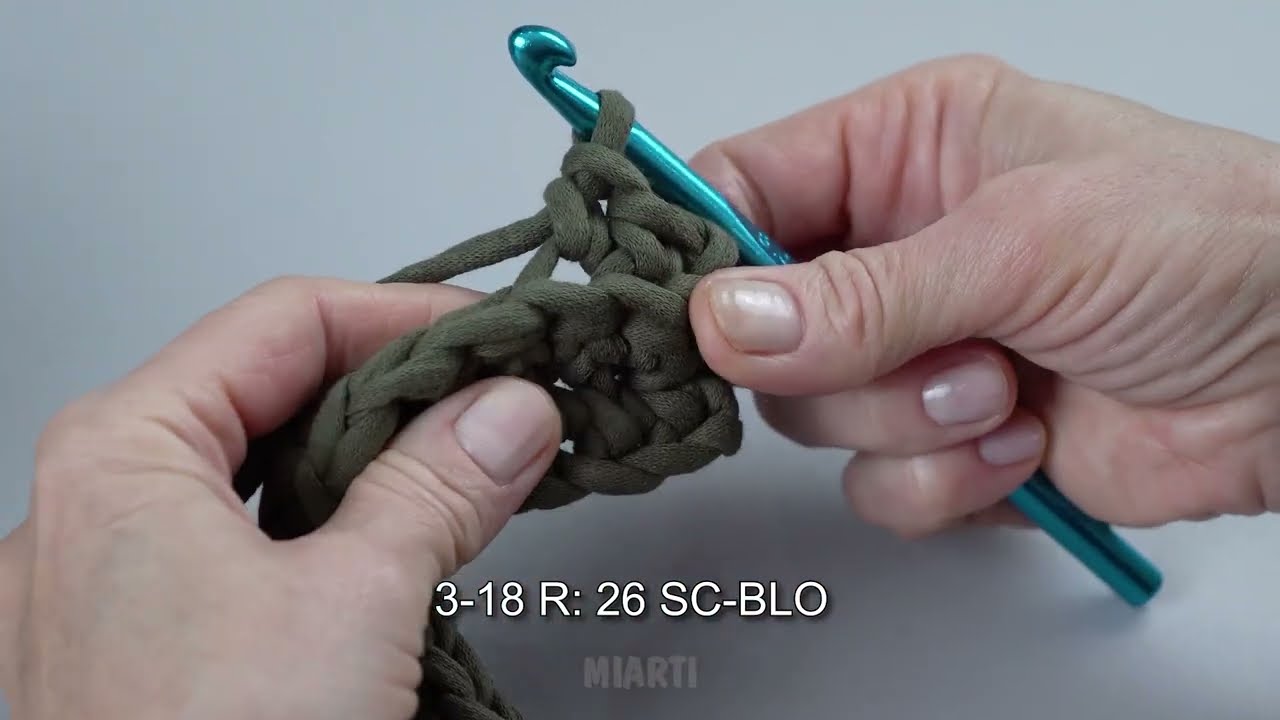
Step 2: Build the Bag Body (Working in the Round)
-
Round 1:
-
SC evenly around all four sides of the rectangle.
-
Place 2 SC in each corner to keep edges flat.
-
Join with a slip stitch to the first SC.
-
-
Rounds 2-25 (or desired height):
-
Ch 1, SC in each stitch around.
-
Continue working in the round to build height.
-
(Use stitch marker to mark the beginning of each round)
-
Optional: Switch colors every few rounds for stripes or color blocking.
Step 3: Add Handles
Option A: Crochet Handles
-
Decide the placement of handles—measure evenly across the top edge.
-
Leave about 6 stitches between the handle ends.
-
To create handle:
-
SC across 5-6 stitches where the handle starts.
-
Chain 30 (or desired handle length), skip 15 stitches, and SC in next 5-6 stitches.
-
Repeat for other side.
-
-
Do 1-2 more rounds of SC around the bag, going over the chain handles to reinforce them.
Option B: Add Ready-made Handles
-
Sew on pre-made leather or wooden handles using yarn or matching thread.
Step 4: Finishing Touches
-
Weave in all ends with a tapestry needle.
-
Block the bag if needed by lightly steaming or wetting and shaping.
-
Add button or zipper closure (optional).
-
Add fabric lining for strength:
-
Cut fabric slightly larger than the bag interior.
-
Fold and sew the edges.
-
Hand-stitch the lining inside the bag using needle and thread.
-
Customization Ideas
-
Add tassels or pom-poms to the handle.
-
Sew on patches, appliqués, or buttons for decoration.
-
Use granny squares instead of a plain body for a boho look.
-
Try textured stitches like half-double crochet, puff stitch, or bobble stitch.
Time Estimate
| Experience Level | Approximate Time |
|---|---|
| Beginner | 4–6 hours |
| Intermediate | 2–4 hours |
✅ Tips for Success
-
Use cotton yarn for durability and structure.
-
If you want a stretch-free bag, avoid loose stitches.
-
Use a smaller hook than the yarn suggests for a tighter weave.
-
Practice the stitches first if you’re a beginner.
Your Finished Bag!
Congrats! You’ve made a beautiful, custom crochet bag. Whether it’s for groceries, books, or daily essentials, you now have a handmade piece that’s both practical and stylish.
Watch tutorial: