 by
by Absolutely! I can give you a detailed, step-by-step guide on how to make a small crochet bag with a “Sand Waves” design. I’ll break it down into materials, stitches, pattern explanation, and finishing touches so it’s easy to follow.
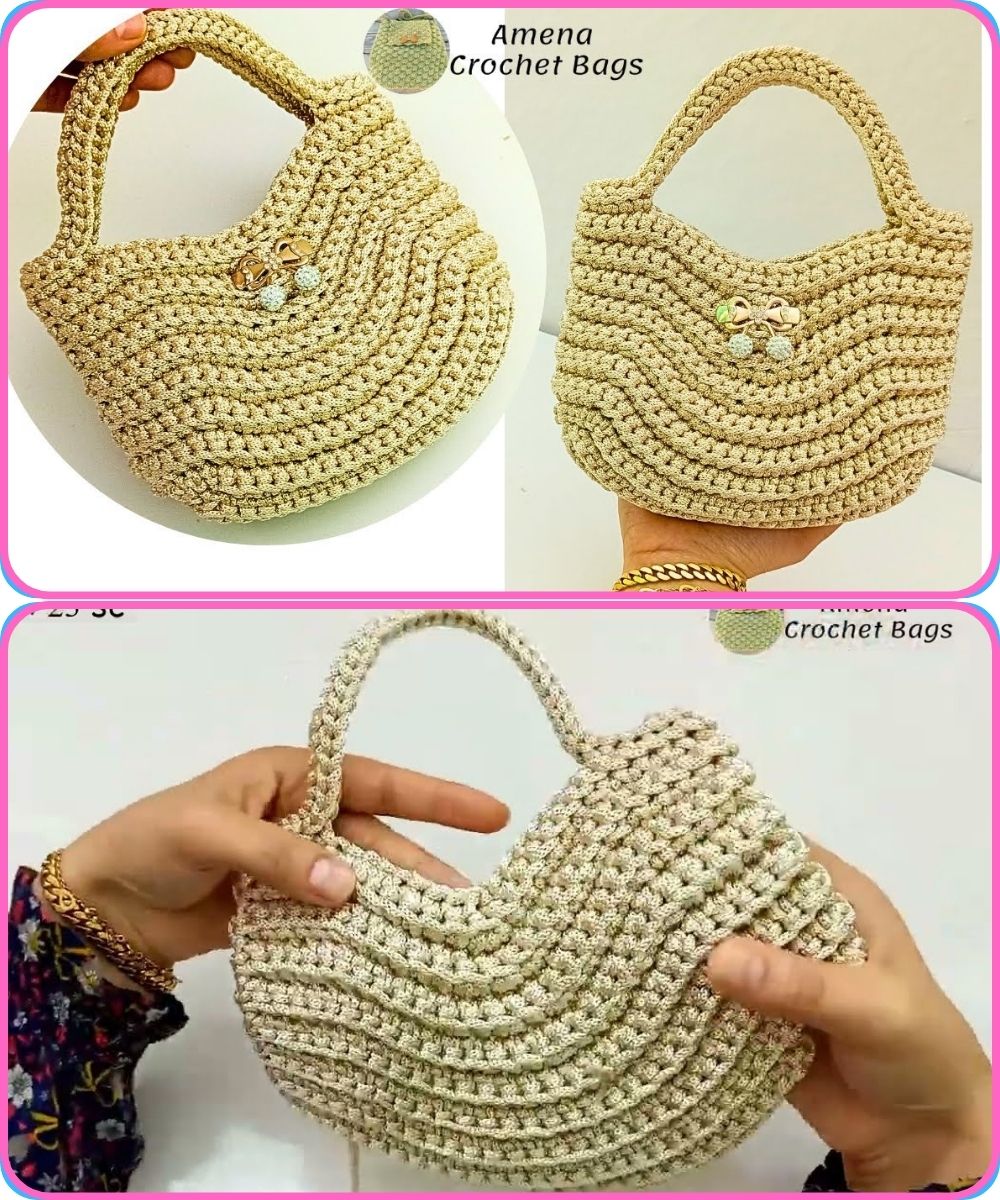
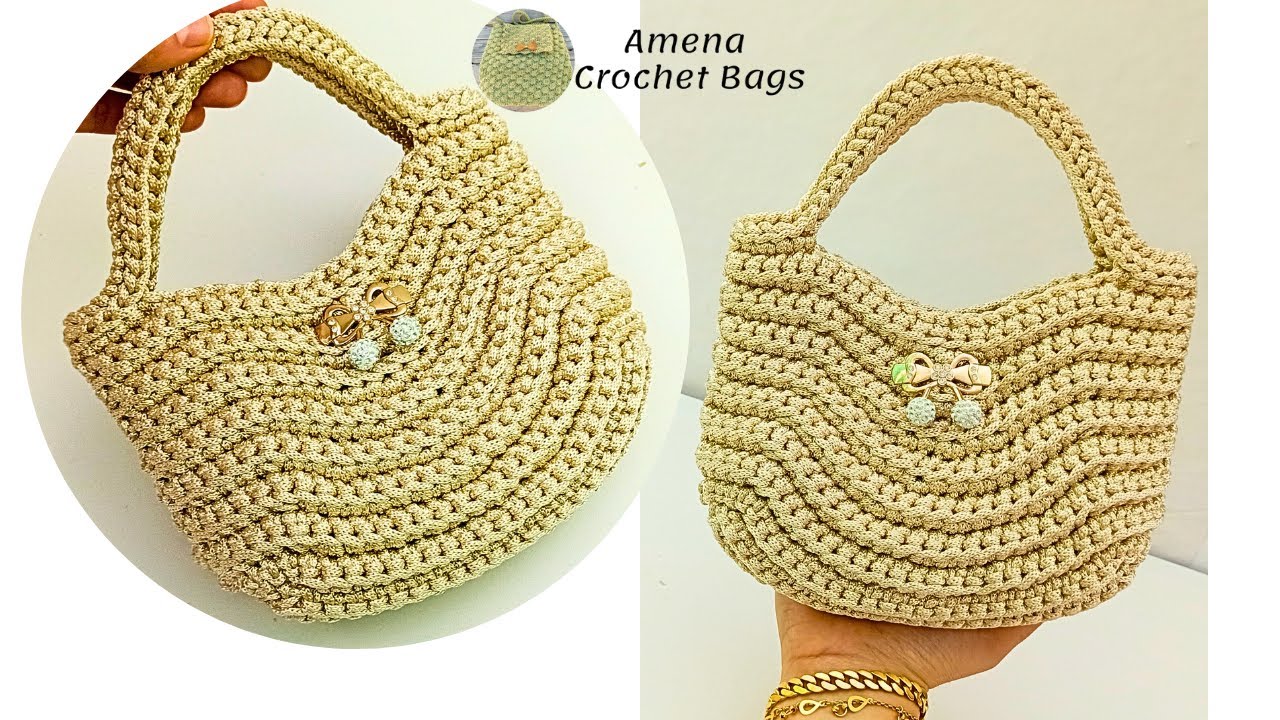
How to Make a Small Crochet Bag with “Sand Waves” Design
Materials Needed
-
Yarn: Medium weight cotton or acrylic yarn (DK or worsted weight). Choose two colors if you want the waves to stand out.
-
Crochet Hook: Recommended size for your yarn (usually 4 mm–5 mm for worsted weight).
-
Scissors
-
Tapestry Needle (for weaving in ends)
-
Optional: Bag lining fabric and sewing needle/thread.
-
Optional: Bag handles (wooden or crocheted).
Basic Stitches Used
-
Chain (ch)
-
Single Crochet (sc)
-
Half Double Crochet (hdc)
-
Double Crochet (dc)
-
Slip Stitch (sl st)
-
Shell Stitch (used to create “waves”):
-
Typically 5 dc in the same stitch or space.
-
Understanding the “Sand Waves” Design
The “Sand Waves” design is usually a wavy ripple pattern created using a combination of increases and decreases in double crochet stitches. The effect looks like gentle sand waves on a beach.
Wave Pattern Example:
-
Row pattern: 2 dc in one stitch, 1 dc in next 2 stitches, 2 dc in next stitch, skip 1 stitch (repeat across the row).
-
This creates peaks and valleys resembling sand waves.
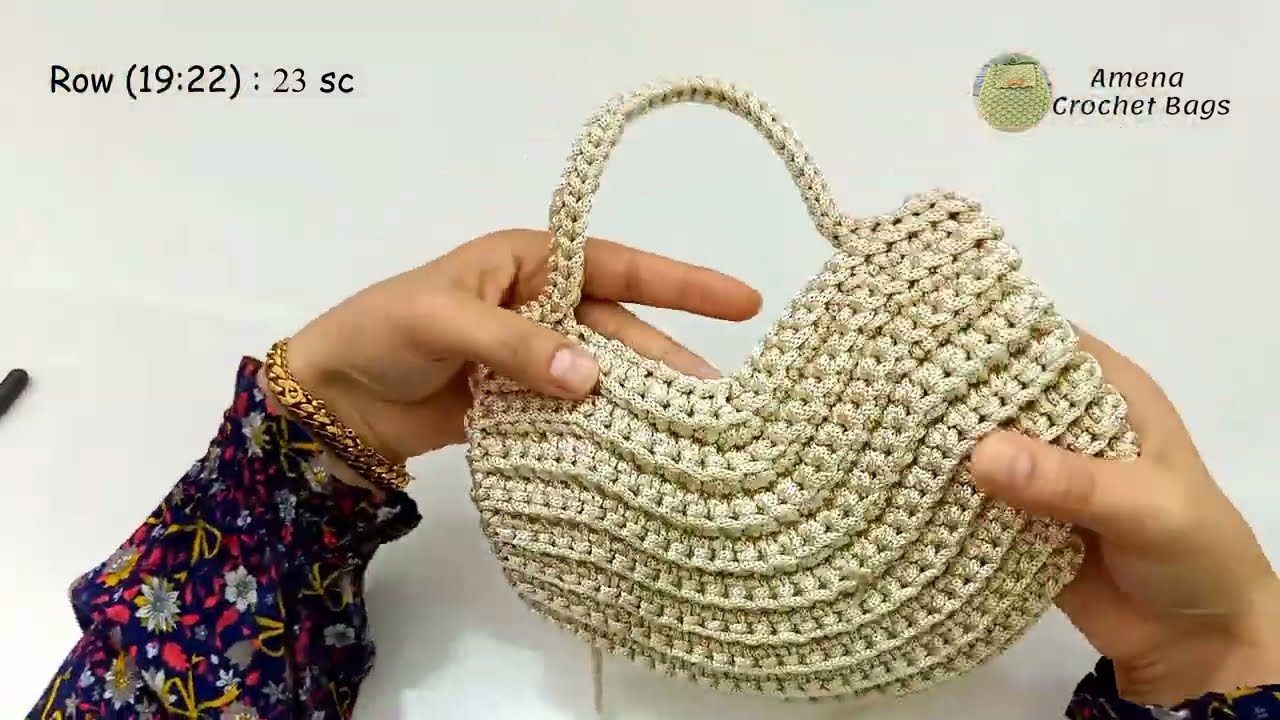
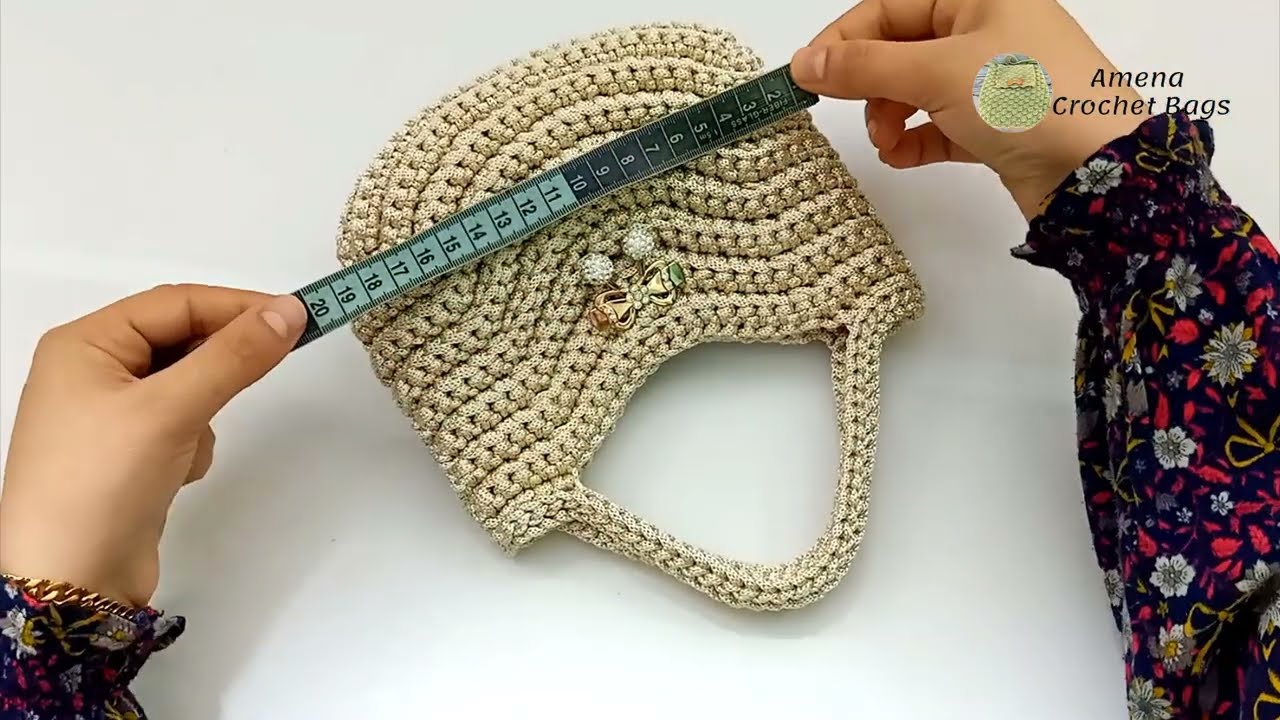
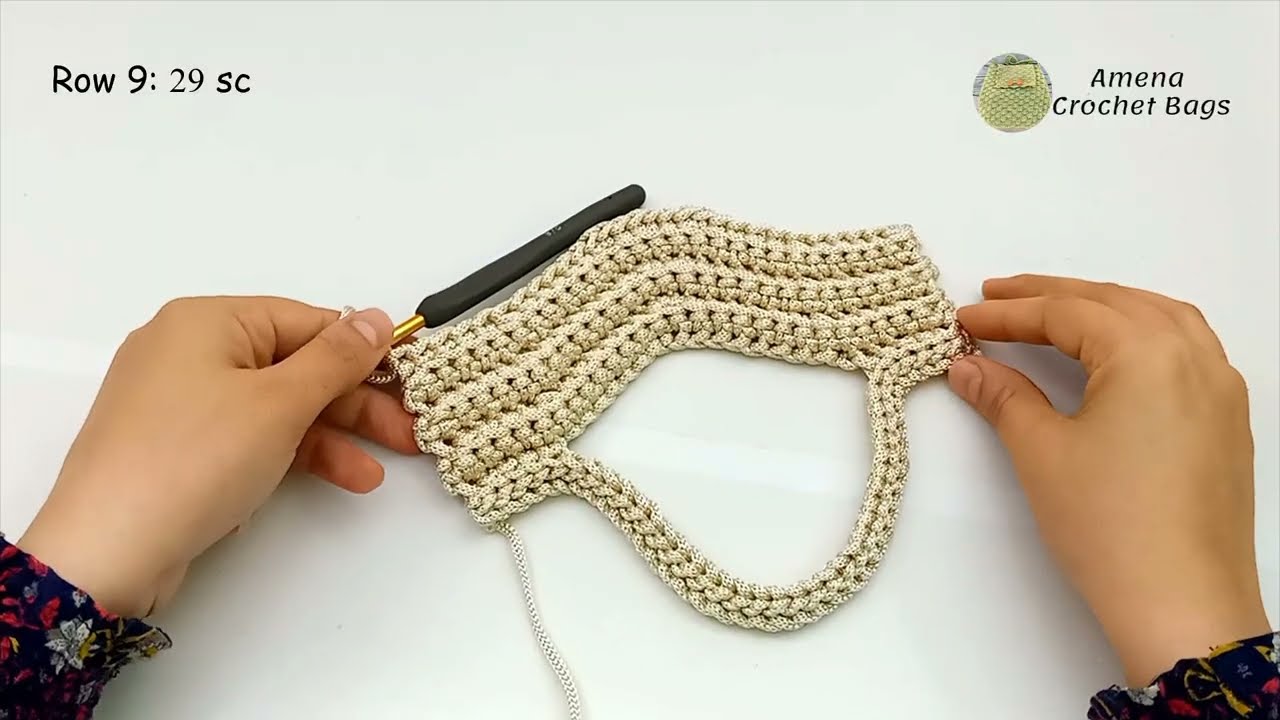
Step 1: Create the Base of the Bag
-
Decide the size of the bag. A small bag could be roughly 8 inches wide and 6 inches tall.
-
Chain a multiple of the stitch count needed for the wave pattern (usually multiples of 6–8 depending on your pattern).
-
Work a row of single crochet (sc) across the foundation chain. This creates a firm base.
Step 2: Start the “Sand Waves” Pattern
-
Turn your work.
-
Begin the wave pattern in double crochet:
-
Example (for one color):
-
Dc in next 2 stitches
-
2 dc in next stitch
-
Dc in next 2 stitches
-
Skip 1 stitch
-
Repeat across the row.
-
-
-
Turn and continue for 8–10 rows or until your bag reaches the desired height.
Tip: Alternate colors every 2–3 rows for a sand dune effect.
Step 3: Form the Bag
-
Once you reach the desired height, fold the rectangle in half with the right sides facing out.
-
Slip stitch or single crochet along the sides to close the bag.
Step 4: Add Handles
-
Crochet handles directly onto the bag:
-
Chain desired length, attach to opposite side with slip stitch.
-
Reinforce by working a few rows of sc over the handles for strength.
-
-
Or attach store-bought handles with yarn and needle.
Step 5: Optional Lining
-
Cut a piece of fabric slightly smaller than your bag.
-
Sew inside the bag to prevent stretching and add durability.
Step 6: Finishing
-
Weave in all ends using a tapestry needle.
-
Block the bag lightly if desired to help it keep shape.
-
Your small crochet bag with “Sand Waves” design is ready!
Tips for a Better Finish
-
Use cotton yarn for more defined waves.
-
Keep consistent tension to make waves even.
-
For a beachy look, alternate neutral and pastel colors.
-
If you want a round bottom, crochet in rounds instead of a rectangle.
If you want, I can also draw a visual stitch diagram of the Sand Waves pattern and the bag shape, which makes it much easier to follow, especially for beginners.
Watch video: