 by
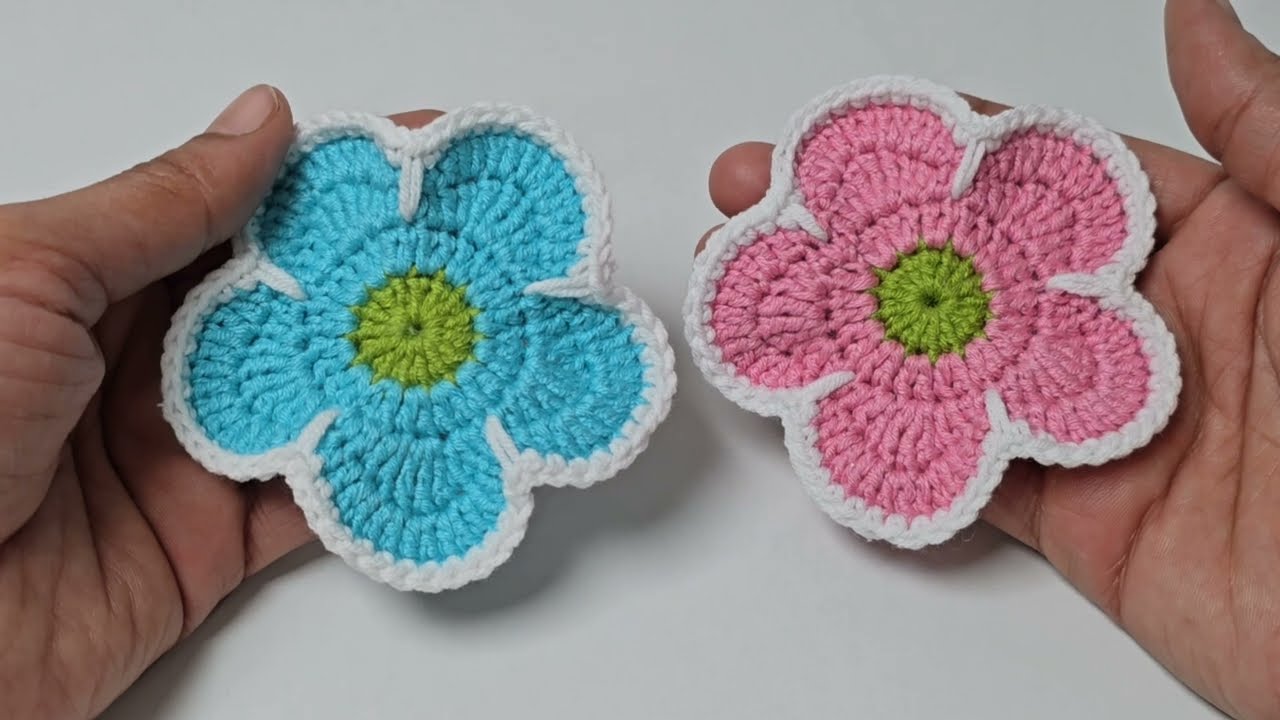
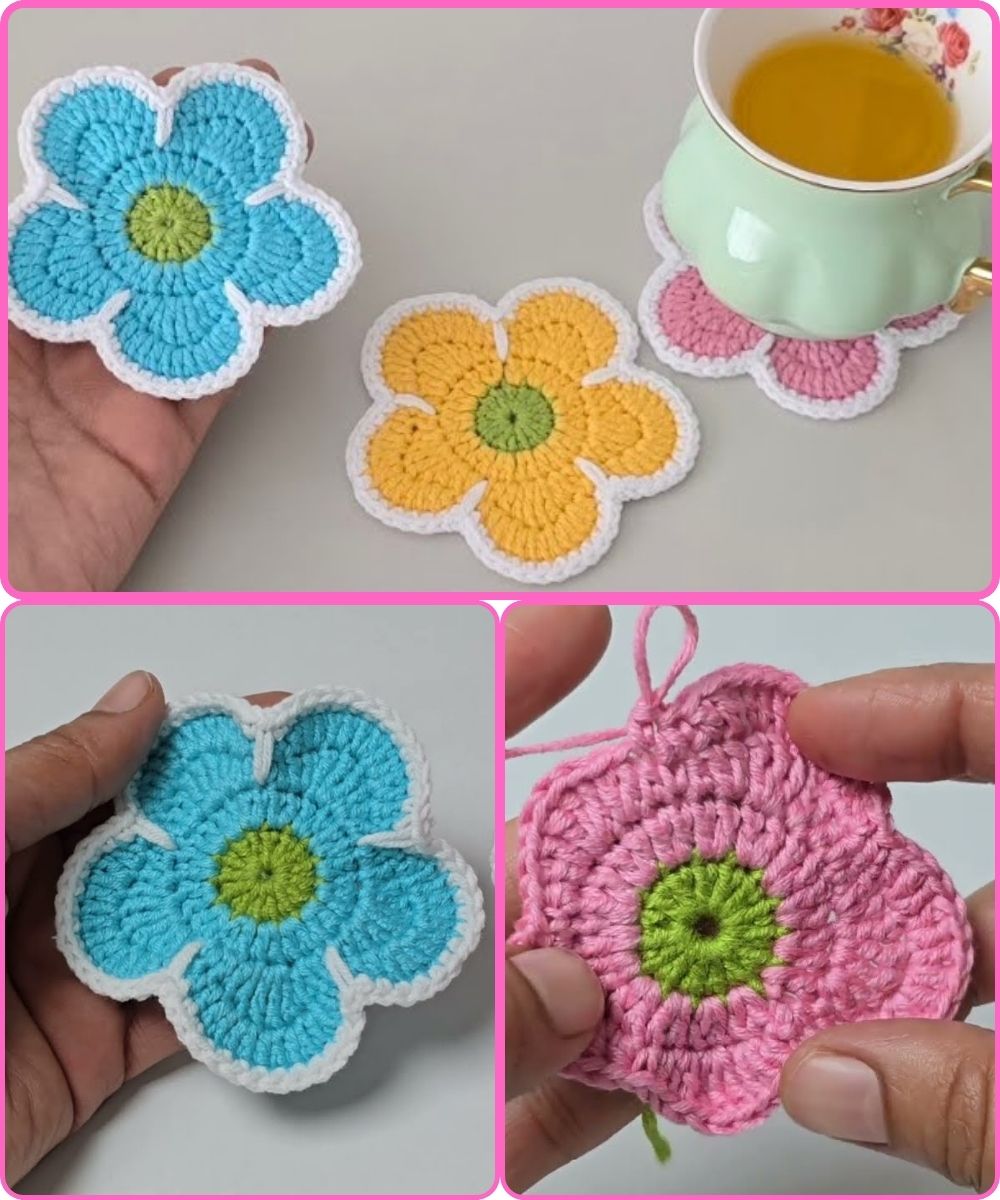
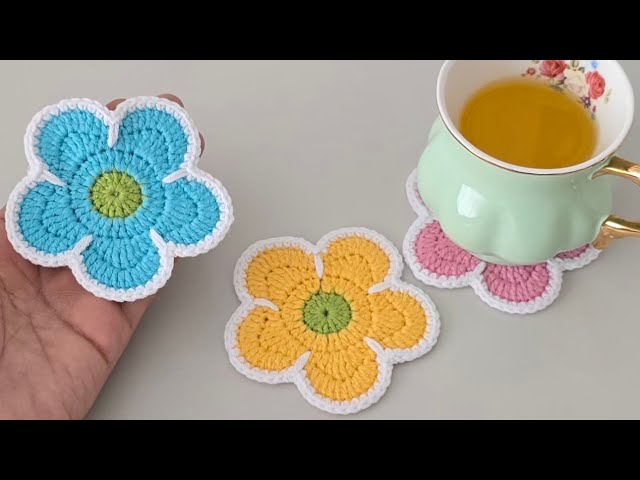
by Bring the beauty of a blooming garden to your home with this adorable crocheted daisy flower coaster! Perfect for protecting your surfaces in style, this project is designed for beginners and experienced crocheters alike. Get ready to create a functional piece of art that’s as delightful to make as it is to use.
Your Garden of Supplies: Materials You’ll Need
Before we start stitching, gather your colorful “yarn petals” and tools:
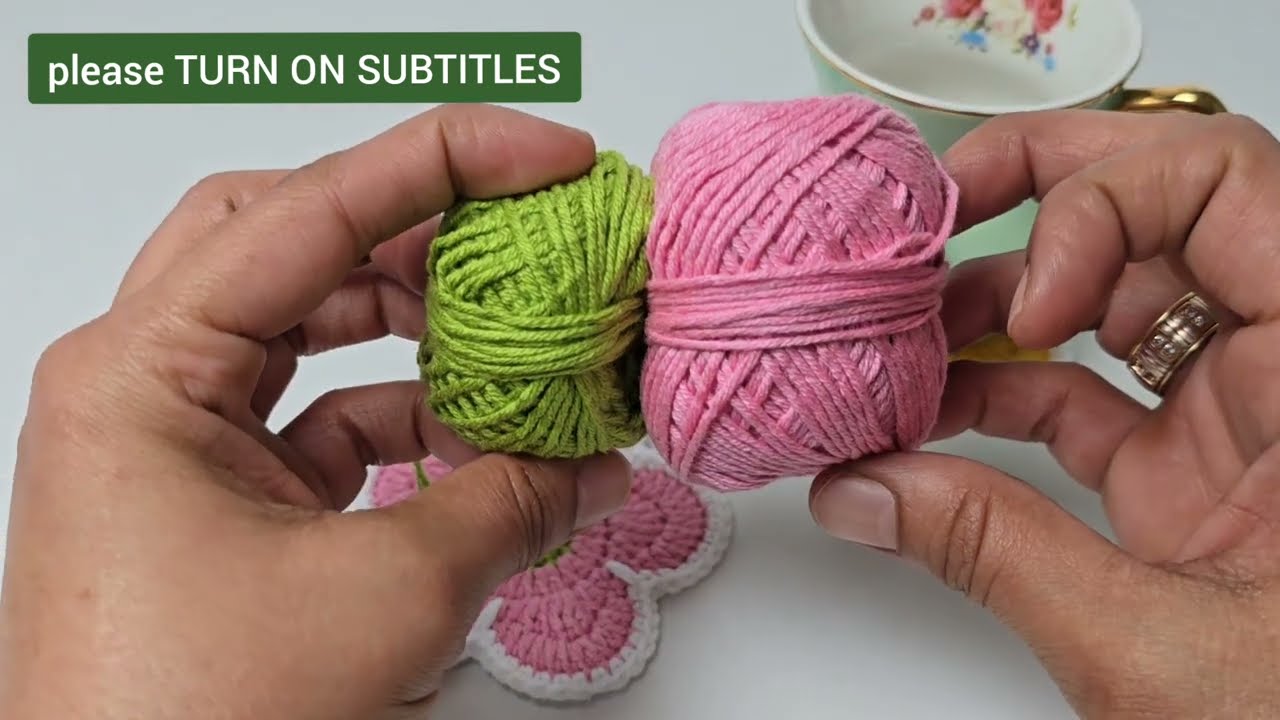
- Yarn:
- Green Yarn: For the vibrant center of your daisy.
- Pink Yarn (or your preferred petal color): For the cheerful petals.
- White Yarn (or your preferred border color): For the crisp, defining border.
- Crochet Hook: A 2.75mm crochet hook is recommended, or a size appropriate for your chosen yarn weight to achieve a neat, dense fabric suitable for a coaster.
- Scissors: To snip your yarn.
- Yarn Needle: For weaving in ends.
Let’s Bloom: Step-by-Step Daisy Coaster Pattern
This tutorial will guide you through creating each part of your daisy, from the green center to the lovely white border.
Part 1: The Heart of the Daisy – The Green Center
We’ll start by crocheting a flat, dense circle that forms the core of your flower.
- Magic Ring: Begin with a magic ring. This creates a tight, adjustable center for your work.
- Round 1: Chain 2 (does not count as a stitch). Work 12 double crochets (dc) into the magic ring. Pull the ring tight to close the center. Join with a slip stitch (sl st) to the top of the first dc. (12 stitches)
- Round 2: Chain 2. Work 2 dc in each stitch around. Join with a sl st to the top of the initial chain 2. (24 stitches)
- Fasten off your green yarn, leaving a short tail to weave in.
Part 2: Petal Power – The Pink Petals
Now for the fun part – creating those lovely petals!
- Attach Pink Yarn: With your green center facing you, attach your pink yarn to any stitch on the edge of the green circle with a slip stitch.
- First Petal:
- Chain 3 (counts as first double crochet).
- Work 3 double crochets (dc) into the same stitch where you joined the yarn.
- Chain 3.
- Slip stitch (sl st) into the next stitch. This completes your first petal.
- Repeat Petals:
- *Slip stitch into the next stitch.
- Chain 3.
- Work 3 dc into the same stitch.
- Chain 3.
- Slip stitch into the next stitch.*
- Repeat from * to * around the entire green circle until you have a full ring of petals. You should have 12 petals in total.
- Fasten off your pink yarn, leaving a short tail to weave in.
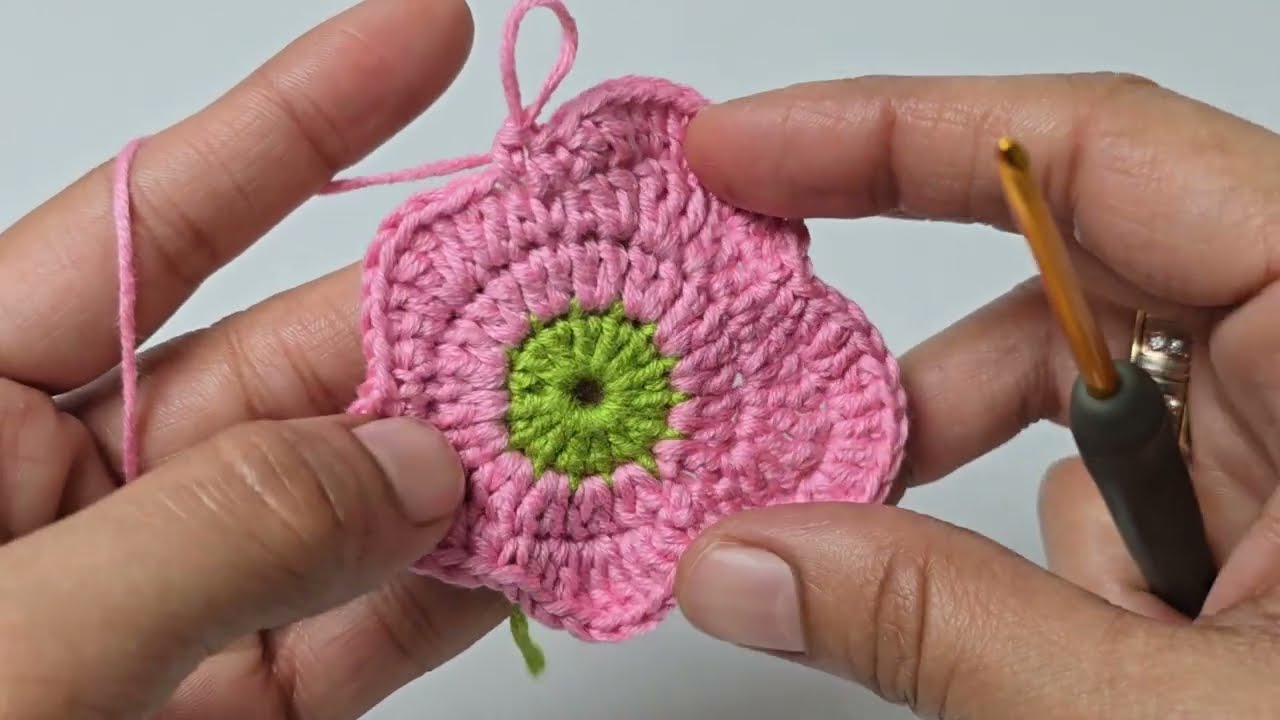
Part 3: The Crisp Edge – The White Border
To give your daisy a polished, defined look, we’ll add a simple white border.
- Attach White Yarn: Attach your white yarn with a slip stitch into any of the chain-3 spaces at the top of a petal (where you chained 3 before doing the 3 dc).
- Working Around Petals:
- Chain 1 (does not count as a stitch).
- Work 1 single crochet (sc) into the same chain-3 space.
- Work 1 sc into each of the next 3 dc stitches of the petal.
- Work 1 sc into the next chain-3 space.
- Work 1 sc into the next slip stitch (the one between petals, joining to the green center).
- *Work 1 sc into the next chain-3 space (of the next petal).
- Work 1 sc into each of the next 3 dc stitches of that petal.
- Work 1 sc into the next chain-3 space.
- Work 1 sc into the next slip stitch (between petals).*
- Repeat from * to * around the entire coaster.
- Join with a slip stitch to the first sc.
- Fasten off your white yarn.
Your Daisy Coaster is Blooming!
Congratulations! You’ve successfully crocheted a beautiful daisy flower coaster. These are not only practical but also add a lovely touch of handmade charm to any room. Make a set in various colors to brighten up your home or give them as thoughtful, personalized gifts.
Happy crocheting!
Watch tutorial:
https://www.youtube.com/watch?v=i4tXiZte0Qk