 by
by Below is a clear, detailed, beginner-friendly guide for making a warm hood/snood using only 2 straight knitting needles. No circular needles, no advanced skills—just simple stitches and straightforward construction.
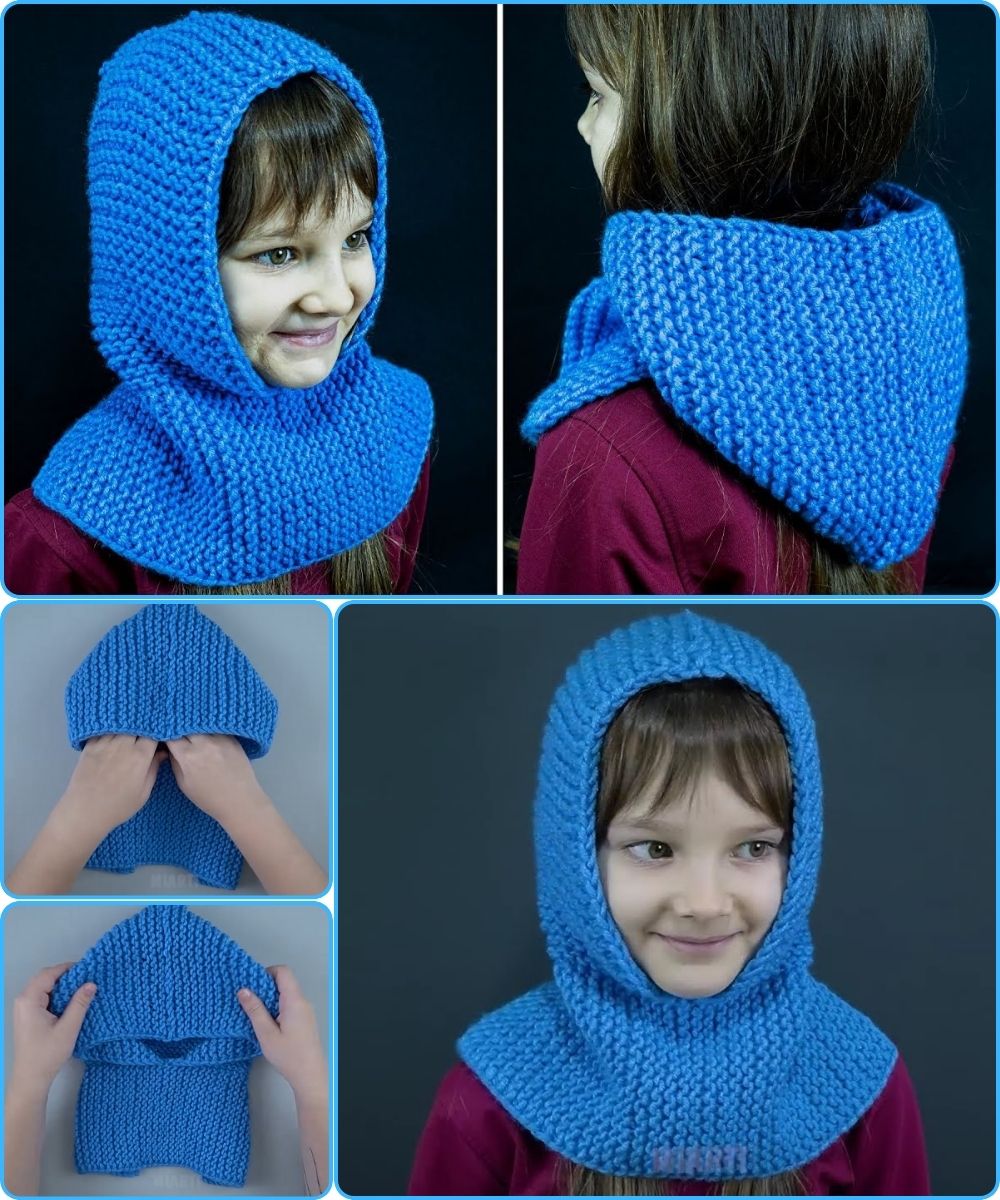
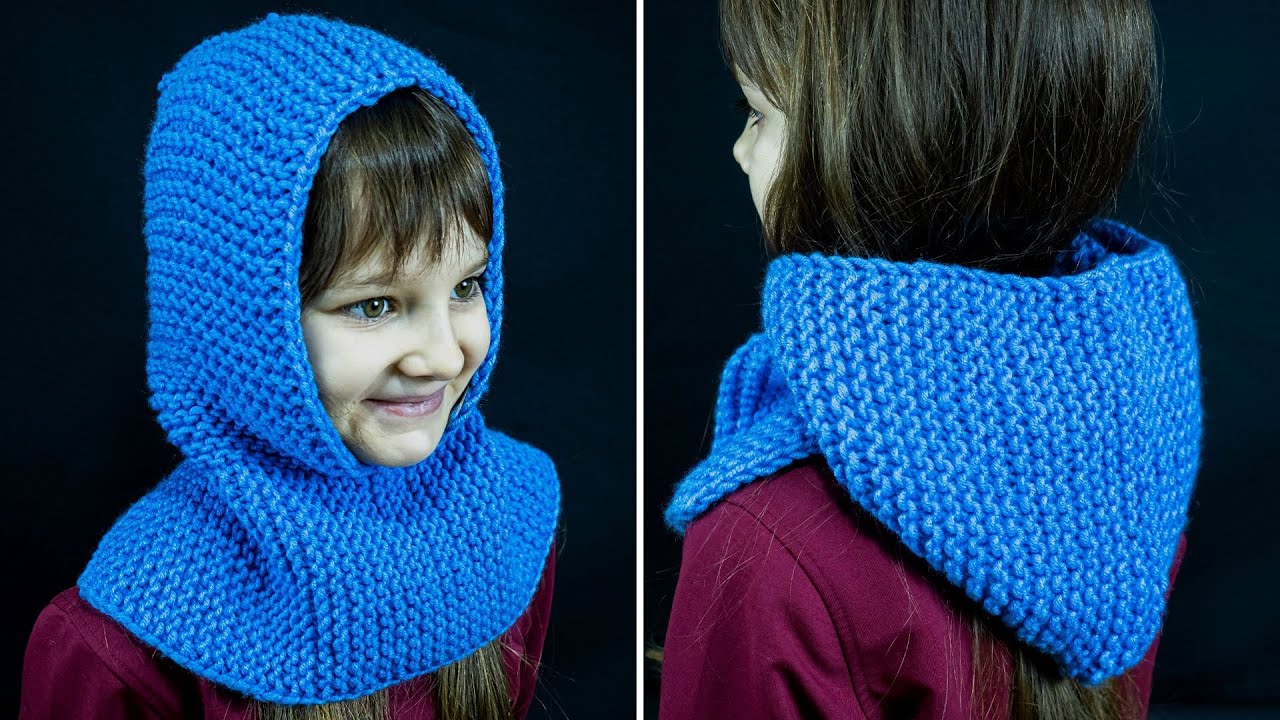
🧶 How to Make a Warm Hood / Snood on 2 Knitting Needles
Easy, quick, and perfect for beginners!
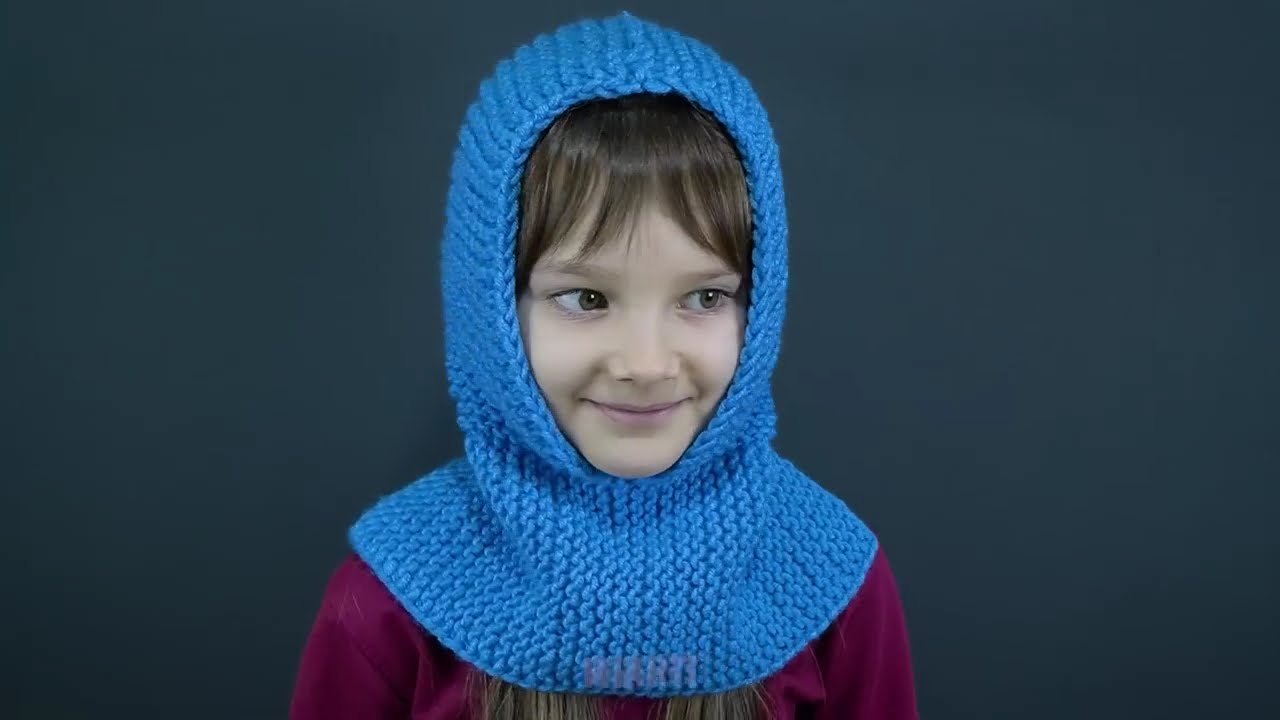
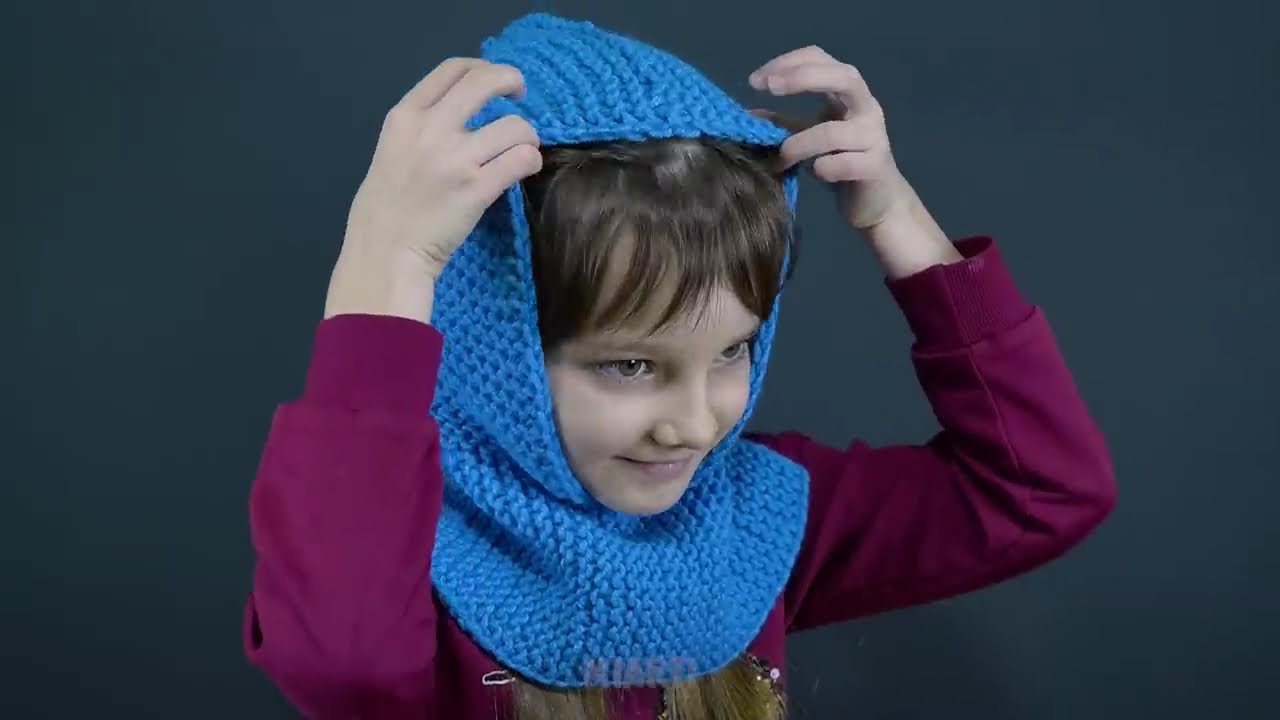
This project creates a cozy piece that functions as both a hood and a neck warmer, all made from one simple rectangle.
⭐ What You Need
-
Yarn: 2 skeins of chunky or super chunky yarn (ideal for warmth and fast knitting)
→ Look for yarn weight 5 or 6. -
Knitting Needles: Straight needles size 8–10 mm (US 11–15).
-
Tapestry needle: For sewing seams.
-
Scissors
🧵 Step-by-Step Instructions
1️⃣ Cast On
Cast on 50–60 stitches
(Choose 50 for a snugger fit, 60 for a looser/wider hood.)
Tip: Your cast-on width = the height of the hood once folded, so choose what feels comfortable.
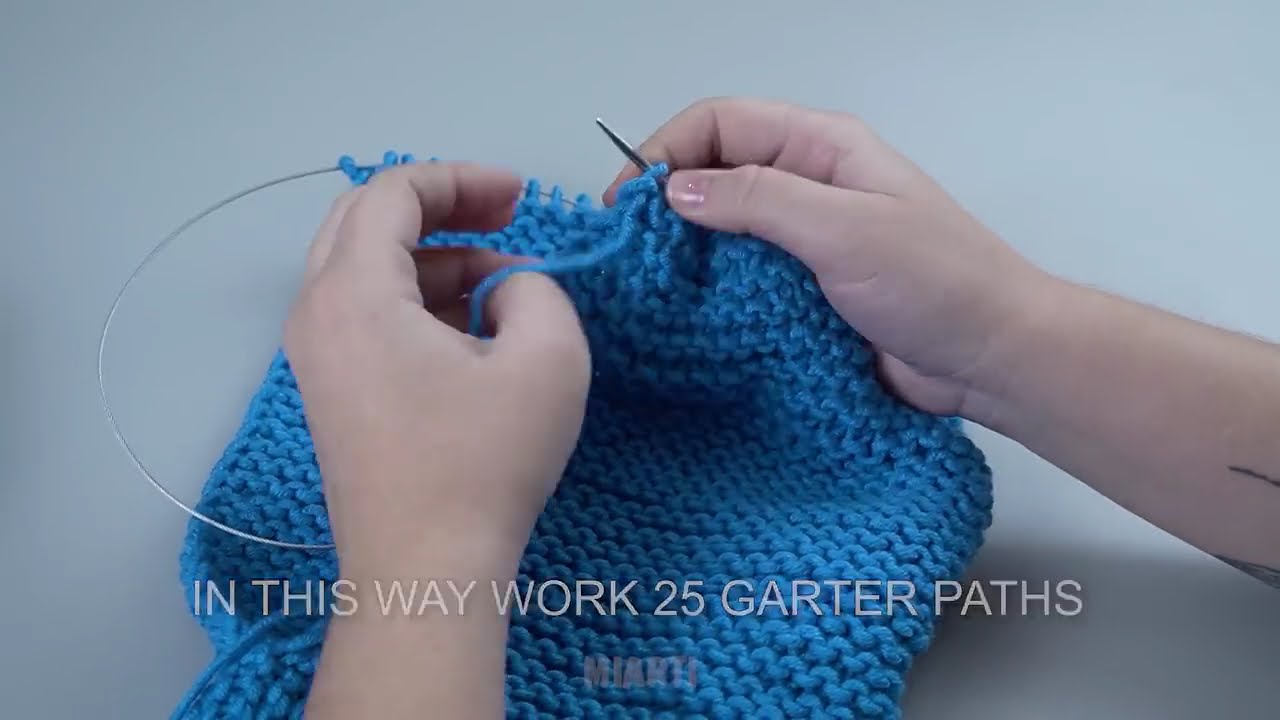
2️⃣ Knit the Body (Rectangular Panel)
You will knit one large rectangle. Choose one of the following stitch patterns:
Option A: Garter Stitch (Easiest)
-
Knit every row.
-
Result: Stretchy, plush, warm fabric.
Option B: Rib Stitch (Very Stretchy)
-
Row 1: K2, P2 repeat
-
Row 2: Knit the knits, purl the purls
-
Repeat
-
Result: A flexible, snug fit around the neck.
Option C: Stockinette Stitch
-
Row 1: Knit
-
Row 2: Purl
-
Repeat
-
(Curling edges are fine—this gets folded and sewn.)
3️⃣ Knit Until You Have a Long Rectangle
Continue knitting until your panel measures:
Length: 45–55 cm (18–22 inches)
This length ensures the piece can wrap around the neck and fold over the head comfortably.
Chunky yarn grows fast—you might finish in just a few hours!
4️⃣ Bind Off
Bind off loosely so the edge doesn’t tighten the hood.
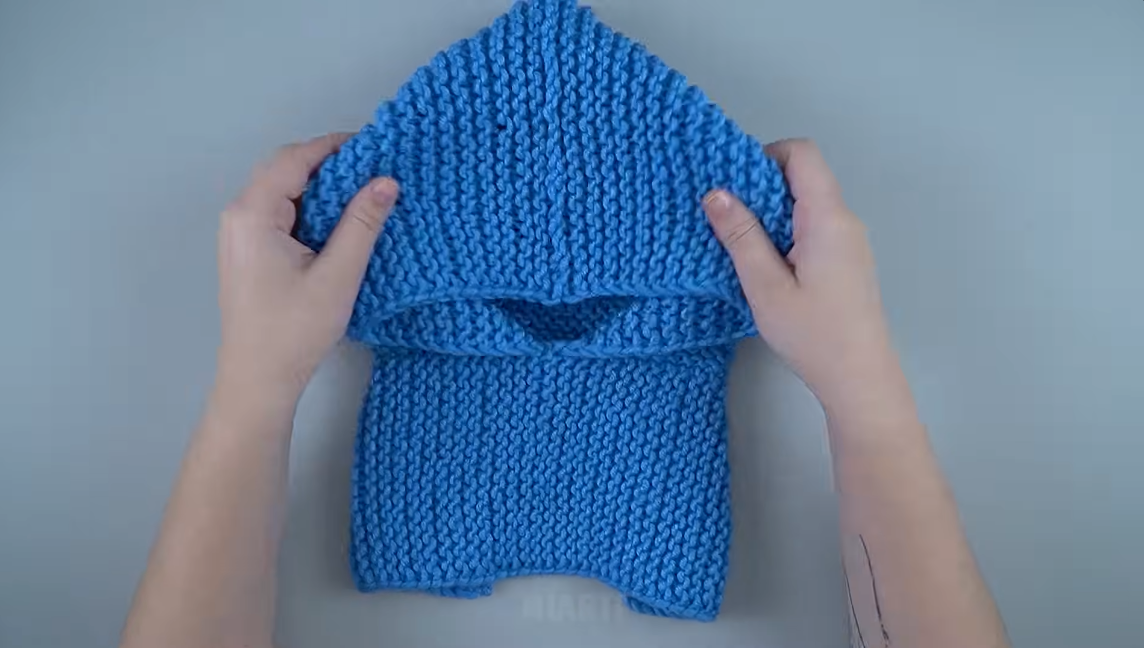
🪡 Assembly (Super Easy!)
You now have one rectangle. Time to turn it into a hood/snood.
Method A: Hood + Snood Combo (Most Popular)
-
Fold the rectangle in half widthwise
– You should have a square when folded. -
Sew ONLY the back edge
– Using mattress stitch or whip stitch, sew the top portion of the folded edge.
– Leave the bottom open (this is the part that goes over your neck).
🔍 Visualizing:
-
Folded edge = back of the head
-
Sewed area = top/back seam
-
Open ends = face opening + lower neck opening
That’s it! It forms a cozy hood with a draping neck.
Method B: Classic Snood (No Hood Shape)
If you want a simple tube:
-
Do not fold.
-
Sew the short sides together to form a loop.
This makes a soft neck warmer that can also be pulled up over the head.

🎀 Optional Add-Ons
✔️ Add a Drawstring
Pick up stitches around the face opening and knit an i-cord.
✔️ Make it Extra Warm
Line the inside with fleece fabric.
✔️ Add a Border
Knit 4–6 rows of ribbing (K1, P1) on each edge when you begin/finish.
🧶 Quick Beginner Tips
-
Chunky yarn hides mistakes—great for first projects.
-
If your edges look uneven, a gentle steam block will fix it.
-
Using a larger needle makes the hood softer and drapier.
🎉 You’re Done!
You’ve made a warm, stylish hood/snood using only 2 needles, a simple rectangle, and beginner stitches. It’s fast, forgiving, and absolutely gift-worthy.
If you’d like, I can also provide:
✅ a printable pattern
✅ step-by-step pictures
✅ a video-style written guide (row-by-row)
✅ a sized pattern for kids, teens, or adults
Just tell me!
Watch tutorial: