 by
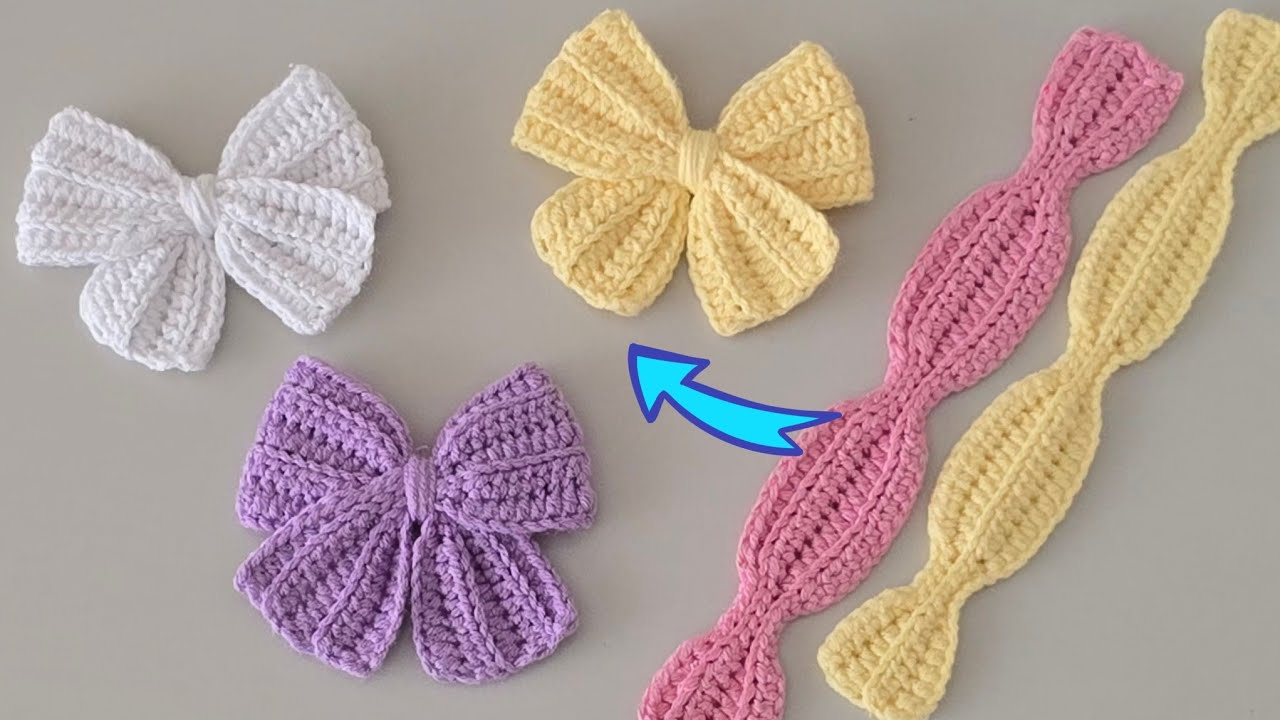
by Welcome, fellow crafters! Are you looking for a charming handmade touch to elevate your gift wrapping, adorn your hair, or simply add a delightful accent to your projects? Look no further! Today, we’re diving into the wonderful world of crochet to create a beautiful, versatile bow. This pattern is perfect for adding a personalized flair to any item, and whether you’re a seasoned crocheter or just starting out, you’ll find this guide easy to follow. Get ready to transform a simple skein of yarn into an elegant accessory!
Materials You’ll Need
Before we begin, gather your supplies. For this project, you’ll need just a few essentials:
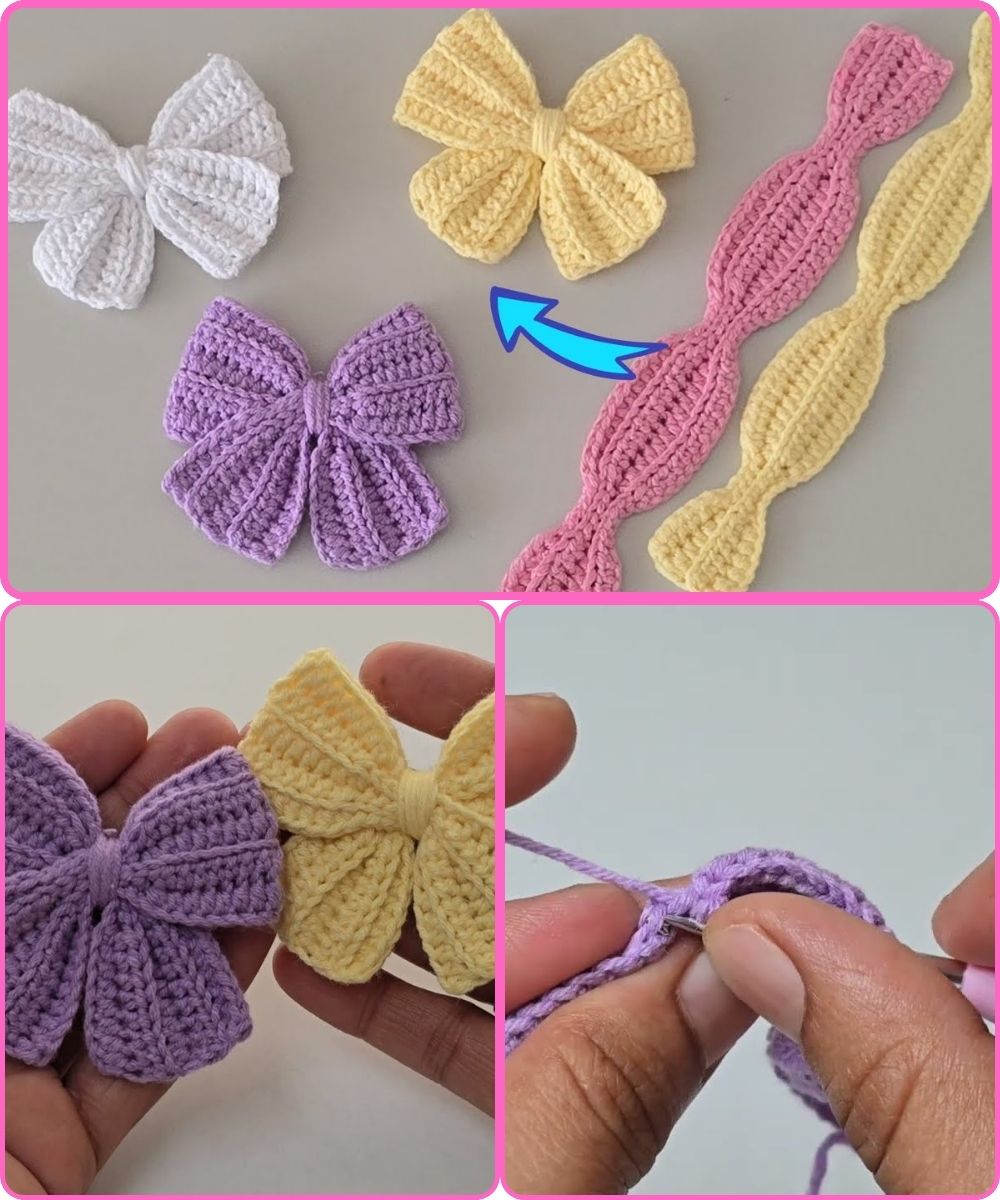
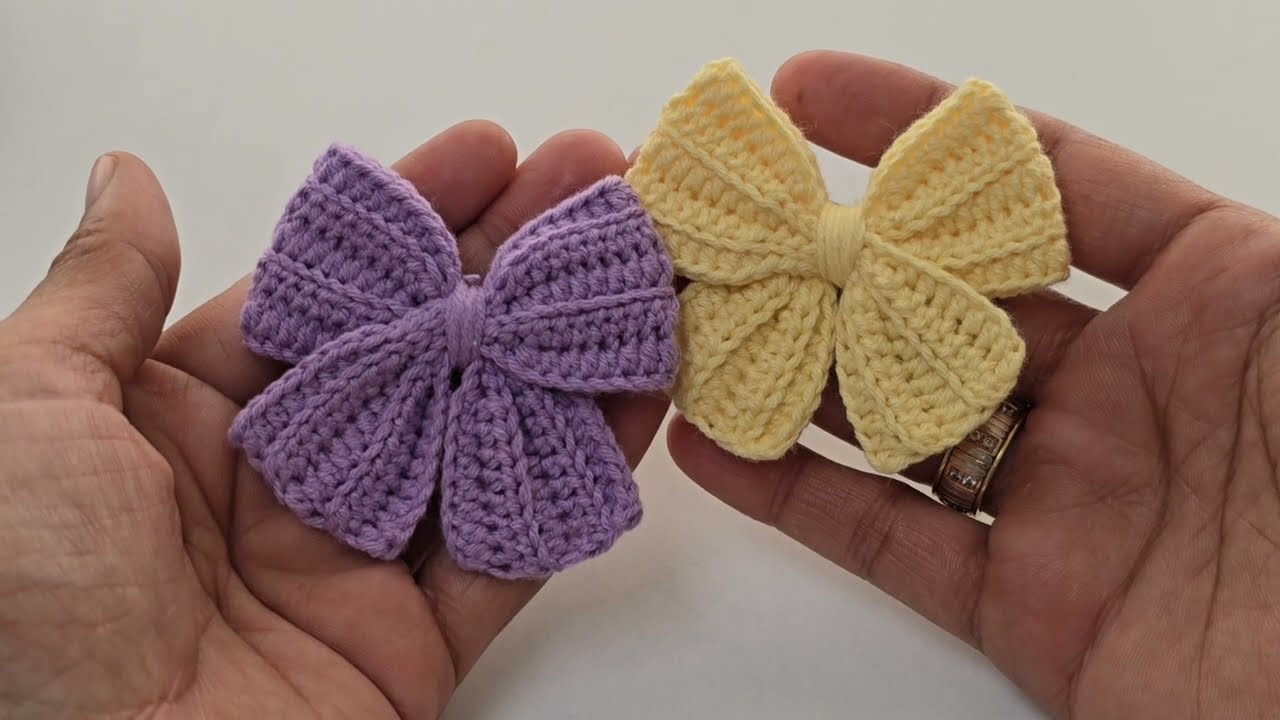
- Yarn: Choose your favorite color and fiber! A ball of acrylic or cotton yarn works beautifully. The video used a lovely purple yarn, but feel free to experiment with colors that match your style or occasion.
- Crochet Hook: The video recommends a 2.20mm crochet hook for a delicate finish. However, you can adjust your hook size based on your yarn weight and desired bow size and drape.
- Scissors: For cutting your yarn.
- Yarn Needle (or Tapestry Needle): For weaving in ends neatly.
Let’s Get Crocheting! Step-by-Step Instructions
This pattern creates a bow with a lovely wavy texture, perfect for a soft, elegant look. We’ll break it down into easy-to-manage steps.
Step 1: The Foundation Chain
- Start with a Slip Knot: Create a slip knot on your hook.
- Chain Stitches: Chain a series of stitches. The video suggests chaining until your piece measures approximately 22 cm (about 8.6 inches) in length. This will be the width of your finished bow. Ensure your chain is not too tight.
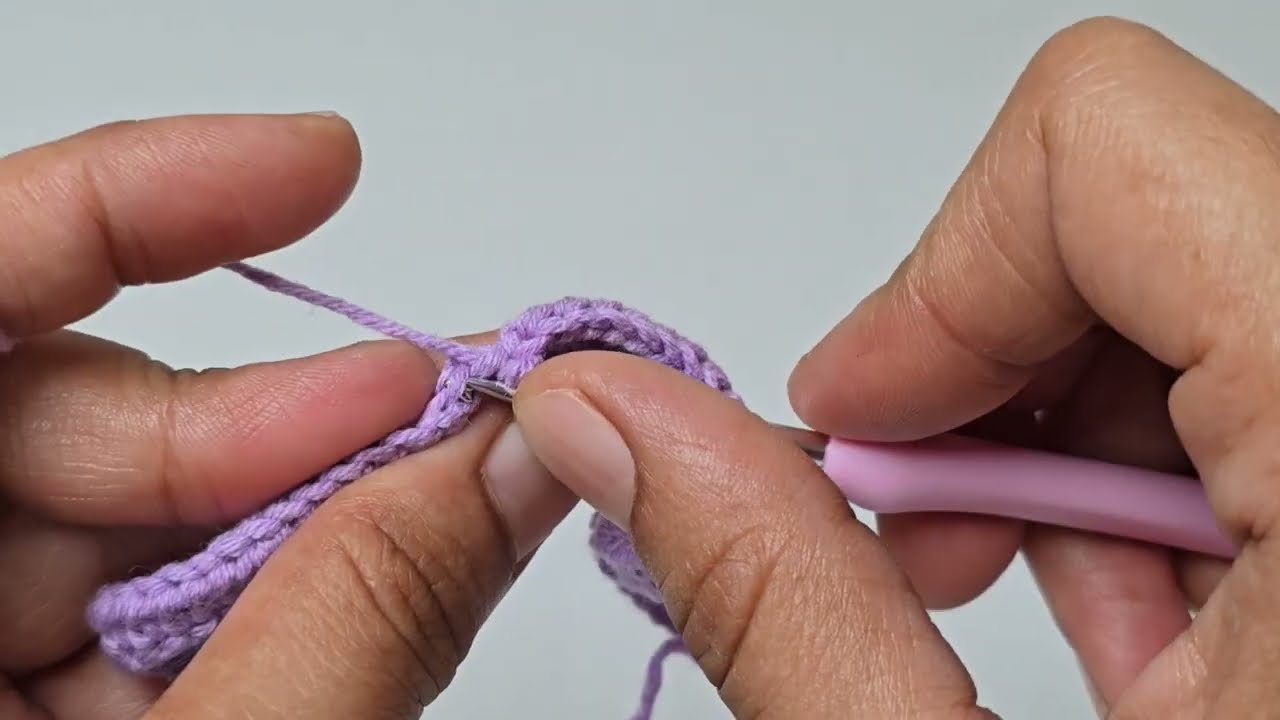
Step 2: Crocheting the Base Rows (Single Crochet)
- Row 1 (and subsequent base rows): Once your foundation chain is complete, work single crochet (SC) stitches into each chain across. This creates a sturdy and even base for your bow.
- Continue working in SC rows until you have a few rows that form a solid foundation. This section will determine the overall height of your bow’s main body before the wavy pattern begins.
Step 3: Creating the Wavy Pattern (Alternating Stitches)
This is where the magic happens and your bow gets its unique texture!
- Row [X]: To create the wavy, textured pattern, you will alternate between single crochet (SC) and double crochet (DC) stitches.
- For example, you might start with 1 SC in the first stitch, then 1 DC in the next, then 1 SC, and so on, across the row.
- Experiment with the alternating pattern to achieve your desired ripple effect. Sometimes, skipping a stitch or adding an extra chain can enhance the wave.
- Continue this alternating pattern for several rows until the crocheted piece reaches your desired length for the main body of the bow. The length will dictate how “full” your bow looks when folded.

Step 4: Finishing the Main Piece
- Once you’ve achieved the desired length for your bow’s main body, finish off your work.
- Fasten Off: Cut your yarn, leaving a tail of about 6-8 inches. Yarn over and pull the tail completely through the loop on your hook to secure the stitch.
Step 5: Forming the Bow Shape
Now, let’s turn your flat crocheted piece into a beautiful bow!
- Fold and Cinch: Take your finished crocheted piece and fold it in half, then bring the two ends towards the center, overlapping slightly.
- Gently pinch and cinch the middle of the folded piece to start forming the bow shape. You’ll see the classic bow outline emerge.

Step 6: Securing the Center
To hold the bow’s shape securely and give it a polished finish, we’ll wrap the center.
- Prepare a Separate Yarn Piece: Cut a separate, shorter piece of yarn (about 12-15 inches).
- Wrap the Center: Using this separate piece of yarn, tightly wrap it around the cinched center of your bow multiple times. This will define the bow’s shape and create a neat central band.
- Secure the Ends: Once wrapped, tie the ends of the wrapping yarn tightly at the back of the bow. Use your yarn needle to weave in any remaining loose ends for a clean look.
Step 7: Final Touches
- Trim Excess Yarn: Carefully trim any excess yarn tails from your securing knot and woven-in ends.
- Adjust and Shape: Gently adjust and fluff your bow to achieve its final, perfect form.
Your Beautiful Bow is Complete!
And there you have it! A unique, handmade crochet bow ready to adorn gifts, hair, headbands, or anything else that needs a touch of charm. The video showcases a lovely purple bow alongside a yellow one, demonstrating the versatility of this pattern. We hope you enjoyed creating this delightful accessory. Happy crocheting!
Watch tutorial:
https://www.youtube.com/watch?v=flcS2Eo4nIQ