 by
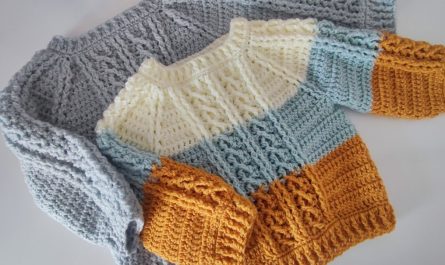
by Absolutely! I can give you a detailed, step-by-step guide on how to crochet a layered cardigan. I’ll break it down into materials, pattern basics, and step-by-step instructions, so it’s beginner-friendly but also adaptable for more advanced crocheters.
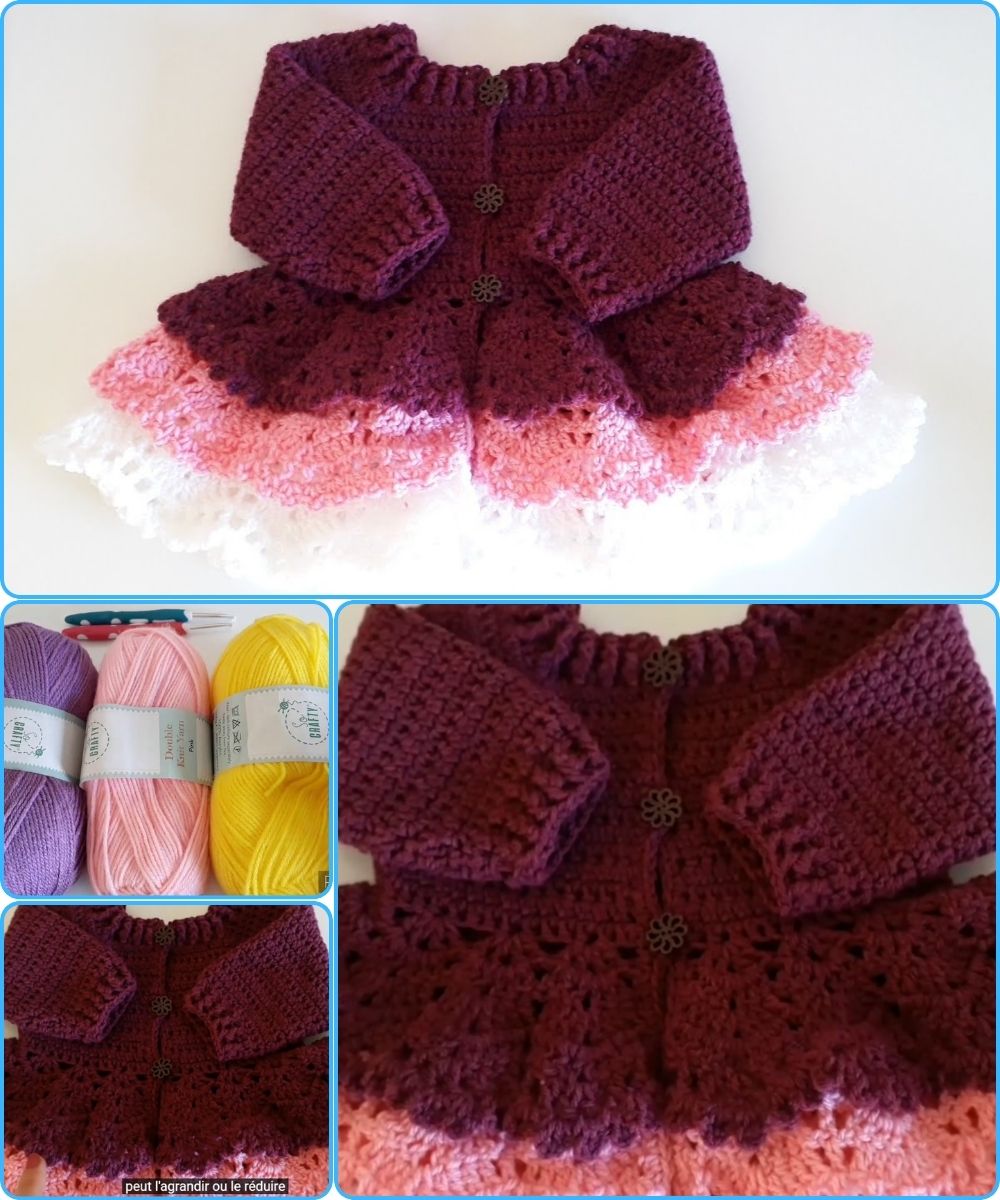
Materials Needed
-
Yarn:
-
Medium-weight yarn (worsted, #4) is ideal for a cozy cardigan.
-
Choose colors depending on your style. If you want a layered look, consider two complementary colors.
-
-
Crochet Hook:
-
Recommended size: 5.0 mm (H) or as suggested on the yarn label.
-
-
Other Tools:
-
Scissors
-
Tapestry needle (for weaving in ends)
-
Stitch markers (optional but helpful)
-
Step 1: Take Measurements
Before starting, measure:
-
Bust or chest circumference
-
Sleeve length
-
Cardigan length (from shoulder to hem)
This helps you adjust the pattern to fit your size.

Step 2: Crochet the Base Layer
The base layer is usually a simple cardigan body. You can choose open-front or buttoned style.
Pattern (Basic Steps):
-
Back Panel:
-
Chain a foundation chain that matches your shoulder-to-shoulder width.
-
Work in rows of double crochet (dc) or half double crochet (hdc) until the piece reaches your desired back length.
-
-
Front Panels:
-
Make 2 panels for the front. They should be half the width of the back plus extra for overlap.
-
Work in the same stitch as the back panel.
-
-
Joining:
-
Seam the shoulders by slip stitching or sewing.
-
Attach the front panels to the back with a single crochet or whip stitch along the shoulders.
-
Step 3: Crochet the Sleeves
-
Option 1: Set-in sleeves
-
Measure the armhole and create a rectangle matching the width and length of your arm.
-
Seam the sides after attaching to the cardigan body.
-
-
Option 2: Raglan sleeves
-
Start from the top shoulder and crochet down diagonally.
-
Use increases at the shoulder seam to shape the sleeve naturally.
-
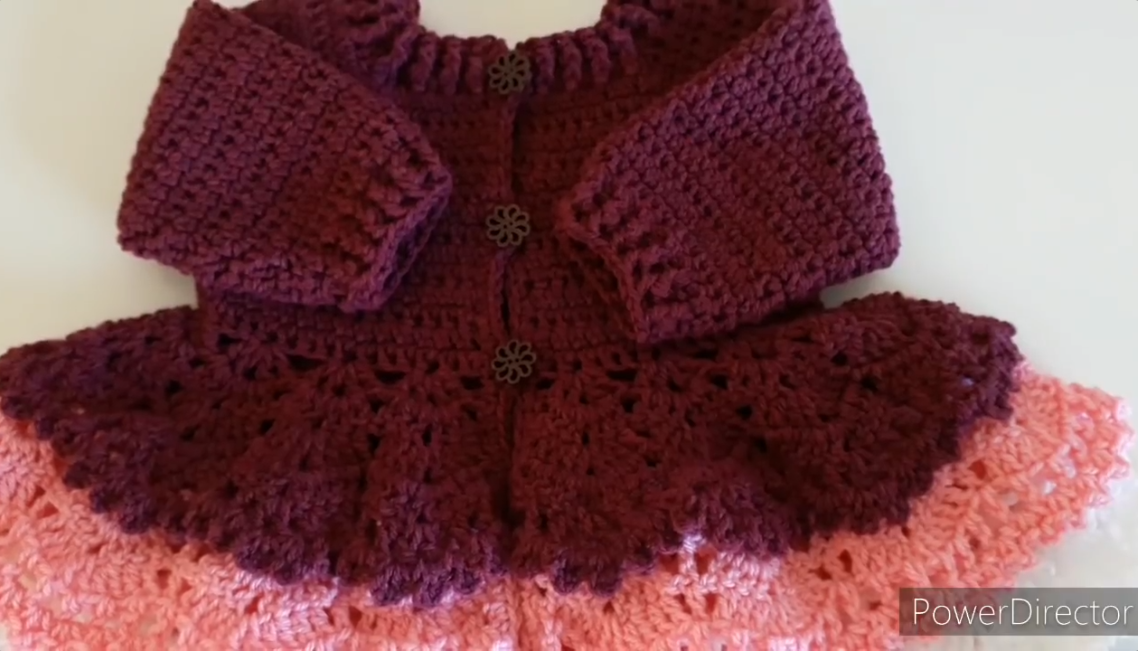
Step 4: Create the Layered Effect
The layered look can be achieved in several ways:
-
Outer Layer Panel:
-
Chain a longer strip than your front panels.
-
Crochet a light openwork lace or ribbed stitch along the edges.
-
Attach this panel to the neckline and let it drape over the base layer.
-
-
Layered Hem:
-
Add a longer rectangular piece at the bottom back and sides.
-
This creates a flowing layered effect like a waterfall cardigan.
-
-
Optional:
-
Crochet a contrasting trim along the front edges or sleeve hems to enhance the layered appearance.
-
Step 5: Assembly and Finishing
-
Weave in all yarn ends neatly.
-
Block your cardigan lightly to shape it.
-
Add buttons or tie closure if desired.
-
Adjust the layered panels to ensure they drape naturally.
Tips for a Beautiful Layered Cardigan
-
Use lighter yarn for the top layer to prevent bulk.
-
Consider lace stitches like shell stitch or V-stitch for the top layer for elegance.
-
Keep consistent tension throughout so layers align properly.
-
Try color blocking for a modern layered effect.
If you want, I can also write a complete stitch-by-stitch pattern for a specific size, including diagrams for the layered panels, so you can follow it exactly and make your cardigan from start to finish.
Do you want me to do that next?
Watch tutorial: