by
by Absolutely! Here’s a detailed guide on How to Make a Super Easy Crochet Yoke – great for beginners or anyone wanting a quick project to add to a dress, blouse, or sweater.

How to Make a Super Easy Crochet Yoke (Step-by-Step)
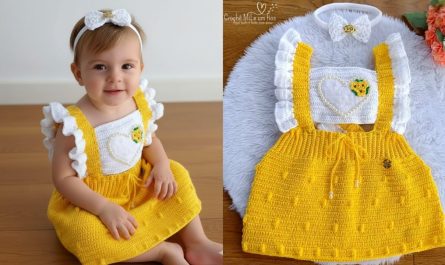
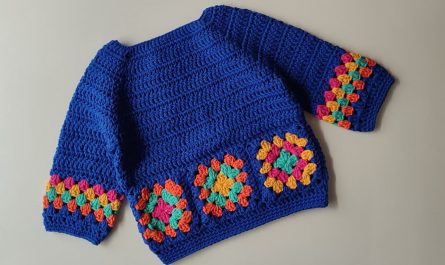
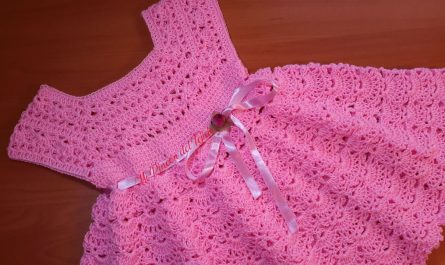
A crochet yoke is the upper part of a top or dress, often circular or square in shape, that connects the neck to the body of the garment. It can be elegant, lacy, or textured, depending on the stitch you choose.
This guide covers:
-
Materials
-
Measuring & Sizing
-
Pattern structure
-
Stitch guide
-
Finishing
Materials Needed:
-
Yarn: Lightweight yarn (Category 2 or 3) for a delicate yoke, or worsted weight (Category 4) for a chunkier look
-
Hook: Match your yarn label’s suggestion (commonly 3.5mm–5mm)
-
Measuring tape
-
Scissors
-
Tapestry needle
-
Stitch markers (optional)
Step 1: Take Measurements
You need two key measurements:
-
Neck circumference (measure around your neck or neckline of garment)
-
Shoulder width or upper chest (where the yoke will stop and body will begin)
These will help determine your starting chain count and increases.

Step 2: Choose Yoke Style
You can crochet a yoke in various shapes. This guide focuses on the round yoke, which is easy and seamless.
Other styles (not covered here but worth exploring later):
-
Square yoke
-
Raglan yoke
-
Hexagon yoke
Step 3: Basic Yoke Pattern Structure
We’ll use a top-down circular yoke method worked in rounds.
Round Yoke Foundation (for adult size):
-
Foundation Chain: Chain a multiple of 8 that fits your neck comfortably. Try ch 64, join with sl st (adjust based on neck size).
-
Round 1: Ch 2 (counts as dc), dc in each chain around, join with sl st to top of ch-2.
-
Round 2 (Increase Row): *Ch 2, dc in next 7 sts, 2 dc in next; repeat around. This increases evenly.
-
Round 3: Dc in each st around.
-
Repeat Increase Round every 2–3 rows until the yoke reaches desired width (shoulder or upper chest).
Repeat increases like this:
-
R5: Increase in every 8th stitch
-
R7: Increase in every 9th stitch
-
R9: etc.
Tip: Try it on as you go!
Optional Stitch Variation
To make it prettier and more lacy, try alternating:
-
Shell Stitch Rows: (dc, ch 1, dc) in same st
-
V-Stitch Rows: (dc, ch 2, dc) in same st
Example:
-
R2: V-stitch in every 3rd stitch
-
R3: Dc in each stitch
-
R4: Shell stitch in V-spaces
-
R5: Dc row (increase)
This creates a textured and openwork design perfect for a dress yoke or summer top.
Step 4: Divide for Body
When the yoke is wide enough:
-
Lay it flat and place markers for front, back, and armholes.
-
Example division (for 80 sts):
-
20 front
-
20 back
-
20 each armhole
-
Underarm Joining:
-
Ch 5–10 under each arm to create armhole opening
-
Start crocheting in the round again for the body.
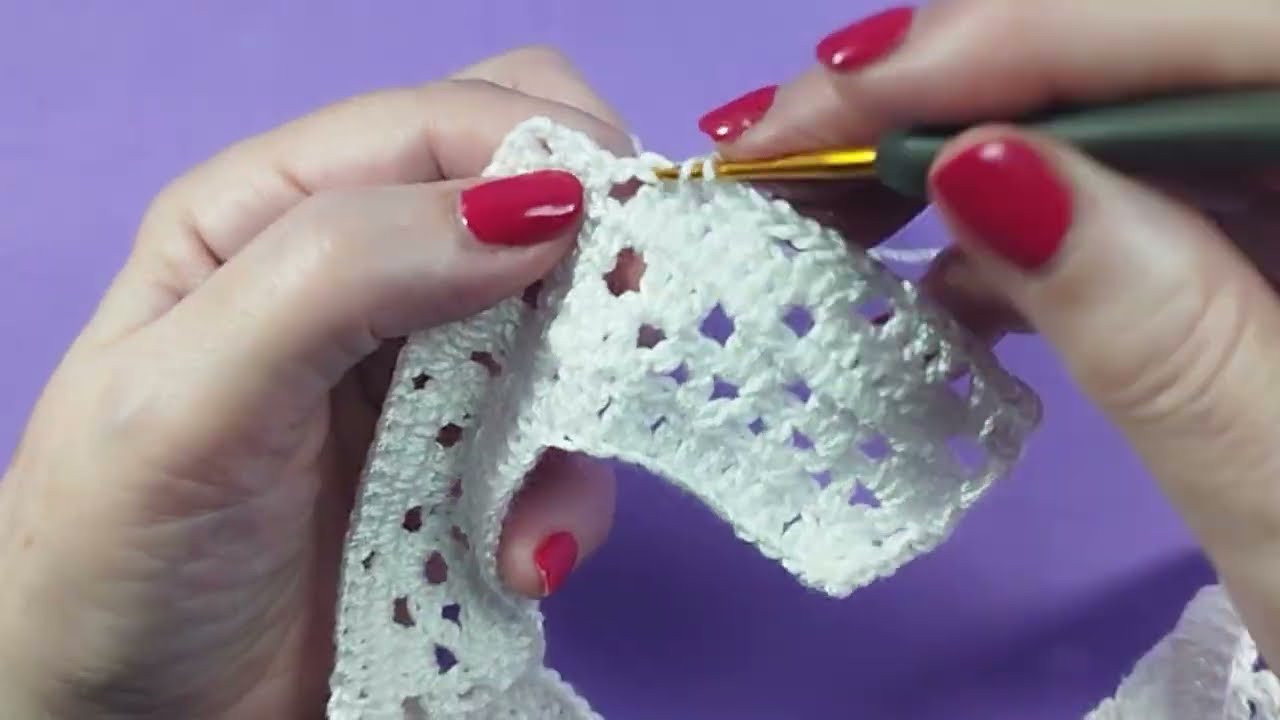
Step 5: Finishing
-
Neckline: Add a round or two of single crochet or reverse sc (crab stitch) for a finished edge.
-
Block the yoke: Gently shape with steam or wet blocking for a professional look.
-
Sew to a dress/blouse or continue crocheting the rest of the top or sweater.
Tips for Success
-
Try on as you go – especially after every few increase rounds.
-
Use stitch markers to mark increases and divisions.
-
Use lightweight cotton or bamboo yarns for summer yokes.
-
Want color? Use variegated yarn or change colors every few rows.