 by
by Sure! Here’s a complete step-by-step guide on how to make a crochet crop top, suitable for beginner to intermediate crocheters. This guide includes materials, instructions, and optional modifications.
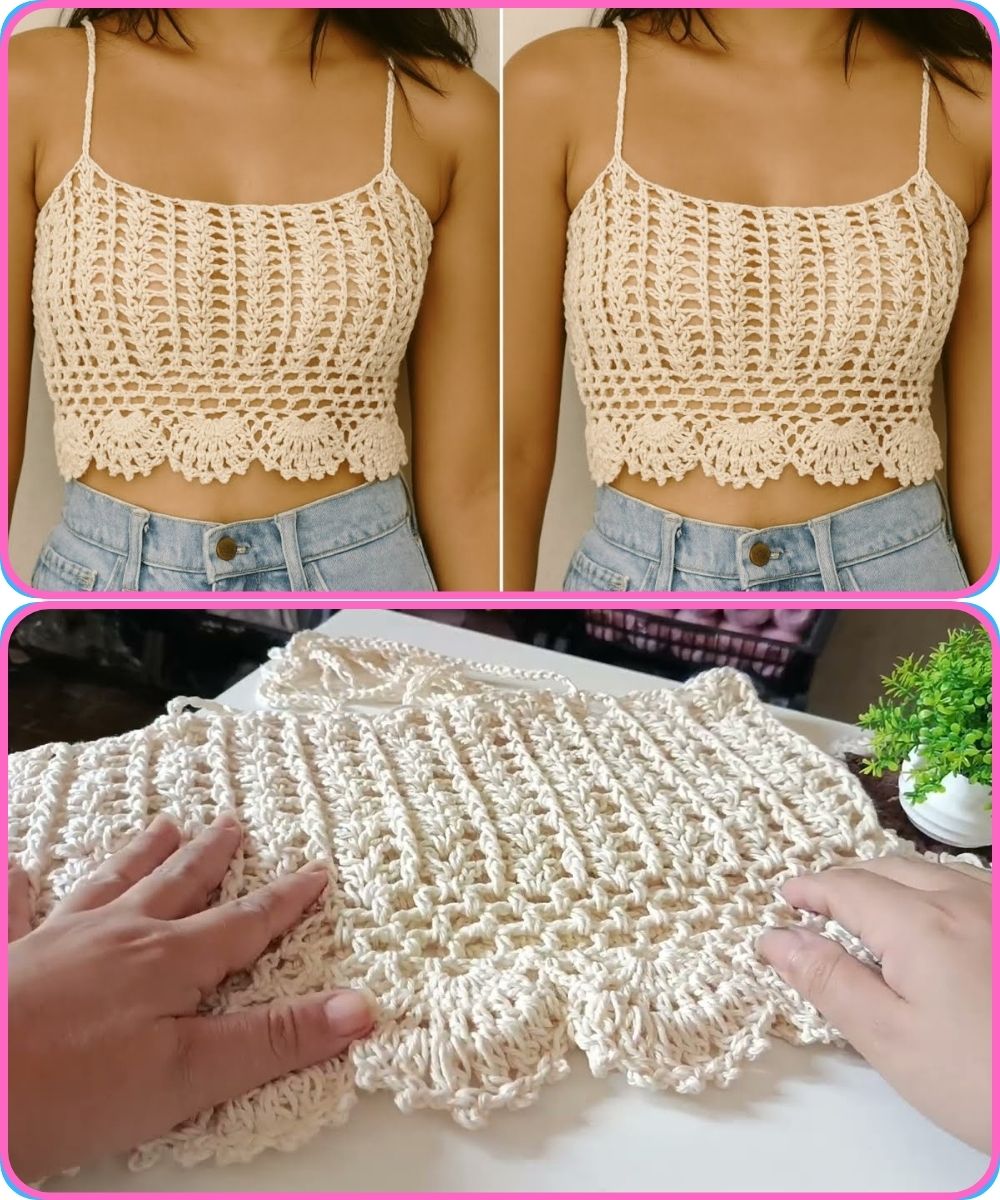
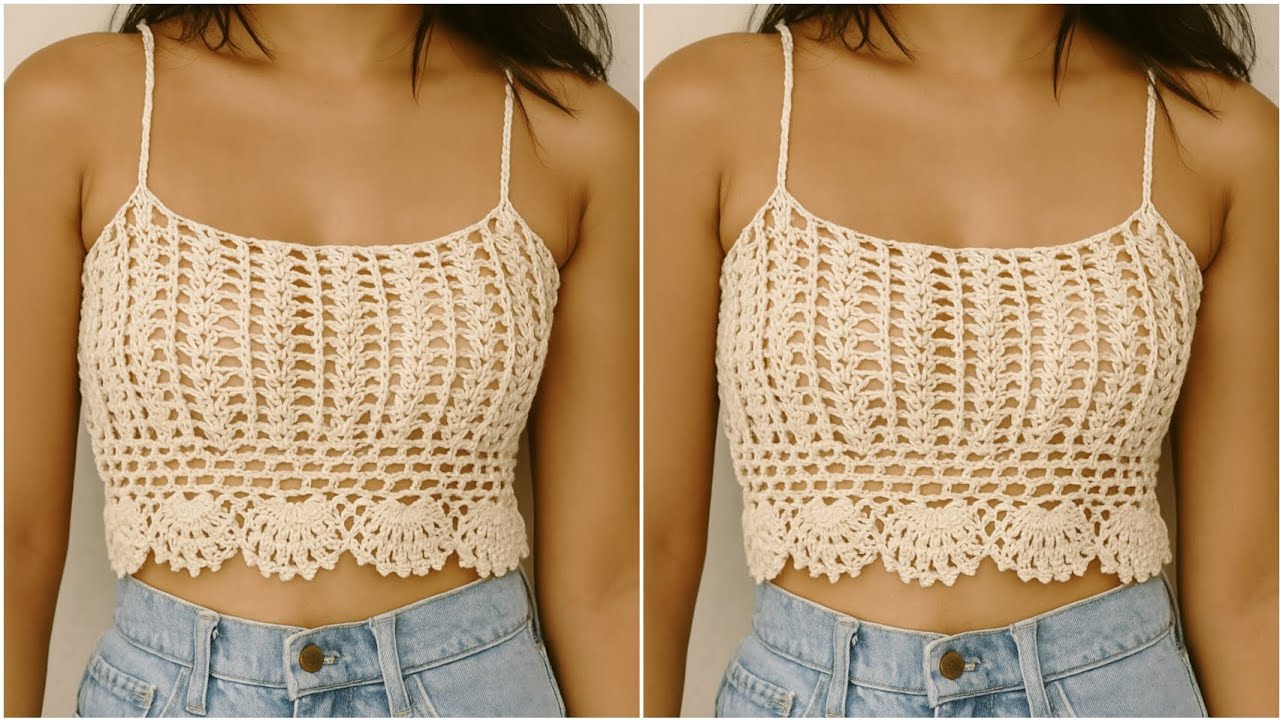
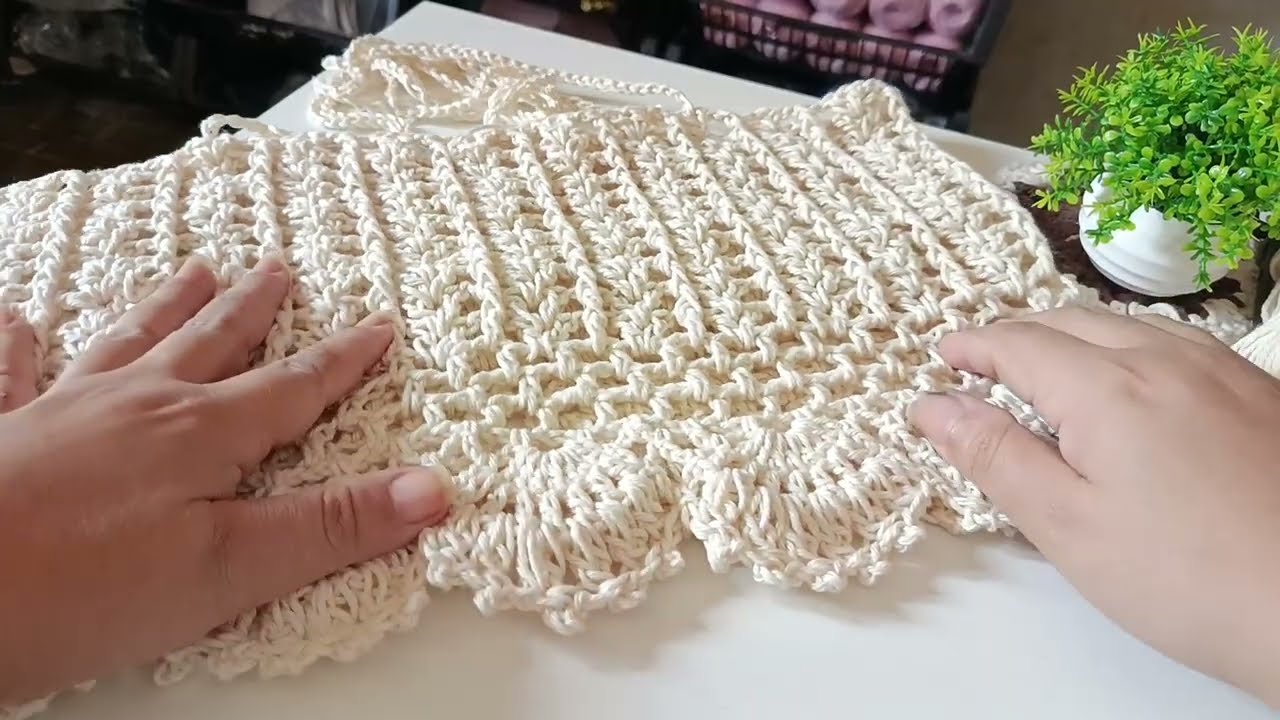
How to Make a Crochet Crop Top – Step-by-Step Guide
MATERIALS NEEDED:
| Item | Details |
|---|---|
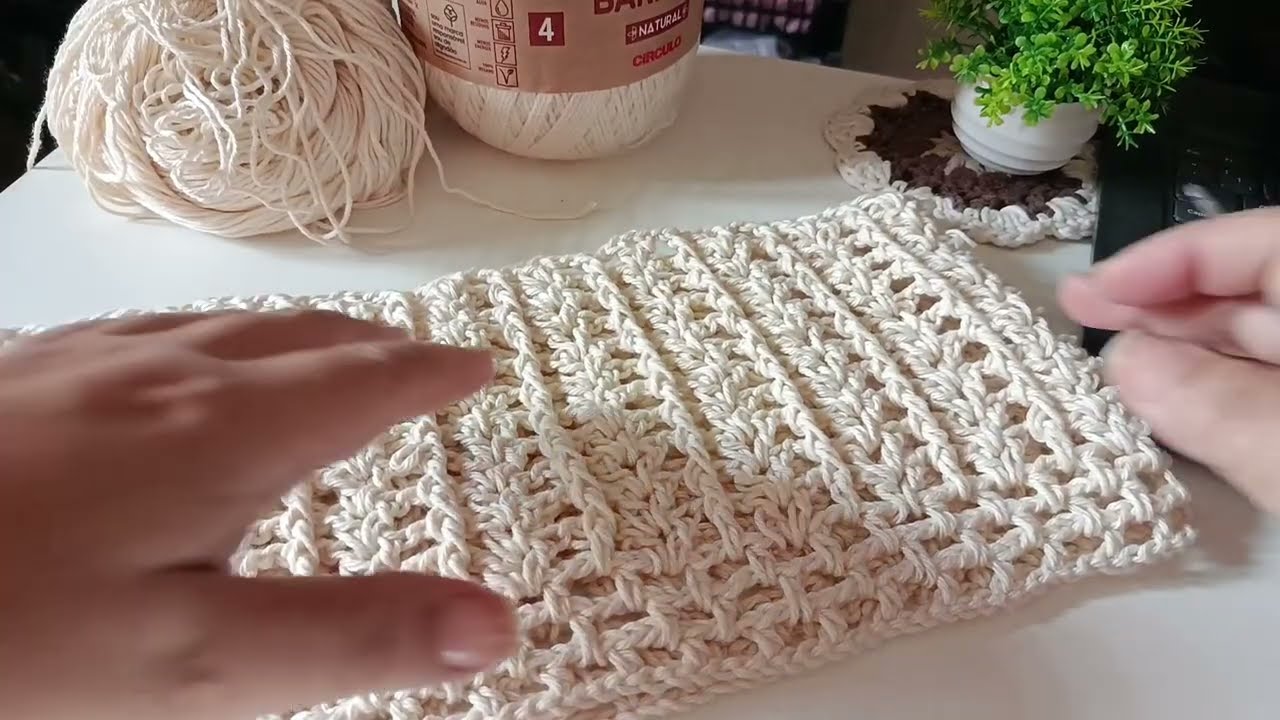
| Yarn | Worsted weight (Category 4) or DK weight yarn (cotton or bamboo is best) |
| Crochet Hook | Size H/5.0 mm or as recommended for your yarn |
| Tapestry Needle | For weaving in ends |
| Stitch Markers | Optional, but helpful |
| Scissors | Sharp for clean cuts |
| Measuring Tape | For sizing |
✨ STEP 1: Choose Your Style and Measure Yourself
Decide on the crop top design:
-
Basic bralette
-
Halter top
-
Tube top
-
Tank style with straps
Then, take measurements:
-
Bust circumference
-
Underbust
-
Desired length (from chest to hem)
-
Cup size (if adding cups)
Tip: Write these down! Measurements will guide your foundation chain and shaping.
✨ STEP 2: Make a Gauge Swatch
Before starting the full piece, crochet a small square (4″x4″) to test your tension.
-
Chain 20 and work 10 rows of half double crochet (or your preferred stitch).
-
Measure the square.
-
Adjust your hook size if needed to match pattern gauge.
✨ STEP 3: Start the Foundation Chain
Chain long enough to fit around your bust or underbust, depending on design.
-
For a bralette-style: Chain for individual cups, approx. 12–15 chains wide.
-
For a tube/halter: One continuous chain, measure to your bust circumference.
Add 2 extra chains for turning if using single/double crochet.
✨ STEP 4: Crochet the Base or Cups
For Cup Style (Bralette):
-
Start with a chain of 12–15 stitches (depending on desired cup size).
-
Row 1: Single crochet (SC) across.
-
At the last stitch, add 3 SC in the final stitch and rotate the piece.
-
Work SC along the opposite side of the chain.
-
Continue working in rows or rounds, adding 1 stitch at the peak each row.
-
Stop when the cup fits your bust (test against your body).
-
Make 2 cups, join them in the middle using SC or whip stitch.
For Tube or Halter Top:
-
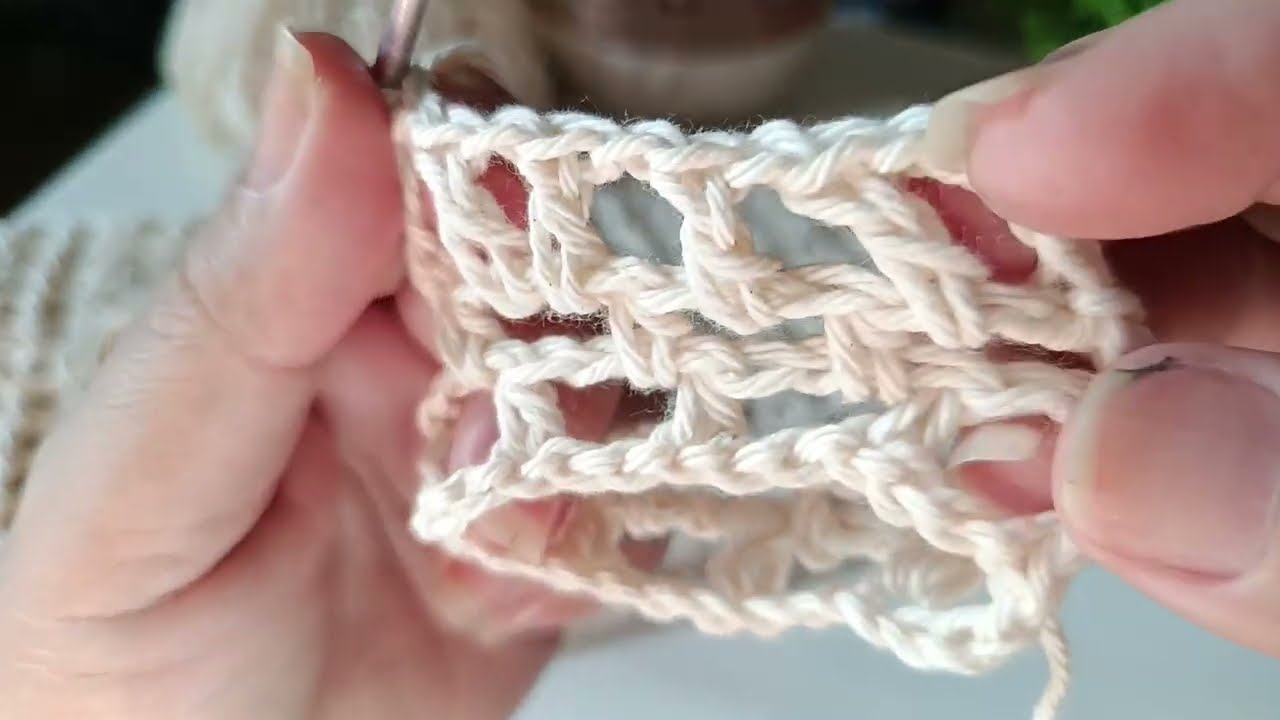
Row 1: SC or half double crochet (HDC) across the chain.
-
Turn and repeat rows until desired height is reached.
✨ STEP 5: Join and Shape the Body
-
After the cups or base are done, start working in the round or in rows for the torso.
-
If using cups, connect the two and add chains under the bust for width, then begin crocheting rows down.
-
Use HDC, SC, or mesh stitch for the body area.
-
Try the top on as you go to adjust shaping (taper in at waist or flare at the bottom if desired).
✨ STEP 6: Add Straps
There are several strap styles:
-
Tie straps: Chain long enough to tie behind neck or shoulders.
-
Fixed straps: SC or HDC rows until the right length, then sew in place.
-
Cross-back: Two straps attached in front and crossed in the back.
Attach using slip stitch or whip stitch. Reinforce well so they’re strong!
✨ STEP 7: Finishing Touches
-
Add Edging: You can SC around all edges for a clean finish or add shell stitch for flair.
-
Try it on and adjust if needed (you can always add more rows).
-
Weave in all loose ends using a tapestry needle.
-
Block the top if using natural fibers – wet block or steam block to shape it evenly.
✨ OPTIONAL ADDITIONS:
-
Lining: Sew a soft lining or cups inside for extra coverage.
-
Back closure: Use tie-backs, buttons, or corset-style lacing.
-
Decorative Stitches: Try picot edging, mesh, or puff stitch details.
SAMPLE BASIC CROCHET CROP TOP PATTERN (Tube Style)
Here’s a quick starter pattern:
-
Chain enough to wrap around bust (e.g., 90 chains).
-
Join with slip stitch to form a ring.
-
Ch 2, then HDC in each stitch around. Join with sl st.
-
Repeat for 10–15 rows depending on desired length.
-
Add straps using 40–50 chains from front edge to back.
-
Fasten off and weave in ends.
TIPS FOR BEST RESULTS
-
Use cotton yarn for breathability and comfort.
-
Try on the top frequently to adjust for fit.
-
Use stitch markers to keep track of beginning of rounds or shaping points.
-
Customize with colors, stripes, or granny squares.
Watch tutorial: