 by
by Sure! Here’s a detailed guide on how to make a crochet baby dress using the shell stitch. This version is beginner-friendly and suitable for ages 0-3 months. I’ll break it down into materials, stitch abbreviations, and a step-by-step pattern. Let’s get started!
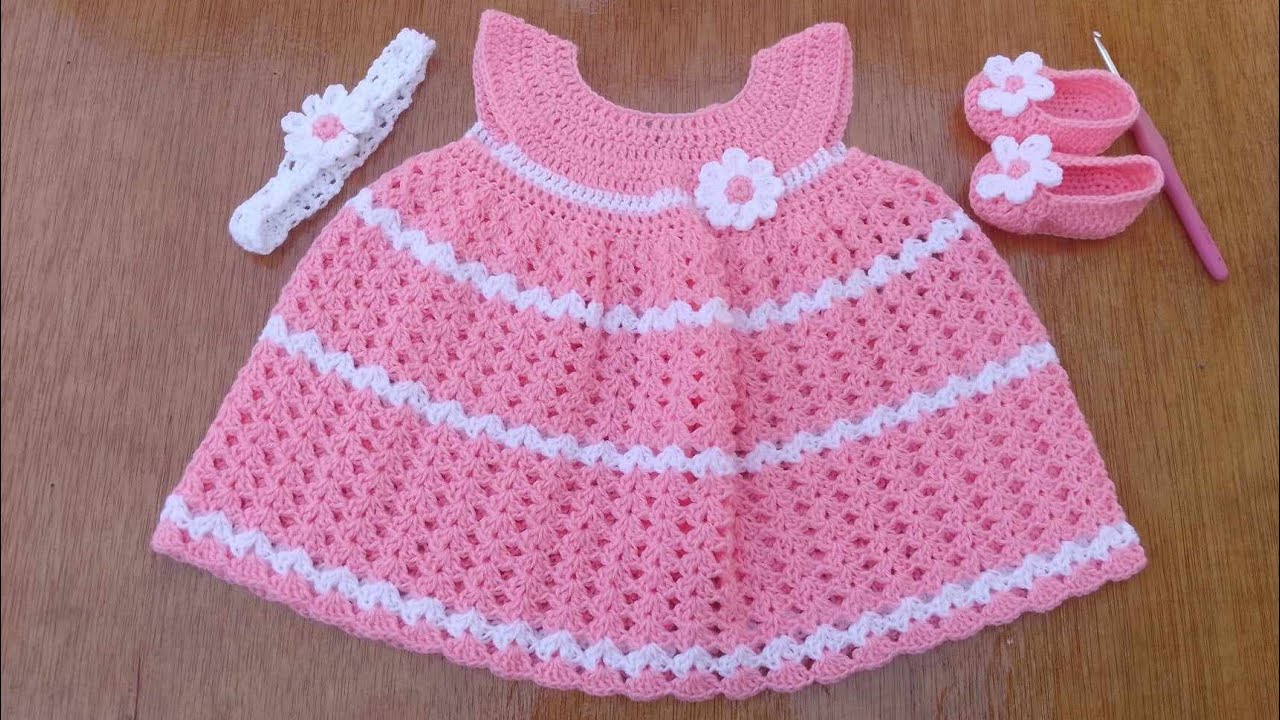
Crochet Baby Dress (0-3 Months) – Shell Stitch | EASY for Beginners
✅ MATERIALS NEEDED:
-
Yarn: Light worsted weight (Category 3 or 4) baby yarn or cotton blend – approx. 150–200g
-
Crochet hook: 4.0 mm (G/6) or 4.5 mm depending on your tension
-
Scissors
-
Tapestry needle (for weaving in ends)
-
Buttons (optional – for back closure)
-
Stitch markers (optional)
STITCH ABBREVIATIONS (US TERMS):
| Abbreviation | Meaning |
|---|---|
| ch | Chain |
| sc | Single crochet |
| dc | Double crochet |
| st | Stitch |
| sl st | Slip stitch |
| sk | Skip |
| sp | Space |
| rep | Repeat |
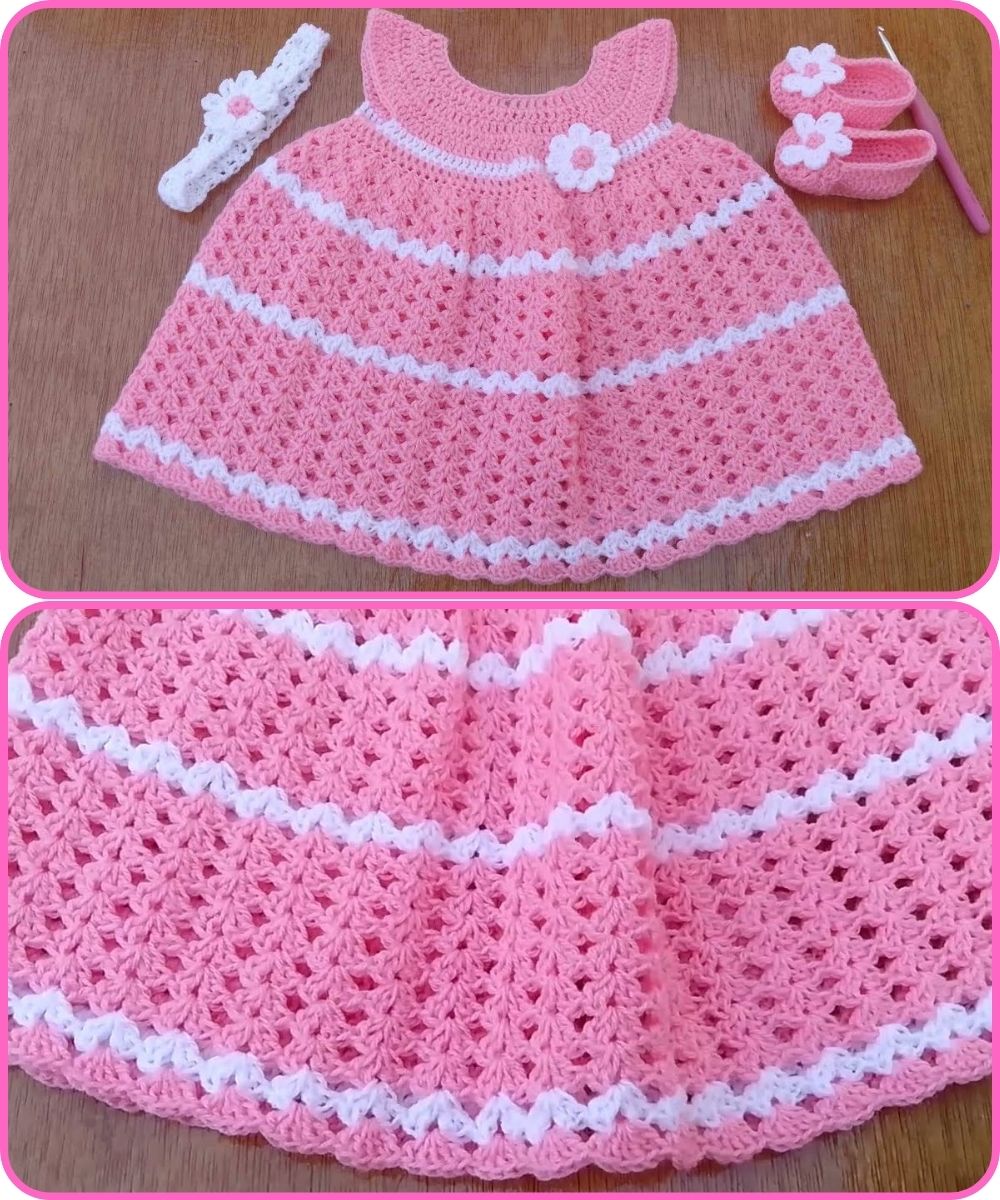
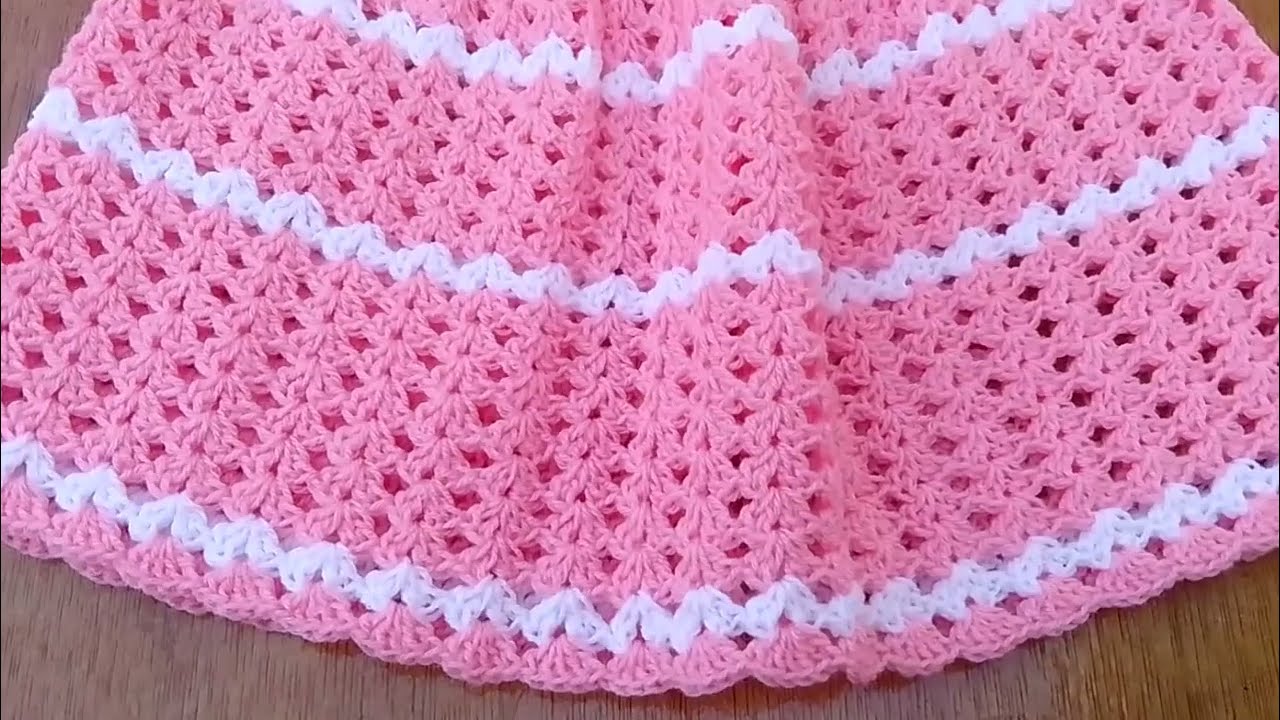
WHAT IS THE SHELL STITCH?
The shell stitch is made by working multiple double crochets into the same stitch or space. A basic shell usually consists of 5 double crochets in one stitch, separated by skipped stitches for spacing.
PATTERN: CROCHET BABY DRESS (0-3 MONTHS)
Gauge: 18 dc x 10 rows = 4″x4″ (approximate)
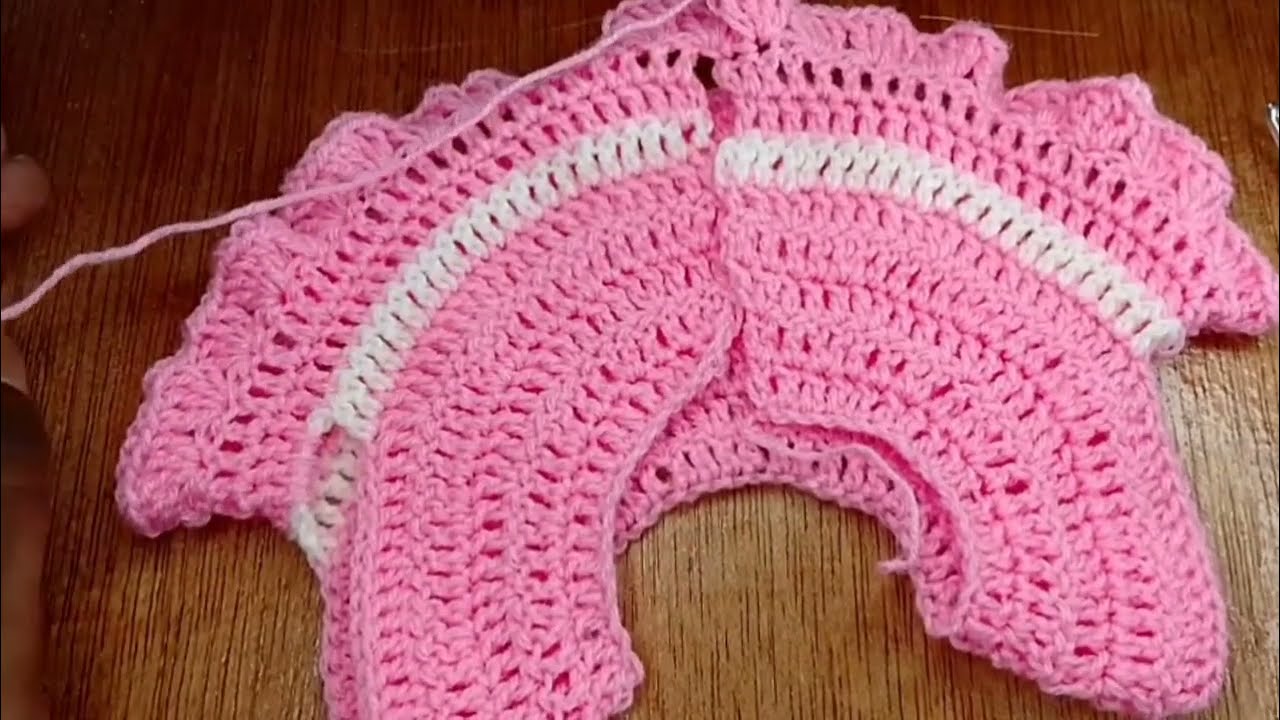
STEP 1: YOKE (TOP OF DRESS)
-
Start with a foundation chain:
-
Ch 52 (or multiple of 8 + 4)
-
Join to first ch with sl st to form a circle. Be careful not to twist the chain.
-
-
Round 1:
-
Ch 2 (does not count as dc), dc in same st and in each st around. (52 dc)
-
Join with sl st to top of first dc.
-
-
Round 2 (Increasing for raglan yoke):
-
Place stitch markers after 13, 13, 13, 13 stitches to divide front, back, and sleeves.
-
Ch 2, dc in each st until marker, (dc, ch 1, dc) in marked st, rep * around.
-
Join with sl st.
-
-
Rounds 3–6:
-
Repeat Round 2, increasing at the marked points to shape the yoke.
-
You should now have more stitches to separate sleeves and body.
-
STEP 2: DIVIDE FOR SLEEVES
-
After yoke is complete, you’ll join the front and back parts to make the body, skipping the sleeves.
-
Round 7:
-
Dc in each stitch across the front panel, skip all stitches for the sleeve, dc across back panel, skip other sleeve, join.
(You can ch 3 under each armhole if needed for extra room.)
-
STEP 3: SHELL STITCH BODY
-
Round 8: Start Shell Pattern
-
Ch 3 (counts as dc), sk 2 sts, 5 dc in next st (shell made), sk 2 sts, dc in next st, rep from * around.
-
Join with sl st to top of ch-3.
-
-
Round 9–18 (or desired length):
-
Sl st into next 2 sts to reach center of shell.
-
Ch 3, 2 dc in same st (start half shell), sk 2, dc in next st, sk 2, 5 dc in next st, rep around.
-
End with 2 dc in same st as beginning half shell, join.
-
-
Add more rounds if you want a longer dress.
STEP 4: FINISHING THE NECKLINE & ARMHOLES
-
Neckline (optional):
-
Sc around neckline for a cleaner edge.
-
Add button loops on one side if desired.
-
-
Armholes:
-
Sc evenly around each armhole opening for a neat finish.
-
STEP 5: FINISHING TOUCHES
-
Weave in all loose ends with a tapestry needle.
-
Sew on buttons to the back if needed.
-
Optionally, add a ribbon or bow at the waistline for decoration.
APPROXIMATE FINISHED SIZE (0–3 Months)
| Measurement | Size |
|---|---|
| Chest | 16–17 inches |
| Length | 12–13 inches (adjustable) |
| Armhole | ~3 inches |
BONUS: Want a Video Tutorial?
If you prefer following along with a video, search YouTube for:
“Crochet Shell Stitch Baby Dress 0-3 Months – Beginner Tutorial”
There are many creators like Sirins Crochet, HappyBerry Crochet, or Hopeful Turns that offer visual step-by-step instructions.
Watch tutorial: