 by
by Absolutely! Here’s a step-by-step guide to making an easy crochet baby ruffle dress for beginners, complete with tips, basic stitches, and structure. This tutorial assumes basic crochet knowledge (like how to chain and double crochet), but I’ll walk you through each stage.
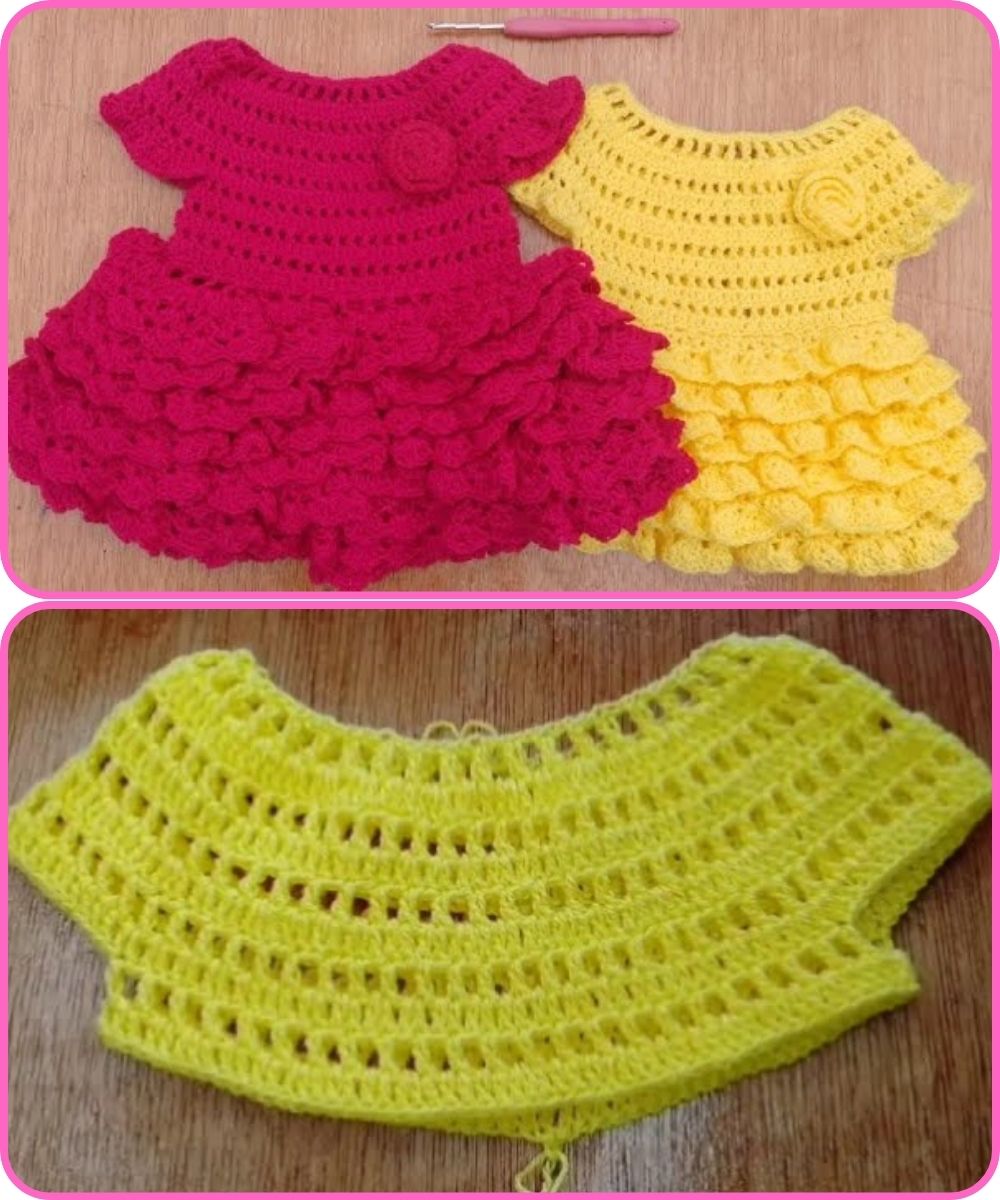
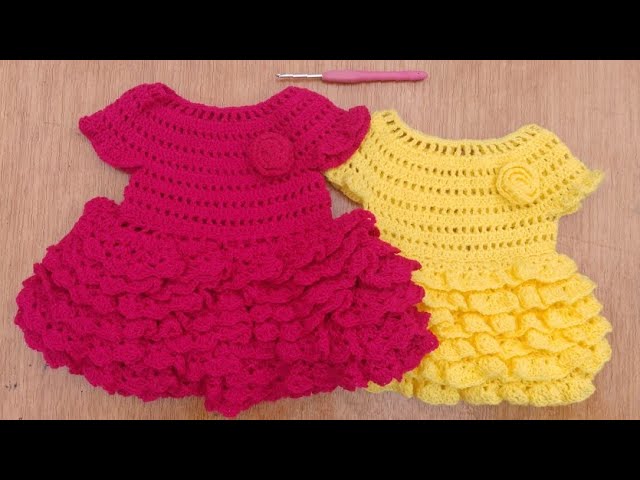
How to Make an Easy Crochet Baby Ruffle Dress (Step-by-Step)
✅ Skill Level: Beginner
✅ Size: 0–6 months (you can adjust for larger sizes)
✅ Tools & Materials:
-
Yarn: Soft baby-friendly yarn (e.g., acrylic or cotton blend, #3 light worsted)
-
Hook: 4.0 mm (G/6) crochet hook
-
Scissors
-
Yarn needle
-
Stitch markers (optional)
-
Buttons (for the back closure or embellishment)
✨ Overview of the Dress Parts:
-
Yoke (Top bodice)
-
Body with Ruffles
-
Skirt
-
Finishing touches
Basic Stitches Used:
-
CH = Chain
-
SL ST = Slip Stitch
-
SC = Single Crochet
-
DC = Double Crochet
-
V-Stitch = (DC, CH 1, DC) in the same stitch
Step-by-Step Instructions
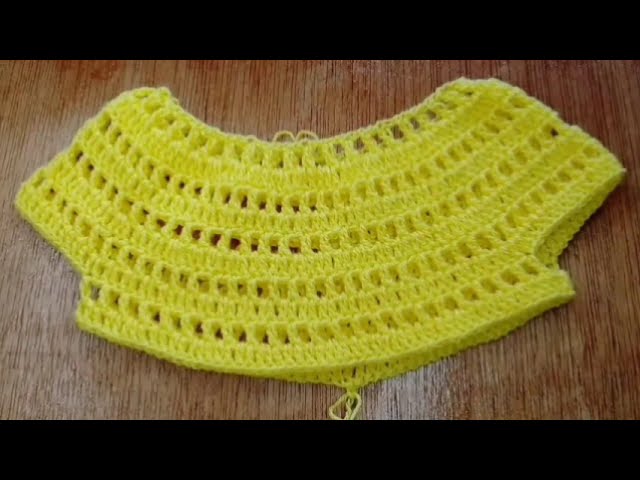
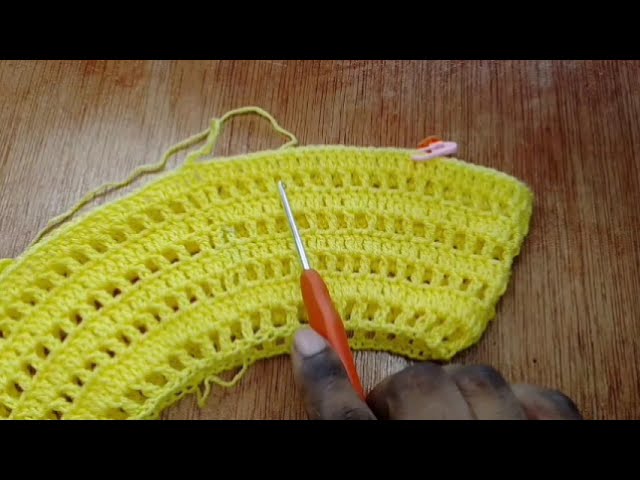
Step 1: Start with the Yoke (Top of the Dress)
-
Foundation Chain:
CH 52 (or any multiple divisible by 4 + 4 extra for turning) -
Row 1:
DC in 4th CH from the hook and across. (You’ll have 50 DC) -
Row 2-5:
Increasing rows to shape the yoke for armholes
Repeat this pattern:-
CH 3 (counts as DC), turn.
-
DC in each stitch across.
-
On each end of the row, add an extra DC to increase.
After row 5, your piece should start forming a slight curve.
-
-
Row 6: Mark the Armholes
-
Divide stitches for front, back, and sleeves:
For 50 stitches:-
10 (Front) – 10 (Sleeve) – 10 (Back) – 10 (Sleeve) – 10 (Front)
-
Use stitch markers if needed.
-
-
Row 7: Create Armhole Spaces
-
CH 3, DC across 1st section (Front)
-
SK 10 stitches (sleeve), CH 10 (creates armhole)
-
DC across Back
-
SK 10 (sleeve), CH 10 (second armhole)
-
DC to end (Front)
-
Now you have the yoke complete, and two armholes formed!
Step 2: Create the Skirt Base
-
Row 8:
-
CH 3, DC in each stitch across (including chain spaces you made for armholes).
-
-
Row 9 (Optional for extra ruffles):
-
Add a V-stitch in every 3rd stitch to flare the skirt.
-
(DC, CH 1, DC) in same stitch, skip 2, repeat
-
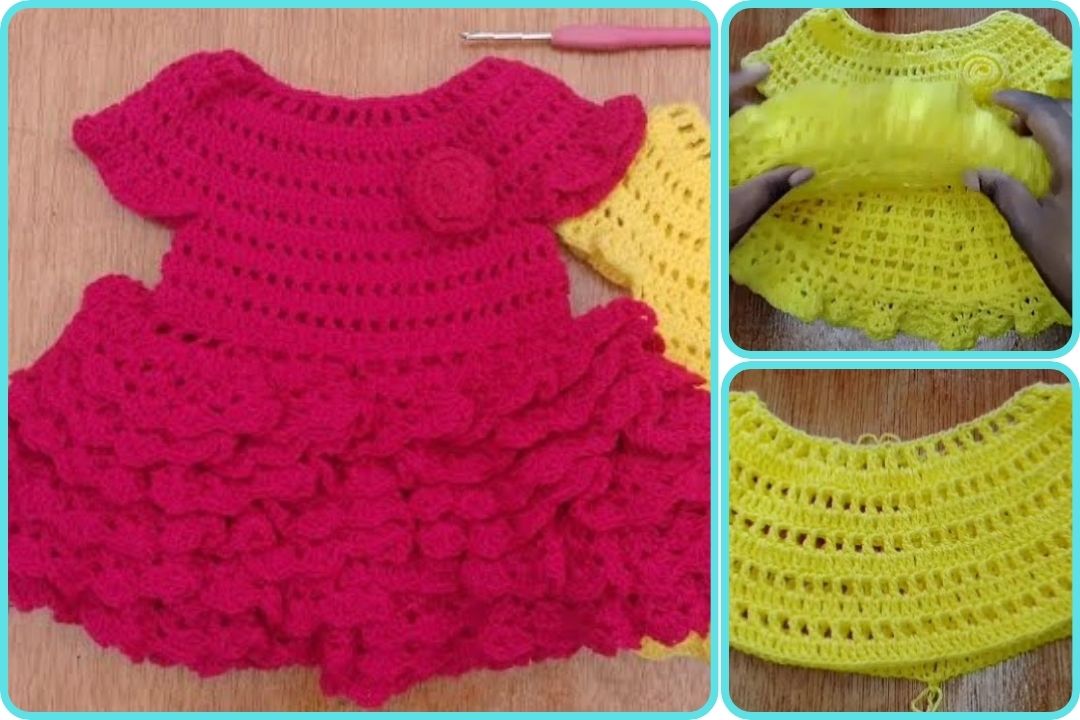
Step 3: Start Adding Ruffles
To make the dress ruffled, you crochet multiple stitches into a single stitch to increase volume.
-
Ruffle Row 1:
-
Attach new yarn color if desired.
-
CH 3, 3 DC into each stitch around.
-
This creates the ruffled look.
-
-
Ruffle Row 2 (Optional for thicker ruffle):
-
CH 3, 2 DC in each stitch.
-
-
Continue for Desired Length:
Add rows depending on how long you want the skirt. You can add 2–3 ruffle layers with different colors.
Step 4: Finishing the Sleeves and Neckline
-
Sleeve Edging:
-
SC around the armholes for a clean edge.
-
Optional: Add a ruffle row to sleeves by working 2 DC into each stitch.
-
-
Neckline Edging:
-
SC around neckline.
-
You can add a picot edge (CH 3, SL ST in same stitch) every few stitches for a delicate look.
-
-
Back Closure:
-
Leave 3–4 stitches unstitched at the back top for buttons.
-
SC around the back opening.
-
Sew on buttons and create CH spaces for buttonholes.
-
Step 5: Final Touches
-
Weave in all loose ends using a yarn needle.
-
Add bows, flowers, or appliqués if desired.
-
Lightly block the dress (optional) to even out stitches.
Simple Customization Ideas
-
Use multicolor yarn for a gradient effect.
-
Add a satin ribbon around the waist.
-
Make matching booties or headband.
Care Instructions (If Giving as a Gift)
Include a note with:
-
“Hand wash or gentle machine wash in cold water”
-
“Lay flat to dry”
Want a Video Tutorial?
Would you like me to find a beginner-friendly YouTube video tutorial that matches this pattern? I can pull one for you. Just let me know!
Watch tutorial: