 by
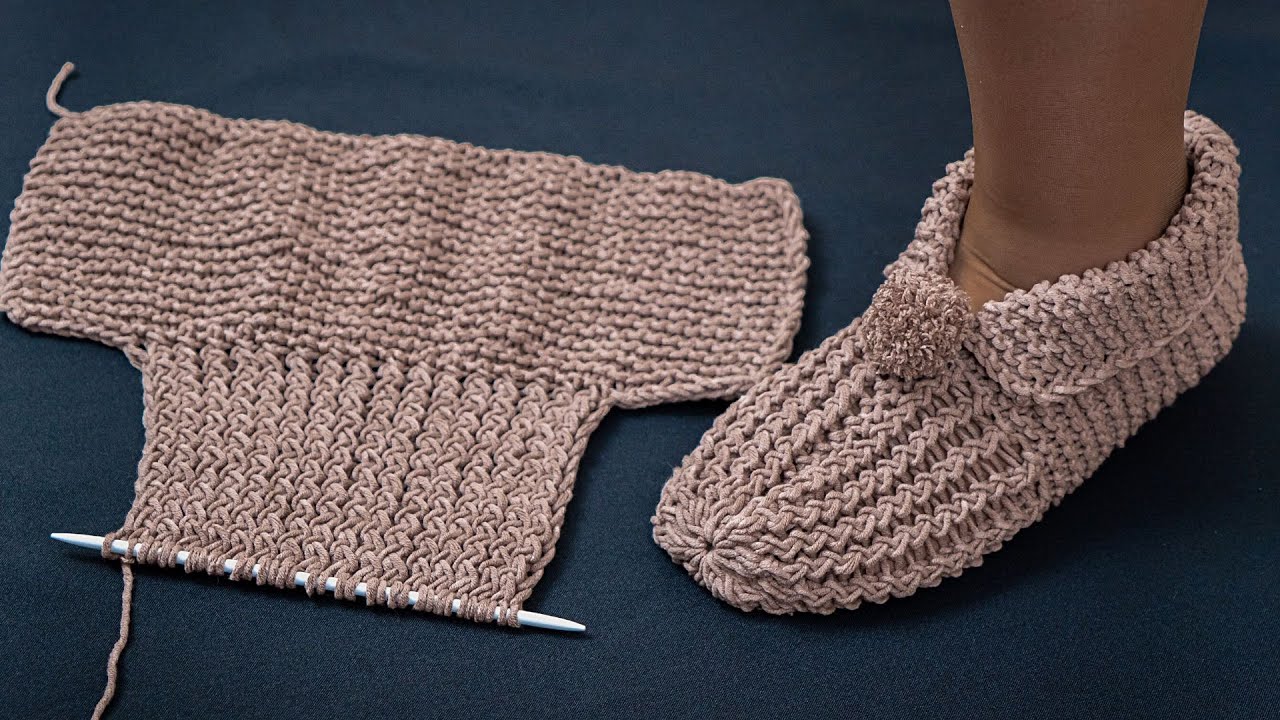
by How to Make Knitted Slippers Easily and Simply
Even a Beginner Can Handle It!
Knitted slippers are one of the best beginner knitting projects. They are:
- warm
- comfortable
- quick to make
- perfect for gifts
The best part?
You only need:
- simple stitches
- 2 knitting needles
- basic sewing
No complicated shaping is required.

What You Need
Materials
- Soft medium-weight yarn
- 2 knitting needles (4–5 mm / US 6–8)
- Yarn needle
- Scissors
- Measuring tape
Beginner Skills Needed
You only need to know:
- Cast on
- Knit stitch
- Purl stitch (optional)
- Bind off
- Simple sewing
That’s all!
Best Yarn for Beginners
Choose:
- Acrylic yarn
- Wool blend yarn
- Chunky yarn for faster knitting
Avoid:
- Very thin yarn
- Slippery yarn
- Fancy textured yarn at first
Easy Beginner Slipper Pattern
This simple pattern makes soft house slippers using one flat knitted piece.
Step 1 — Cast On
Cast on:
- 40 stitches
This fits an average adult foot.
For larger slippers:
- add 2–4 stitches
For smaller slippers:
- reduce 2–4 stitches
Step 2 — Knit the Cuff
The cuff keeps the slipper snug around the ankle.
Rib Pattern
Row 1
- Knit 2, Purl 2
- Repeat across row
Row 2
- Knit the knit stitches
- Purl the purl stitches
Repeat for:
- 10–14 rows
This creates a stretchy ribbed cuff.
Step 3 — Knit the Main Slipper
Now knit every row.
This creates:
- garter stitch
Garter stitch is:
- soft
- stretchy
- beginner-friendly
Continue Until:
The piece measures:
- about 20 cm (8 inches)
Step 4 — Shape the Toe
Now decrease stitches to form the toe area.
Decrease Row
- Knit 2 stitches together across the row
This reduces the stitch count.
Next Row
- Knit all stitches
Repeat these two rows until:
- about 10 stitches remain
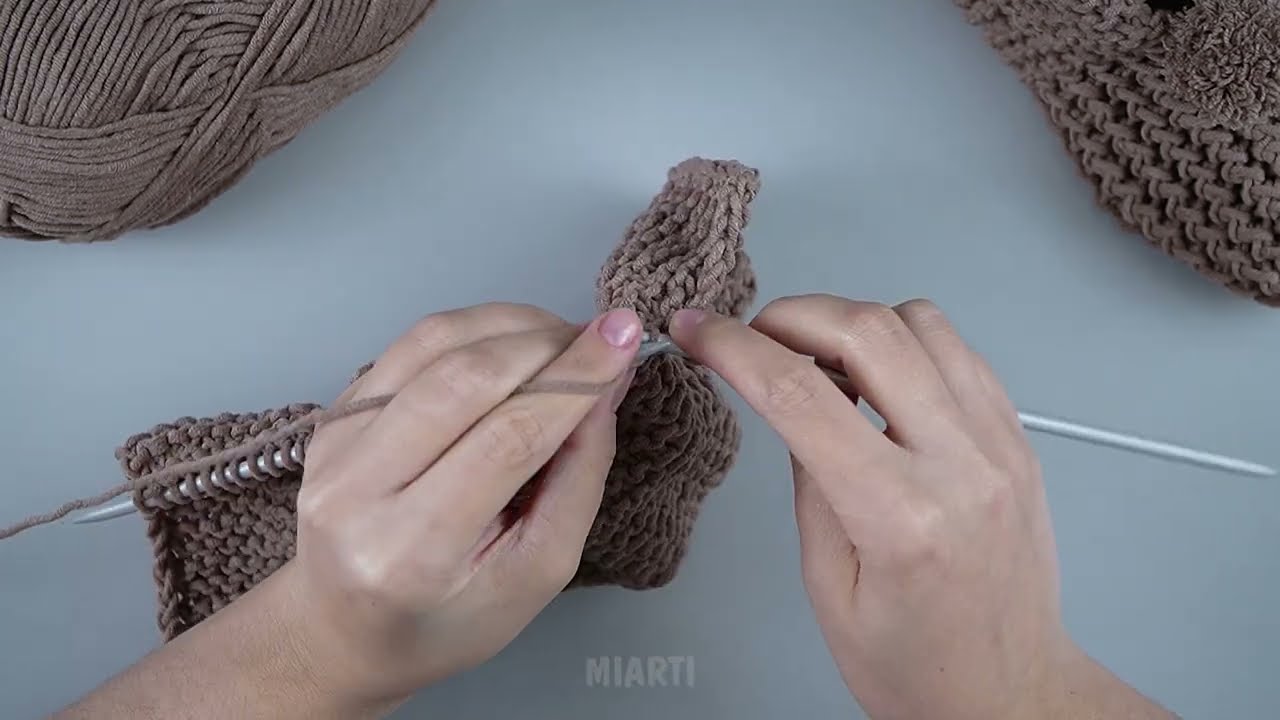
Step 5 — Finish the Toe
Cut the yarn, leaving a long tail.
Thread the yarn through the remaining stitches.
Pull tightly to close the toe.
Secure with a knot.
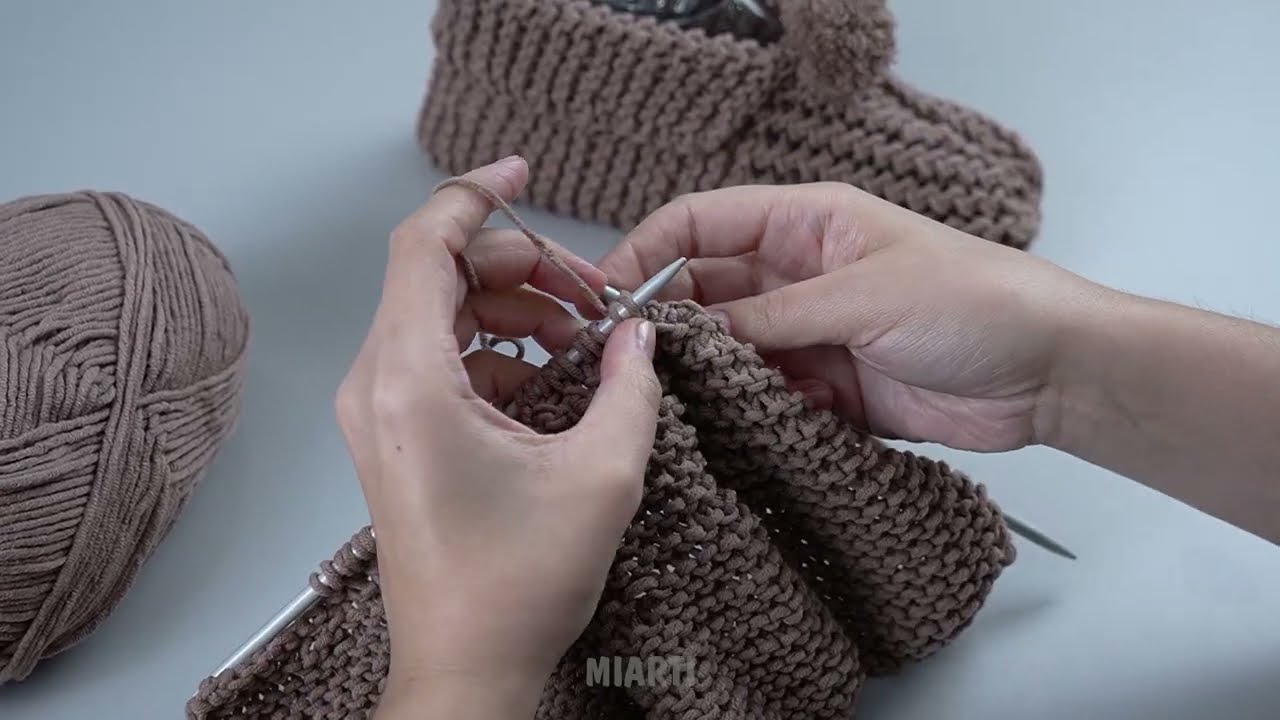
Step 6 — Sew the Slipper
Fold the slipper in half.
Using a yarn needle:
- Sew the toe seam
- Sew the bottom sole
- Sew the heel
Turn right side out.
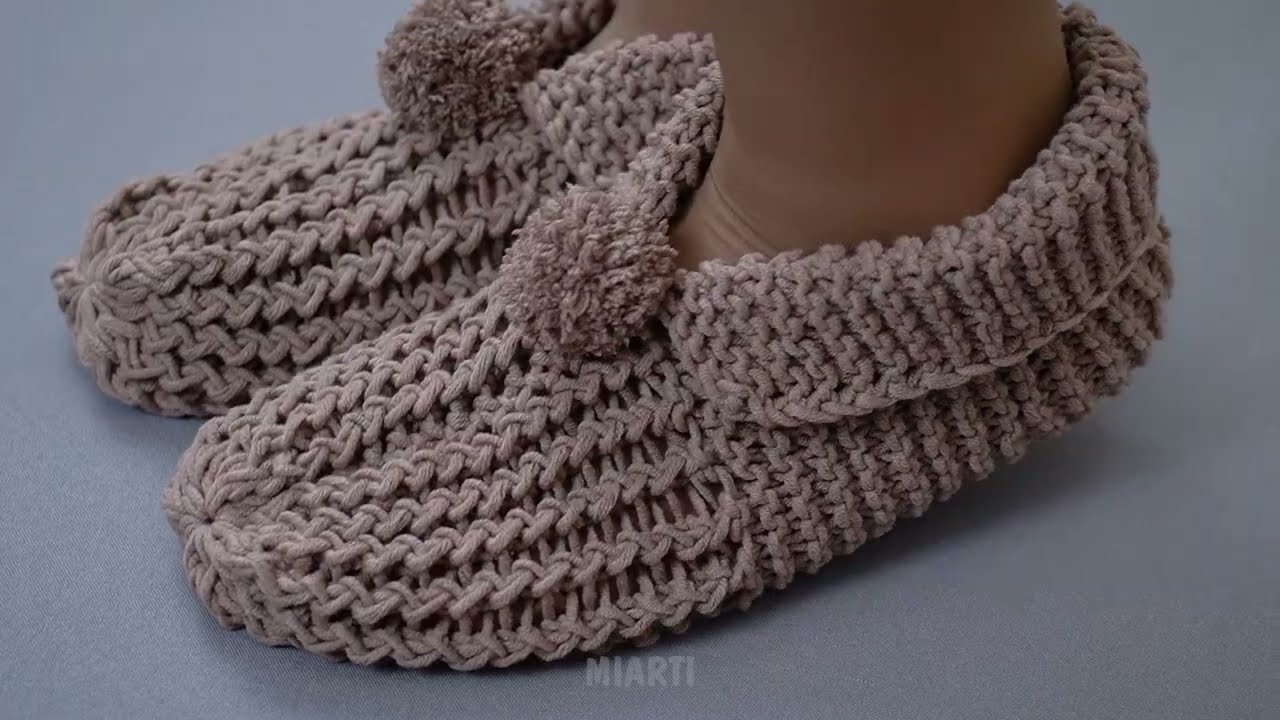
Your slipper is finished!
Simple Beginner Size Guide
| Foot Size | Cast On |
|---|---|
| Small | 36 stitches |
| Medium | 40 stitches |
| Large | 44 stitches |
Easy Decoration Ideas
Make your slippers beautiful with:
- Pom-poms
- Buttons
- Knitted flowers
- Color stripes
- Decorative borders
Want Extra Warmth?
Use:
- chunky yarn
- double strands of yarn
- wool blends
You can also sew soft fabric onto the sole.
Beginner Tips
Keep Stitches Loose
Tight stitches are harder to knit.
Count Stitches Often
This helps keep the shape even.
Practice Garter Stitch First
Knit every row until comfortable.
Use Light-Colored Yarn
Dark yarn makes stitches difficult to see.
Common Beginner Mistakes
Uneven Edges
Normal for beginners — improves with practice.
Slippers Too Tight
Use larger needles or more stitches.
Loose Seams
Sew carefully using small stitches.
Simple Slipper Pattern Summary
| Step | What To Do |
|---|---|
| Cast on | 40 stitches |
| Rib cuff | K2, P2 |
| Main section | Knit every row |
| Toe shaping | Knit 2 together |
| Finish | Sew seams |
Why This Project Is Perfect for Beginners
✔ Simple stitches only
✔ No circular needles needed
✔ Fast project
✔ Easy to customize
✔ Cozy and practical
✔ Great gift idea
Final Thoughts
With just:
- 2 knitting needles
- soft yarn
- basic stitches
…you can create warm, beautiful knitted slippers even if you are completely new to knitting.
This project is:
- relaxing
- affordable
- fun
- beginner-friendly
After finishing your first pair, you can experiment with:
- colors
- patterns
- buttons
- textured stitches
Happy knitting! 🧶
Watch tutorial: