 by
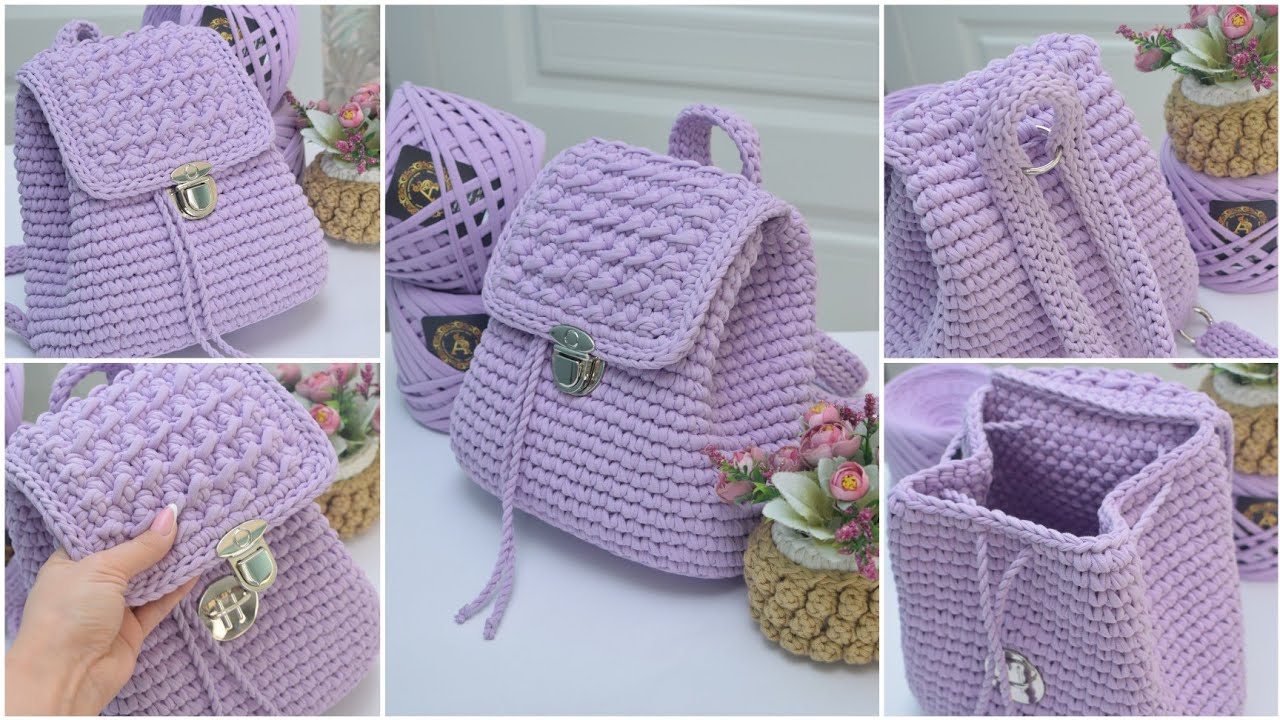
by Based on the video tutorial for the “Helen” crocheted backpack, here is a detailed blog post pattern you can use. This pattern breaks down the process into clear, manageable sections, similar to the video’s structure, and includes key details to help a crafter follow along.
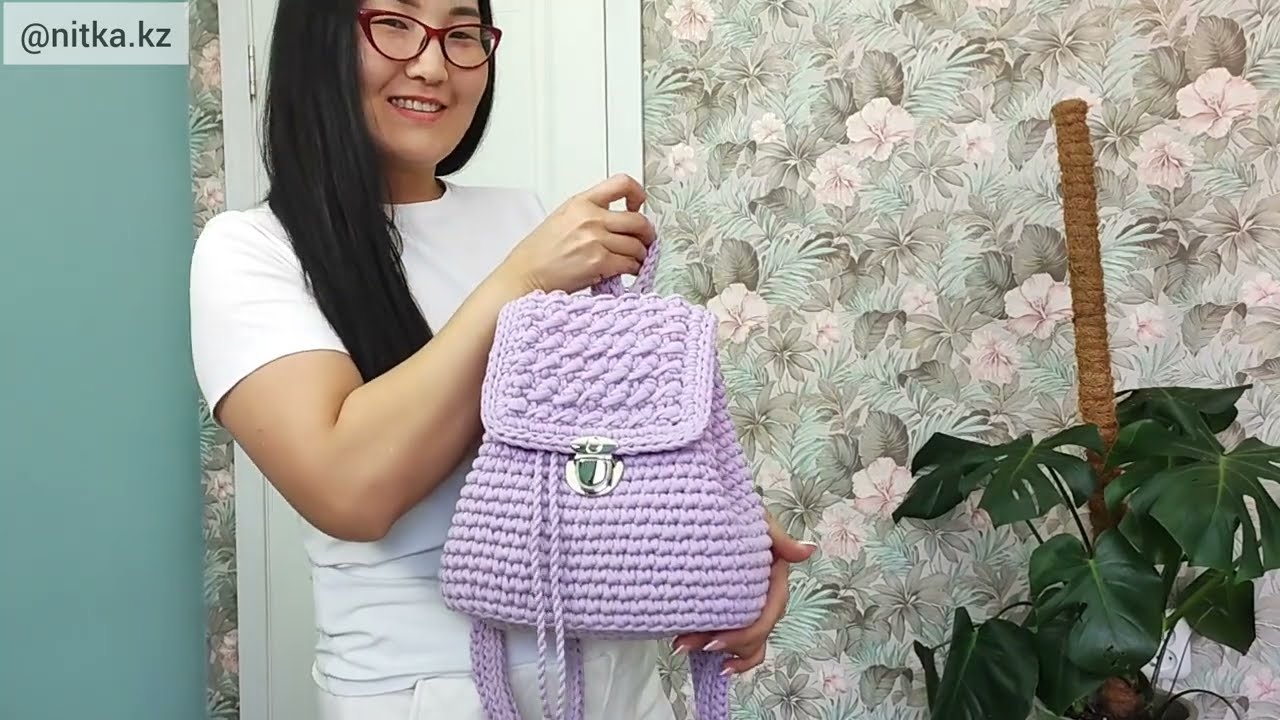
Craft Your Own “Helen” Crochet Backpack: A Step-by-Step Guide
Ready to create a stylish and practical backpack all on your own? The “Helen” crochet backpack is a beautiful project that’s perfect for carrying your essentials. This guide is inspired by the detailed tutorial by Zhanara from Nitka kz and will walk you through each step, from gathering your materials to the final assembly.
Materials You’ll Need:
Before you begin, make sure you have everything on this list.
- Yarn: Altyn lilac-colored knitted yarn (or a similar yarn of your choice).
- Crochet Hooks: A size 6 crochet hook for the main body and a size 4 hook for auxiliary work.
- Hardware: A simple portfolio lock, one large ring (30mm inner diameter), and two medium rings (25mm inner diameter).
- Other: Scissors, yarn needle.
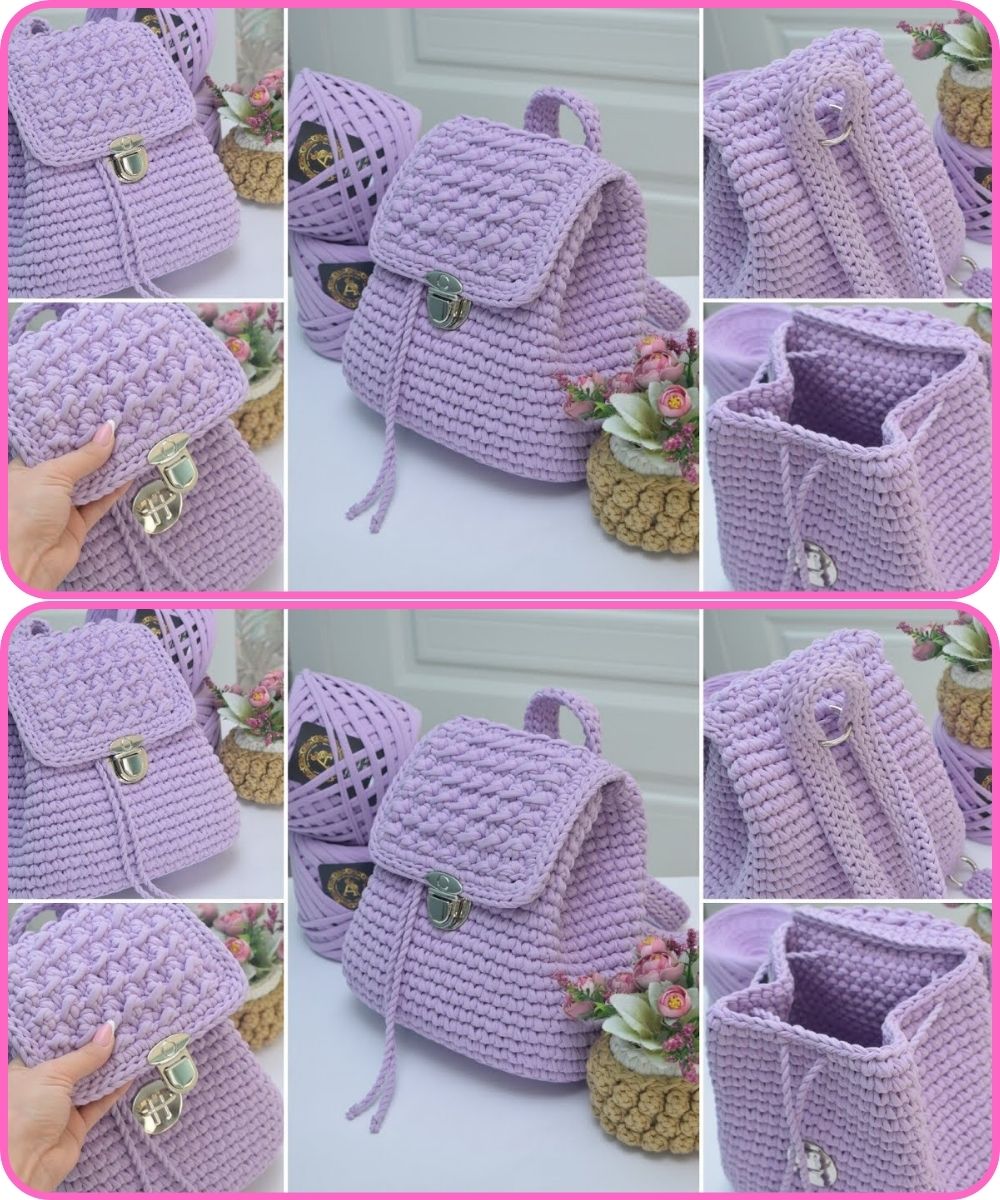
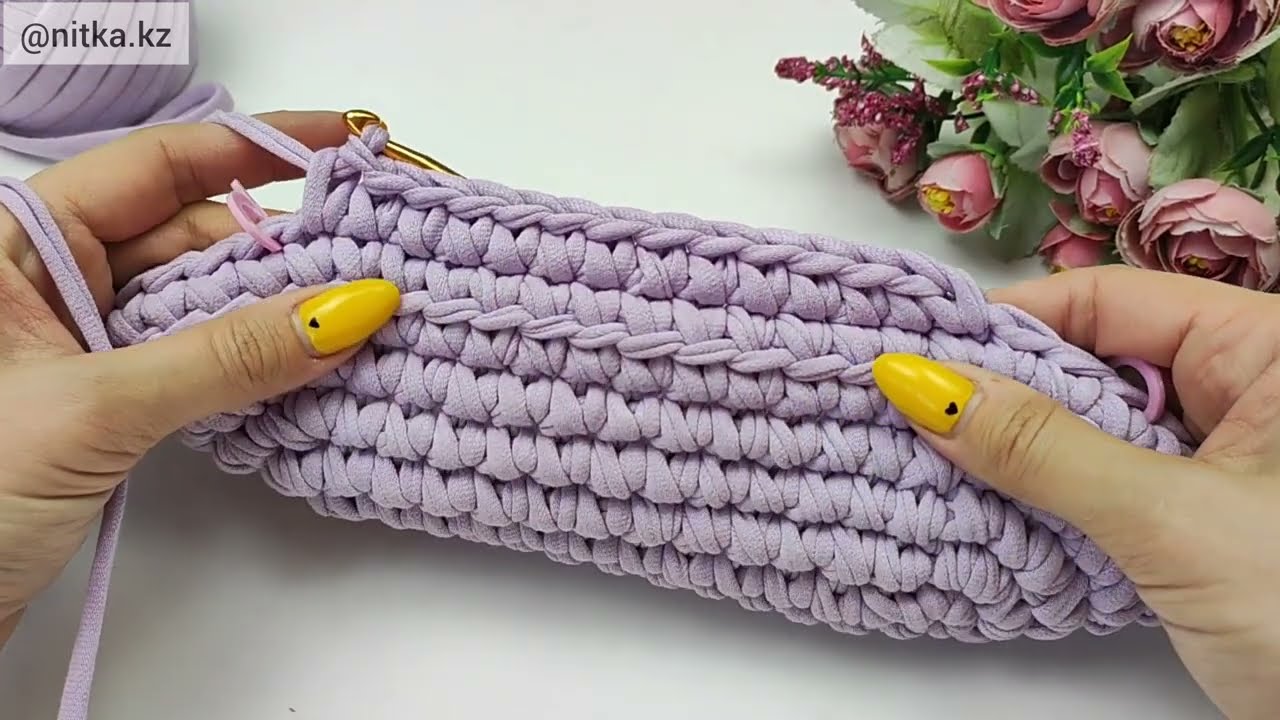
Step 1: The Base of the Backpack
The foundation of the backpack is an oval-shaped base.
- Start by creating a slip knot and chaining 14 air loops.
- Work a series of rows, increasing stitches as you go, to form the oval shape.
- Continue until you complete the fifth row, which should have a total of 54 stitches. This will be the base of your bag.
Step 2: Building the Walls
Now you’ll work your way up to create the body of the backpack.
- Work the first two rows of the walls, incorporating increases to bring your total stitch count to 60.
- After the initial increases, continue crocheting for 20 more rows without any increases to build the height of the backpack’s main section.
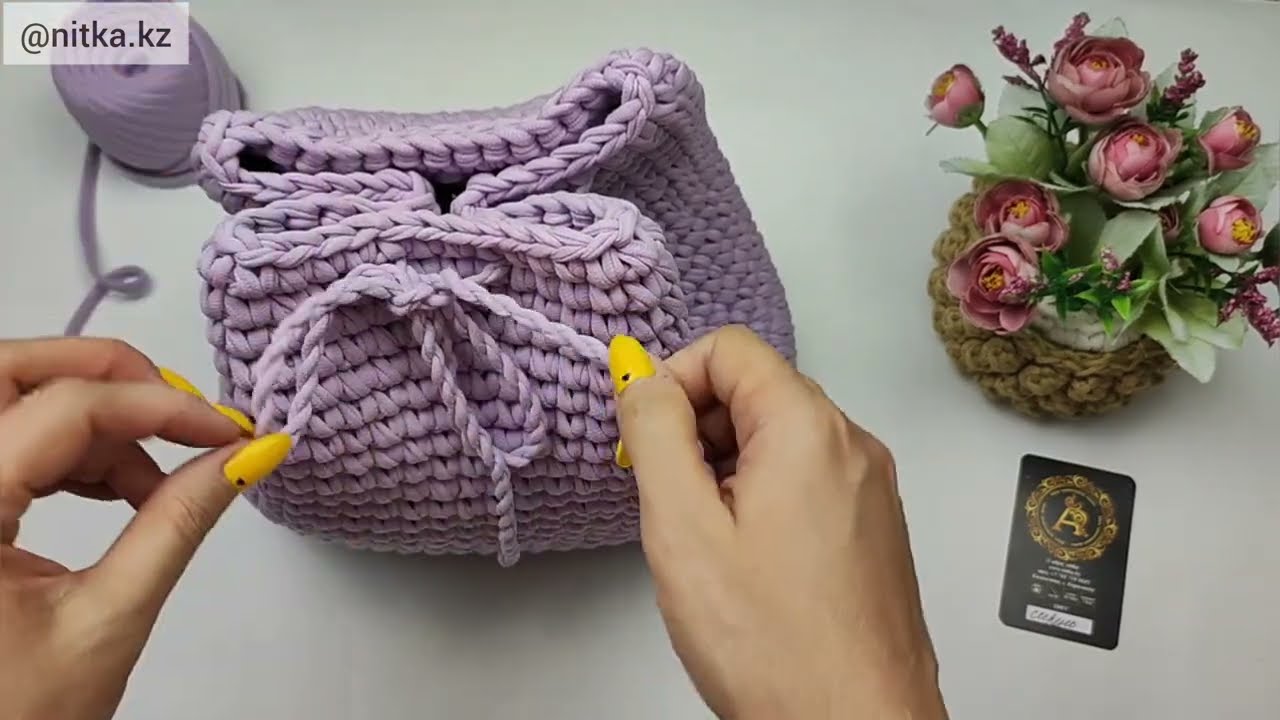
Step 3: Creating the Drawstring
The drawstring is a functional and decorative element.
- Measure and cut a 3-meter piece of yarn.
- Twist the yarn tightly to form a durable cord. You can use a friend to help hold one end, or attach it to something stationary. The tighter you twist, the more defined the cord will be.
Step 4: The Flap
The flap will cover the top opening and secure your belongings.
- Begin by chaining 15 air loops.
- Work 14 rows, following a pattern of half-double and slip stitches as you go.
- Finish the flap by creating a single crochet border around the edges for a neat, finished look.
- Once complete, attach the flap to the top back of the backpack.
Step 5: The Shoulder Strap
The final crocheted piece is the long, comfortable shoulder strap.
- Chain 141 air loops.
- Work four rows of slip stitches along the length of the chain. This will create a sturdy and comfortable strap.
Step 6: Final Assembly
You’re almost done! This is where all the pieces come together.
- Attach the shoulder strap to the medium rings and connect them to the backpack.
- Install the portfolio lock on the front of the backpack and the flap.
- Weave in all your loose ends and make sure everything is securely fastened.
A Note on Lining:
For a more polished and professional finish, you can add a fabric lining to the inside of your backpack. The original tutorial creator, Nitka kz, has a separate video on how to sew the lining for this backpack, which you can check out for additional instructions.
Watch tutorial: