 by
by Here’s a detailed beginner-friendly guide on how to crochet a baby jacket/cardigan/vest, including tips on easy patterns, materials, and steps. This guide assumes you have basic knowledge of crochet (chain, single crochet, double crochet), but I’ll also include beginner tips and simplified instructions.
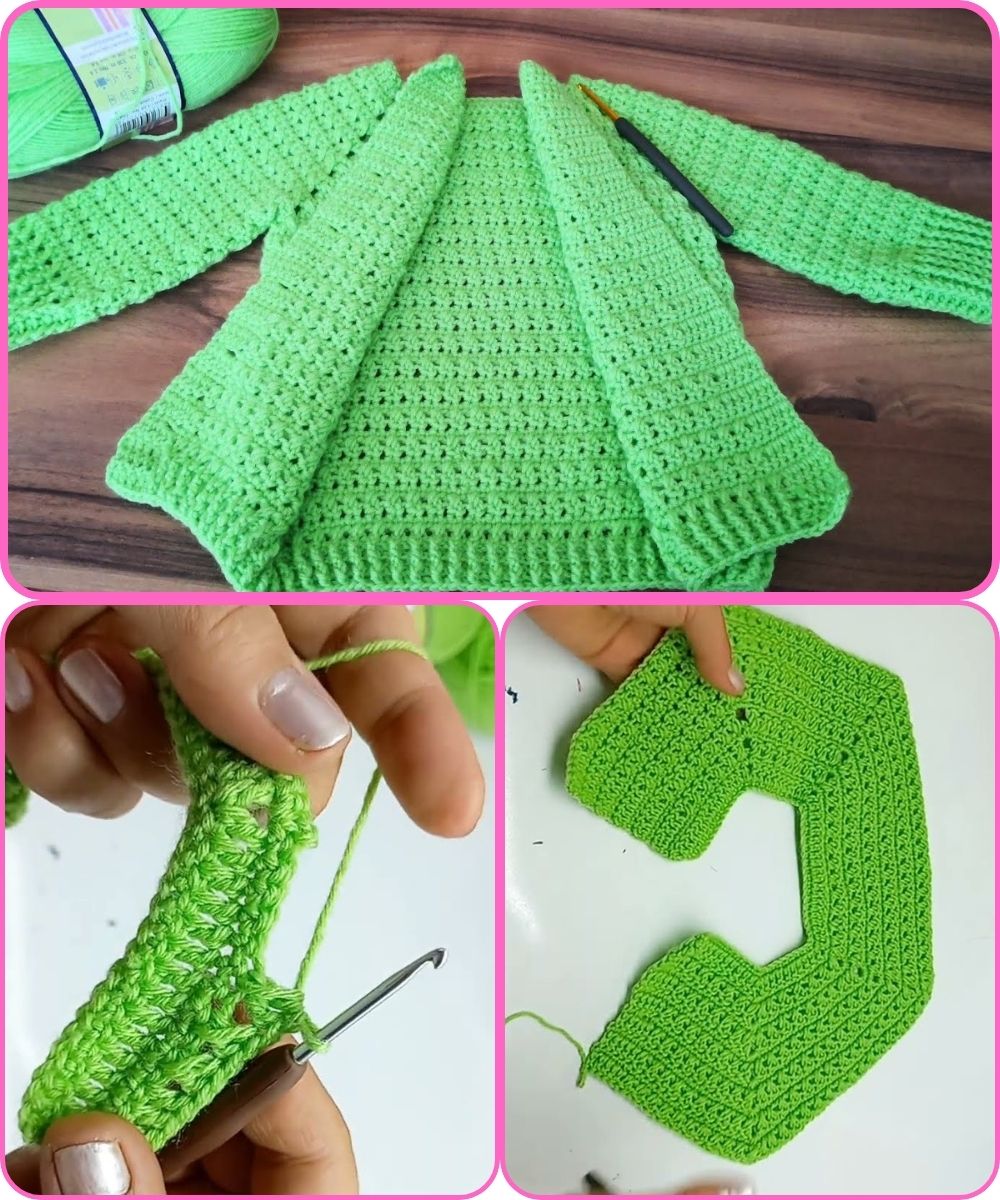
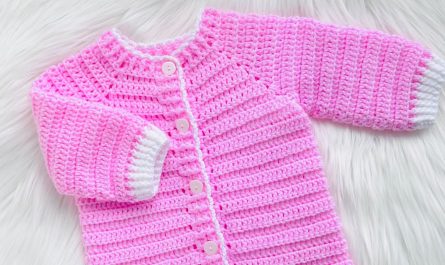
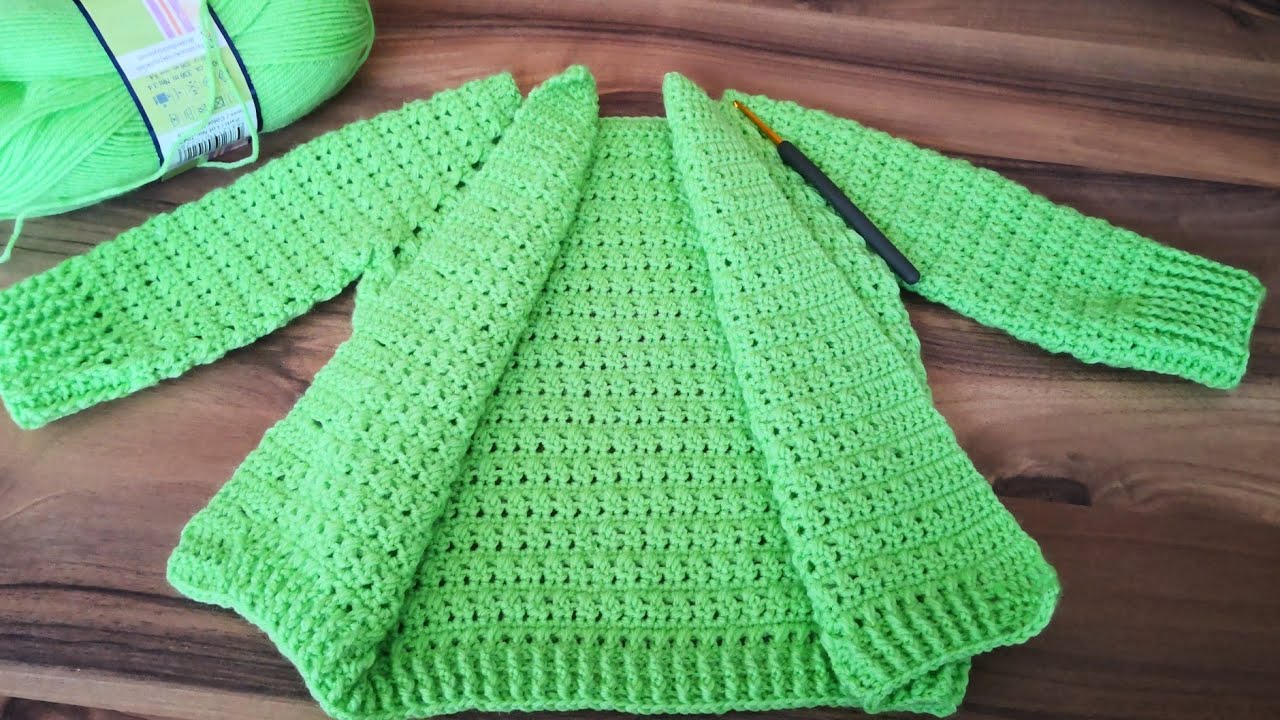
Easy Crochet Baby Jacket/Cardigan/Vest for Beginners
What You’ll Learn:
-
Basic materials needed
-
How to choose the right yarn and hook
-
A simple pattern (step-by-step)
-
Tips for customizing sizes
-
Ideas for vest/jacket models
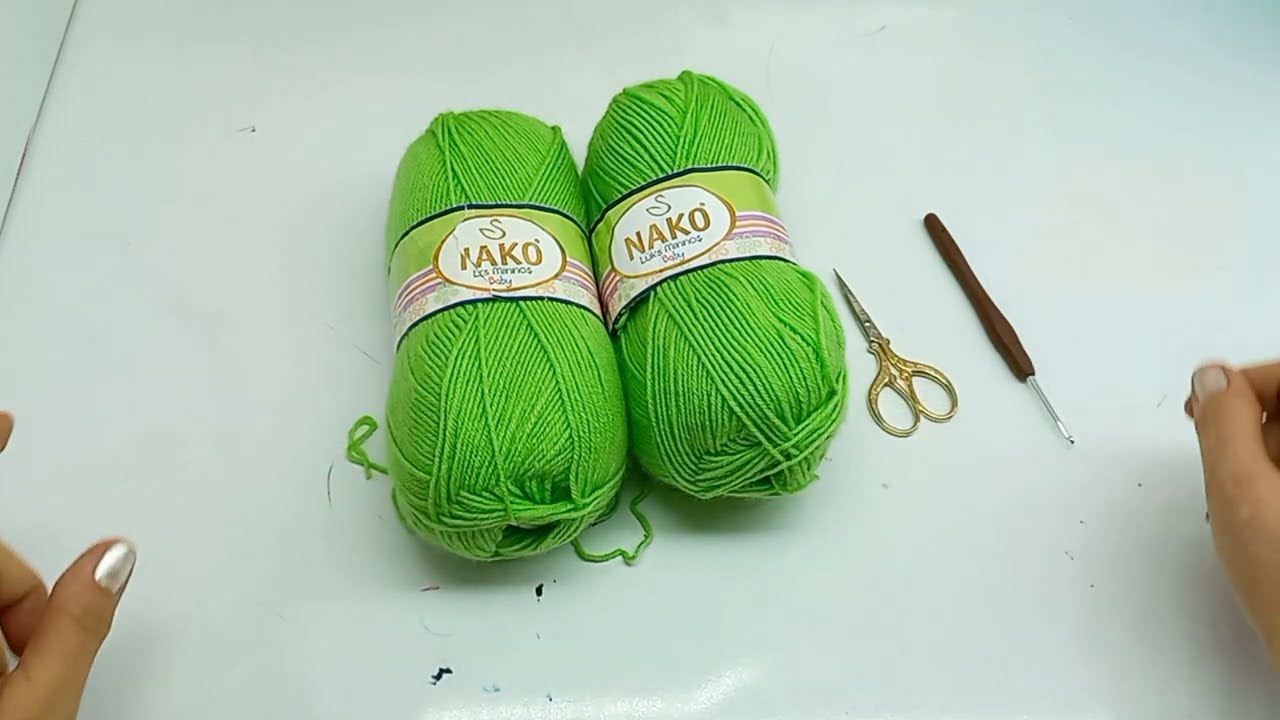
1. Materials You Will Need
| Item | Description |
|---|---|
| Yarn | Soft baby yarn (DK weight / Light worsted is ideal) – acrylic or cotton blends |
| Crochet Hook | Size 4mm to 5mm (check yarn label for recommendation) |
| Scissors | For trimming yarn |
| Tapestry Needle | For weaving in ends |
| Buttons (Optional) | For front closure |
| Stitch Markers | To keep track of rounds/rows (optional but helpful) |
2. Choosing a Yarn & Hook
-
Yarn Weight: Use Light Worsted (DK/Weight 3) for baby clothing.
-
Fiber: Choose soft yarns suitable for babies – avoid scratchy wool or yarns that shed.
-
Hook Size: Typically 4mm (G) to 5mm (H) for baby items.
✅ Tip: Make a small swatch to check your tension – it helps with sizing!
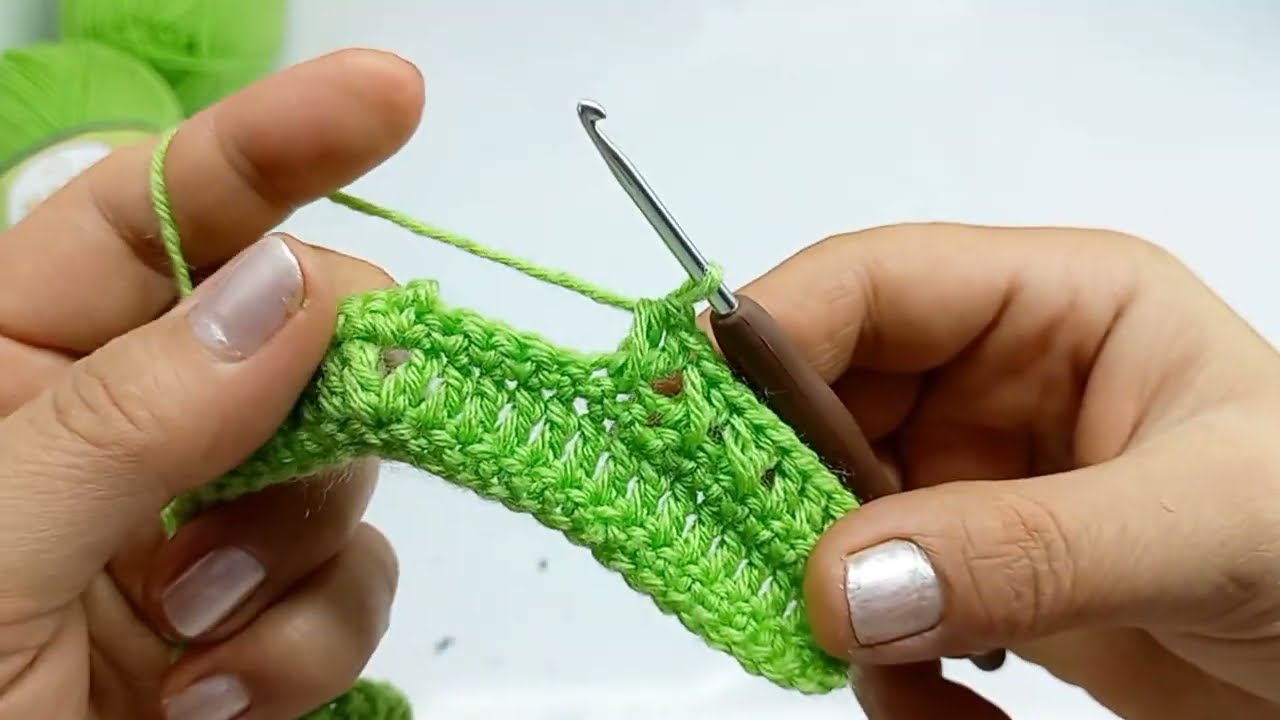
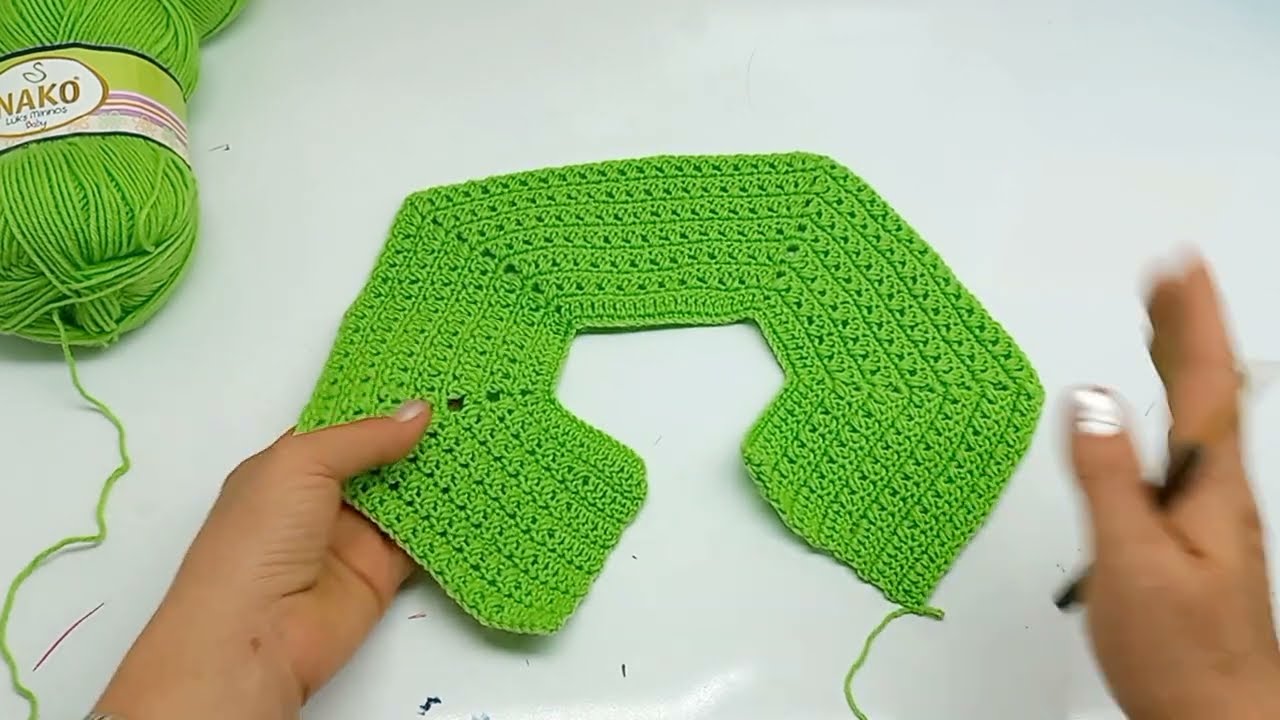
3. Simple Baby Cardigan Pattern (0–6 months)
We’ll use a top-down yoke method — no seams, worked in one piece.
Beginner-Friendly Baby Cardigan (Top-Down Raglan Style)
Abbreviations:
-
ch – chain
-
sc – single crochet
-
dc – double crochet
-
sl st – slip stitch
-
st(s) – stitch(es)
-
inc – increase (2 dc in 1 stitch)
Step-by-Step Instructions:
✅ Yoke (Neck to Armpit)
-
Ch 54 (creates the neckline)
-
Row 1:
dc in 4th ch from hook and each ch across
(You now have 52 dc) -
Mark raglan points:
Divide the stitches as follows:-
8 sts for front left
-
10 sts for sleeve
-
16 sts for back
-
10 sts for sleeve
-
8 sts for front right
Use stitch markers to mark between these sections.
-
-
Rows 2–10: Raglan Increases
-
ch 2 (counts as dc), dc in each stitch across
-
At each marker: (dc, ch 1, dc) in same st (this increases the yoke)
-
Continue for about 10 rows or until it reaches baby’s armpit
-
✅ Separate Body and Sleeves:
-
Place sleeves’ stitches on a stitch holder or scrap yarn.
-
Work across the front, skip sleeve stitches, work back, skip second sleeve, work front.
-
Continue with body.
✅ Body Section:
-
Work in dc rows or sc + dc alternating rows for texture.
-
Make 8–10 rows depending on desired length.
-
Finish with a border (optional):
-
Add 1 row of sc around the bottom and sides for a clean edge.
-
✅ Sleeves:
-
Attach yarn at underarm.
-
Work in rounds of dc (or sc for tighter sleeves) for 6–8 rounds.
-
Optionally, taper the sleeves by decreasing 1 st every 2nd row.
✅ Finishing:
-
Add buttons if desired.
-
Use the tapestry needle to weave in all yarn ends.
4. Design Variations
Baby Vest Model (Sleeveless)
-
Skip the sleeves section entirely!
-
After yoke, separate for body and continue with same steps as above.
Baby Jacket Model
-
Use the cardigan base but add:
-
Hood (make a square and attach to neckline)
-
Front panels slightly wider for overlap
-
Ribbing or borders around the bottom/sleeves
-
5. Tips for Success
-
Use stitch markers to keep track of raglan increases.
-
Keep it simple: Stick to basic stitches until you’re confident.
-
Make it colorful: Use striped yarns or color changes for visual interest.
-
Practice on a sample before starting the main project.
6. Easy Stitches for Beginners
| Stitch | Use |
|---|---|
| Single Crochet (sc) | Tight and warm, good for ribbing |
| Double Crochet (dc) | Soft and flexible, great for body |
| Half Double Crochet (hdc) | A mix of sc and dc – easy and neat |
| Granny Stitch (clusters) | Creates a lacy effect, very beginner-friendly |
7. Size Guide (Rough Estimate)
| Age | Starting Chain | Rows for Yoke | Body Rows |
|---|---|---|---|
| 0–3 mo | 48–54 ch | ~8–10 | ~8–10 |
| 3–6 mo | 56–60 ch | ~10–12 | ~10–12 |
| 6–12 mo | 60–66 ch | ~12–14 | ~12–14 |
You can adjust the number of rows to make it longer or wider.
8. Helpful YouTube Channels for Visuals
-
Bella Coco Crochet
-
Blossom Crochet
-
Crochet with Clare
-
The Crochet Crowd
Watch tutorial: