 by
by Here’s a detailed guide on how to make the most beautiful children’s dresses, with a focus on creating a gorgeous crocheted children’s dress. Whether you’re a beginner or intermediate in crochet, this walkthrough provides step-by-step details to help you make a stunning, wearable piece for a child.
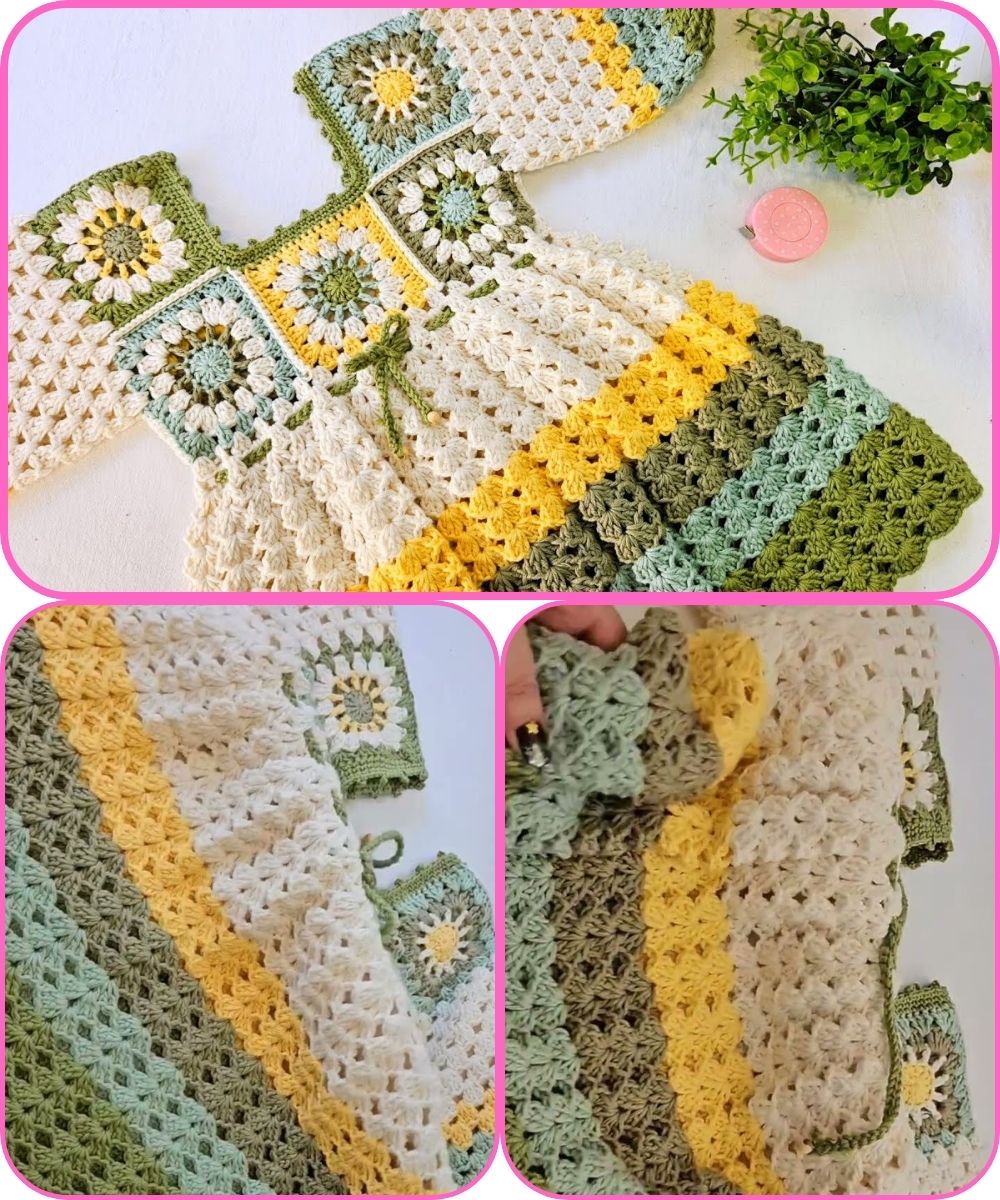
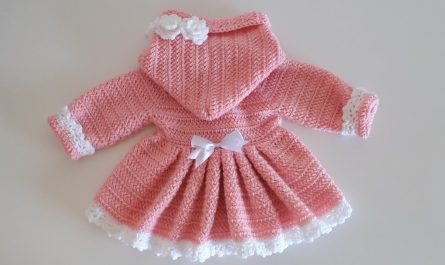
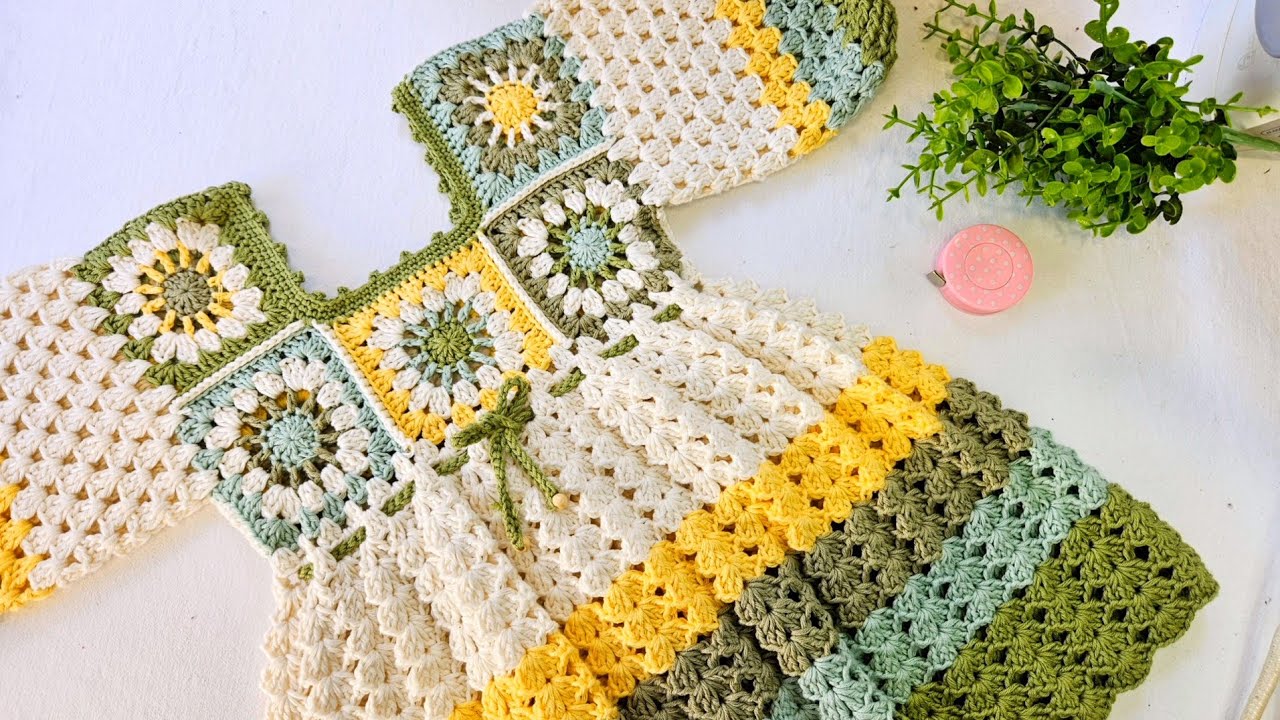
How to Make the Most Beautiful Children’s Dresses
Focus: Making a Gorgeous Crocheted Children’s Dress
What You’ll Need
Materials:
-
Yarn: Choose a soft, lightweight yarn suitable for children’s garments. Cotton or bamboo blends are perfect for comfort and breathability.
-
Recommended Yarn: Size 3 (DK or Light Worsted)
-
-
Crochet Hook: Follow your yarn’s label, usually 3.5 mm to 4.5 mm
-
Buttons or Zipper (for closure)
-
Tapestry Needle
-
Stitch Markers
-
Scissors
-
Measuring Tape
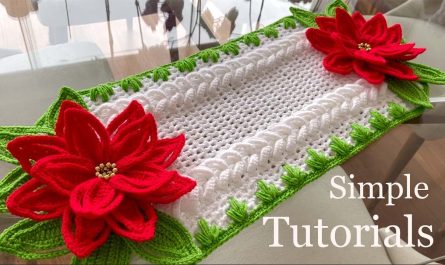
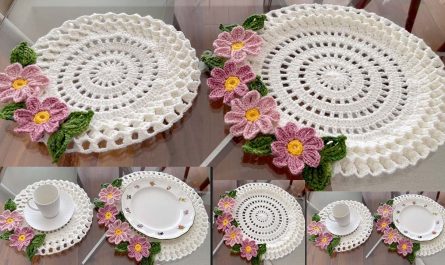
✨ Design Ideas for a Beautiful Dress
-
Yoke Top, Flared Bottom: A fitted top with a lacy, flared skirt is classic and charming.
-
Color Blocks or Ombre Effect: Use two or more complementary colors.
-
Lacy Shell Stitch Skirt: Makes the dress flowy and elegant.
-
Cap Sleeves or Puff Sleeves: Adds a dainty touch.
-
Crochet Flower Appliqués or Bows: Perfect for decoration.
Step-by-Step Instructions
Step 1: Take Measurements (or Choose Size)
You can create the dress for standard sizes (e.g., 1-year-old, 3T, 5T) or measure the child directly.
Key measurements:
-
Chest circumference
-
Dress length (shoulder to desired hem)
-
Shoulder width
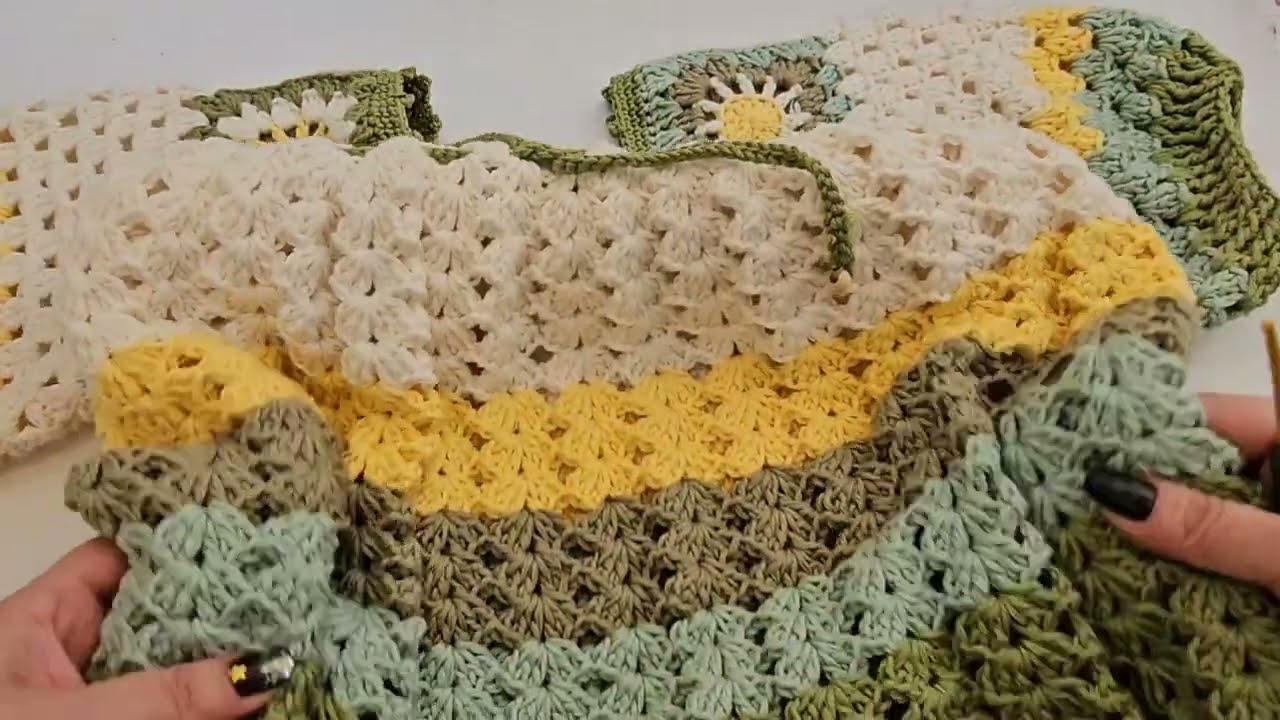
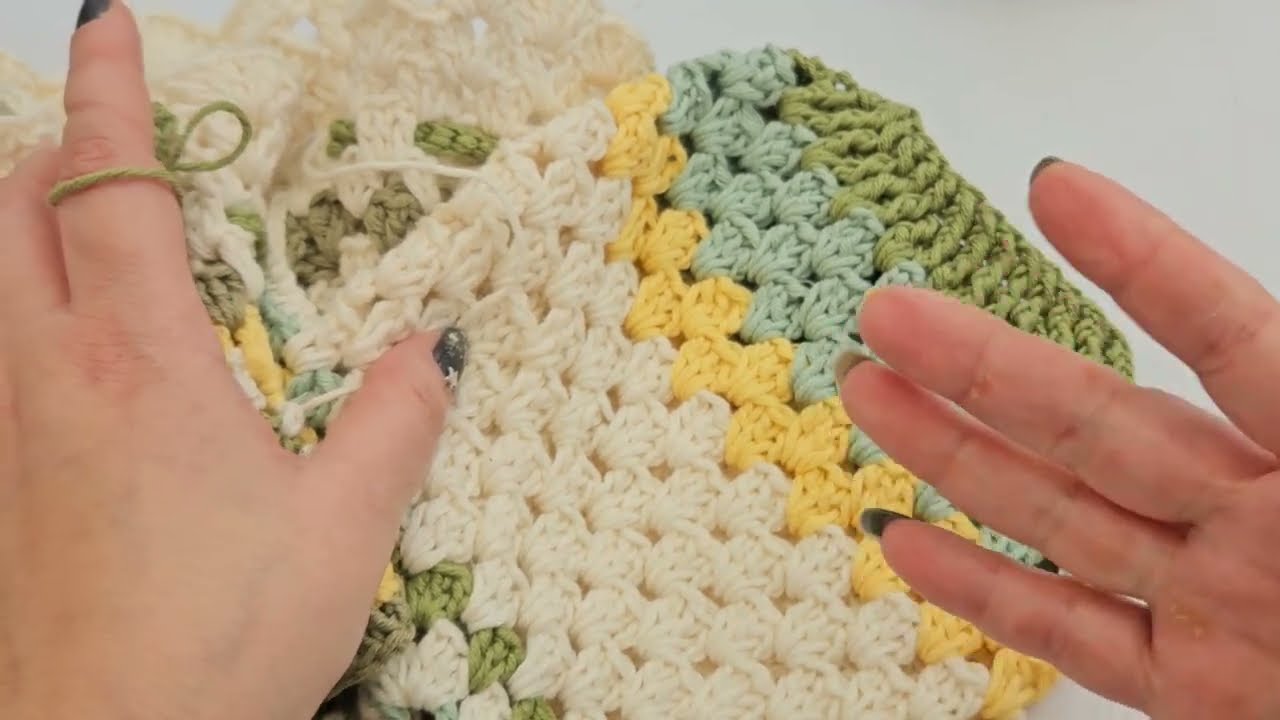
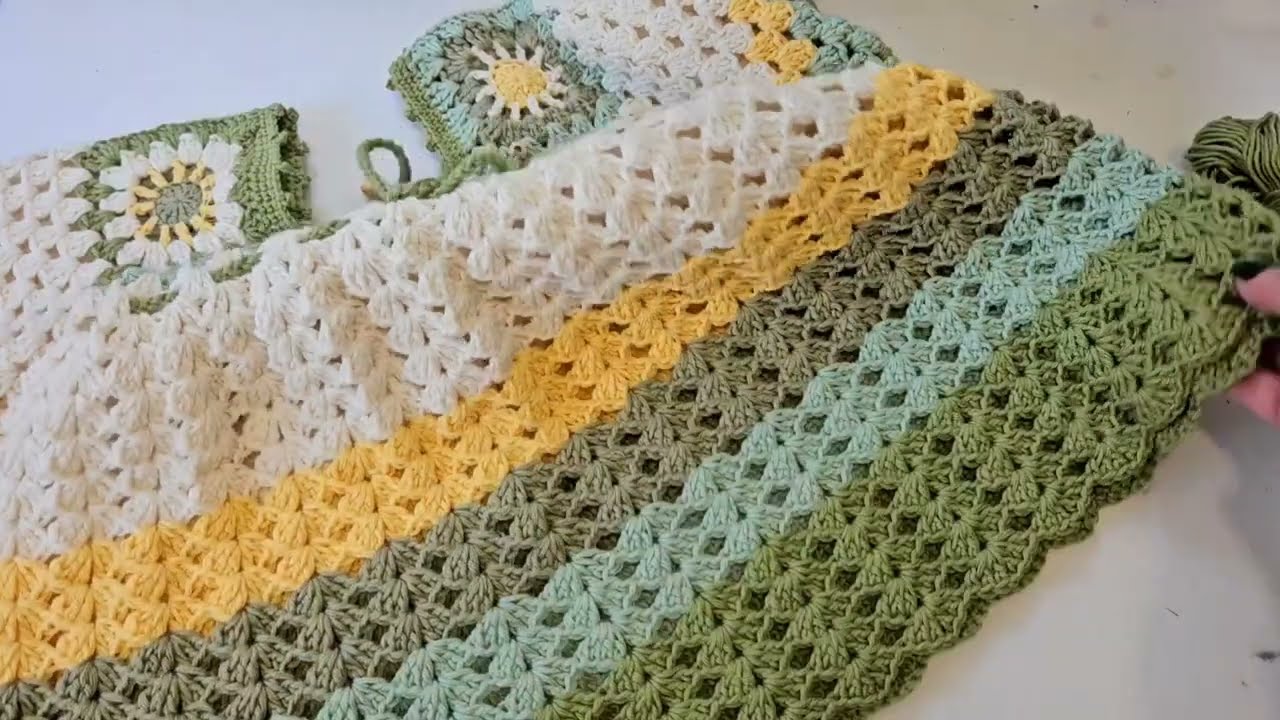
Step 2: Make the Yoke (Top Part)
Use double crochet (dc) or half double crochet (hdc) for a neat, stretchy fit.
Basic Yoke Pattern:
-
Chain enough to fit the neckline (e.g., 60–80 chains).
-
Join in a round (or work flat if back closure is needed).
-
Increase every few stitches to form a round yoke.
-
Work until it reaches underarm level (~5–6 inches deep).
-
Divide for armholes:
-
Leave sections for front and back panels.
-
Skip stitches for armholes and join underarms with chains.
-
Optional: Use a shell stitch pattern in the final rounds for added beauty.
Step 3: Work the Skirt
Once the yoke is done, you’ll start the skirt directly from the bottom of the bodice.
For a flowy skirt:
-
Increase stitches right after the yoke (e.g., 2 dc in each stitch).
-
Work in rounds using shell stitch, fan stitch, or V-stitch.
-
Continue until desired length.
⏳ Tip: For a ruffled look, increase every few rows.
Step 4: Sleeves (Optional)
-
For cap sleeves: Single or double crochet along the armhole for 3–5 rows.
-
For long sleeves: Join yarn at the armhole and work downwards, decreasing slightly.
Step 5: Edging and Finishing Touches
-
Add picot edging or shell edging to the neckline and hem.
-
Sew on buttons, bows, or crochet flowers.
-
Weave in all loose ends with a tapestry needle.
Dress Styling Ideas
| Style | Description | Embellishments |
|---|---|---|
| Classic Princess | Lacy skirt with fitted bodice | Pearl buttons, satin ribbon |
| Summer Breeze | Sleeveless, cotton yarn | Floral appliqués |
| Winter Cozy | Long sleeves, wool-blend yarn | Puff stitch details |
| Vintage Charm | Muted colors, scallop edges | Wooden buttons, lace collar |
Tips for Success
-
Always make a gauge swatch to ensure proper sizing.
-
Use stitch markers to keep track of increases or pattern repeats.
-
Steam block your dress when done for a polished finish.
-
Don’t be afraid to mix patterns—you can use a simple top with an ornate skirt.
Final Touch: Optional Lining
For added comfort and modesty, sew a cotton fabric lining inside the skirt portion. Make sure it is breathable and sewn loosely to allow stretch.
❤️ Ideal Age Range
Crocheted dresses are best suited for ages 0 to 6 years, though larger patterns can be modified for older children.
Watch tutorial: