 by
by Sure! Here’s a complete step-by-step guide on how to make a crochet tank top, from gathering materials to finishing touches. This is great for beginners who are comfortable with basic crochet stitches.
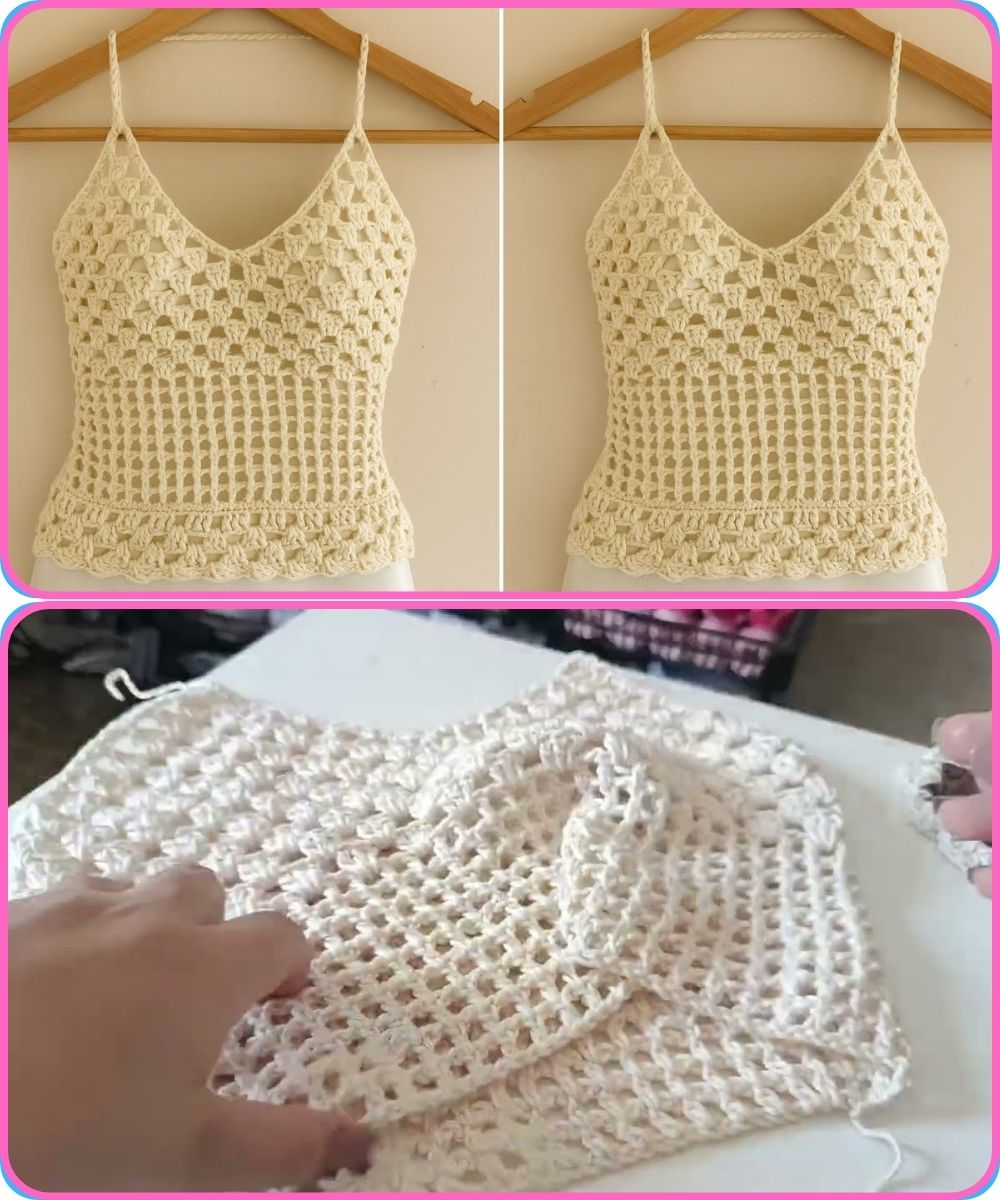
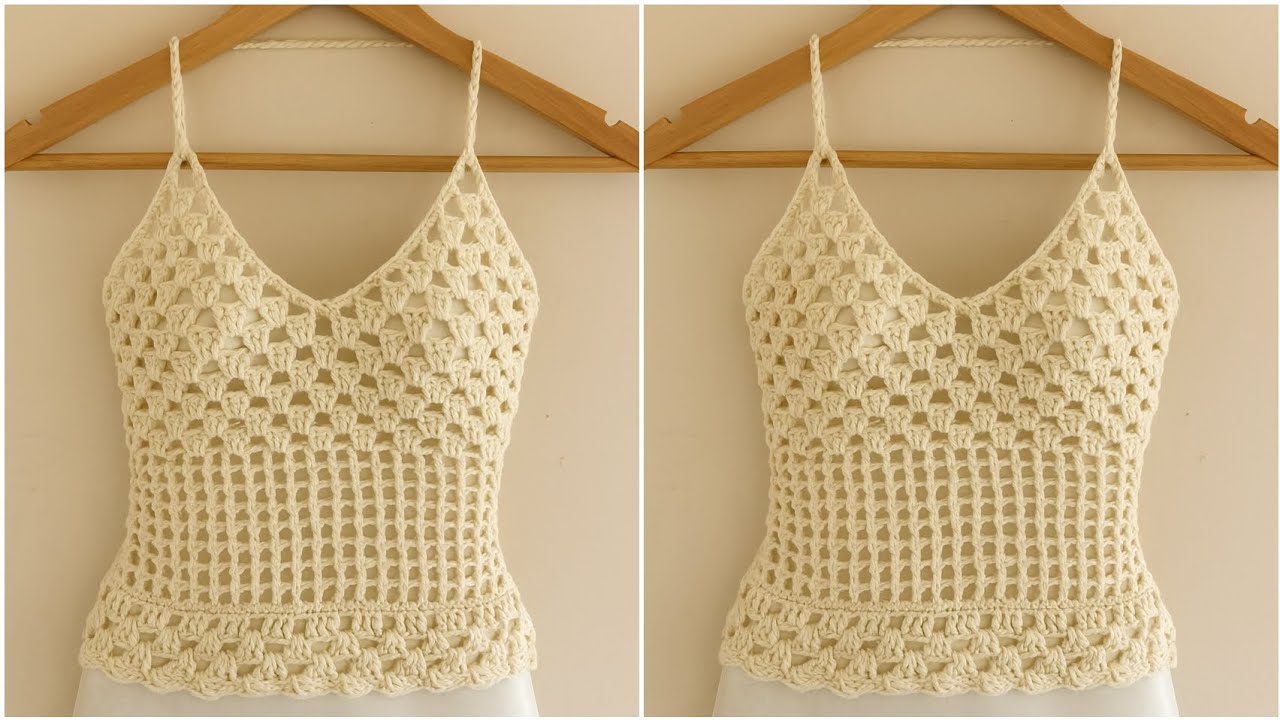
How to Make a Crochet Tank Top: Step-by-Step Guide
Materials Needed
-
Worsted weight or DK yarn (cotton is best for wearability)
-
Crochet hook (size recommended on yarn label; usually 4mm–5.5mm)
-
Stitch markers
-
Measuring tape
-
Yarn needle (for weaving in ends)
-
Scissors
-
Optional: Buttons, decorative edging yarn, etc.
Step 1: Choose a Pattern or Design
Before starting, decide on:
-
Fit: Loose, fitted, cropped, or full-length?
-
Style: Basic tank, racerback, halter, etc.
-
Stitch pattern: Do you want it to be solid, lacey, ribbed?
Tip: For beginners, start with a simple rectangular or two-panel tank top.
Step 2: Take Your Measurements
You’ll need:
-
Bust (widest part of chest)
-
Length (shoulder to hem)
-
Strap length (from front top to back)
Write these down to use as a sizing guide.
Step 3: Make a Gauge Swatch
Crochet a 4×4 inch (10×10 cm) square using your chosen stitch and yarn.
-
Count how many stitches and rows per 4 inches.
-
Adjust your hook size if needed to match the pattern or your measurements.
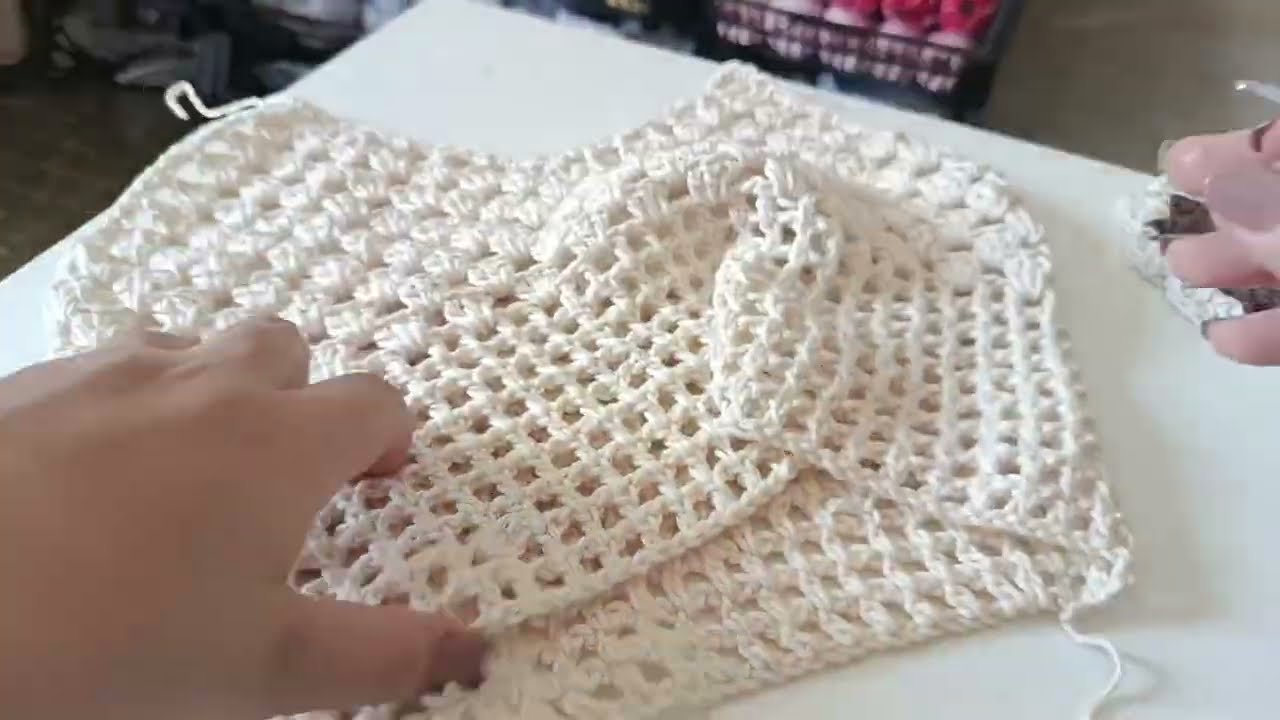
Step 4: Crochet the Body Panels
Option A: Two Rectangles (Front & Back)
Option B: One Long Panel (Folded & Seamed at Sides)
Example Pattern (for two rectangles):
-
Foundation Chain
Chain enough to match your bust width divided by 2 (for each panel).
e.g., If bust is 36”, chain to match 18”. -
Body Rows
-
Turn, and start working your stitch (e.g., double crochet, half double crochet, or a pattern like shell stitch).
-
Continue rows until the panel reaches your desired length.
-
-
Repeat for the second panel.
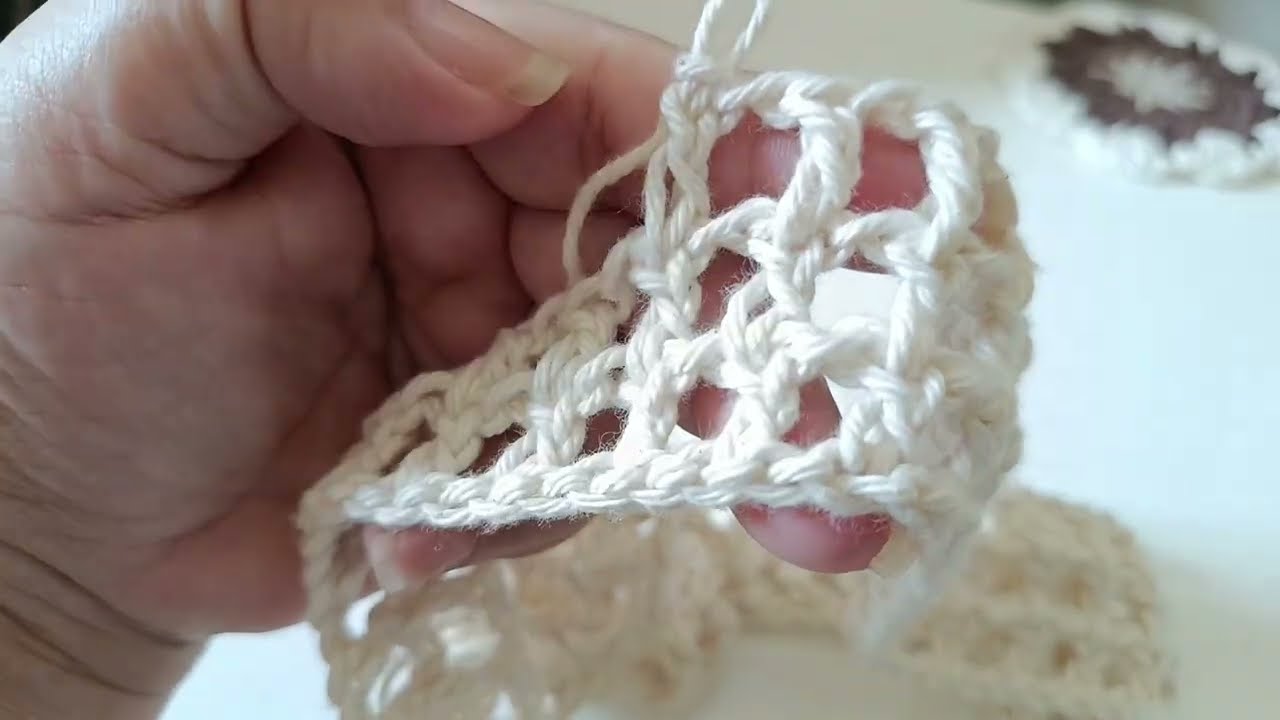
Step 5: Assemble the Tank Top
-
Join Panels
-
Place panels together, right sides facing.
-
Use slip stitch or whip stitch to seam side seams, leaving space for armholes (approx. 6–8 inches depending on fit).
-
-
Create Shoulder Straps
-
Attach yarn at the top edge of the front panel.
-
Chain or single crochet rows until strap reaches back (use measuring tape).
-
Sew or slip stitch to back panel.
-
Repeat on the other side.
-
Tip: Try it on before permanently attaching straps to ensure proper fit.
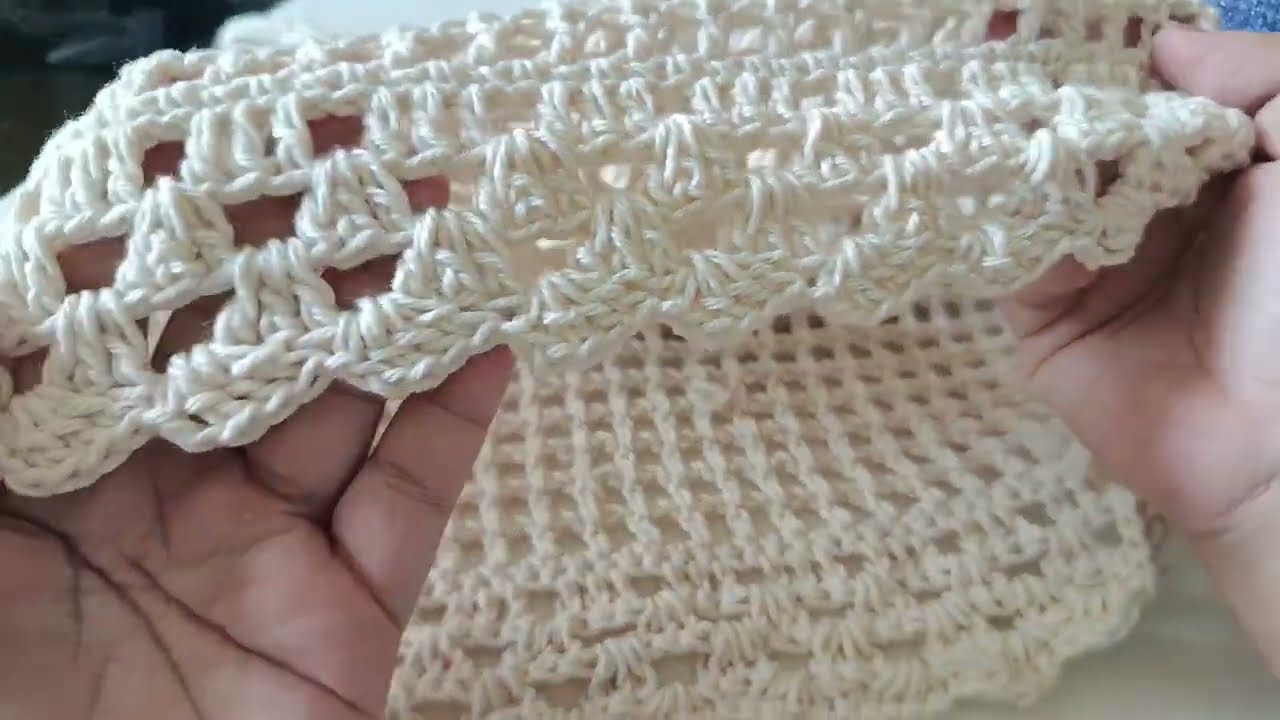
✨ Step 6: Add Finishing Touches
-
Edge Trim (optional)
Single crochet or scallop edging around neckline, armholes, and hem for a clean finish. -
Weave in Ends
Use a yarn needle to weave all loose ends into your work. -
Block the Tank Top
Wet or steam block to help even out stitches and shape the garment.
Care Instructions
-
If made with cotton: machine wash cold, lay flat to dry.
-
If made with acrylic or blends: check yarn label.
Beginner-Friendly Tank Top Stitch Suggestions
-
Single Crochet (sc) – tight and structured
-
Half Double Crochet (hdc) – quick and soft
-
Double Crochet (dc) – open and airy
-
Granny Stitch – fun, vintage feel
-
Mesh/Lace Stitch – great for summer
Example: Simple DC Tank Top Pattern Outline
Here’s a basic outline for a small size:
Front & Back Panels (Make 2):
-
Chain 40 (adjust for size).
-
Row 1: DC in 3rd chain from hook and across.
-
Row 2–40: DC across (adjust number of rows for desired length).
Straps (Make 2 per side):
-
Attach yarn where you want the strap.
-
Chain 15–25 (based on needed length).
-
Slip stitch to back panel.
Watch tutorial: