 by
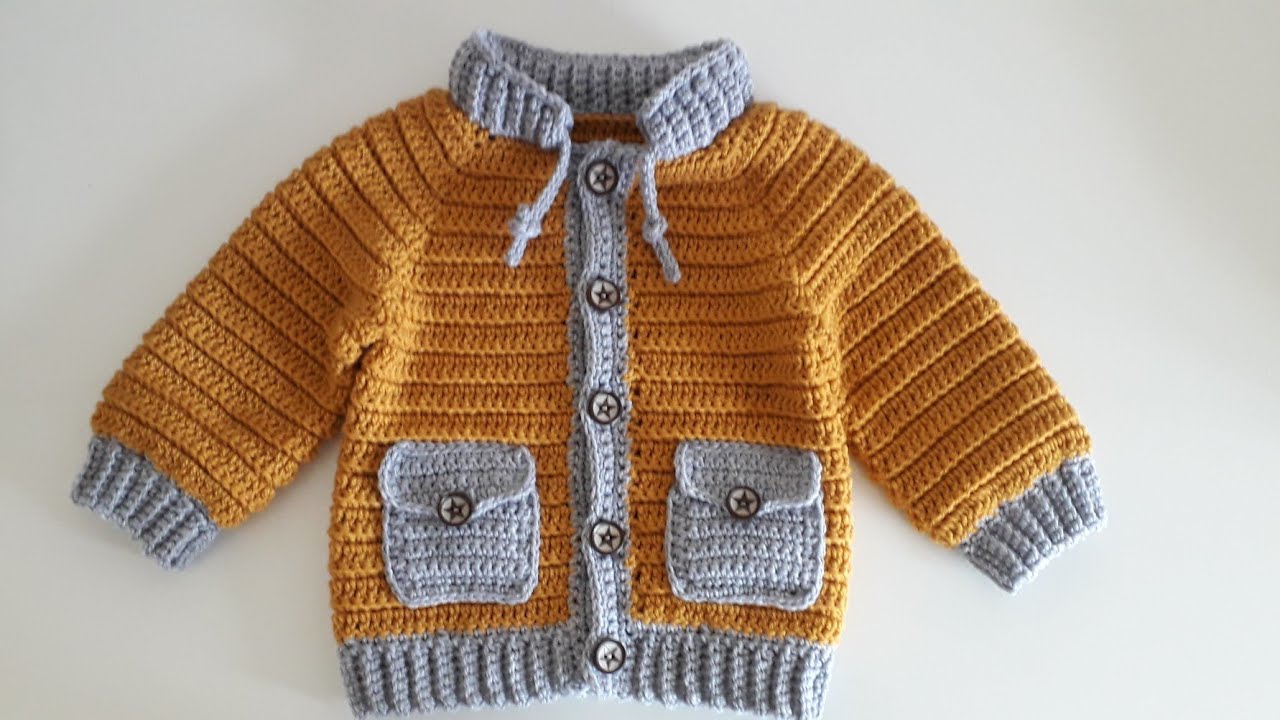
by Below is a detailed, beginner-friendly guide on how to crochet a boys’ jacket with pockets. This includes materials, sizing tips, stitch instructions, construction steps, pocket shaping, assembly, and customization ideas.
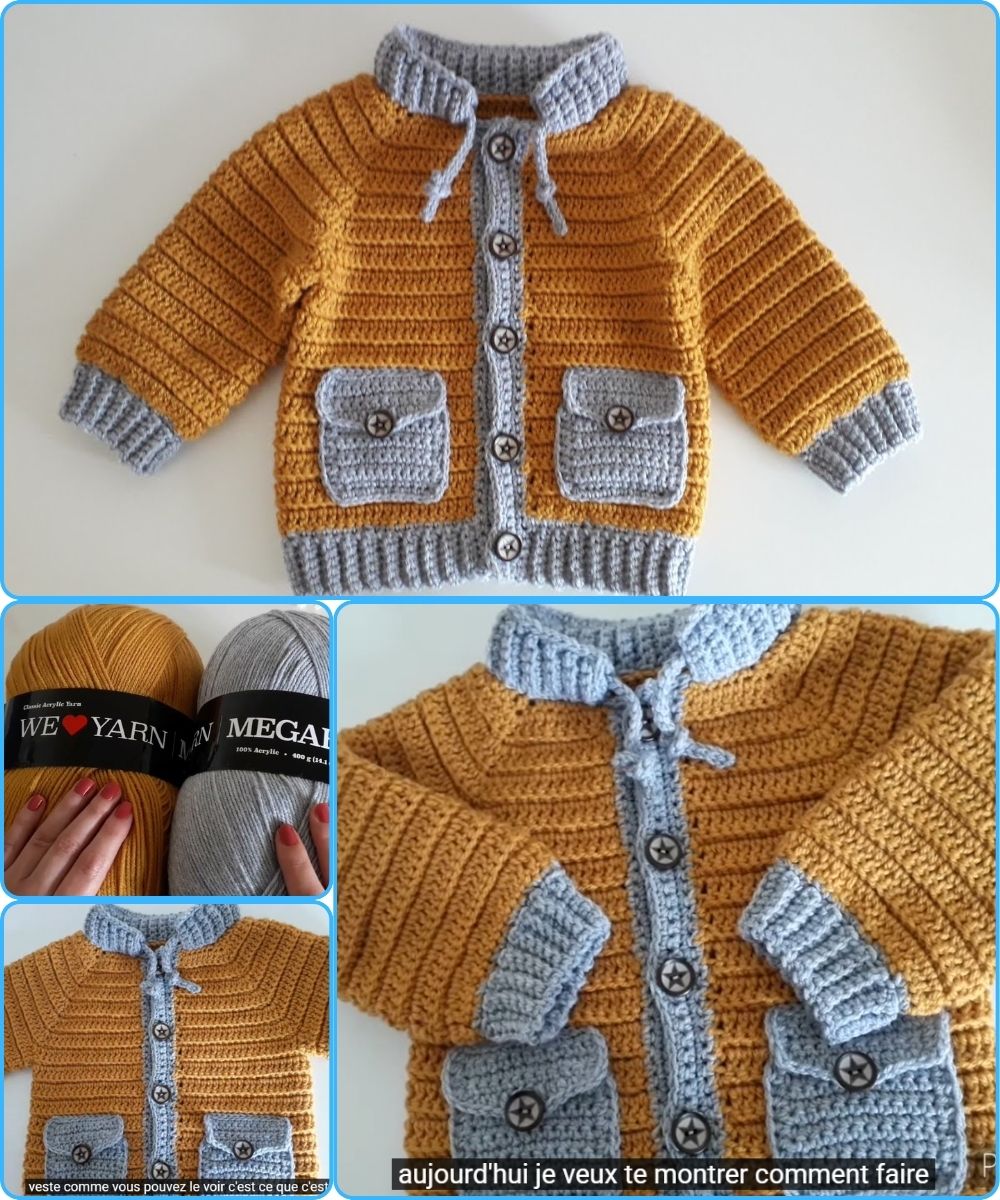
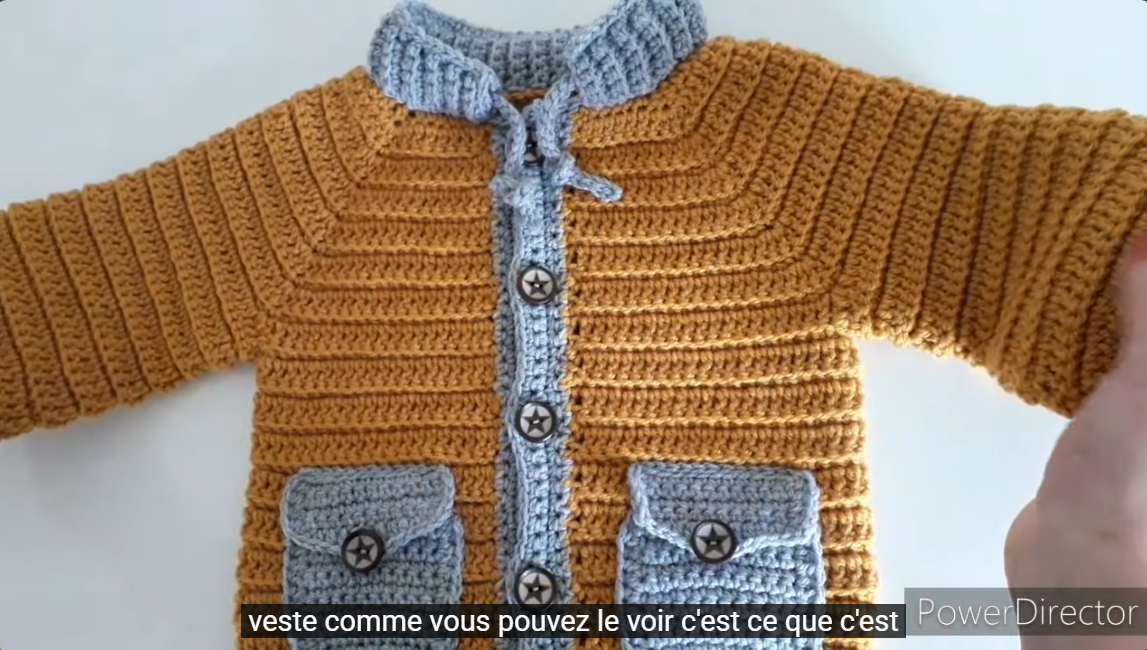
🧵 How to Crochet a Boys’ Jacket With Pockets (Step-by-Step Guide)
This guide is written in a way that you can adapt to any size—from toddler to older boys.
✅ Materials Needed
-
Yarn: Worsted weight (Category 4) or DK (Category 3) depending on the thickness you prefer
Soft acrylic or acrylic-cotton blends are great for kids. -
Crochet Hook: Size recommended on your yarn label (commonly 4.0mm, 4.5mm, or 5.0mm)
-
Stitch Markers
-
Tapestry Needle
-
Measuring Tape
-
Buttons (optional for closure)
-
Scissors

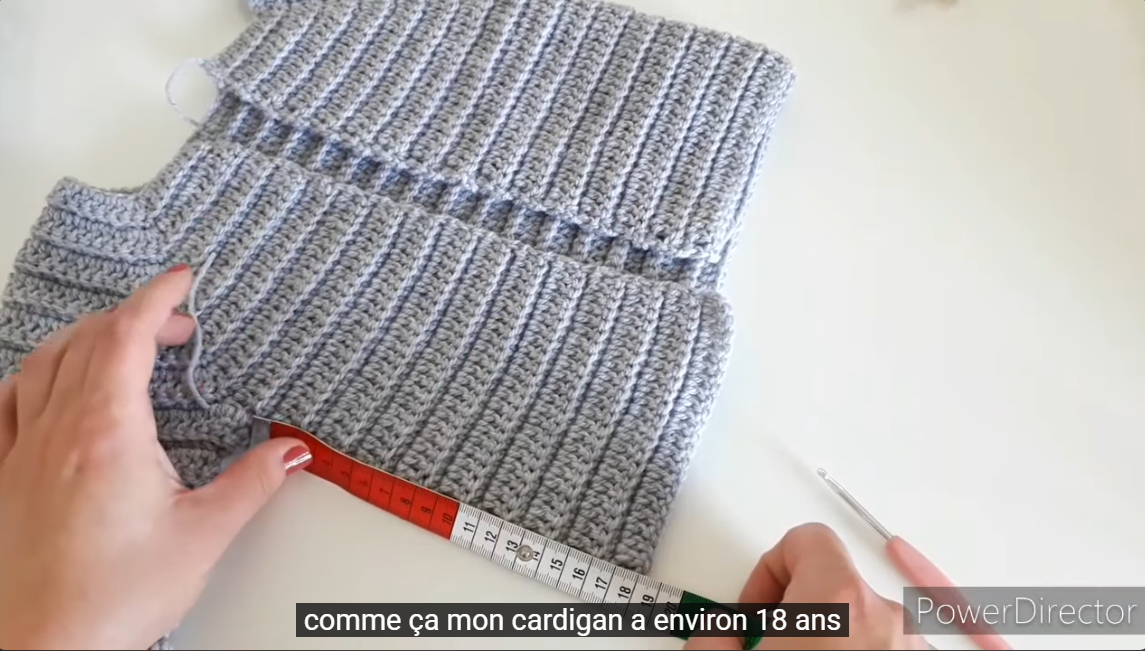
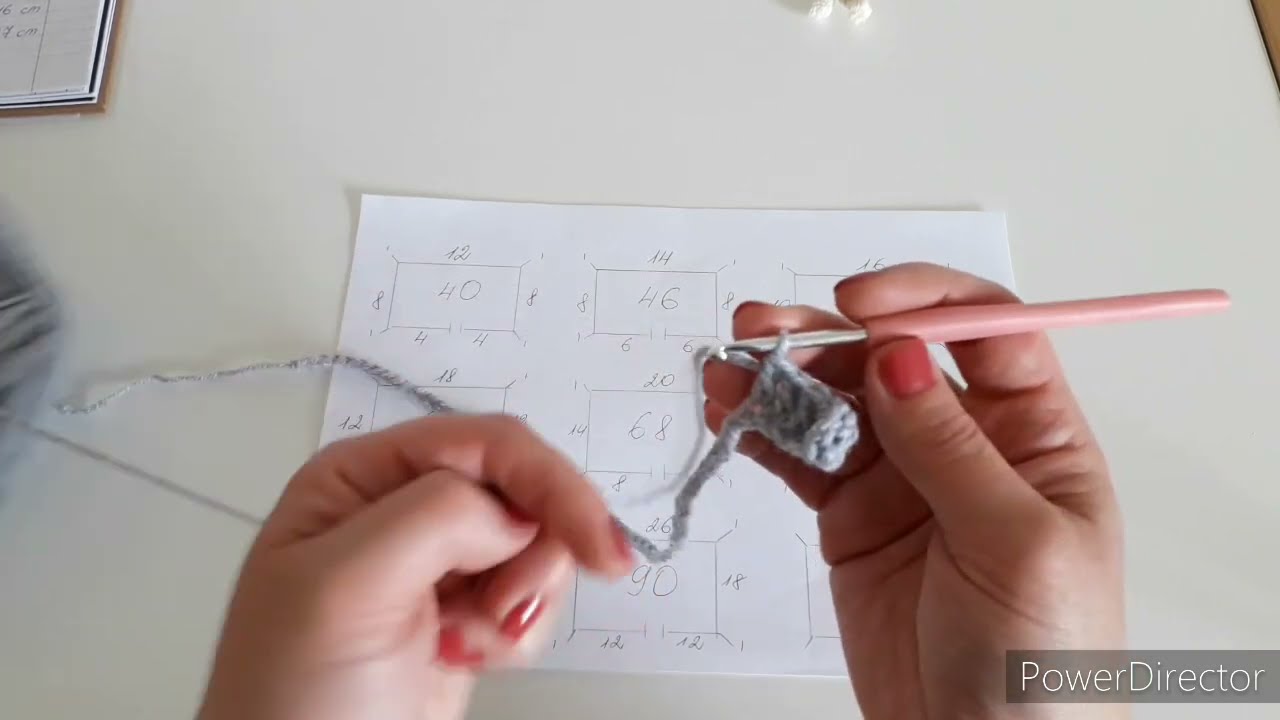
📏 Step 1: Take Measurements (or Follow Standard Sizes)
If you want a custom fit, measure:
-
Chest circumference
-
Torso length (shoulder to hip)
-
Sleeve length (shoulder to wrist)
-
Armhole depth
Standard Chest Sizes for Boys:
-
2–4 yrs: 22–24 in (56–61 cm)
-
5–7 yrs: 25–27 in (63–69 cm)
-
8–10 yrs: 28–30 in (72–76 cm)
🧶 Step 2: Choose a Simple Base Stitch Pattern
Any of these stitches work well for jackets:
-
Half Double Crochet (hdc) – stretchy and warm
-
Single Crochet (sc) – dense and sturdy
-
Double Crochet (dc) – looser & works up quickly
-
Herringbone Half Double Crochet – textured “knit-like” look
-
Griddle Stitch (sc, dc repeat) – great texture for boys
A common choice for jackets is hdc because it creates flexible but not too open fabric.
🧥 Step 3: Construction Method
The most beginner-friendly way is:
Option A — Crochet in 5 Panels
-
Back Panel
-
Left Front Panel
-
Right Front Panel
-
Two Sleeves
Then seam everything together.
Option B — Top-down Raglan (No Seaming Body)
Work from neck downward, increasing at 4 raglan points.
Add sleeves and pockets after.
Below I give the detailed steps for the 5-panel method, easiest for beginners.
🧵 Step 4: Crochet the Back Panel
-
Chain the width needed (usually chest width ÷ 2 + 1–2 inches ease).
Example for a 5–7 year-old: chain about 45–55 with a 5mm hook. -
Row 1: hdc in 2nd ch from hook and across.
-
Continue working hdc rows until the piece measures the torso length (minus about 2 inches for the ribbing).
Optional Ribbing for Bottom Hem:
-
Work 6–10 rows of hdc in the back loops only (hdc BLO).
🧵 Step 5: Crochet the Front Panels (Left & Right)
These are narrower—about ¼ chest width each.
-
Chain about 22–27 (depending on size).
-
Work the same stitch pattern as the back panel.
-
Make two panels.
Neck shaping (optional):
-
When the piece is about 2–3 inches from full length, decrease 1 stitch at neck edge every row 2–3 times.
🧵 Step 6: Crochet the Sleeves
-
Chain length = wrist circumference (about 18–22 chains for ages 4–10).
-
Work hdc or dc rows.
-
Increase 1 stitch at each side every 4–5 rows until reaching upper-arm width.
-
Continue until the sleeve is your measured length.
Optional Cuff:
-
Work 6–8 rows of hdc BLO for stretch.

🧲 Step 7: Shape and Crochet the Pockets
These can be square, rectangular, or angled.
Simple Square Pocket:
-
Chain 15–18.
-
Work hdc rows until pocket is square or slightly rectangular.
-
Optionally add:
-
2–3 rows of slip stitch or single crochet at top edge (to prevent stretching).
-
Decorative ribbing at the opening.
-
Angled Pocket (cool for boys’ jackets!):
-
Crochet square as above.
-
At row 8–10: decrease 1 stitch at start of row for 4–6 rows to form diagonal edge.
🧵 Step 8: Add Button Bands or a Zipper (Optional)
Button Band:
-
With jacket facing up, attach yarn on one front side.
-
Work sc rows evenly up the left side for 4–6 rows.
-
On the opposite panel, create buttonholes by:
sc 3, ch 2, skip 2, sc across(adjust spacing as needed).
Zipper:
-
Sew zipper on with needle & thread after assembly.

🪡 Step 9: Assembly
-
Join shoulders: Seam the top of front panels to the back panel.
-
Attach sleeves:
-
Fold sleeve in half to find the center.
-
Match center to shoulder seam.
-
Sew around the armhole.
-
-
Sew side seams: from bottom up to armpit, then down the sleeve.
-
Attach pockets:
-
Position pockets about 1–2 inches above the bottom edge.
-
Use stitch markers to hold in place.
-
Whipstitch or slip-stitch around edges (leave top open!).
-
🧶 Step 10: Add Collar or Hoodie (Optional)
Simple Fold-Over Collar:
-
Attach yarn at neckline.
-
Work sc rows around neck.
-
Continue for 8–12 rows or desired height.
-
Fold outward and sew lightly.
Hoodie:
-
Attach yarn at neckline.
-
Work sc or hdc rows upward.
-
Increase slightly at the center if needed for shaping.
-
When hood is tall enough, fold and seam top closed.
⭐ Customization Ideas
-
Two-tone colors (sleeves different color than body)
-
Stripes across chest
-
Ribbed sleeves for a bomber-jacket look
-
Leather or faux-wood buttons
-
Contrast-colored pocket edging
-
Sports patch-style appliqués
🎁 Need a Written Pattern in Specific Size?
Tell me:
-
Age or chest size of the boy
-
Stitch type you prefer
-
Whether you want:
-
Buttons,
-
Zipper,
-
Hoodie or collar
-
I can write out a full, row-by-row pattern for you.
Watch tutorial: