 by
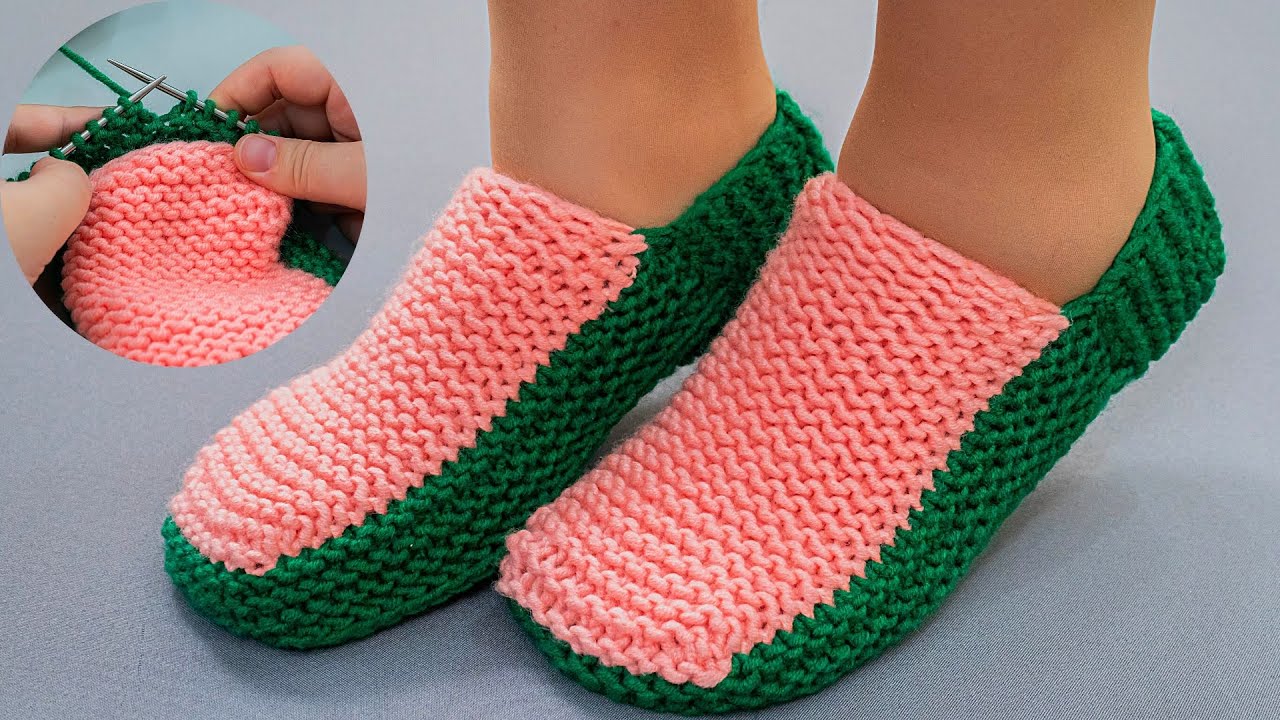
by Below is a clear, beginner-friendly, detailed guide on how to make simple knitted slippers using only knit stitches (garter stitch) and 2 straight needles. This is one of the easiest slipper patterns for beginners!
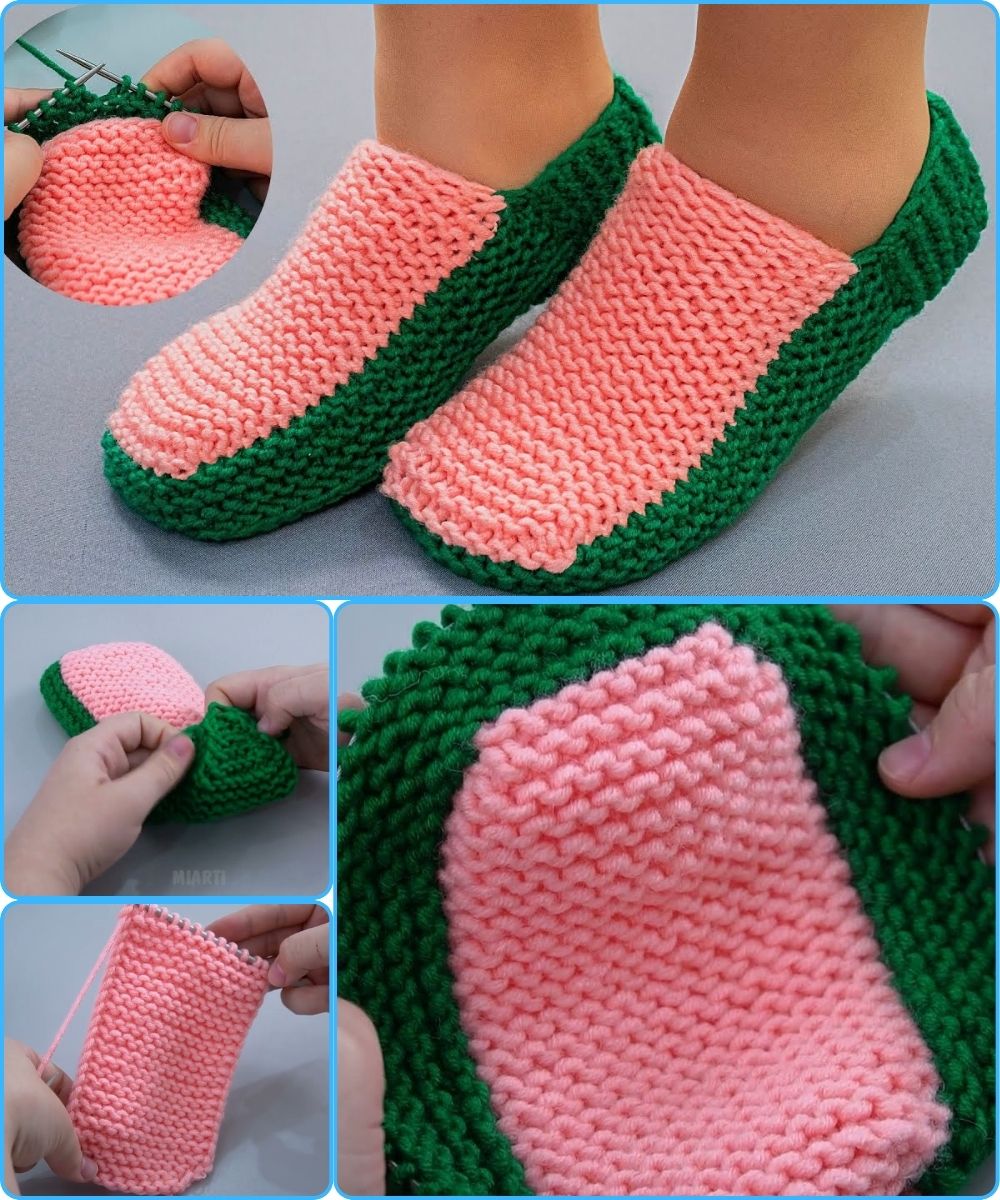
🧶 How to Make Knitted Slippers on 2 Needles (Beginner Friendly – Knit Stitch Only)
These slippers are worked flat (back and forth) in garter stitch and then folded and sewn together. No purl stitches, no shaping with increases/decreases—just simple knitting.
✅ Materials Needed
-
Yarn: Medium weight (Worsted / Aran / #4)
Approx. 100–150 g for a pair -
Needles: U.S. 8 (5 mm) or size to match your yarn
-
Tapestry needle (for sewing)
-
Scissors
🧵 Size Guide (Approx.)
Use this chart to cast on the right number of stitches:
| Foot Size | Cast On (Stitches) |
|---|---|
| Child (5–6 yrs) | 24 sts |
| Women Small (US 5–6) | 28 sts |
| Women Medium (US 7–9) | 30 sts |
| Women Large / Men Small | 32 sts |
| Men Medium / Large | 34–36 sts |
You can adjust simply by adding or subtracting stitches in multiples of 2.
⭐️ Pattern Overview
You will knit:
-
The toe section (a long rectangle)
-
The foot section (slightly shorter rectangle)
-
The heel section (a small square)
Then you fold and sew to shape the slipper.
Everything is worked in garter stitch (knit every row).
🪢 Step-by-Step Instructions
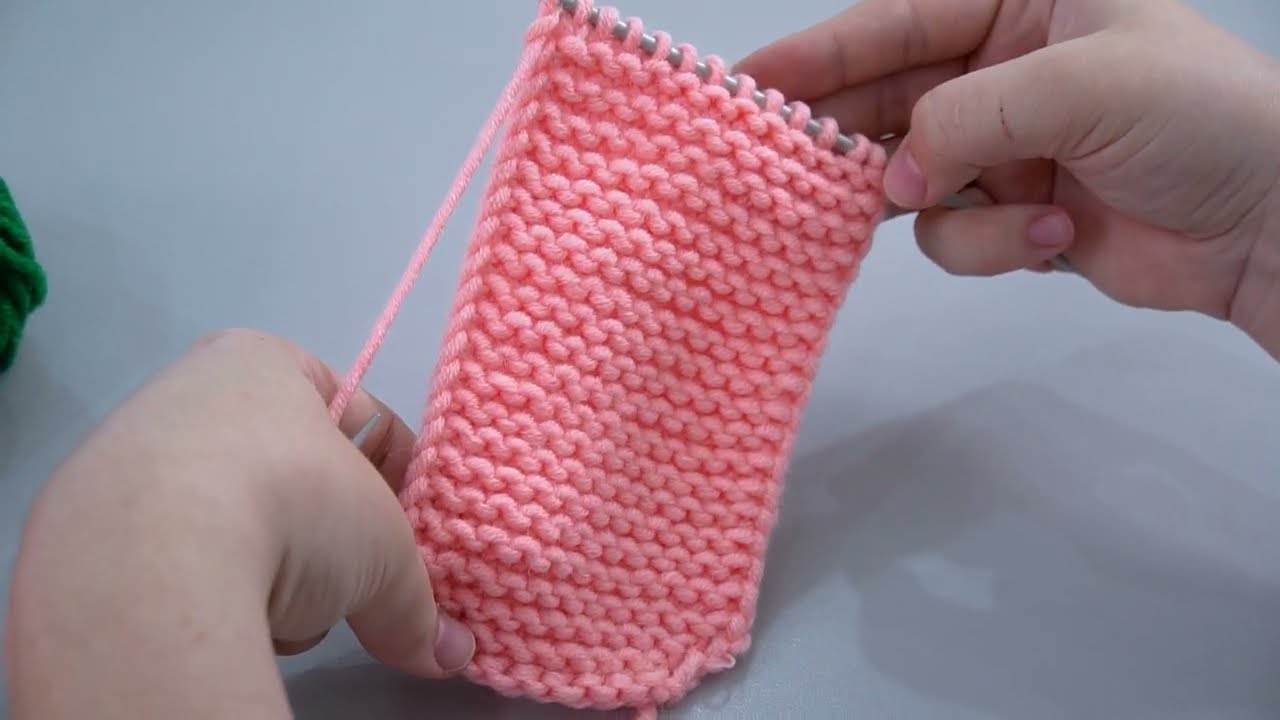
🟦 1. Cast On
Cast on the number of stitches for your size (e.g., 30 stitches for Women Medium).
🟦 2. Knit the Toe Section
Knit every row until your piece measures 5–6 inches (12–15 cm) from cast-on edge.
This forms the roomy toe box.
Tip: If you want a tighter toe, make it slightly shorter; a roomier toe, knit a bit longer.
🟦 3. Knit the Foot Section
Continue in garter stitch for an additional:
-
4–5 inches (10–13 cm) for women
-
5–6 inches (13–15 cm) for men
This is the length that covers the top of the foot.
🟦 4. Knit the Heel Section
Knit until your piece measures:
-
2.5–3 inches (6–8 cm) for women
-
3–4 inches (8–10 cm) for men
This small section folds upward to form the heel cup.
🟦 5. Bind Off
Bind off all stitches loosely.
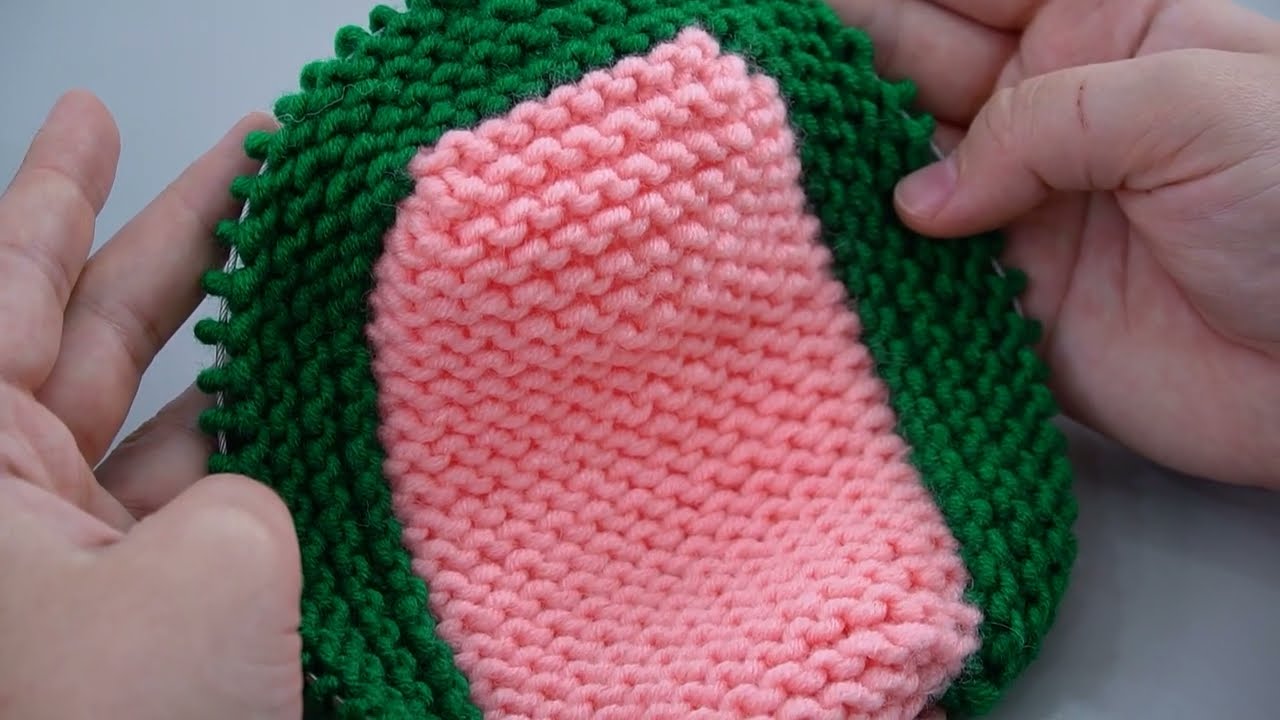
🧷 Finishing — Sewing the Slipper (Important!)
You now have one long rectangular strip. Here’s how to shape it:
🧵 Step 1: Fold the Toe
Fold the first (toe) section in half and sew along the long edge to close the toe.
It should form a rounded pouch.
🧵 Step 2: Sew the Top of the Foot
Sew the top edges together halfway along the foot section.
This creates the opening for the ankle.
🧵 Step 3: Fold and Sew the Heel
Fold the heel section in half and sew the back seam.
The slipper shape will reveal itself immediately!
🧽 Optional: Add a Ribbed Edge (Still Easy!)
Pick up stitches around the ankle opening
→ Knit 4–6 rows in garter stitch
→ Bind off.
This creates a nicer finished edge.
🧶 Optional Embellishments
-
Add a pom-pom on the toe
-
Sew on a button
-
Make a small bow
-
Add a non-slip sole fabric underneath
-
Use striped or variegated yarn for fun colors
🟩 Troubleshooting Tips for Beginners
✔ If your edges look loose → Try slipping the first stitch of each row
✔ If the slipper is too small → Add 2–4 more cast-on stitches next time
✔ If it’s too large → Reduce stitches or shorten foot section
✔ Garter stitch stretches! Your slipper will loosen slightly after wearing.
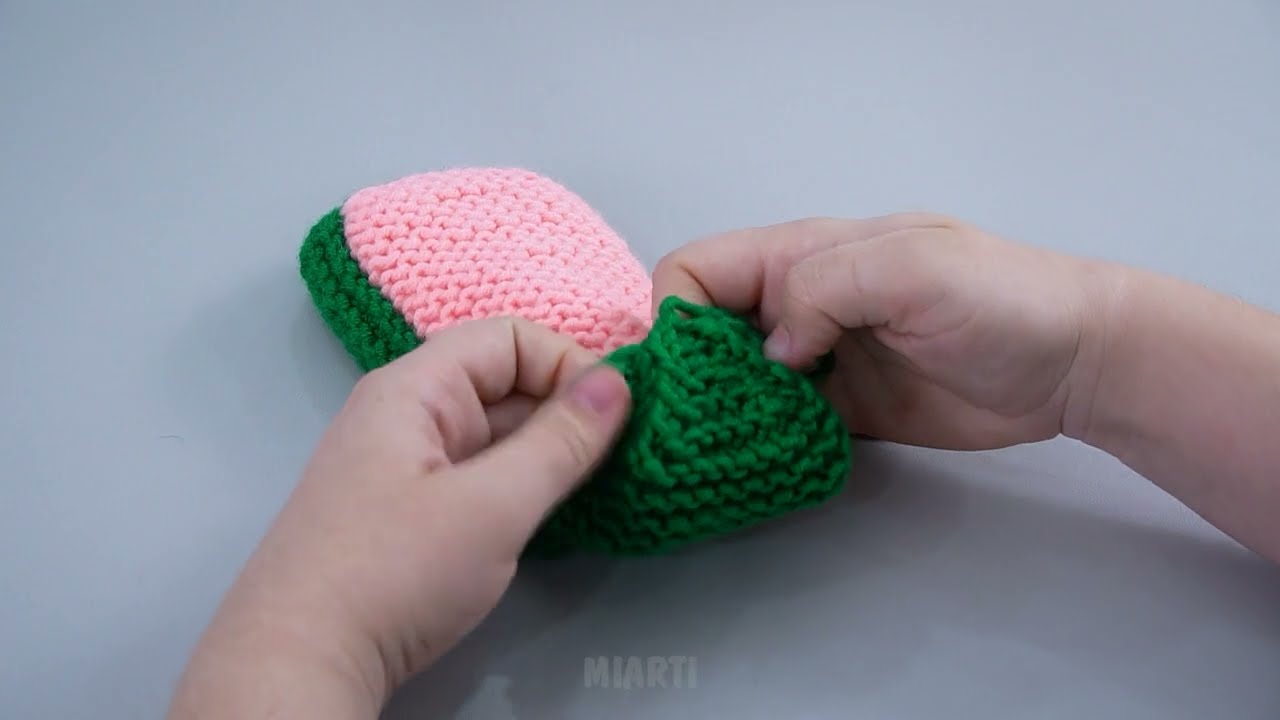
🎉 You’re Done!
You’ve made a cozy pair of slippers using only:
-
2 needles
-
Knit stitches
-
Basic sewing
Perfect for beginners and great as gifts.
If you want, I can also create:
👉 A printable PDF version
👉 A diagram showing how the slipper folds
👉 A video-friendly script for a tutorial
👉 Instructions for two-color or striped slippers
Watch tutorial: