 by
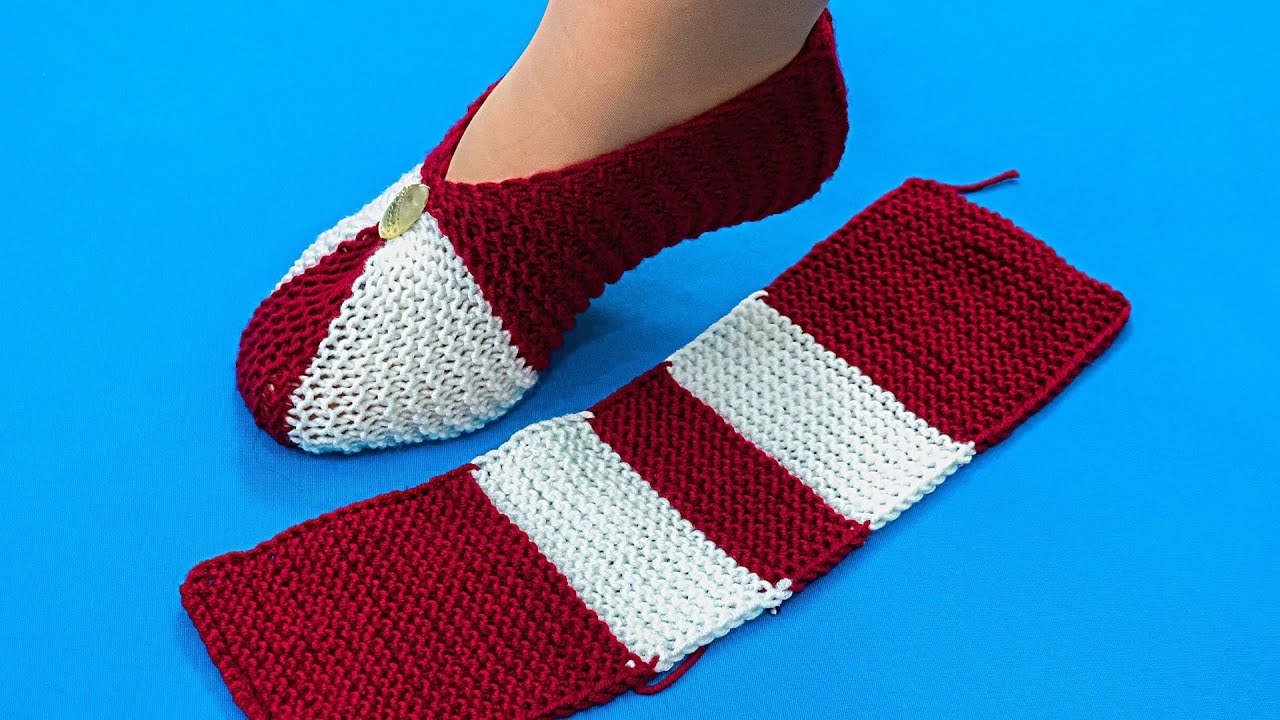
by Below is a clear, beginner-friendly, detailed tutorial for making simple knitted slippers on 2 straight needles. These are the classic “grandma slippers” that are easy, cozy, and fast to knit!
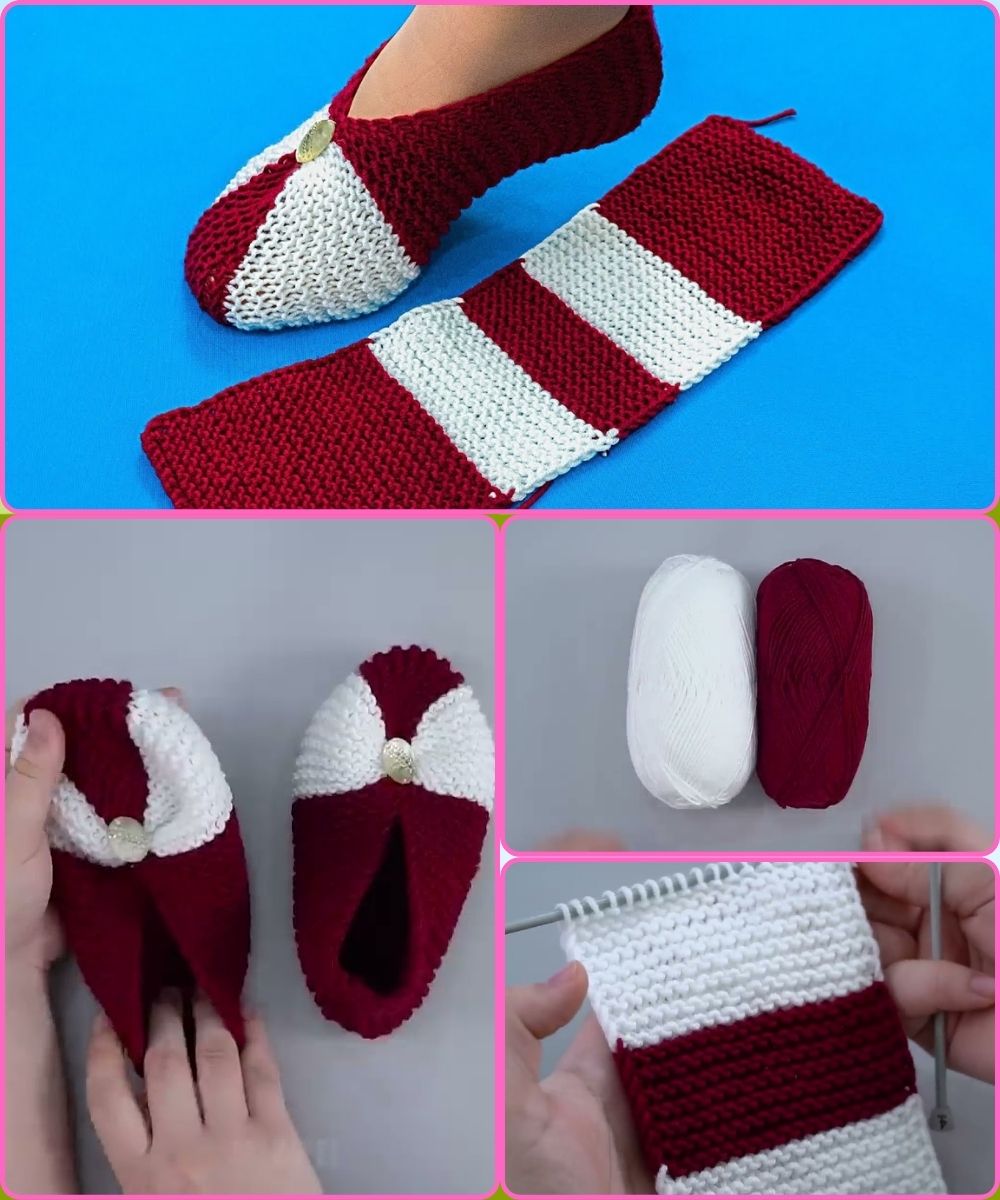
🧶 How to Make Simple Slippers on 2 Knitting Needles
Skill level: Easy / Beginner
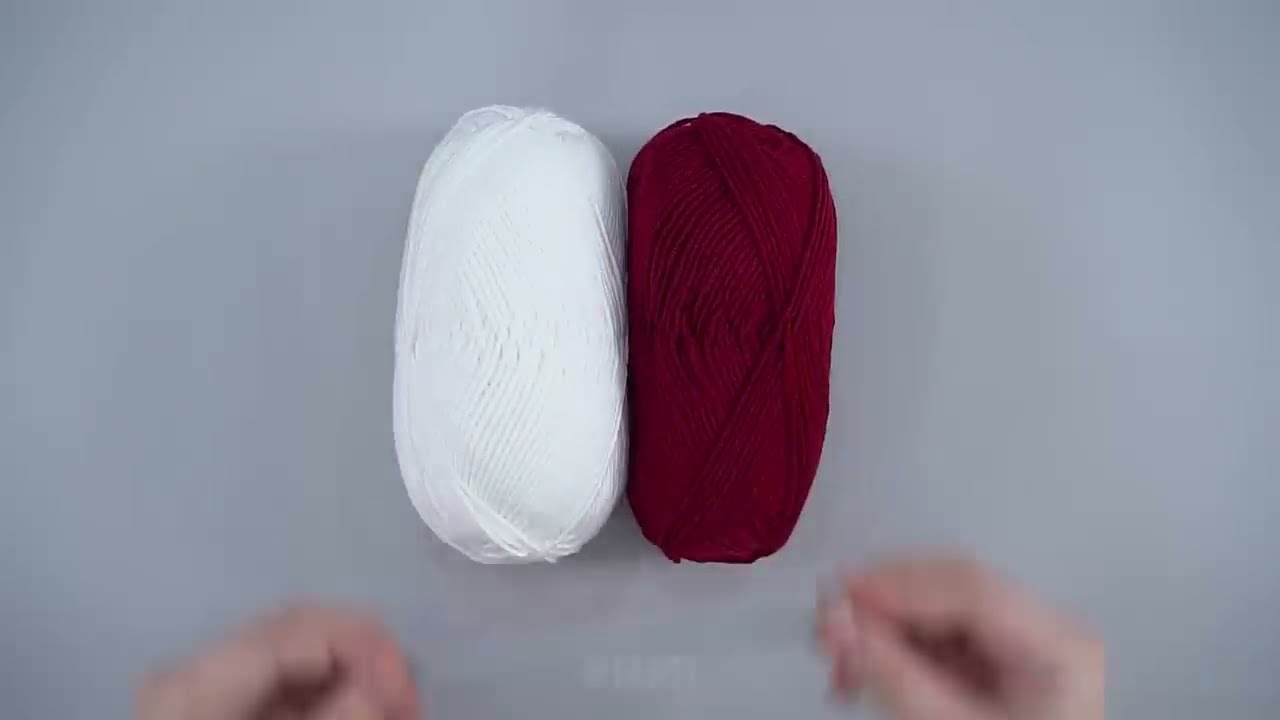
Tools Needed:
-
2 straight knitting needles (4–5 mm / US 6–8 recommended)
-
Worsted or chunky yarn (any soft yarn)
-
Yarn needle (for sewing seams)
-
Scissors
These instructions create one-size adult slippers, but I also include size adjustment tips at the end.
⭐ Slipper Construction Overview
These slippers are made from one flat rectangular piece that is shaped by decreasing for the toe and then sewn together.
Super simple: Knit → Fold → Stitch → Wear!
🧵 Step-by-Step Tutorial
1. Cast On
Cast on 30 stitches (for average adult foot).
-
Chunky yarn → cast on 24
-
Thin yarn → cast on 36
You can use Long Tail Cast-On or your favorite method.
2. Knit the Ribbed Cuff (Optional but nice!)
Work K1, P1 ribbing for 8–10 rows.
This gives the slipper a stretchy ankle opening.
Row Example:
-
Row 1: K1, P1 repeat to end
-
Row 2: K1, P1 repeat to end
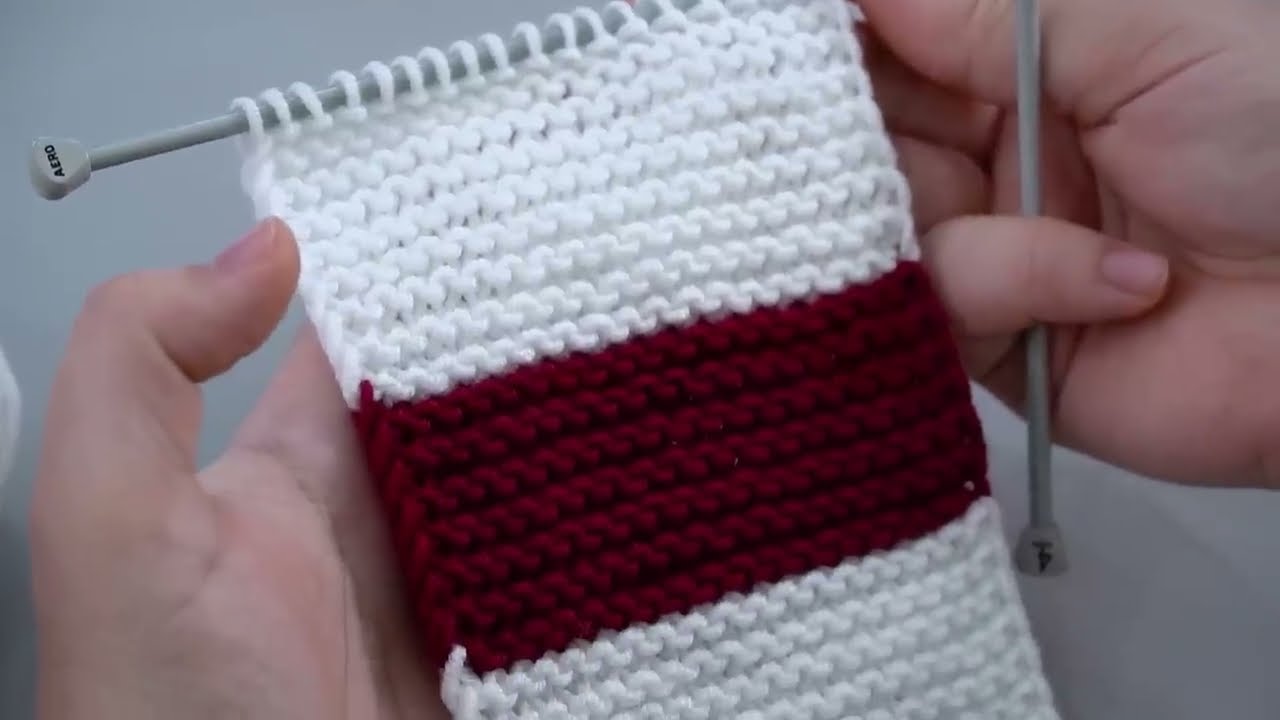
If you prefer a simple design, knit in garter stitch instead.
3. Knit the Body of the Slipper
Switch to garter stitch (knit all rows).
Knit until the piece measures:
-
7–8 inches for women
-
8–9 inches for men
-
Or until it reaches the base of your toes when measured against your foot.
This section forms the foot/top of the slipper.
4. Shape the Toe (Decreasing Section)
Switch to stockinette stitch OR continue in garter stitch—your choice.
Toe Decrease Pattern in Garter Stitch
Repeat the following 2 rows until you have 10 stitches left:
-
Row A: K2 together, knit to last 2 stitches, K2 together
-
Row B: Knit all stitches
You will see the toe area narrowing.
5. Bind Off
When you reach 10 stitches,
-
Cut the yarn, leaving a long tail (about 12–14 inches)
-
Thread it through all remaining stitches
-
Pull tight to close the toe like a drawstring
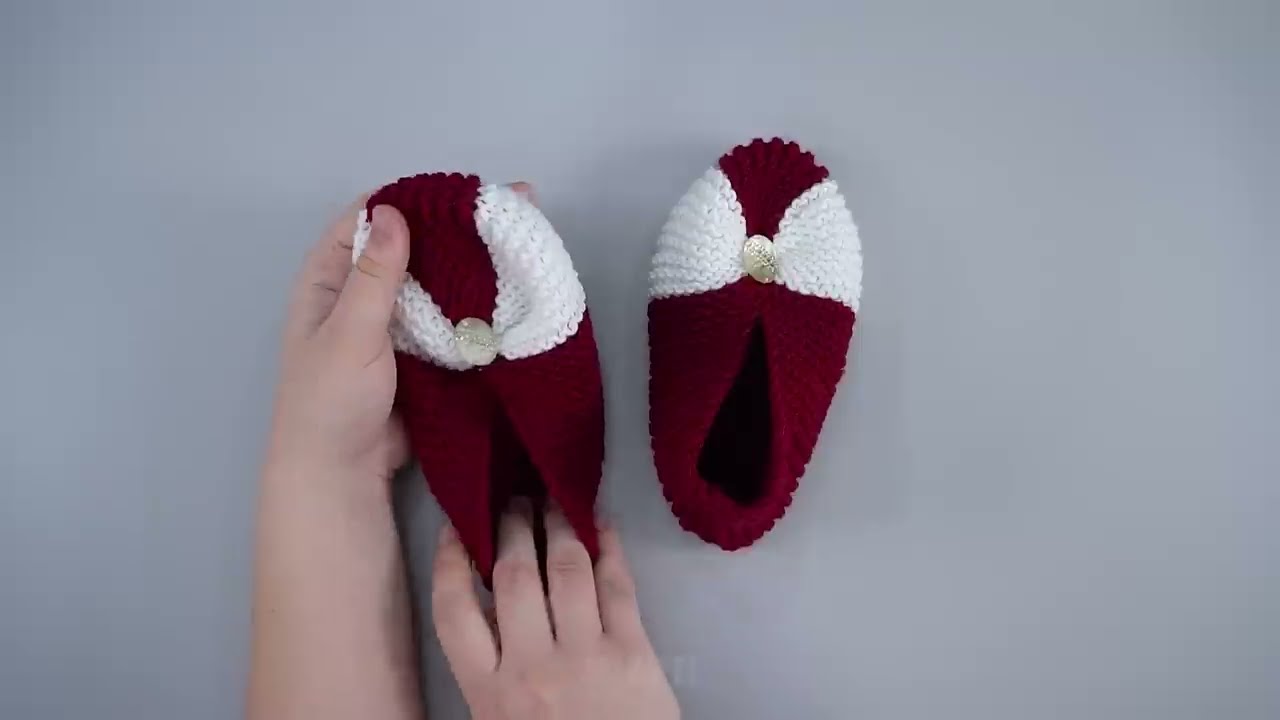
🪡 6. Sewing the Slipper
Fold the piece in half lengthwise.
You will sew 3 areas:
-
Toe seam
-
Pull the yarn tight to close the hole
-
Then stitch up the top of the toe for ~2–3 inches
-
-
Top of foot
-
Sew from toe upward to where the ankle opening begins
-
-
Heel seam
-
Use mattress stitch or whip stitch to close the back of the foot
-
Do NOT sew the ribbed cuff area—you need that opening to slip your foot through!
🌟 7. Turn Right Side Out
Once all seams are done, turn the slipper inside out (right side out), and you’re done!
👣 Fit Adjustments
You can easily modify size:
To Make Bigger Slippers:
-
Cast on more stitches (increase by 4–6)
-
Knit more rows in the body section
-
Leave toe section the same
To Make Smaller Slippers:
-
Cast on fewer stitches
-
Knit fewer body rows
For Children:
-
Cast on 18–22 stitches
-
Knit shorter foot length
-
Decrease until 6–8 stitches before closing toe
🧶 Optional Design Ideas
You can personalize your slippers!
✔ Add a pom-pom
✔ Knit stripes by changing colors
✔ Use chunky yarn for extra plush slippers
✔ Add a crocheted edging around the ankle
✔ Sew felt pads on the bottom for anti-slip
🎉 You’re Done!
These slippers knit up fast—about 1–2 hours per pair once you get the hang of it. Cozy, stretchy, and great for gifts!
If you want, I can also create:
✅ A printable one-page pattern
✅ A video-style step-by-step script
✅ A version using only garter stitch (super beginner)
Just tell me!