 by
by Here is a clear, detailed, beginner-friendly tutorial on how to make simple knitted slippers. This version uses straight needles, basic stitches, and one flat piece that is folded and seamed — ideal for first-time slipper knitters.
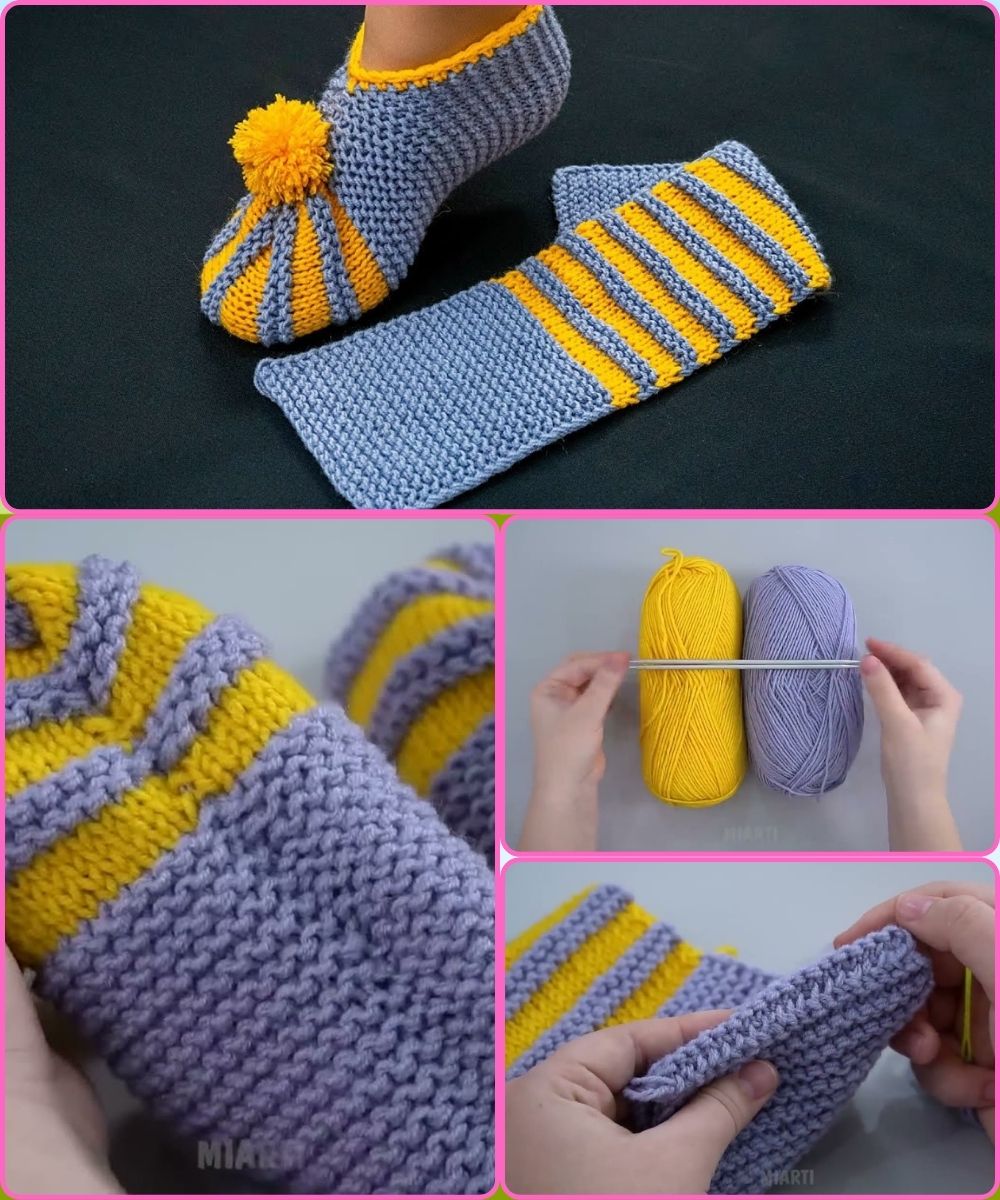
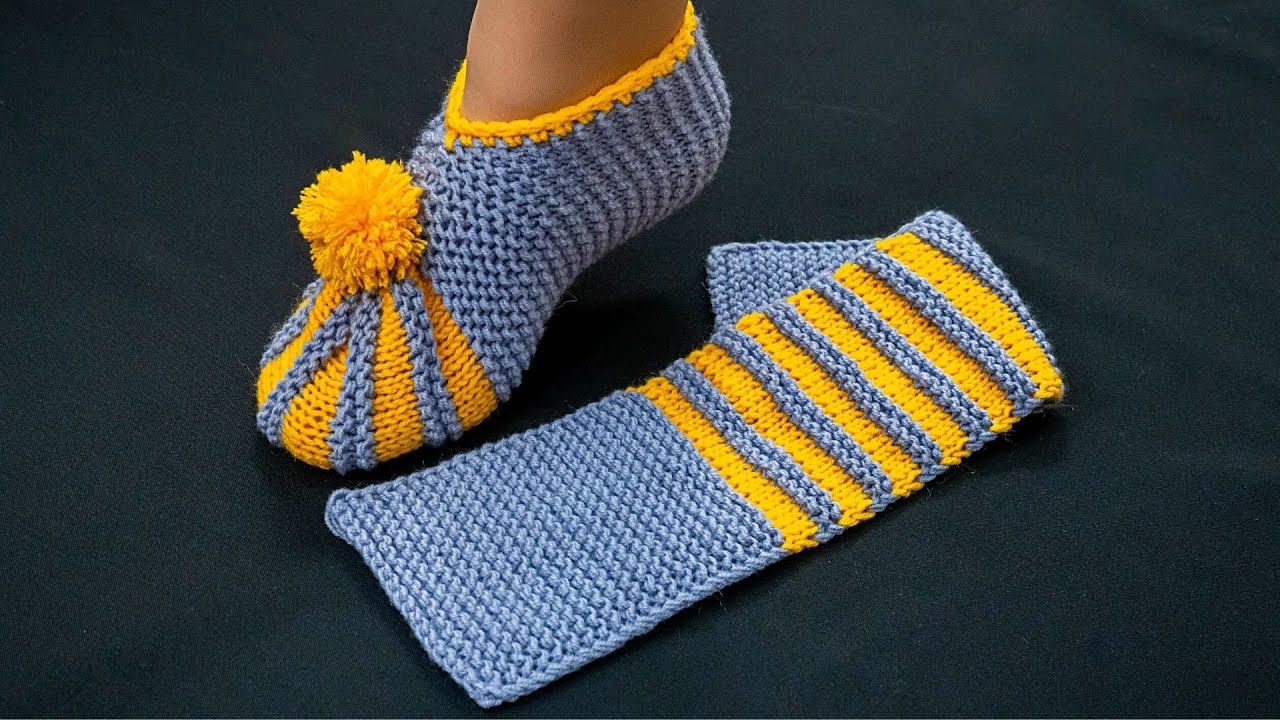
🧶 How to Make Simple Knitted Slippers – A Detailed Step-by-Step Tutorial
These slippers are made from one rectangular piece, shaped with simple decreases, and then sewn up. You can make them in any size — instructions for sizing adjustments are included!
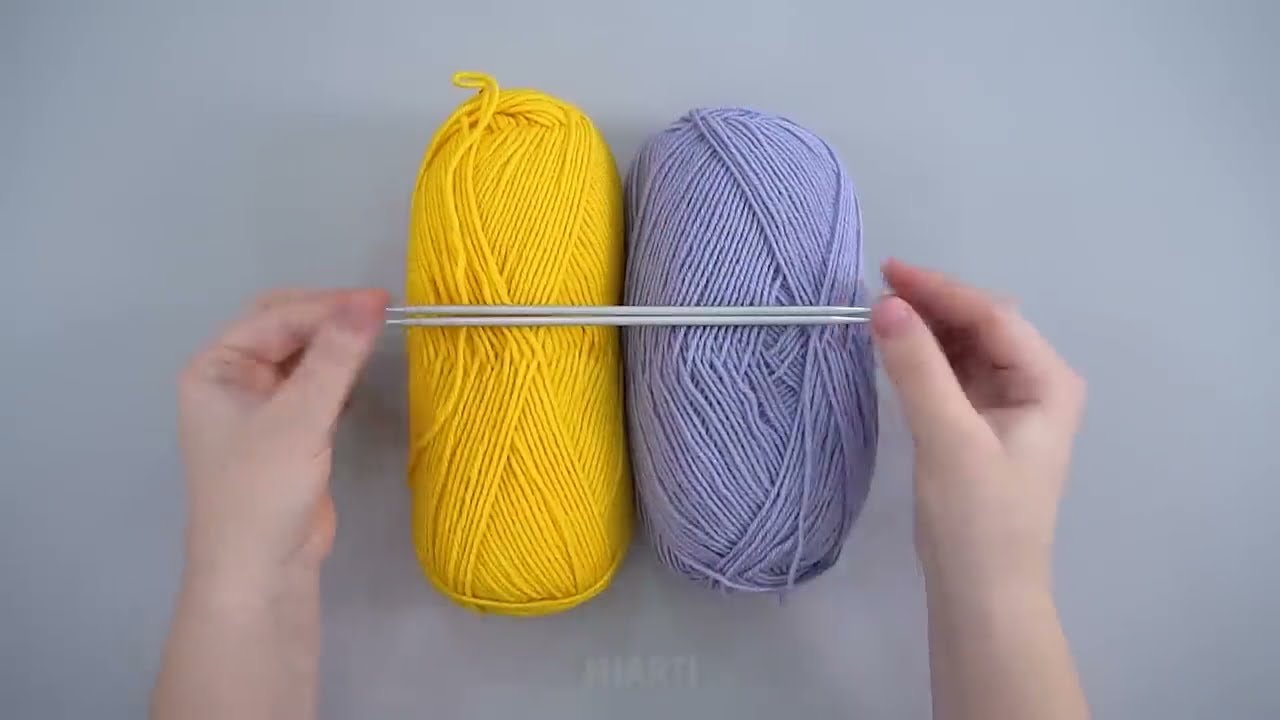
🧵 Materials You Will Need
-
Yarn: Medium (worsted) weight yarn — approx. 80–120 yards depending on size
-
Knitting Needles: Size US 8 (5 mm) or size to achieve a comfortable fabric
-
Yarn needle for sewing seams
-
Scissors
-
Stitch markers (optional)
📏 Sizing Guide
You’ll knit a rectangle whose length equals the foot length + 1 inch, and whose width is roughly twice the foot circumference (because it wraps around the foot).
Simple approximate cast-on counts for slippers using worsted yarn:
| Size | Foot Length | Cast On |
|---|---|---|
| Child (6–8 yrs) | 7–8 in | 24–28 stitches |
| Women’s Small | 8–9 in | 30 stitches |
| Women’s Medium / Men’s Small | 9–10 in | 32–34 stitches |
| Men’s Medium/Large | 10–11 in | 36–40 stitches |
For this tutorial, we’ll assume 32 stitches cast on (Women’s Medium).
🪡 Stitch Pattern
We’ll use:
-
Garter Stitch (knit every row)
This makes the slipper stretchy and extra cozy.
⭐ Step-by-Step Instructions
1. Cast On
Cast on 32 stitches (or the number for your size).
Use a stretchy cast-on if possible.
2. Knit the Foot Section
Knit every row (garter stitch) until your piece measures:
-
5.5–6 inches for women
-
Add or subtract length according to the foot you’re making it for
This forms the bottom of the slipper.
3. Shape the Toe
You’ll create a gentle curve over the toes using decreases.
Row 1:
K2, K2tog, knit to last 4 stitches, K2tog, K2
Row 2:
Knit across
Repeat Rows 1–2 three more times
(You will have decreased 8 stitches total.)
So if you started with 32 stitches, you now have 24 stitches.
4. Knit the Toe Top
Knit 6–8 rows in garter stitch.
The toe area should form a short, square-ish top.
5. Bind Off
Bind off loosely in knit stitch.
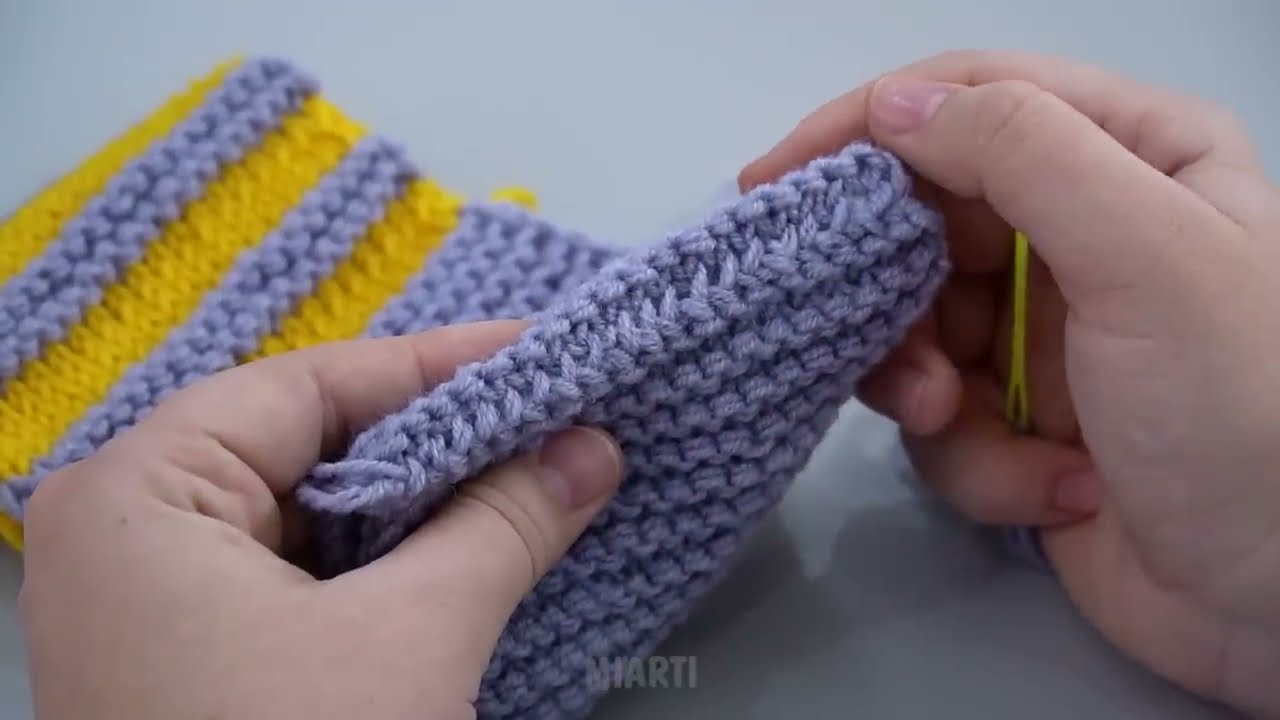
🧵 Sewing and Assembly
Lay your piece flat. It will look like a long rectangle with one end narrowed by decreases.
1. Fold for Toe
Fold the toe section so that both sides meet in the middle.
Sew the toe seam closed, using whip stitch or mattress stitch.
2. Sew the Foot
From the toe, sew along the top of the foot until you reach the ankle opening (usually ⅓–½ of the length).
3. Sew the Heel
Fold the back of the slipper into a “T-shape” and sew the heel seam.
This creates a rounded back.
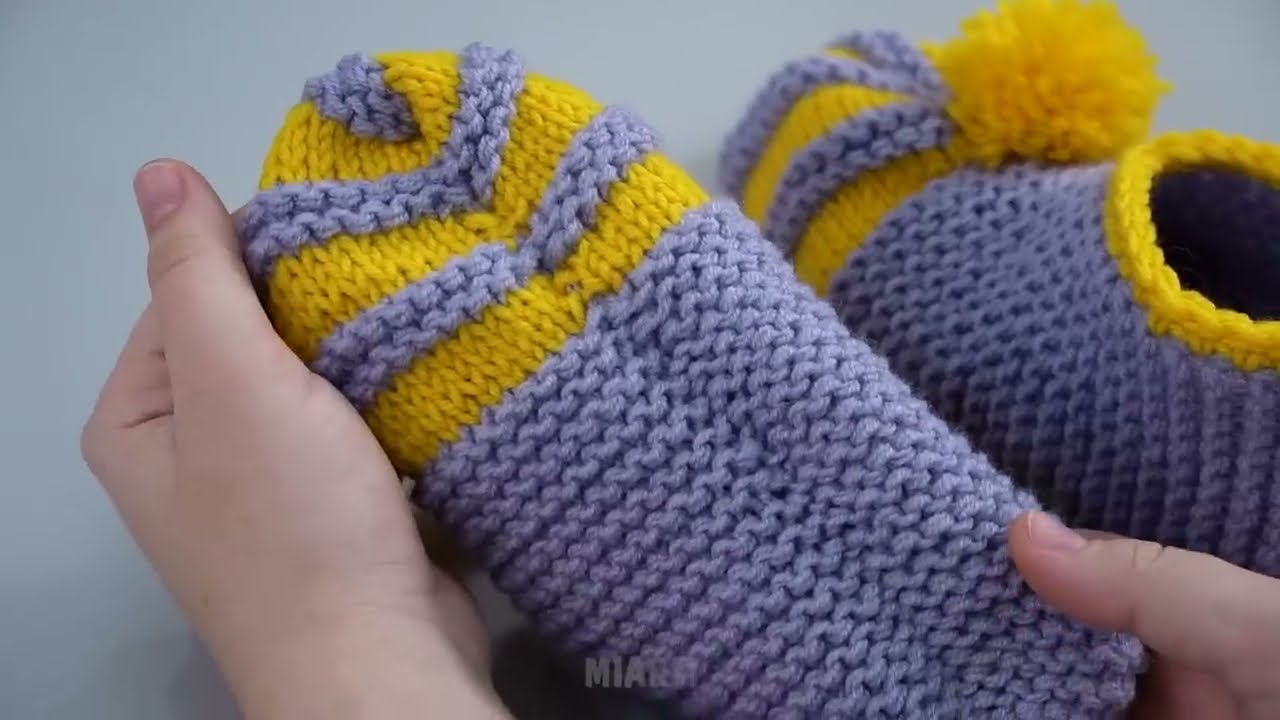
🎉 Turn It Inside Out
Turn your slipper right-side out — the seams will be hidden inside, and the slipper should now look fully shaped!
🌈 Optional Add-Ons
1. Add a Ribbed Cuff
Pick up stitches around the ankle hole and work:
-
K1, P1 rib for 6–12 rows
OR -
Garter stitch for a simple rolled edge
2. Add a Non-Slip Bottom
Use:
-
Puffy fabric paint
-
Silicone dots
-
Leather patches
Place dots or strips along the sole.
3. Embellishments
-
Pom-poms
-
Buttons
-
Duplicate stitch patterns
-
Contrasting toe/heel colors
📐 Adjusting for Any Size
To change the slipper size:
-
Width: Add/subtract cast-on stitches
-
Length: Knit more/less garter rows before toe shaping
-
Toe height: Add extra garter rows before binding off
-
Foot width: Garter stitch is stretchy — adjust by 2–4 stitches if needed
🧦 Tip for Matching Slippers
Make the second slipper immediately while the first is fresh in your mind — write down:
-
Number of rows before the toe
-
Rows after decreasing
-
How many rows for the cuff (if any)
👍 Would you like…?
I can also provide:
-
A printer-friendly pattern version
-
A chart
-
A crochet version
-
A photo-style step-by-step layout
-
A child-size pattern
-
A more advanced slipper pattern with shaping
Just tell me!
Watch tutorial: