 by
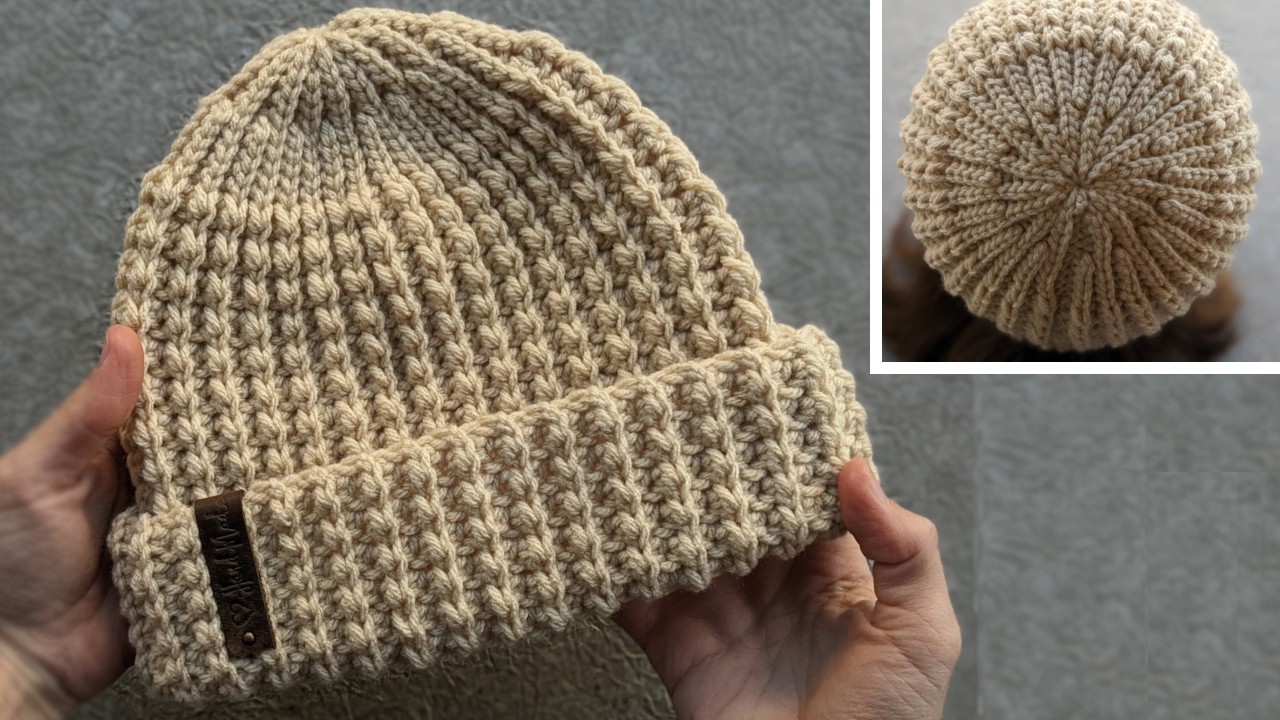
by Sure! Here’s a detailed guide on how to make a crochet flat unisex hat that’s suitable for both men and women. This type of hat is simple, stylish, and versatile — perfect for beginners and a great gift option too.
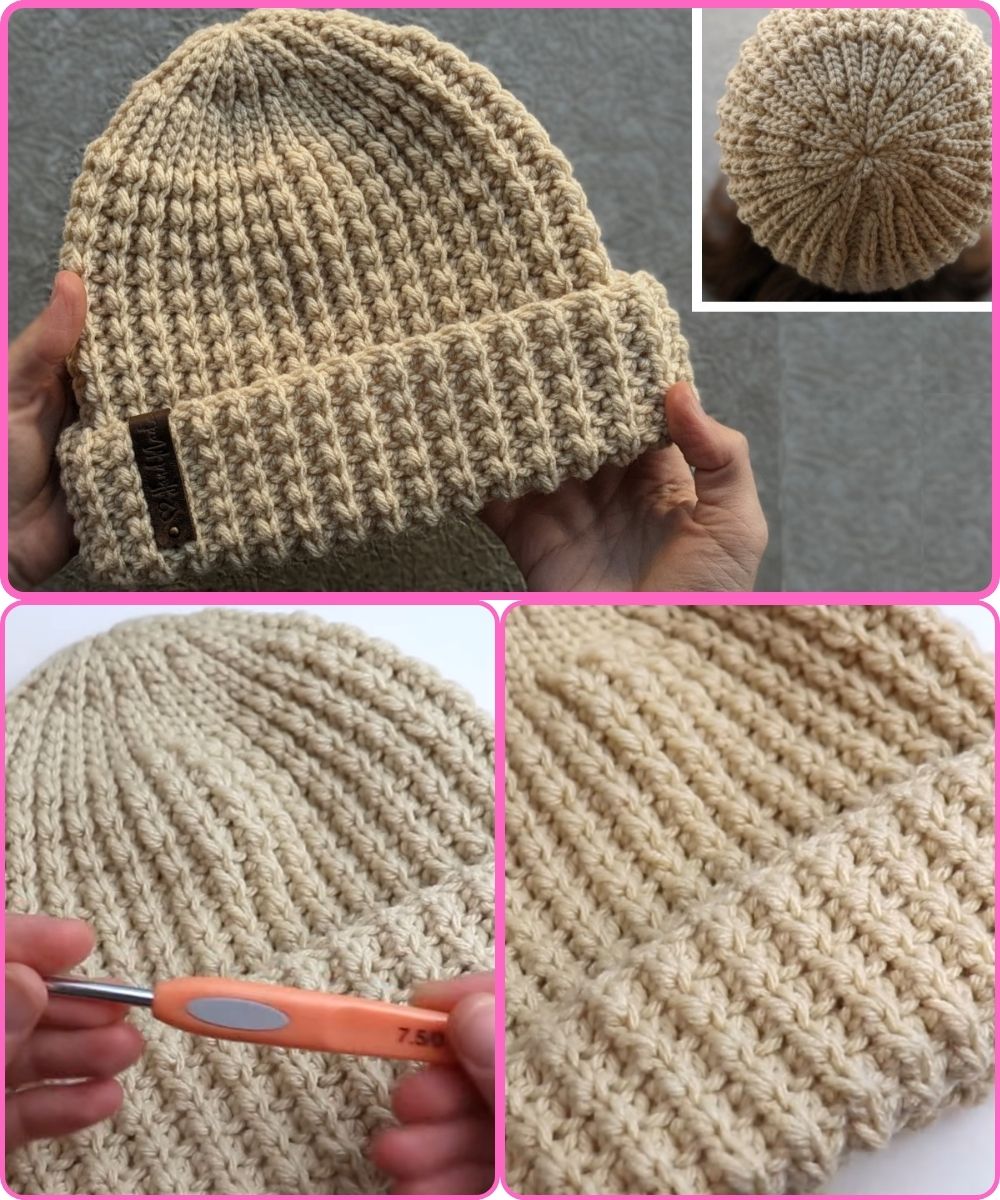
How to Make a Crochet Flat Unisex Hat
(Crochet Hat for Men & Women)
✅ Materials Needed:
-
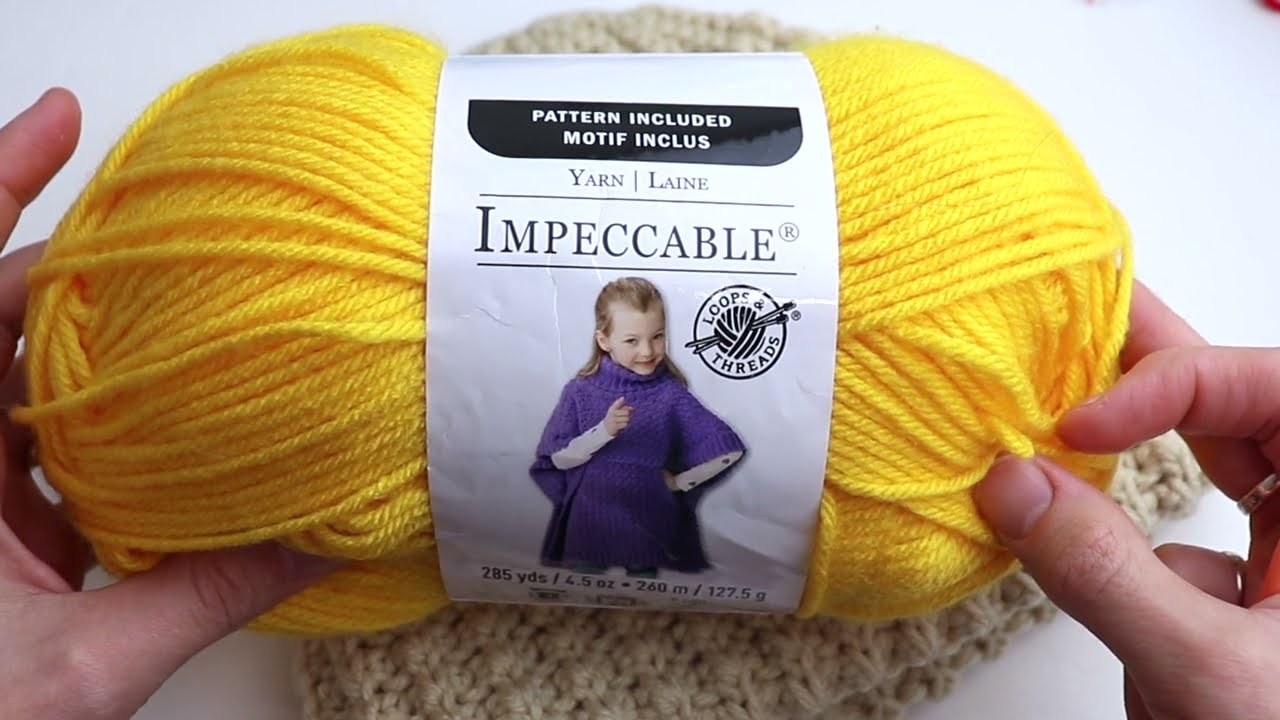
Yarn: Medium-weight yarn (Category 4 – worsted). Use wool for warmth or cotton for a lighter hat.
-
Approx. 100–150g depending on size
-
-
Crochet Hook: 5.0 mm (H/8) – or size recommended for your yarn
-
Tapestry Needle (for weaving in ends)
-
Scissors
-
Stitch Marker (optional but helpful)
Pattern Style:
This pattern creates a flat hat, which is made as a rectangle, then sewn together and gathered at the top. Great for unisex fashion — you can easily adjust the size and length.

✨ Step-by-Step Instructions
Step 1: Determine Hat Size
Measure the head circumference and height of the hat. Use this chart as a general reference:
| Size | Head Circumference | Hat Height |
|---|---|---|
| Teen/Adult S | 21–22” (53–56 cm) | 8–9” (20–23 cm) |
| Adult M/L | 22–24” (56–61 cm) | 9–10” (23–25 cm) |
Step 2: Crochet the Flat Panel
Pattern: Ribbed Texture (Stretchy and stylish)
Use Back Loop Only Half Double Crochet (BLO HDC) for a stretchy ribbed look.
-
Foundation Row:
-
Chain (CH) the height of the hat. (e.g., CH 40 for 9” height)
-
-
Row 1:
-
HDC in the 2nd chain from hook and in each stitch across.
-
Turn your work.
-
-
Row 2 onward:
-
CH 1, HDC in back loop only (BLO) across.
-
Turn.
-
-
Repeat until the panel length equals the head circumference (around 21–23 inches or until it comfortably wraps around the head).

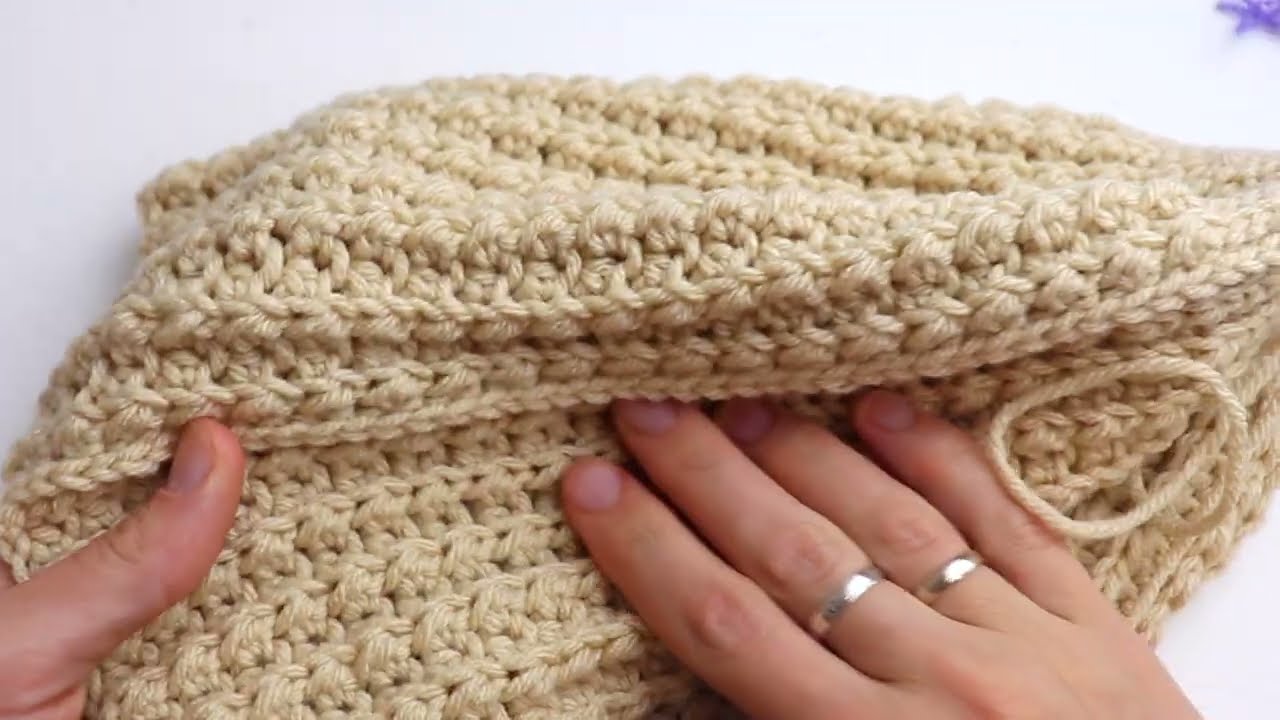
Step 3: Seam the Edges
-
Fold the panel in half (short sides together).
-
Use slip stitches or a tapestry needle to seam the two edges together to form a tube.
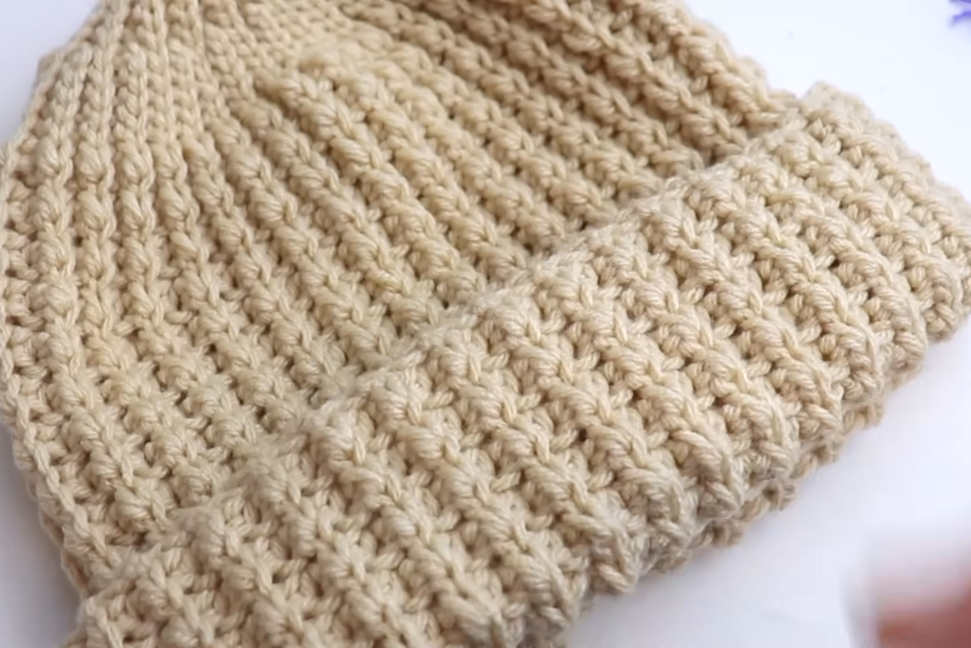
Step 4: Gather the Top
-
Thread a long piece of yarn through your tapestry needle.
-
Weave the yarn around the top edge of the tube (one round of running stitch).
-
Pull tight to cinch the top closed.
-
Secure and knot tightly.
-
Optionally, add a pom-pom or button on top.

Step 5: Finishing
-
Weave in all loose ends with the tapestry needle.
-
Block lightly if desired (especially for cotton yarn).
-
Try it on — done!
Customization Tips
-
Add color: Use stripes or color blocks.
-
Add brim: Fold up the bottom for a cuffed beanie look.
-
Change stitches: Try single crochet or double crochet for different textures.
-
Pom-pom: Add one on top for style!
Perfect For:
-
Men, women, teens — unisex and stylish.
-
Gift-giving, markets, winter accessories.
-
Beginners looking to master simple stitches with a functional project.
Watch tutorial: