 by
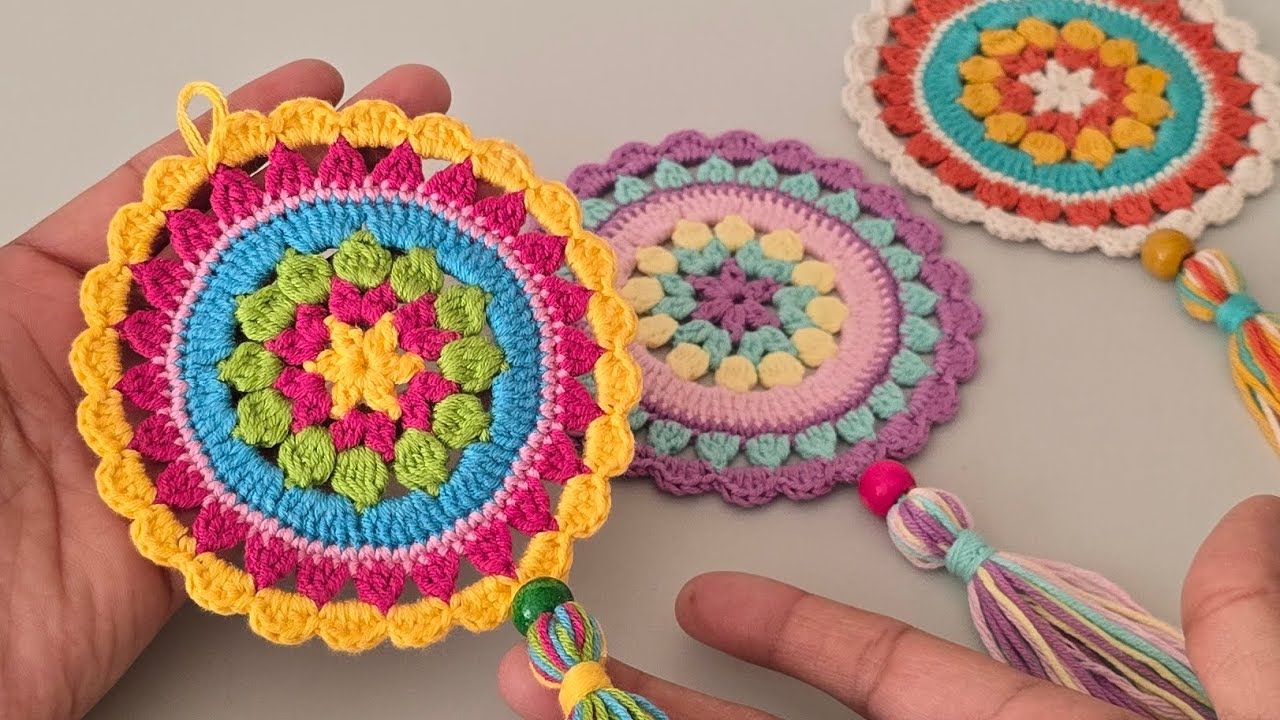
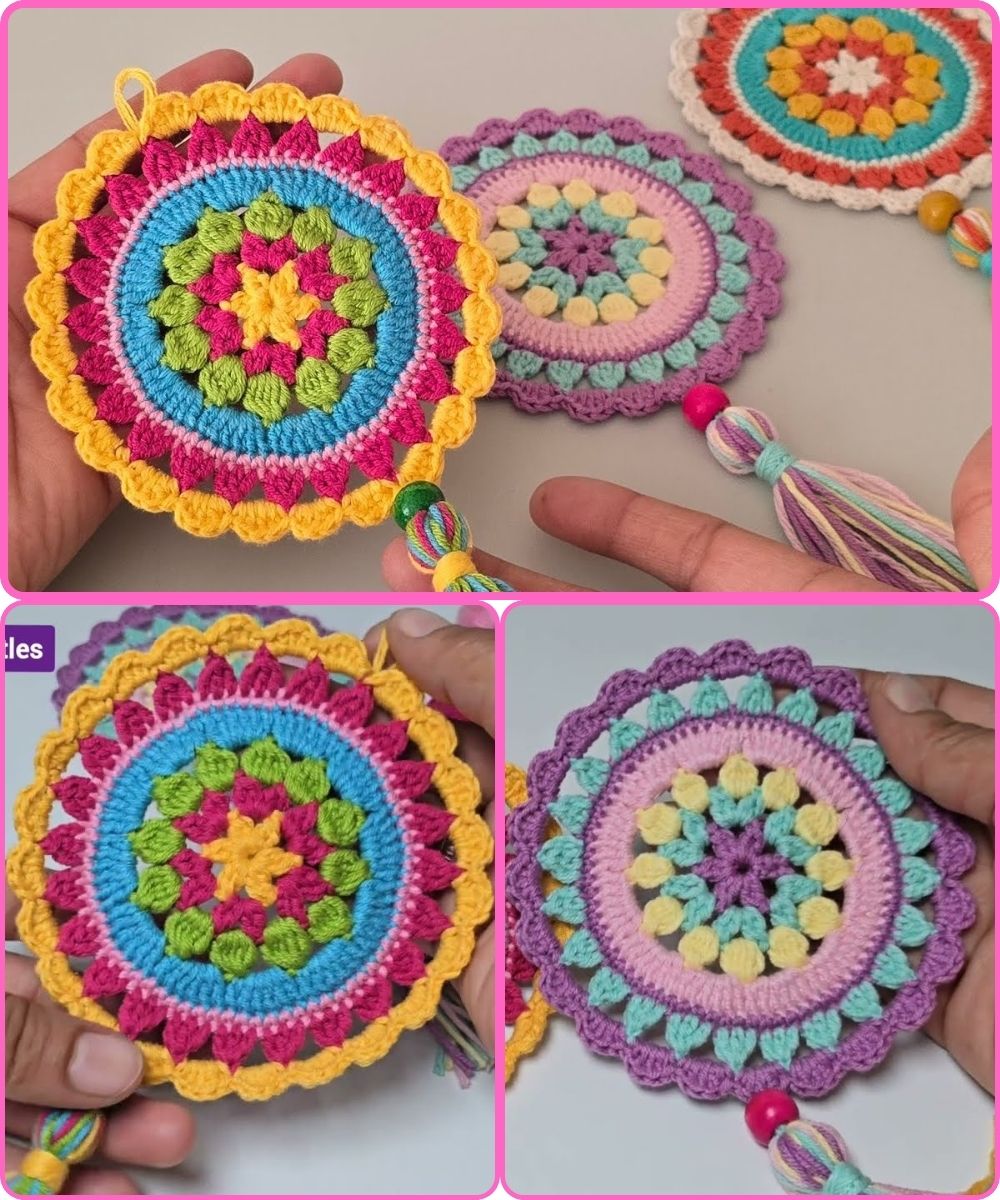
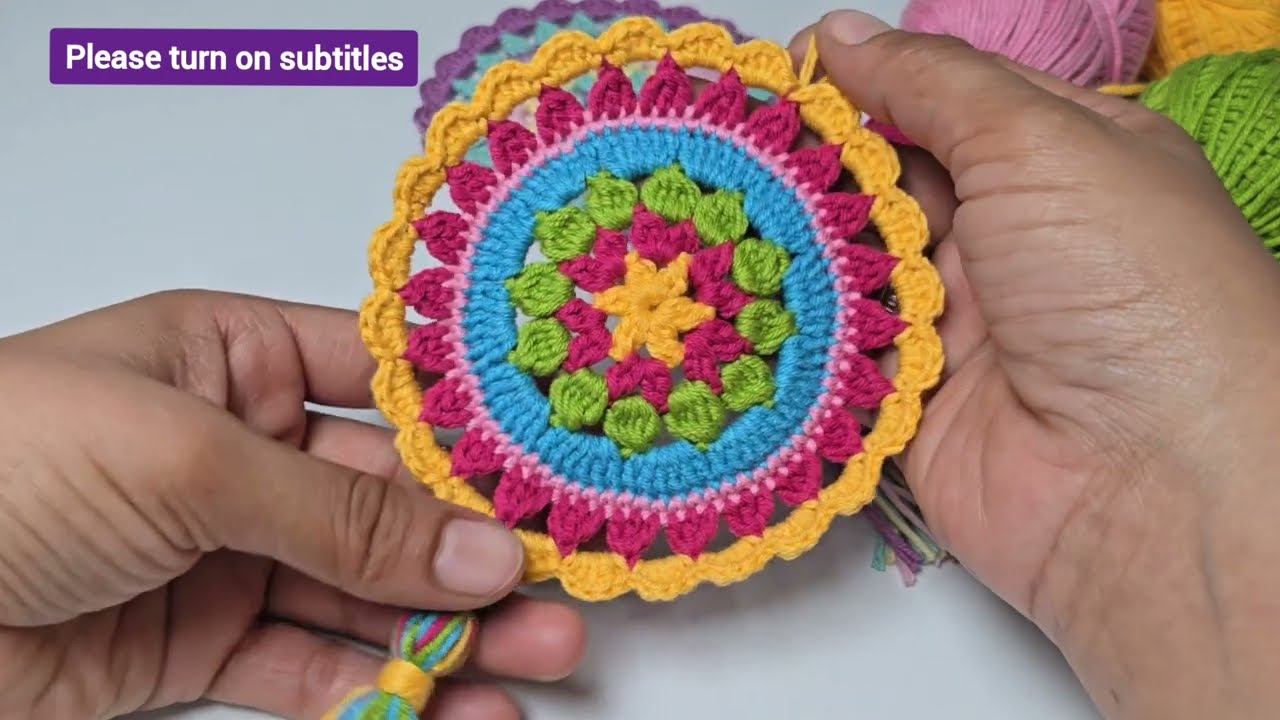
by Imagine a splash of color dancing in the breeze on your balcony, or a whimsical touch adding charm to your garden. That’s exactly what we’re going to create today: a beautiful, handcrafted crochet mandala! These intricate yet surprisingly achievable pieces are perfect for adding a bohemian flair to your outdoor spaces, or even as unique indoor wall art. This tutorial will guide you through each colorful row, resulting in a stunning mandala approximately 11 cm wide. Let’s get hooked on this delightful project!
Materials You’ll Need
To bring your mandala to life, gather these essential supplies:
- Yarn: The video recommends 5-ply, 50% acrylic, 50% cotton medium thickness threads. You’ll want at least 4-5 different colors to create the vibrant, layered effect of a mandala. Choose colors that complement each other or stand out boldly!
- Crochet Hook: A 2.20 mm crochet hook is suggested for a tight, defined stitch that will help your mandala hold its shape.
- Scissors: For cutting yarn.
- Yarn Needle (Tapestry Needle): For weaving in all those colorful ends!
- Optional: A small amount of extra yarn for a hanging chain or tassel for decoration.
Let’s Get Crocheting! Step-by-Step Instructions
This mandala uses a combination of basic stitches and clever color changes to create its intricate design. Don’t worry if it looks complicated – we’ll go row by row!
Step 1: Starting the Mandala (Color 1)
- Magic Ring: Begin by making a magic ring (also known as a magic circle or adjustable ring). This creates a tight center for your mandala.
- Row 1: Chain 3 (counts as your first double crochet). Work 2 double crochets (DC) into the magic ring. Chain 3. Repeat this sequence (3 DC, Chain 3) five more times, for a total of 6 groups of 3 DC with 3 chains in between each group. Join with a slip stitch to the top of the initial chain 3. Fasten off and weave in ends.

Step 2: Introducing V-Stitches (Color 2)
- Attach New Color: Attach your second color to any of the chain-3 spaces from the previous row.
- Row 2: Chain 3 (counts as first DC). Work (1 DC, Chain 1, 1 DC) into the same chain-3 space. This forms your first V-stitch. Repeat (1 DC, Chain 1, 1 DC) in each subsequent chain-3 space around. Join with a slip stitch to the top of the initial chain 3. Fasten off and weave in ends.
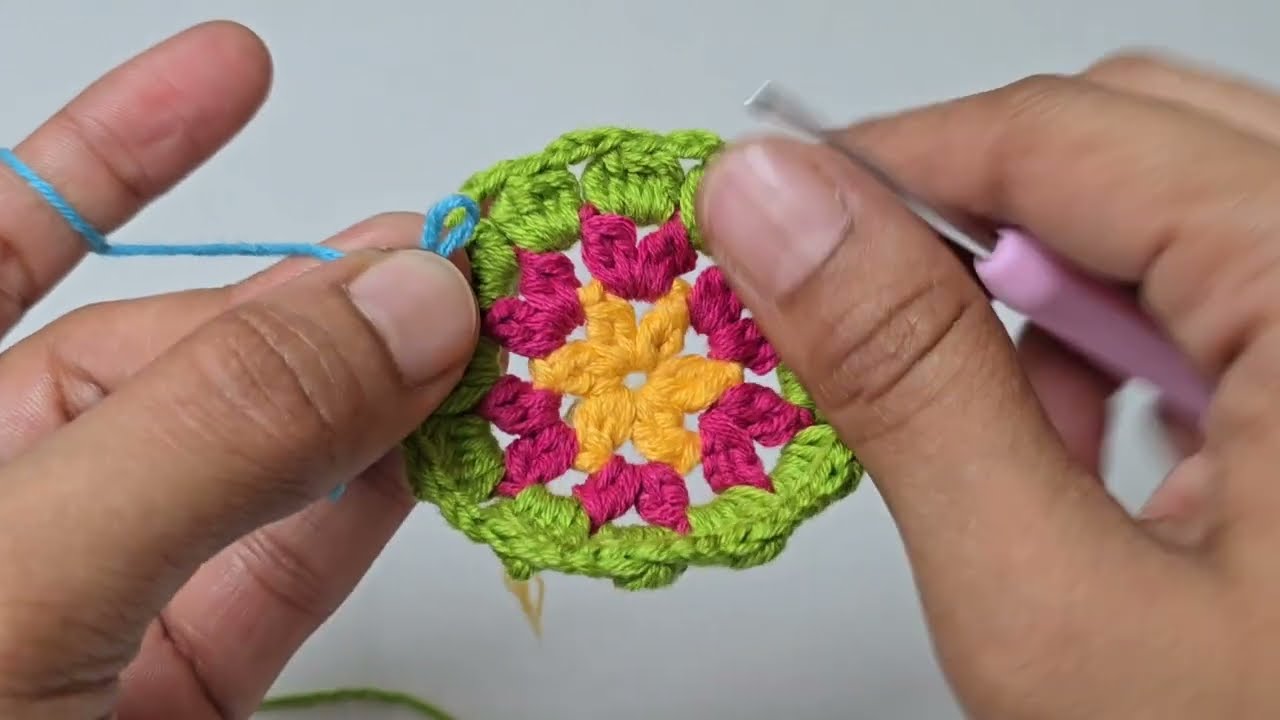
Step 3: Groups of Half Double Crochet (Color 3)
- Attach New Color: Attach your third color to any of the chain-1 spaces (the “V” of the V-stitch) from the previous row.
- Row 3: Chain 2 (counts as first half double crochet). Work 3 half double crochets (HDC) into the same chain-1 space, for a total of 4 HDC in that space. Repeat (4 HDC) in each subsequent chain-1 space around. Join with a slip stitch to the top of the initial chain 2. Don’t worry if this row seems to curl inwards slightly; the video notes that this will flatten out in the next row! Fasten off and weave in ends.
Step 4: Double Crochets and Shaping (Color 4)
- Attach New Color: Attach your fourth color to any stitch at the top of a group of 4 HDC from the previous row.
- Row 4: Chain 3 (counts as first DC). Work 1 double crochet (DC) into the top of the same group of HDC. Then, in the space between the groups of HDC, work 5 double crochets (DC). Alternate between 1 DC on top of a group and 5 DC in the space between groups around the entire row. Join with a slip stitch to the top of the initial chain 3. Fasten off and weave in ends.
Step 5: Single Crochet Border (Color 5 – or repeat Color 1)
- Attach New Color: Attach your fifth color (or re-use an earlier color for continuity) to any stitch from the previous row.
- Row 5: Chain 1 (does not count as a stitch). Work 1 single crochet (SC) into the top of every double crochet from the previous row. This creates a neat, even border and helps flatten any remaining curl. Join with a slip stitch to the initial chain 1. Fasten off and weave in ends.

Step 6: Combined Stitches and Chain Spaces (New Color)
- Attach New Color: Attach a new color to any stitch from the previous row.
- Row 6: This row involves a combination of stitches and creating chain spaces. The video shows combining half double crochet (HDC) and double crochet (DC) stitches, closing loops together (like a cluster stitch), and then creating 4-chain spaces. This creates the open, lacy effect for the outer edge. Follow the video closely for the specific stitch pattern here, as it’s a bit more intricate. Join with a slip stitch.
Step 7: Final Decorative Edge (New Color)
- Attach New Color: Attach a new color to any of the 4-chain spaces from the previous row.
- Final Row (Row 7 implied): In each 4-chain space, work the following sequence: 1 single crochet (SC), 3 double crochets (DC), 1 single crochet (SC). This creates a beautiful scalloped edge around your mandala. Join with a slip stitch. Fasten off and make a hidden join for a seamless finish.
Finishing Touches & Decoration
- Weave in All Ends: This is crucial for a professional and tidy finish. Take your time to weave in all the loose yarn tails.
- Blocking (Optional but Recommended): Gently wet your mandala and pin it out to your desired shape on a foam board or towel. Let it dry completely. This will help open up the stitches and give your mandala a crisp, flat appearance.
- Hanging Chain: For hanging, make a chain of desired length (e.g., 20-30 chains) and attach it to the top of your mandala.
- Decorate the End: Add a tassel, beads, or other decorative elements to the bottom of your mandala for an extra touch of charm, as shown in the video.
Your Mandala is Ready to Shine!
Congratulations! You’ve just created a stunning, unique crochet mandala. Hang it in your garden, on your balcony, or anywhere you want to add a handmade touch of beauty and color. Enjoy the compliments on your beautiful work!
Watch tutorial:
https://www.youtube.com/watch?v=Tw50wbtvQr0