 by
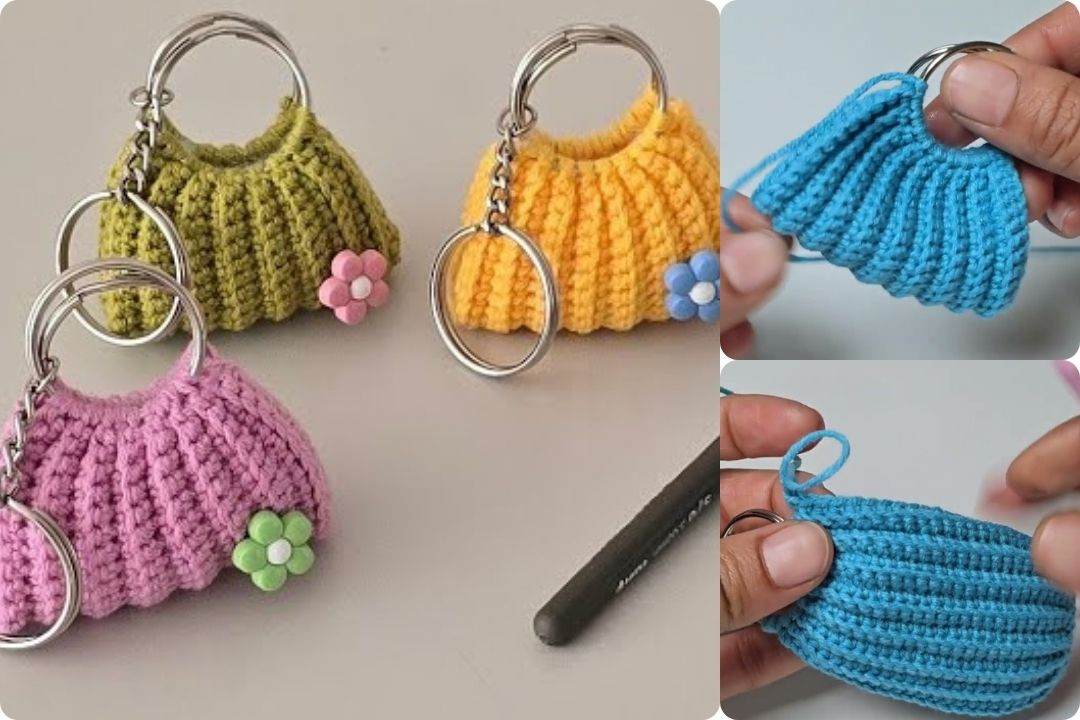
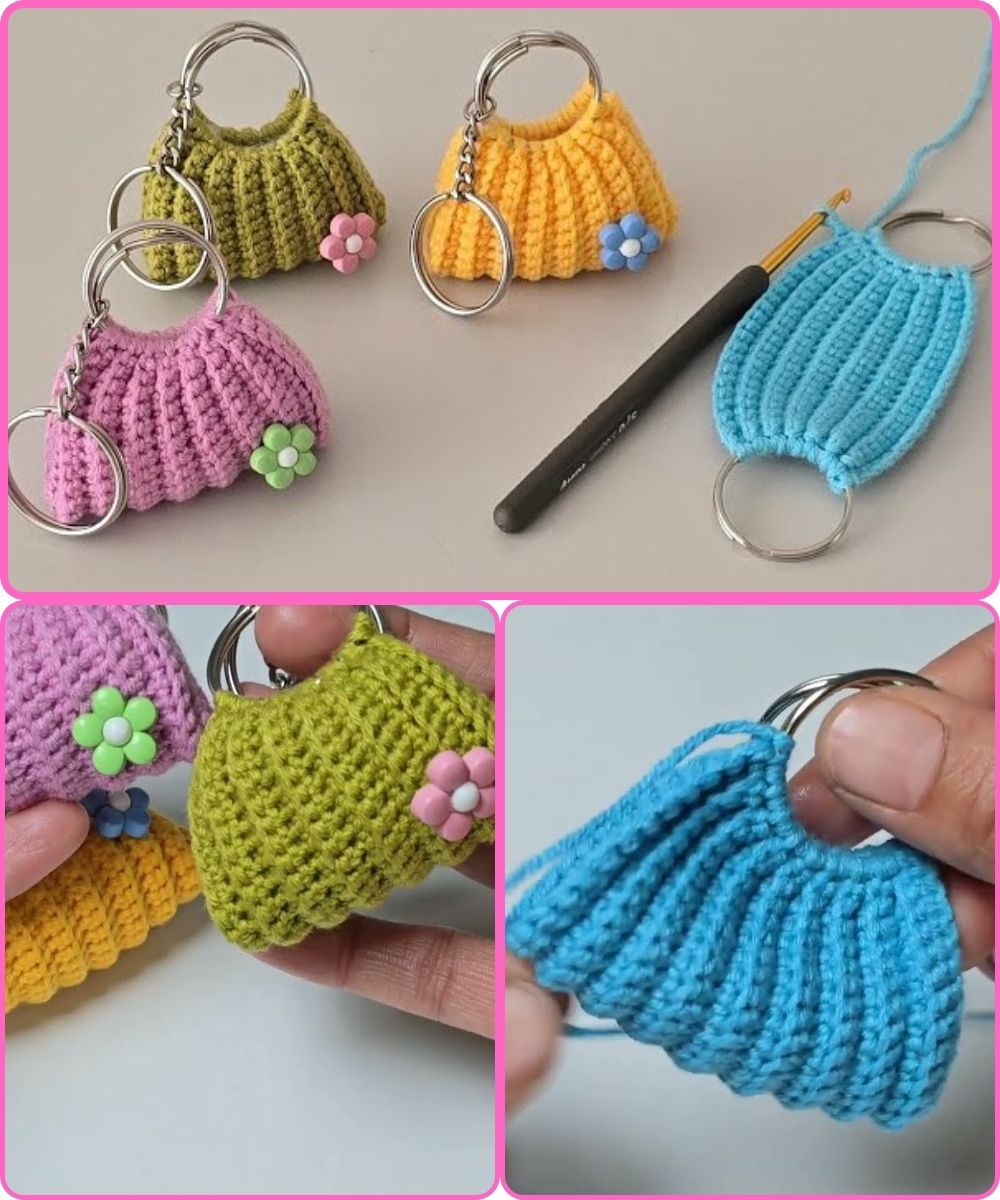
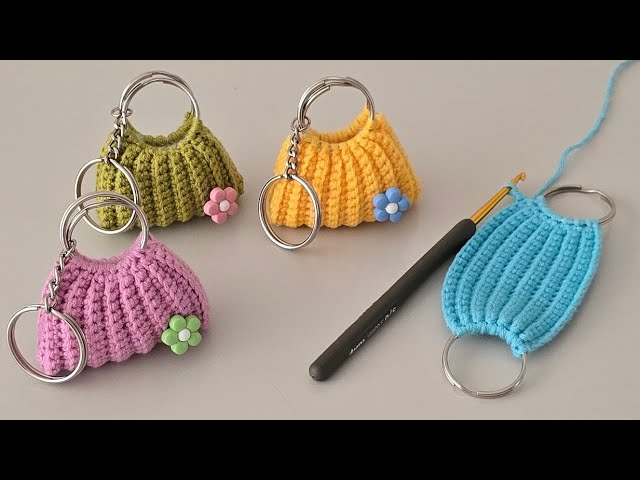
by Looking for a charming, handmade accessory or a unique gift idea? This delightful amigurumi bag keychain is not only incredibly cute but also surprisingly easy and fast to make, even for beginners! Get ready to hook up some miniature cuteness with this step-by-step guide.
Your Crafting Checklist: Materials You’ll Need
Before we dive into creating your tiny bag, gather these essential materials:
- Yarn/Rope: 4-ply cotton rope is recommended for a sturdy finish, but any similar weight yarn will work.
- Crochet Hook: A 2.20 mm crochet hook, or a size appropriate for your chosen yarn/rope to achieve a tight, neat fabric.
- Keychain Clips:
- Two small keychain clips: These will be for the bag handles.
- One larger keychain clip: This will be the main clip for the keychain itself.
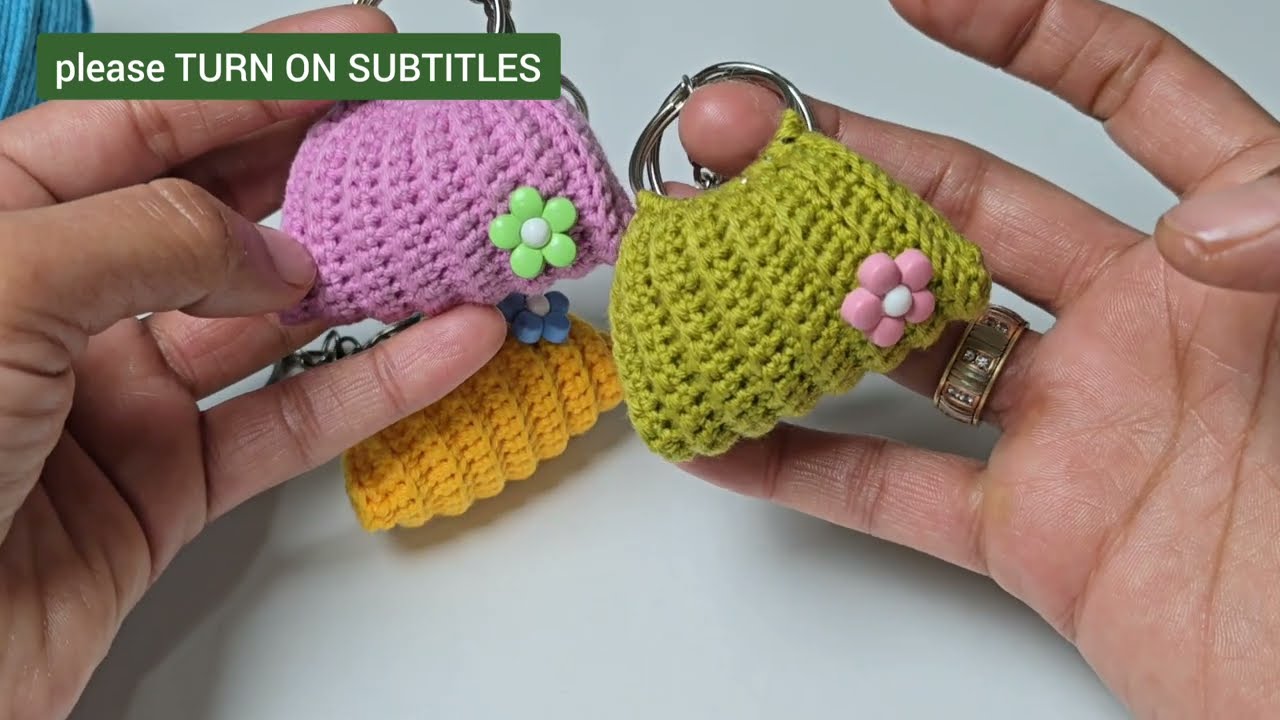
- Decorative Buttons: Small daisy-shaped buttons or any other cute buttons for embellishment.
- Bead Fiber (Stuffing): A small amount of fiberfill to give your bag a plump, lovely shape.
- Yarn Needle: Essential for weaving in ends and sewing the bag together.
- Scissors: For cutting your yarn/rope.
Let’s Get Hooking: Crafting Your Mini Bag!
Follow these instructions carefully, and you’ll have an adorable amigurumi bag in no time!
Part 1: Preparation – Getting Your Clips Ready
- Detach Chains: Take the two small keychain clips for the handles. Carefully remove the chain links from these two clips. You’ll only need the main clip part.
Part 2: Crocheting the Bag – The Body
We’ll create a flat rectangular piece that will form the body of your bag.
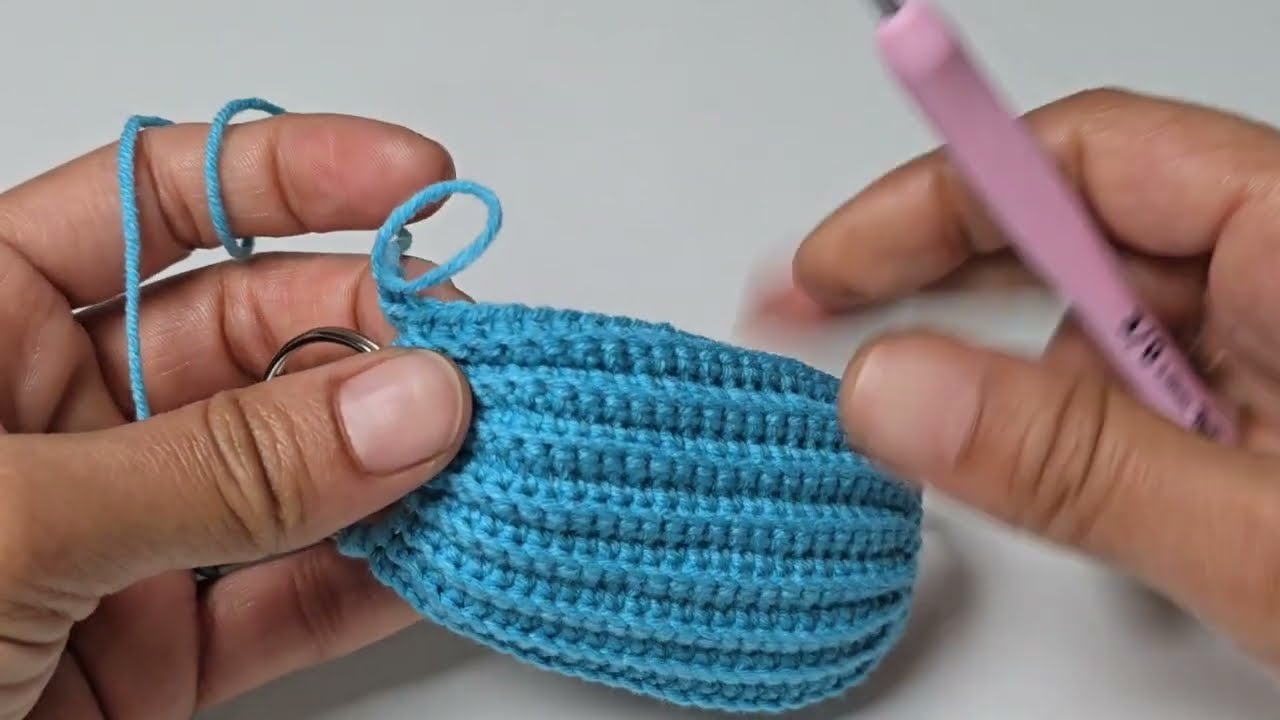
- Starting Chain: Make a slip stitch to secure your thread. Then, chain 25 stitches. This will determine the height of your bag.
- Tip: If you want a taller bag, increase the number of initial chains.
- Row 1: Make a slip stitch into the second chain from your hook. Then, work 1 single crochet (sc) into each of the remaining 24 chains. You will have 24 sc stitches.
- Subsequent Rows (Working in Back Loops Only):
- Chain 1 (does not count as a stitch).
- Make a slip stitch through the ring (this helps secure the row).
- Work 1 single crochet (sc) into the back loop only of each of the 24 stitches across the row.
- Repeat this process until your piece reaches the desired width for your bag. The tutorial suggests making a total of 17 rows.
- Tip: Increasing the number of rows will make your bag wider.
- Finishing the Piece: After completing your last single crochet, make one final chain. Cut your yarn/rope, leaving a long tail (at least 12-15 inches) for sewing the sides of the bag.

Part 3: Assembling Your Bag – From Flat to Fabulous!
Now, let’s transform your flat crocheted piece into a cute little bag.
- Fold and Sew Sides:
- Fold your crocheted rectangle in half, bringing the two short ends together.
- Using your yarn needle and the long tail you left, sew the sides of the bag together. Work through the inside of the front and back loops of the stitches on both edges. This creates a neat seam.
- Repeat for both sides of the bag.
- Turn Inside Out: Once both sides are sewn, carefully turn your bag inside out. This will hide the seams and give your bag a clean finish.
- Stuffing: Gently add the bead fiber (stuffing) through the opening of your bag until it’s plump and holds its shape. Don’t overstuff!
- Sew on Buttons: Using your yarn needle and a small piece of matching yarn, sew your decorative buttons onto the front of your bag.
- Assemble Handles and Keychain:
- Take the two small keychain clips (the ones you removed the chains from). Attach one to each side of the bag’s opening, acting as the handles.
- Finally, attach the larger keychain clip to one of the small bag handle clips.
Your Tiny Bag is Ready for Adventure!
Congratulations! You’ve successfully crocheted an incredibly charming amigurumi bag keychain. These make fantastic personalized gifts, delightful additions to your own bag, or simply a fun little project to brighten your day. Experiment with different colors and button styles to create a unique collection!
Happy crocheting!
Watch tutorial:
https://www.youtube.com/watch?v=ZKgrkTutnsM