by
by Creating a crochet jacket in all sizes—from baby to plus-size adult—requires a flexible pattern structure, sizing knowledge, and customization options. Here’s a step-by-step guide to help you design and make a crochet jacket for any size, with detailed notes on materials, measurements, construction, and adjustments.
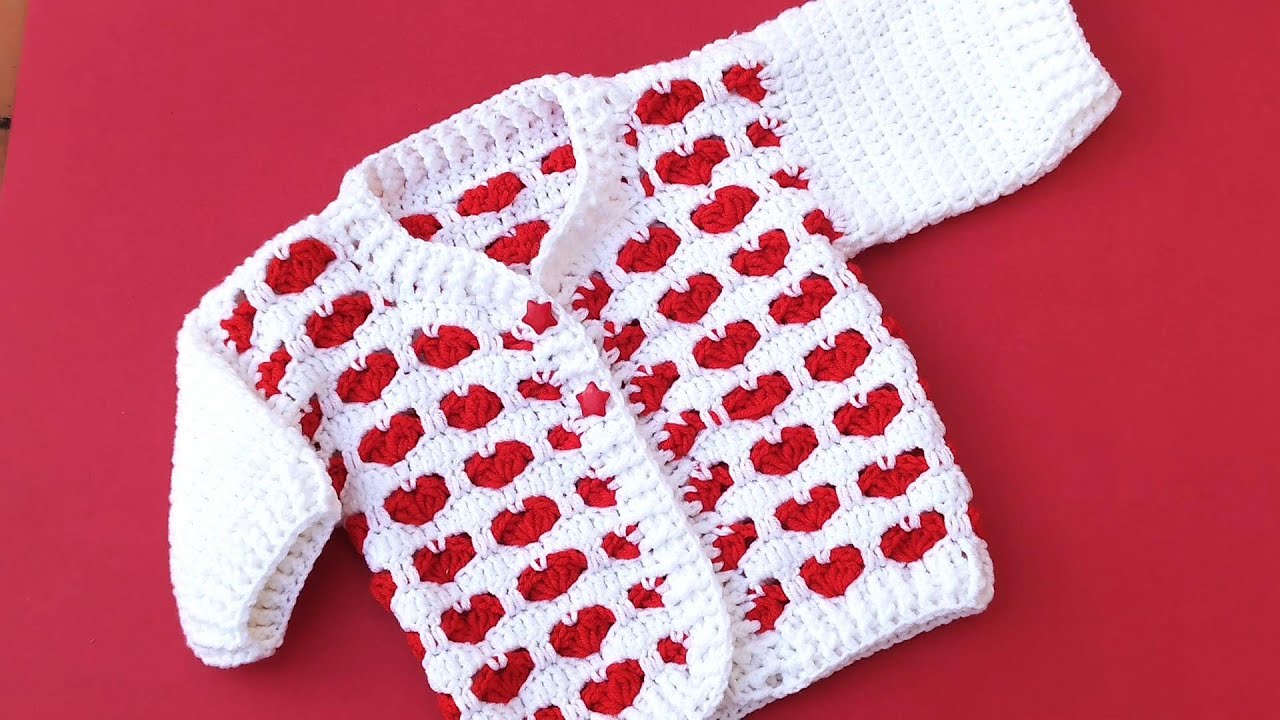
HOW TO MAKE A CROCHET JACKET IN ALL SIZES
Step 1: Choose a Style
Decide what kind of jacket you want to make:
-
Open-front cardigan
-
Zippered jacket
-
Buttoned jacket
-
Hooded or collarless
-
Cropped, hip-length, or longline
For this guide, we’ll focus on a basic open-front cardigan jacket. You can add variations later.
Step 2: Understand Sizing & Measurement
A. Take Body Measurements
You need these key measurements:
| Body Part | Measurement Needed |
|---|---|
| Bust/Chest | Fullest part around chest |
| Shoulder width | From one shoulder edge to the other |
| Arm length | From shoulder to wrist |
| Upper arm | Around bicep |
| Back length | From neckline to bottom hem |
| Waist (optional) | For shaping |
B. Reference a Size Chart (for standard sizes)
Use the Craft Yarn Council’s size chart (in inches or cm) for XS to 5XL and children sizes:
Step 3: Choose Yarn and Hook
| Yarn Weight | Jacket Type |
|---|---|
| DK/Light (#3) | Lightweight for spring/summer |
| Worsted (#4) | All-purpose |
| Bulky (#5-6) | Warm, chunky jackets |
Hook size: Use what’s recommended on the yarn label (typically 5mm–6.5mm for worsted).
✅ Tip: Make a gauge swatch before starting!
Step 4: Calculate Your Gauge
Make a 4″ x 4″ (10×10 cm) swatch in your chosen stitch pattern.
For example:
-
16 stitches x 12 rows = 4 inches (your gauge)
Use it to calculate:
-
How many stitches you need for bust width
-
How many rows for body length
Formula Example:
If your bust is 40 inches and you have 4 stitches per inch → 40 × 4 = 160 stitches
Step 5: Choose Construction Method
♀️ A. Flat Panels (Modular)
-
1 Back Panel
-
2 Front Panels (left/right)
-
2 Sleeves
-
Optional: Ribbing, hood, collar, or edging
B. Top-Down (Raglan)
-
Made in one piece from neckline down
-
Add sleeves separately or in-the-round
For beginners: use flat panel construction—easier to size and assemble.
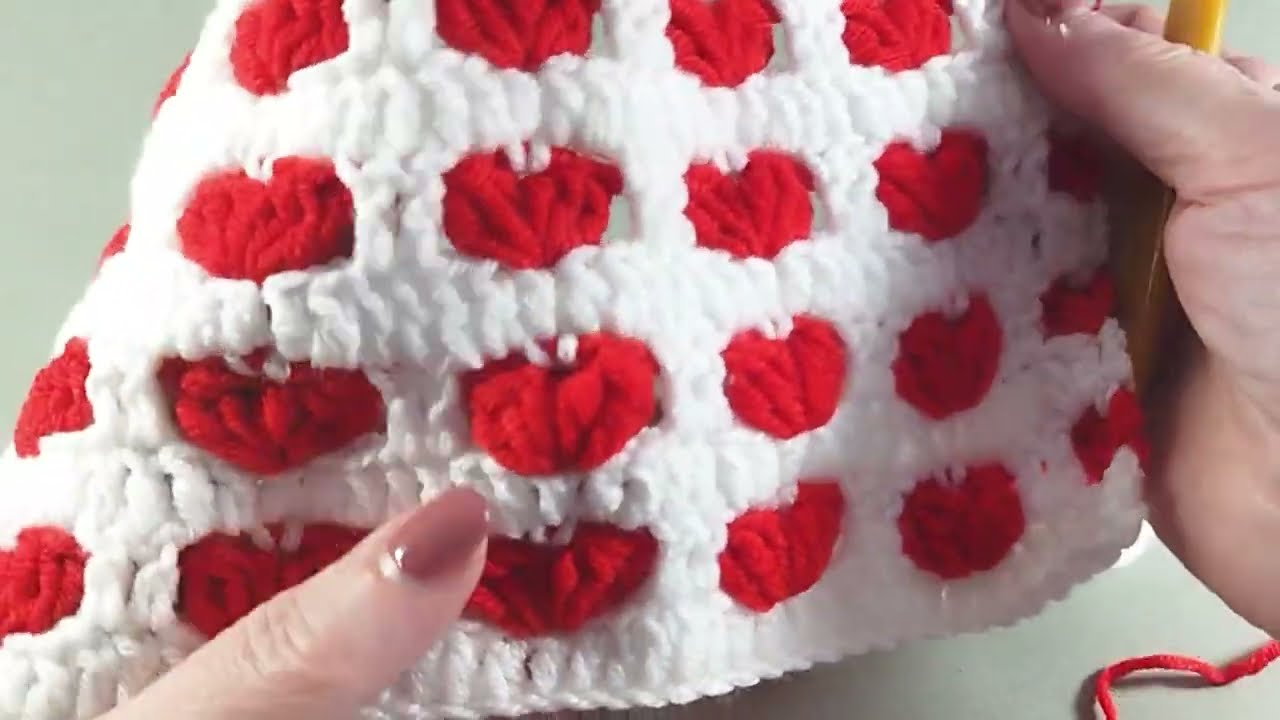
Step 6: Start Crocheting – Flat Panel Jacket Pattern (Customizable for Any Size)
✳️ Stitch Pattern: Half Double Crochet (hdc) – Simple and stretchy
1️⃣ Back Panel
-
Width = Half of bust + ease (e.g., 42” bust → 22” panel width)
-
Foundation chain = Width × stitch gauge
-
Rows = Desired jacket length × row gauge
2️⃣ Front Panels (2)
-
Width = Back Panel ÷ 2
-
Rows = Same as back
Optional: Add shaping at neckline or armholes
3️⃣ Sleeves
-
Width = Upper arm circumference + ease
-
Length = Arm length from shoulder to wrist
You can taper the sleeves by decreasing a few stitches every few rows.
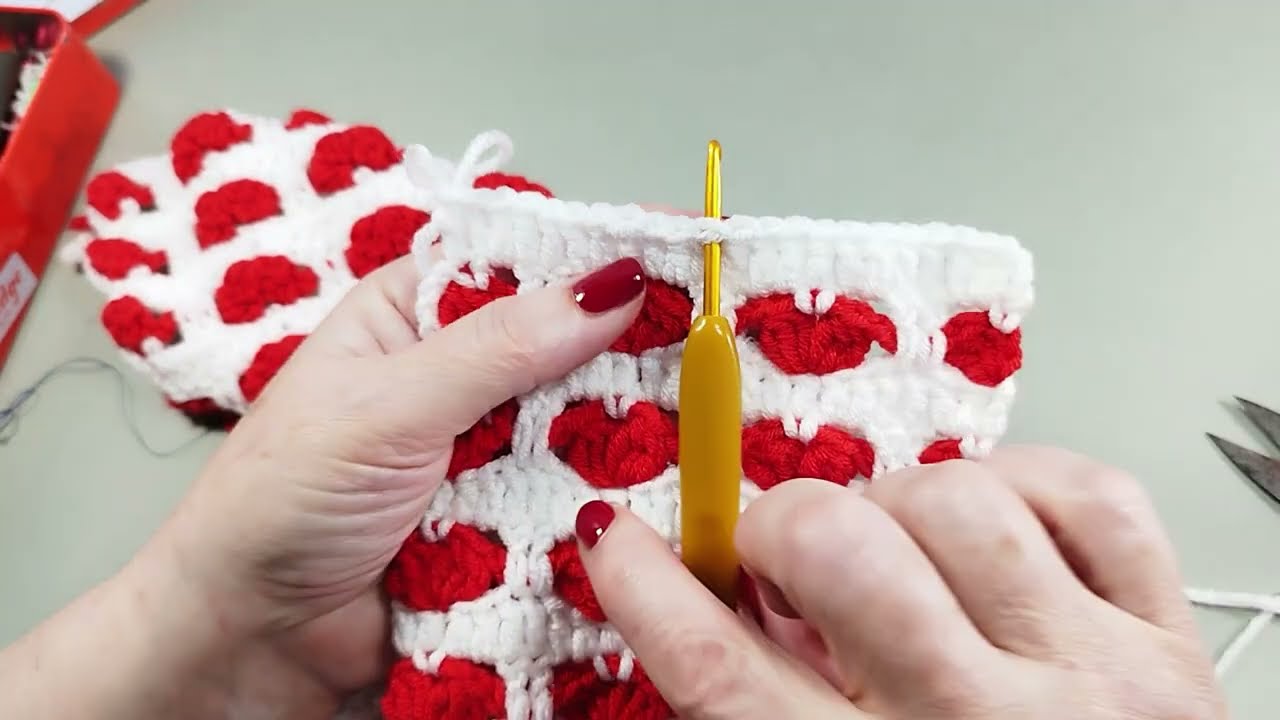
4️⃣ Assembly
-
Sew front panels to back at shoulders
-
Attach sleeves to body
-
Sew sleeve seams and side seams
-
Try on for fit and adjust if needed
5️⃣ Add Edging & Finishing
-
Add ribbing (sc or hdc in back loops) to cuffs, bottom hem, and collar
-
Add buttons, ties, or zipper
-
Weave in all ends
-
Block the jacket (wet or steam blocking)
How to Adjust for Different Sizes
| Adjustment | How to Do It |
|---|---|
| Larger/smaller bust | Add or subtract stitches from each panel |
| Longer sleeves | Add more rows |
| Wider arms | Increase sleeve width at start |
| Add shaping | Use increases/decreases at sides or waist |
| Tall/short length | Adjust row count for torso |
Tip: Create a sizing worksheet to plug in your custom numbers.
Example: Basic Adult Medium Jacket (Bust 38–40”)
| Part | Measurements | Stitch Count (4 st/in) | Rows (12 row/in) |
|---|---|---|---|
| Back panel | 21″ x 25″ | 84 sts wide | 300 rows |
| Front panel (each) | 10.5″ x 25″ | 42 sts wide | 300 rows |
| Sleeve | 15″ x 18″ | 60 sts wide | 216 rows |
(This is just a sample—you’ll calculate your own using your gauge)
Final Notes
-
Use stitch markers to track your rows and shaping
-
Try on the pieces before seaming to ensure a good fit
-
Use a notebook or spreadsheet to track your sizes and stitches for future projects
✅ Optional Enhancements
-
Add pockets
-
Use colorwork (stripes, blocks)
-
Add hood or shawl collar
-
Use fancy stitch patterns (e.g., granny stitch, cables)
Watch tutorial
https://www.youtube.com/watch?v=MlBlp3FGUJk