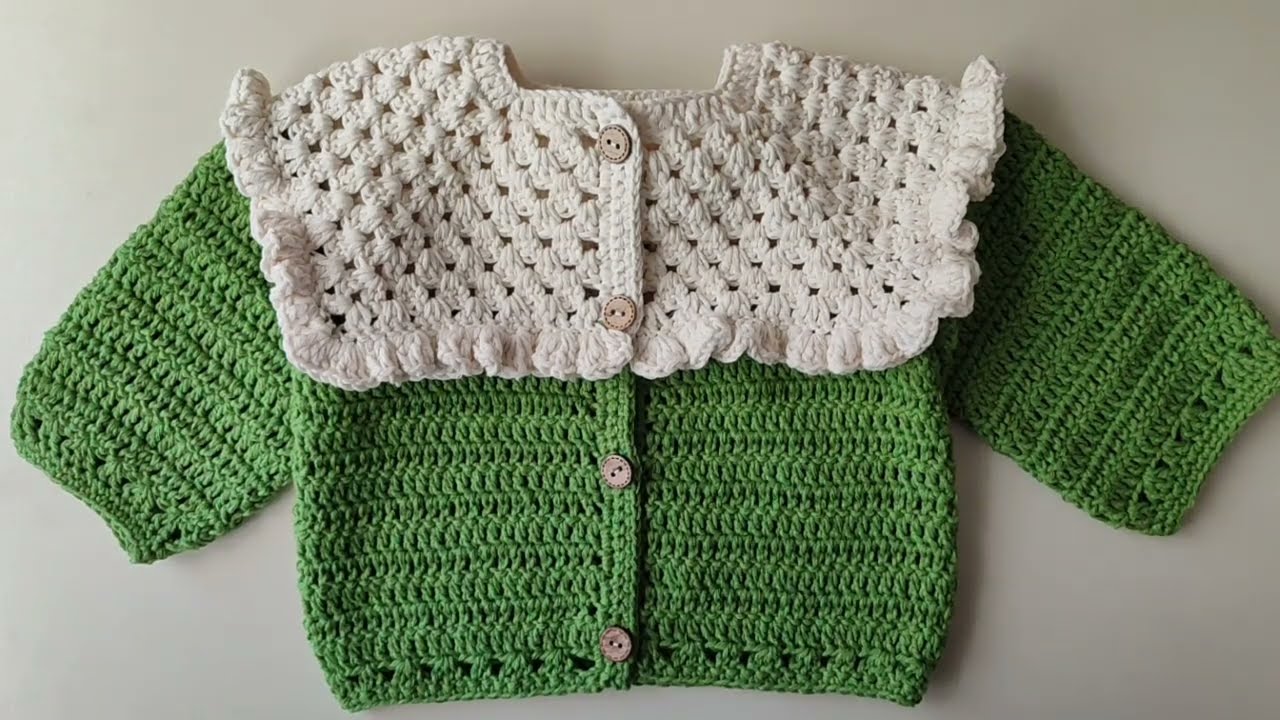
 by
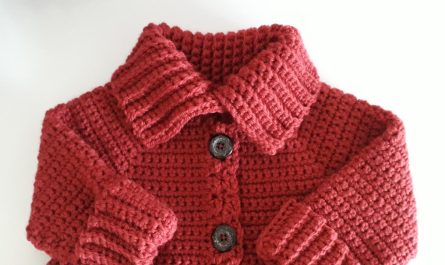
by I couldn’t find a pattern exactly titled “EASYCROCHET COUNTRY MODEL CARDIGAN”, but based on typical “easy crochet country / country‑style cardigan” designs, I can guide you in detail how to make something very similar. If you find more exact details (stitch counts, gauge, schematics) later, you can adapt them into this framework.
Here’s a step‑by‑step, detailed guide to make a “country style” easy crochet cardigan:
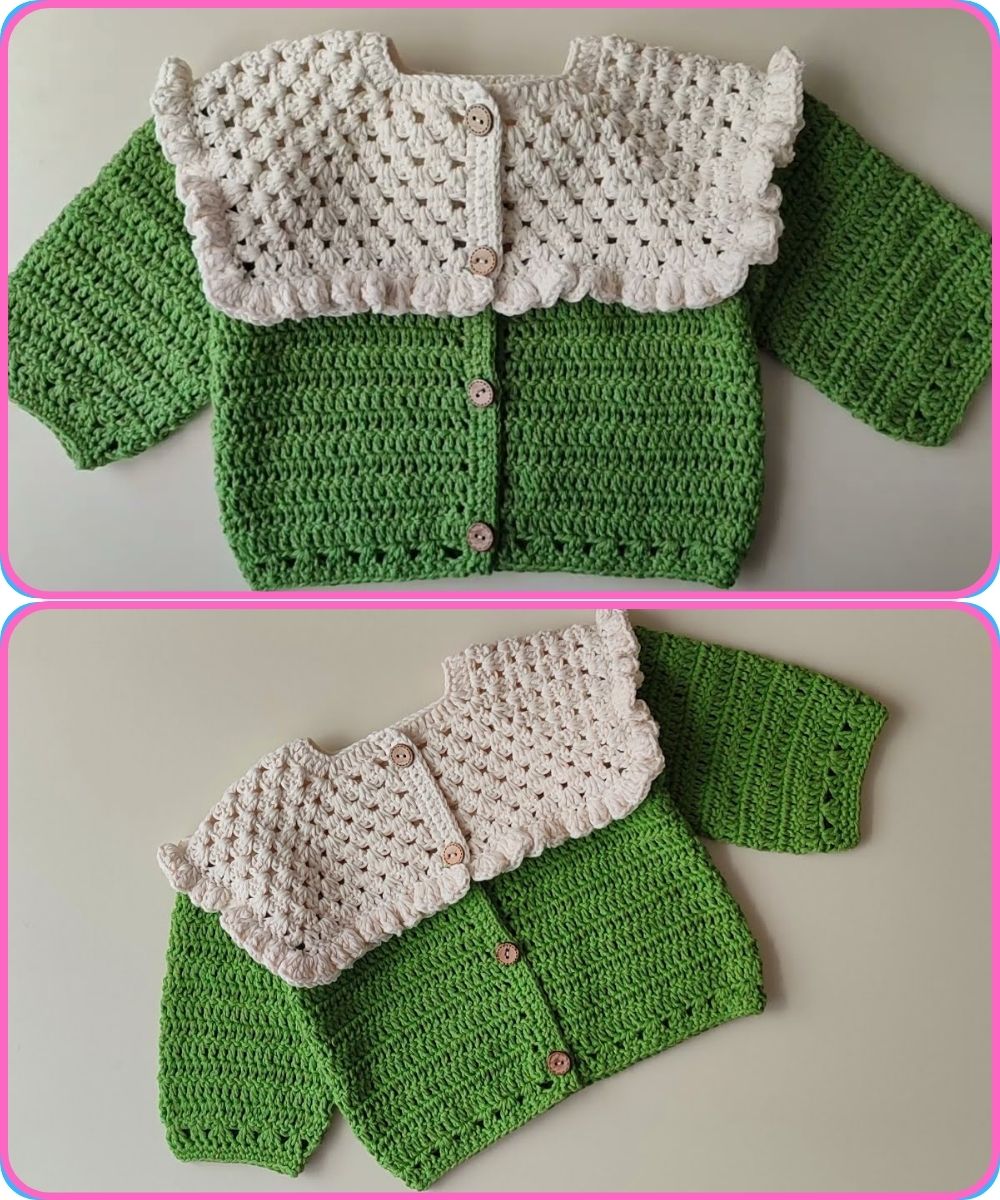
Overview & Design Notes
A “country model” cardigan often refers to a rustic, textured, homespun aesthetic — think simple construction, possibly stripes or color changes, ribbing or textured stitches, and comfortable fit. The version you make can be:
-
Bottom-up (start from hem, work up, then split for sleeves)
-
Top-down (start from neck or yoke)
-
Modular / panel / granny squares
-
With or without pockets, belts, ribbed edges, etc.
To make it “easy,” the pattern should use mostly basic stitches (chain, single crochet (sc), half double crochet (hdc), double crochet (dc)) or simple stitch combinations, with minimal shaping.
Below is a sample method using a bottom-up construction with simple stripes or color changes.
Materials & Tools
-
Yarn: Choose a worsted / DK / medium weight yarn (or whatever weight you prefer), in one or more colors.
-
Crochet Hook: Size appropriate to your yarn (check yarn label).
-
Stitch markers
-
Tapestry (yarn) needle
-
Scissors
-
Tape measure or ruler
-
Buttons (if you’re doing a buttoned front)
-
Block/finishing tools (spray bottle, blocking mats)
Optional:
-
Extra contrast yarn for stripes, ribbing, or detailing
-
Elastic ribbing yarn (if you want stretch in cuffs)
Gauge & Sizing
-
Gauge swatch: Crochet a small square (e.g. 10 × 10 cm or 4 × 4 in) using your intended stitch pattern (for example, using double crochet or half double crochet) to see how many stitches and rows per cm/inch.
-
Decide finished measurements: bust/chest width + ease, cardigan length from shoulder to bottom, sleeve length, armhole depth, shoulder width, etc.
-
Calculate stitches: Use your gauge to convert your desired widths/lengths into stitch counts and row counts.
-
Adjust for motif repeats (e.g. if your stitch pattern repeats every 3 or 4 stitches, make starting chain a multiple of that plus a few extra for turning or edges).
Sample Construction Method (Bottom-Up + Split for Armholes)
Below is a detailed sketch of how you might build the piece.
1. Hem / Ribbed Bottom Edge (Optional)
-
Start with a foundation chain wide enough for the back + 2 front panels (for full width).
-
Work a few rows of ribbing or textured stitches to create a neat bottom (e.g. working in the back loop only, or using front-post/back-post stitches).
-
This gives a “waistband” look.
2. Body (Before Splitting)
-
After the ribbing, continue working upward across the full width (back + front panels) in your stitch pattern (e.g. alternations of dc / hdc rows, or a textured stitch).
-
Continue this until you reach the desired armhole split point (i.e. where you divide for sleeves).
3. Split for Armholes & Shape Neckline
-
At the division row, stop working across the full width. Instead, work separate left front, back, and right front panels.
-
Each panel is worked upward individually (or in two of them together with a gap for neckline) to shape the shoulders and neckline.
-
You may need to decrease some stitches near the shoulder or neckline edge for shaping.
4. Join Shoulders & Side Seams
-
Use slip stitch, whipstitch, or your preferred seaming method to join the shoulder edges.
-
Then seam the side edges (from hem up to armhole).
5. Sleeves (Worked Separately or Joined-On)
Option A (worked separately, then sewn on):
-
Crochet each sleeve as a rectangle (or tapered) going from wrist up toward the armhole, decreasing as needed.
-
Seam the sleeve side.
-
Insert the sleeve into the armhole and sew around the armhole opening.
Option B (worked in the round / joined to body):
-
Pick up stitches around the armhole opening and work the sleeve downward in rounds or back-and-forth rows.
-
Decrease gradually for shaping.
-
Finish with ribbing or cuff if desired.
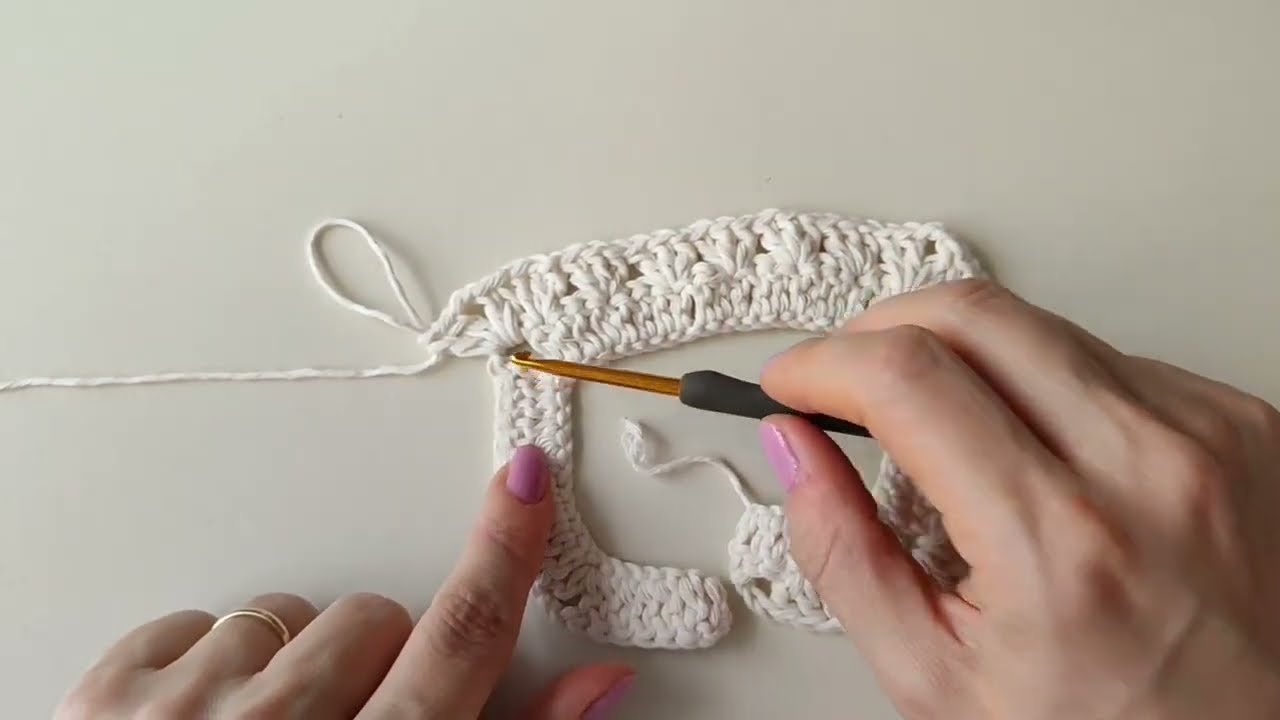
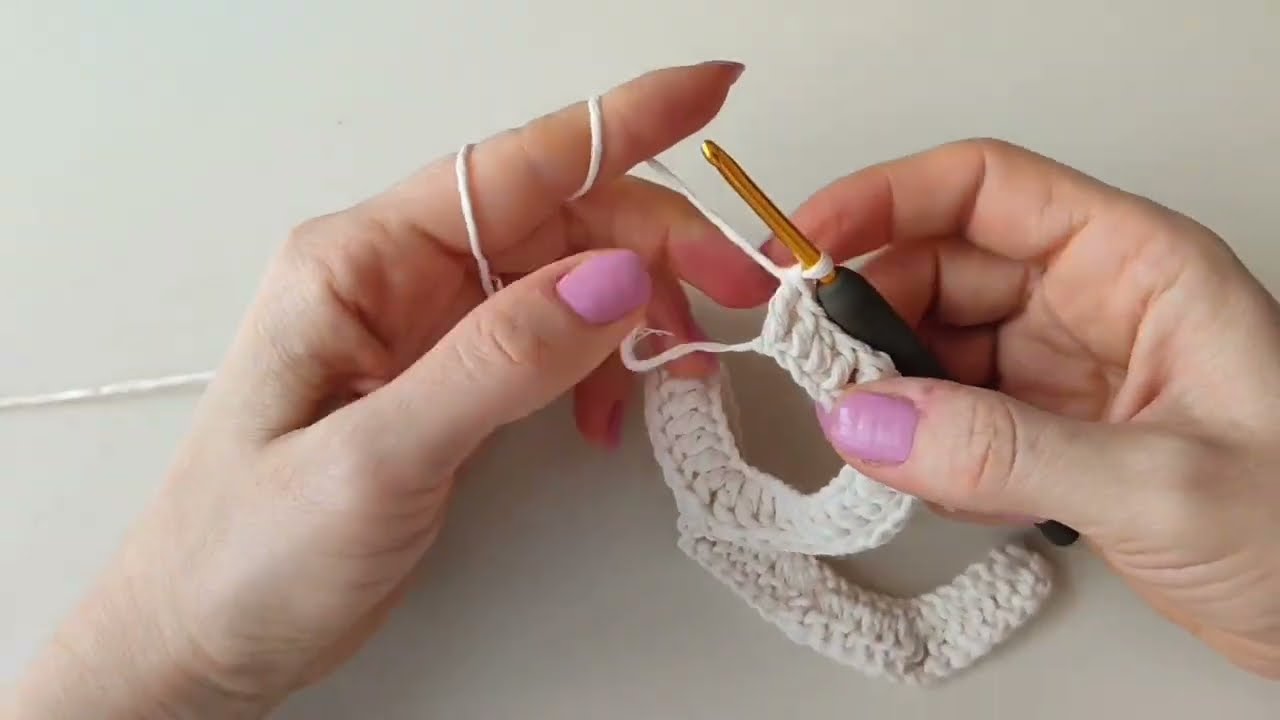
6. Collar / Edging / Front Bands / Button Bands
-
Pick up stitches around the front edges and neckline to work a border: e.g. ribbed band, simple single crochet, or decorative stitch.
-
Ensure you leave space (buttonholes) if you intend to add buttons.
-
If adding buttons, plan their placement before the edging so the buttonholes align.
7. Pockets (Optional)
If you want pockets:
-
Crochet pocket pouches separately (rectangles or squares) the size you want.
-
Insert them into the side seams or inside front panels and sew them onto the cardigan.
-
Add decorative edging around pocket openings if desired.
8. Finishing & Blocking
-
Weave in all ends neatly.
-
Block the completed cardigan to even out stitches, shape edges, and help drape.
-
Sew on buttons (if applicable).
-
Inspect seams and reinforce if needed.
Example with Stripes / Color Changes (“Country” Look)
To give it a country / rustic feel, you can alternate colors or yarn combinations as you go up. For example:
-
Do 2–4 rows of Color A, then 2–4 rows of Color B, alternating.
-
Or mix two threads (e.g. 1 strand of neutral + 1 of contrast) for a heathered look.
-
Use simpler stitches so color shifts stand out.
If you found an actual “country model” pattern, likely they use similar alternating stripes or textured stitches. For instance, one “country style crochet cardigan” instruction uses alternating stripe combinations with three threads of yarn and switching color combinations every 2 rows.
Sample Stitch Pattern / Repeat (for body)
You could use a very simple pattern for ease:
-
Row 1: DC across
-
Row 2: Chain 2 (counts as first DC), DC in each stitch
-
Row 3: Chain 1, SC in each stitch
-
Row 4: Chain 2, DC in each stitch
Alternate the DC and SC rows (or DC / HDC) to give a subtle texture.
Or use “alternating rows of extended single crochet and extended half double crochet” as seen in a simple cardigan design example.
Tips, Adjustments & Troubleshooting
-
Always measure as you go (width, armhole depth, length) to avoid surprises.
-
Use stitch markers to mark divisions (front/back splits, start of rounds).
-
If the cardigan feels too tight in the body, add extra repeats or widen the base chain.
-
For better drape, avoid extremely tight tension; block gently.
-
If working pockets, test size before attaching — you don’t want them too small or too large.
-
Match color changes carefully so stripes align across front/back panels.
Watch tutorial:
https://www.youtube.com/watch?v=pux0I1fzD9A