 by
by Absolutely! Making a crochet pattern sweater involves several key steps, from planning your design to stitching and finishing. Whether you’re creating a pattern from scratch or following an existing one, here’s a detailed step-by-step guide on how to make a crochet sweater, including designing your own pattern if desired.
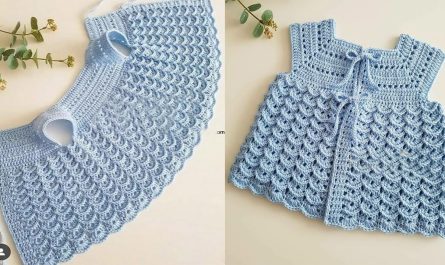
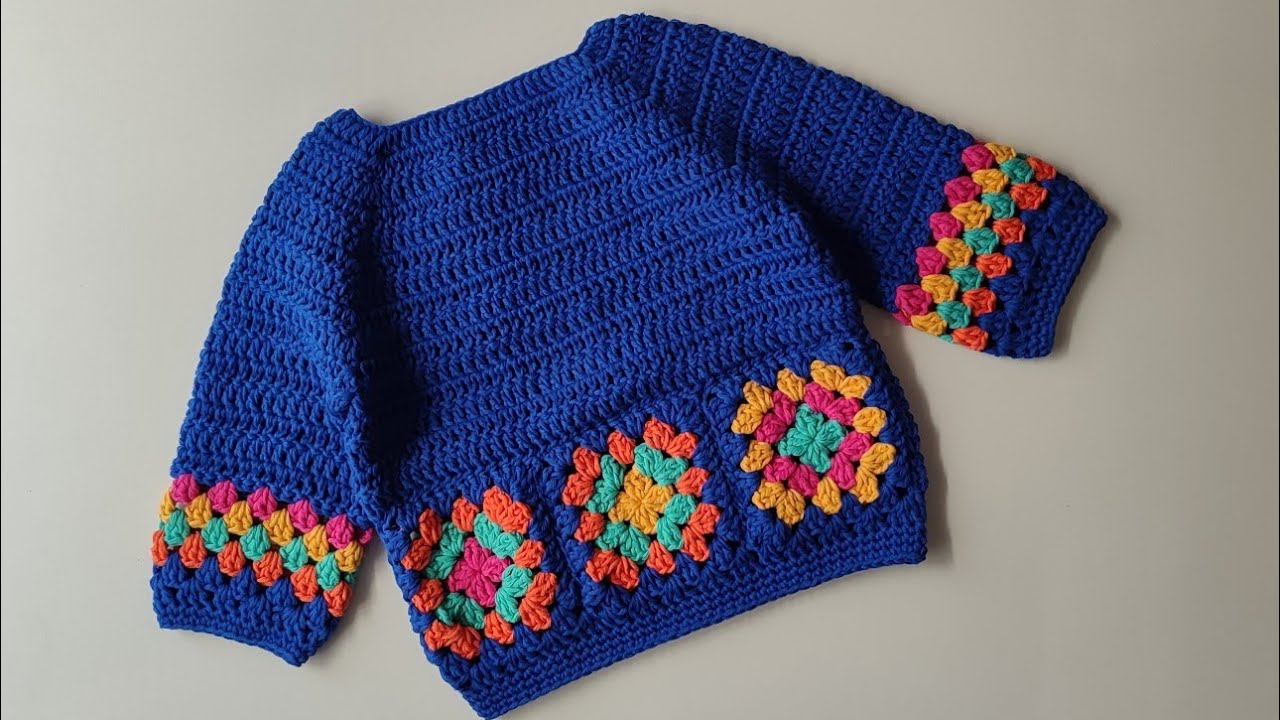
HOW TO MAKE A CROCHET PATTERN SWEATER (Step-by-Step)
Step 1: Plan Your Sweater Design
Before crocheting, you need to plan the style, fit, and yarn.
A. Choose a Sweater Style:
-
Pullover
-
Cardigan (open or buttoned)
-
Turtleneck or Crewneck
-
Crop, standard, or oversized
-
Sleeve type: short, long, puffed, bell, etc.
B. Choose Yarn:
-
Weight: Worsted, DK, Bulky, etc.
-
Fiber: Cotton (cool), wool (warm), acrylic (versatile), blends
-
Color: Solids, variegated, or colorwork
C. Choose Hook Size:
Match your hook size with yarn label or adjust for looser/tighter fabric.
D. Take Measurements:
Measure the intended wearer:
-
Bust
-
Waist
-
Hip
-
Shoulder width
-
Arm length
-
Body length
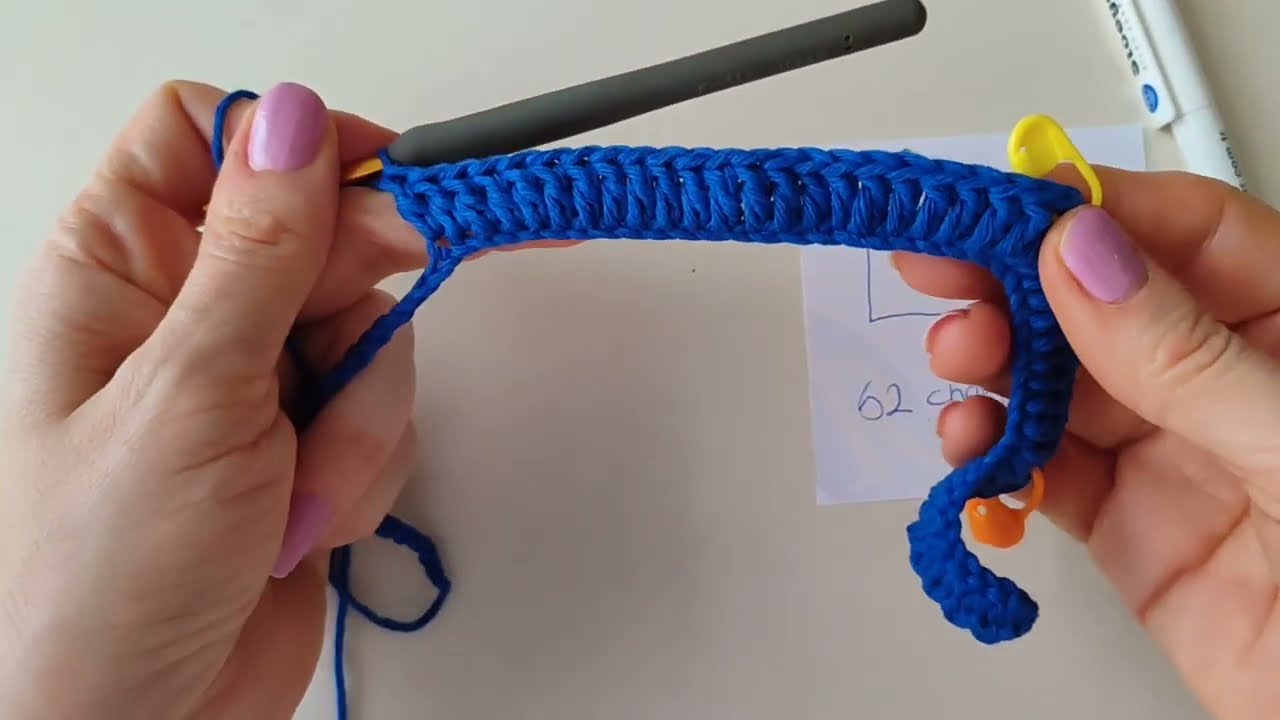
Step 2: Make a Gauge Swatch
A gauge swatch ensures your sweater will come out the right size.
How to Make It:
-
Crochet a 4″x4″ (10cm x 10cm) square using your yarn and hook.
-
Count how many stitches and rows per inch you have.
-
Adjust hook size if your swatch doesn’t match the pattern gauge.
Example Gauge: 16 stitches and 12 rows = 4 inches.
Step 3: Create or Follow a Pattern
You can either:
-
Follow a pattern (recommended for beginners)
-
Design your own (for advanced crocheters)
IF FOLLOWING A PATTERN:
Look for one that matches:
-
Your yarn weight
-
Your size
-
Your skill level (Beginner, Intermediate, Advanced)

IF DESIGNING YOUR OWN:
Break the sweater into these parts:
-
Back panel
-
Front panel
-
Two sleeves
-
Neckline and/or collar
-
Optional: Ribbing (hem, cuffs, collar)
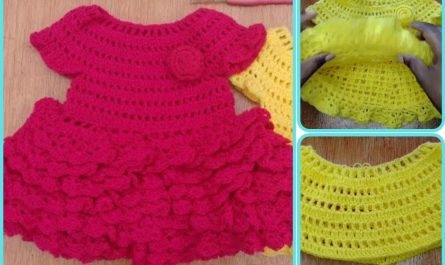
Common Stitch Types:
-
Single Crochet (sc) – tight, good for structure
-
Half Double Crochet (hdc) – medium stretch
-
Double Crochet (dc) – looser, drapes well
-
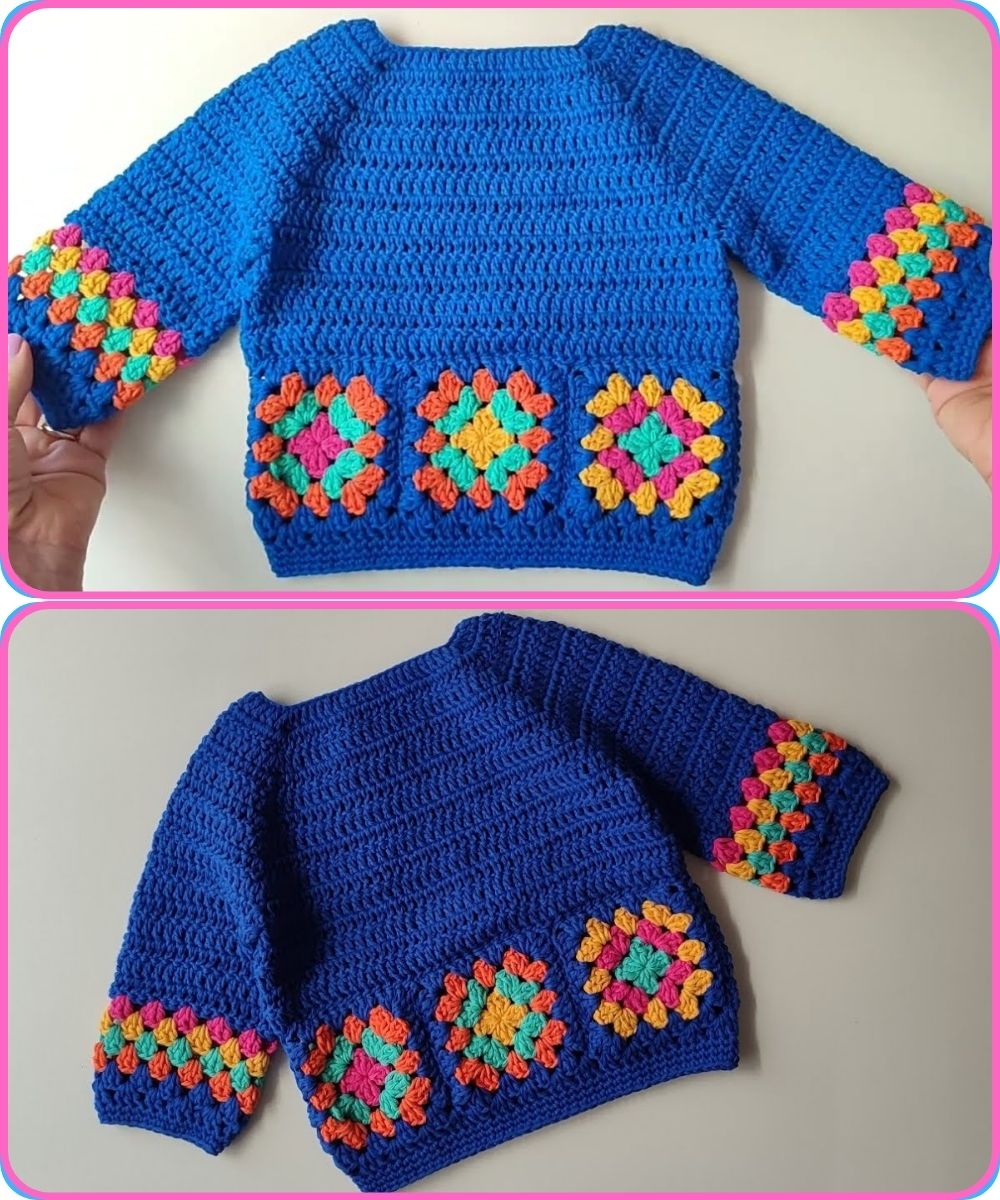
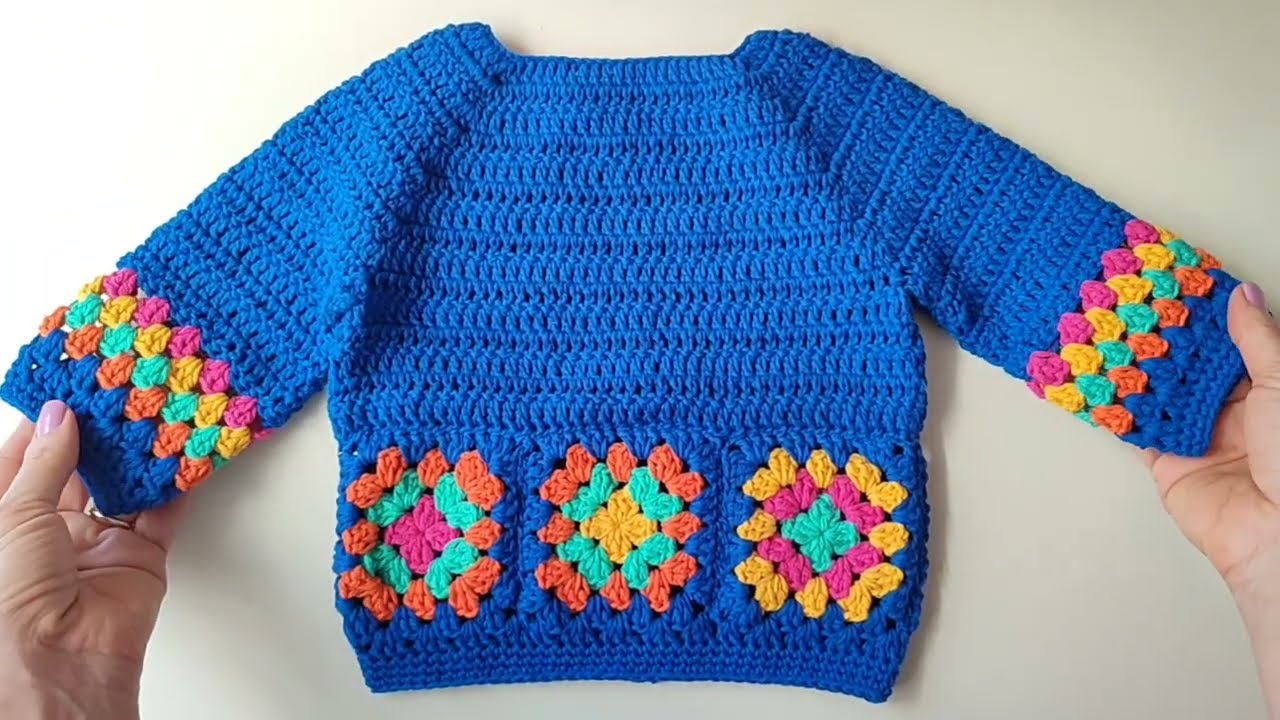
Granny stitch – decorative
-
Shells, cables, bobbles – textured designs
Step 4: Crochet the Sweater Pieces
A. Back and Front Panels:
-
Rectangle or trapezoid shape.
-
Shape the neckline and armholes if needed.
B. Sleeves:
-
Work from shoulder to cuff (top-down), or cuff to shoulder (bottom-up).
-
Tapering depends on style.
C. Ribbing (Optional):
Use slip stitches or front/back post stitches for stretchy ribbing at hems, cuffs, and collars.
Step 5: Join the Pieces Together
-
Use mattress stitch, whip stitch, or slip stitch seam.
-
Start by joining:
-
Shoulder seams
-
Sides (underarm to hem)
-
Attach sleeves (seam them flat, then sew in)
-
-
Try on as you go if possible.
Step 6: Finish the Neckline and Edges
-
Add edging to neckline using sc, hdc, or ribbing.
-
Consider:
-
Ribbed turtleneck
-
Simple sc edging
-
Button bands (for cardigans)
-
Step 7: Weave in Ends & Block
-
Weave in all yarn tails using a yarn needle.
-
Block your sweater (wet or steam block) to shape and soften the fabric.
✅ TIPS FOR SUCCESS
-
Use stitch markers to track shaping.
-
Write down or draw your pattern if you’re designing it.
-
Make notes on stitch counts for each row.
-
Choose seamless construction (like top-down yoke) if you want fewer seams.
-
Check fit often if you’re modifying a pattern.
BEGINNER-FRIENDLY SWEATER CONSTRUCTION TYPES
| Type | Description | Good For |
|---|---|---|
| Rectangle Sweater | 2 rectangles + sleeves | Beginners |
| Top-Down Yoke | Worked in the round from neck down | Seamless, adjustable |
| Side-to-Side | Worked from one side to the other | Unique texture |
| Raglan | Diagonal increases at shoulders | Modern fit |
SAMPLE FREE PATTERNS TO TRY
If you’d like, I can fetch up some free beginner-to-intermediate crochet sweater patterns. Just let me know your skill level and preference (pullover/cardigan, long/short sleeves, etc.).
Watch tutorial: