 by
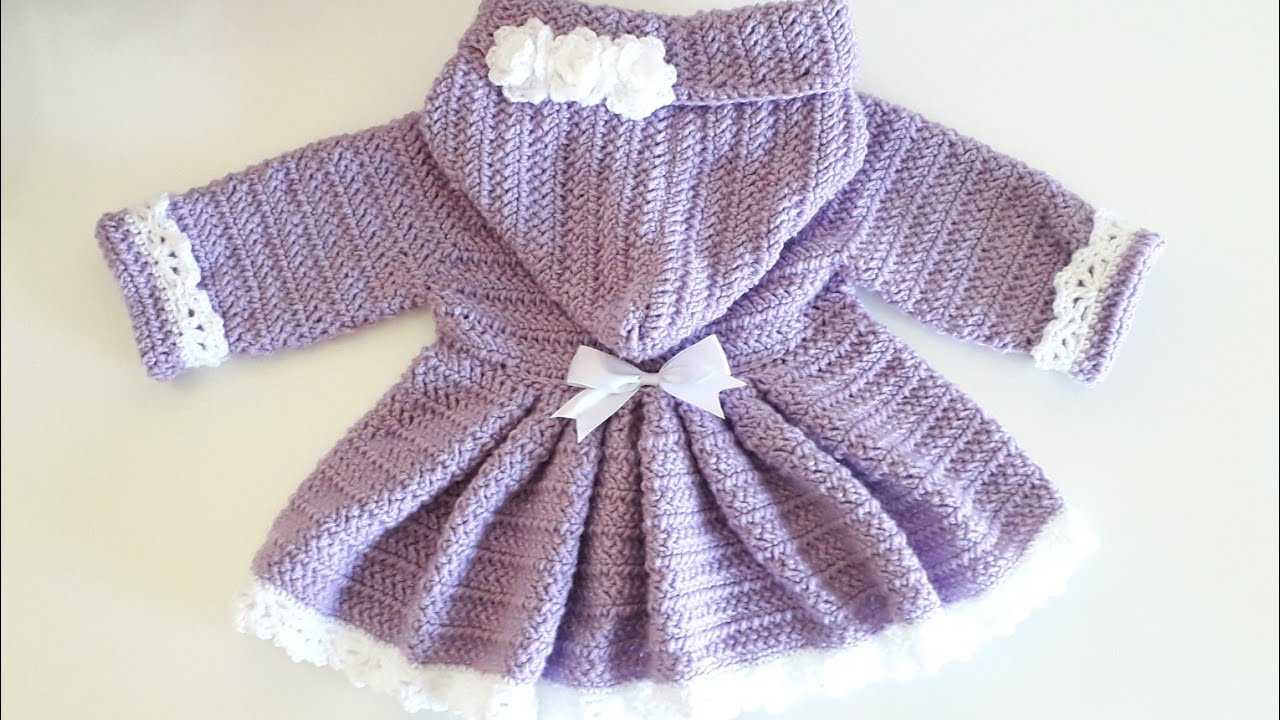
by Below is a clear, step-by-step, detailed guide for making a crocheted hooded coat for a baby girl. It includes materials, stitch explanations, sizing notes, construction steps, and finishing techniques. You can adapt it for 0–3 months, 3–6 months, 6–12 months, or 12–18 months.
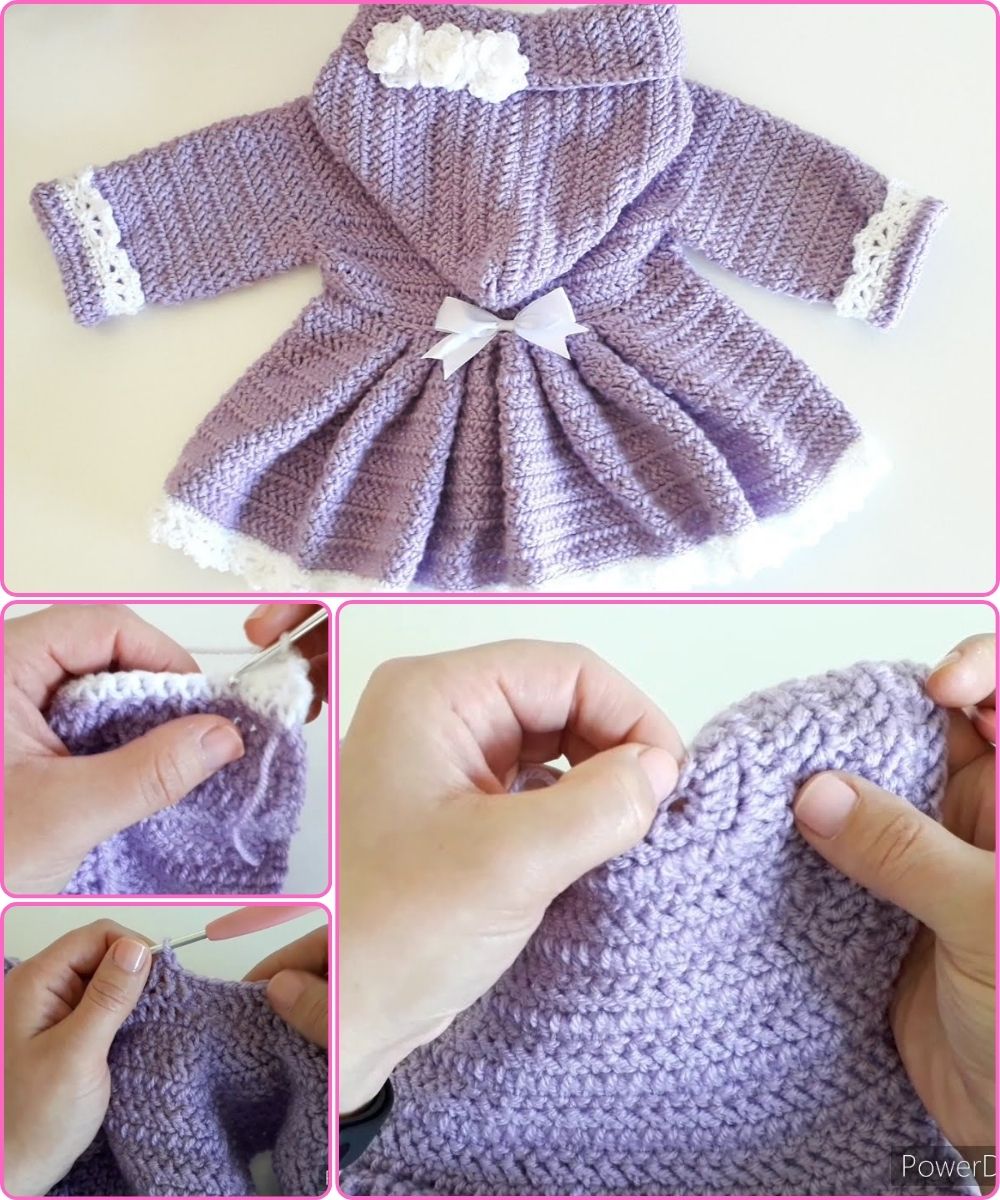
🧵 How to Crochet a Hooded Coat for a Baby Girl
A complete step-by-step guide for beginners and intermediate crocheters
⭐ Materials Needed
-
Yarn: Soft baby yarn (DK/Light Worsted #3) – approx. 300–500g depending on size
-
Hook: 4.0 mm (G) or size recommended on yarn label
-
Tapestry needle for sewing and weaving ends
-
Buttons: 3–5 small buttons (safety-first, no detachable beads)
-
Stitch markers
-
Measuring tape
-
Optional: decorative appliqués, pom-poms, or trim
⭐ Stitches & Techniques Used
-
Ch – chain
-
Sl st – slip stitch
-
SC – single crochet
-
HDC – half double crochet
-
DC – double crochet
-
Inc – increase (2 stitches in one stitch)
-
Dec – decrease (crochet 2 stitches together)
-
Back-loop-only (BLO) – for stretchy rib effect
⭐ Measurements Guide
Approximate chest width (front):
-
0–3 months: 18–19 cm
-
3–6 months: 21 cm
-
6–12 months: 24 cm
-
12–18 months: 26–27 cm
Adjust length and sleeve length according to the baby.
🧶 STEP-BY-STEP INSTRUCTIONS
1. Make the Back Panel
This is a simple rectangle.
For 6–12 months (example size):
-
Chain 45 (or wide enough for half-chest measurement)
-
Rows 1–3: SC across for a sturdy base.
-
Rows 4–35: HDC rows for body.
-
Turn at each row
-
Add more rows for longer coat
-
-
Fasten off.
Tip: If you want a textured look, alternate HDC and DC rows.

2. Make the Front Panels (Left & Right)
You need two narrow rectangles.
Panel width = half of back panel width.
For each panel:
-
Chain 22
-
Rows 1–3: SC
-
Rows 4–35: HDC
-
For neckline shaping (last 4 rows):
-
Dec 1 stitch every row on the inner edge (neck side)
-
Fasten off.
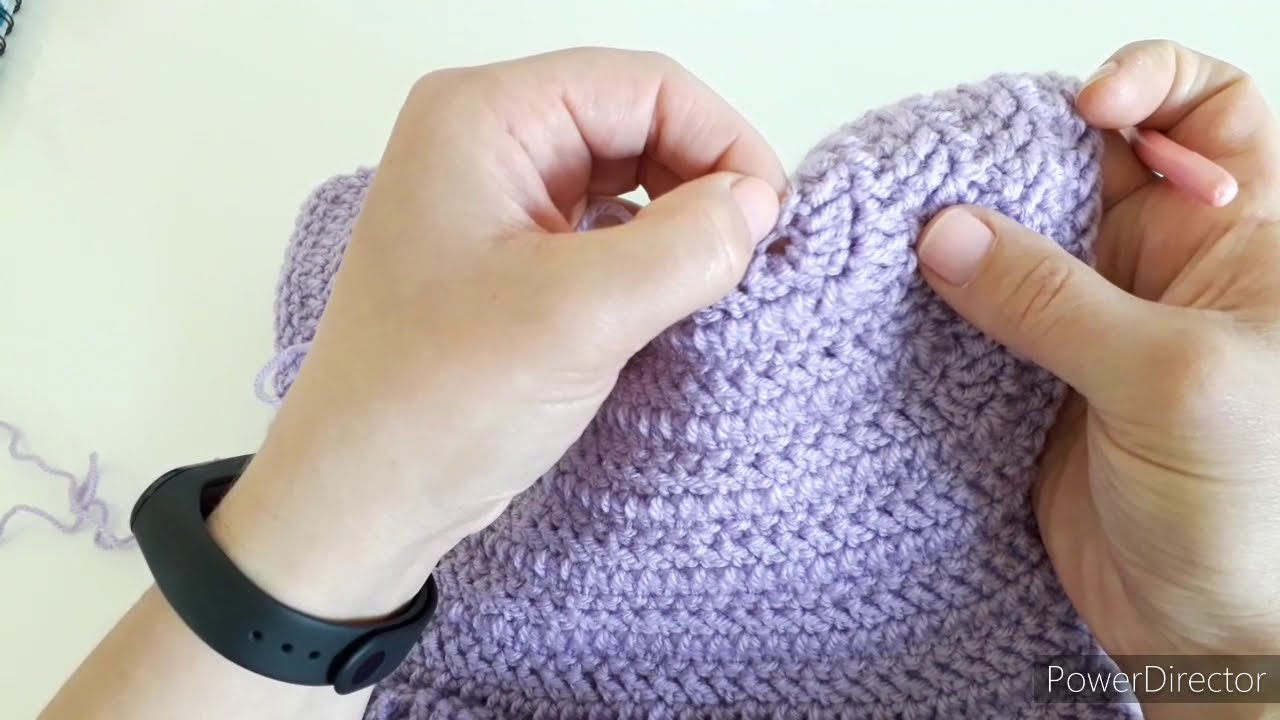
3. Join Shoulders
-
Place front panels over the back panel.
-
Use SC or whip stitch to join shoulders (skip the center area to keep armholes open).
4. Crochet the Sleeves
You can make sleeves straight or slightly tapered.
Method A: Crochet Separately
-
Chain 30 (adjust to baby’s wrist width).
-
Rows 1–40: HDC.
-
Increase every 4th row by 1 stitch on both ends for shaping.
-
Fold in half lengthwise and sew into a tube.
-
Attach to armhole using slip stitch or whip stitch.
Method B: Crochet Sleeves Directly on the Coat (easier)
-
Attach yarn at armhole.
-
Crochet around armhole with HDC.
-
Continue in rounds, decreasing slightly near the wrist if desired.
-
End with 3 rows of SC for a neat cuff.
5. Make the Hood
Hoods are a simple rectangle folded in half.
For 6–12 months:
-
Chain 50 (approx. head width).
-
Rows 1–28: HDC or DC.
-
Fold in half and sew the back seam.
-
Attach hood to the neckline using SC.
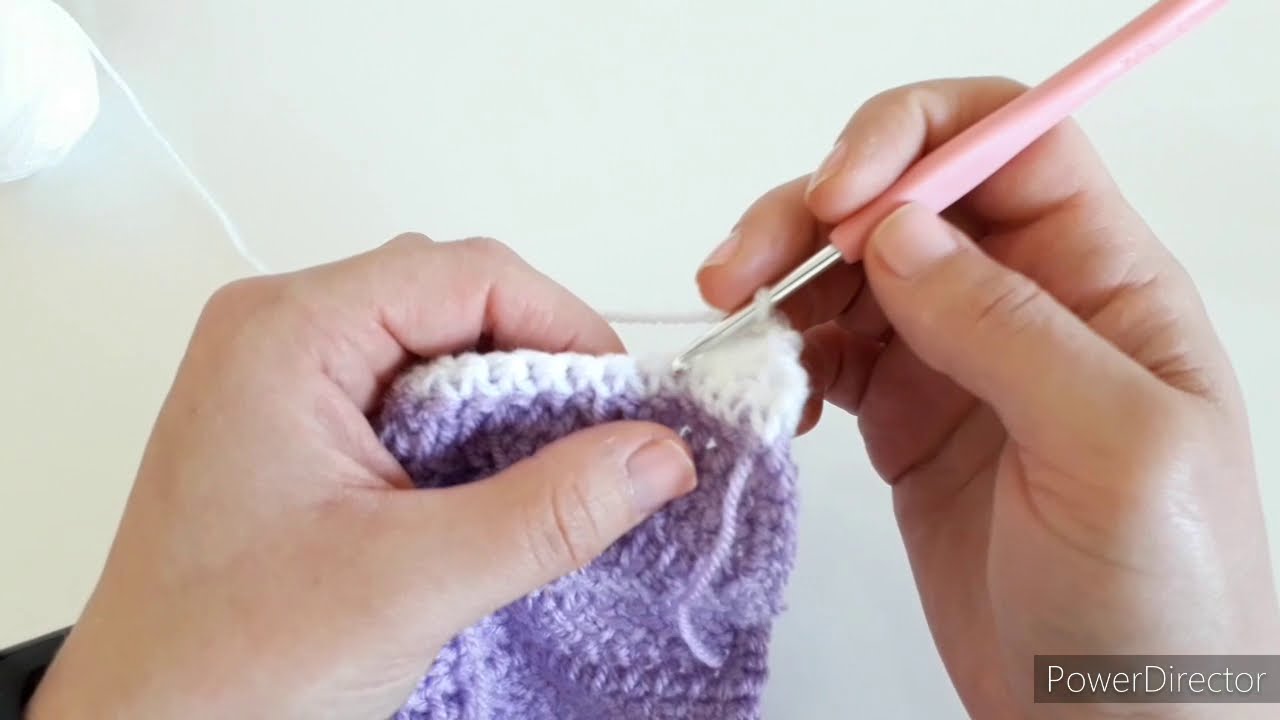
Optional: Add a ribbed edge around the hood by working 3–5 rows of SC or HDC BLO.
6. Add the Button Band
-
Attach yarn to bottom right front panel.
-
Crochet SC up the front, continuing around the hood, and back down the other side.
-
Add 2–3 more rows for thickness.
Buttonholes (usually on right-hand panel):
-
When making row 2:
-
SC 3, ch 1 (skip stitch) = one buttonhole
-
Space them evenly
-
7. Finishing Touches
✔ Weave in all yarn ends
✔ Add buttons and ensure they’re securely sewn
✔ Add decorations like:
-
Flowers
-
Ears on the hood
-
Bows
-
Pockets
-
Contrasting trim
🌸 Optional Hood Ears for Baby Girl
Bear ears (for example):
-
Magic circle, HDC 10
-
Increase around
-
Fold and sew to the top of hood
🎀 Customization Ideas
-
Use puff-stitch rows for a textured, girly design
-
Add a scalloped border around the hem:
-
(SC, skip 1, 5 DC in next, skip 1) repeat
-
-
Use pastel colors, ombré yarn, or stripes
-
Add front pockets shaped like hearts
🎉 Let me know if you want:
✔ A printable pattern format
✔ A video-style step breakdown
✔ Pattern for a specific size (0–18 months)
✔ A diagram / chart
✔ A version using granny squares
Would you like me to tailor it to a specific size or style?
Watch tutorial: