 by
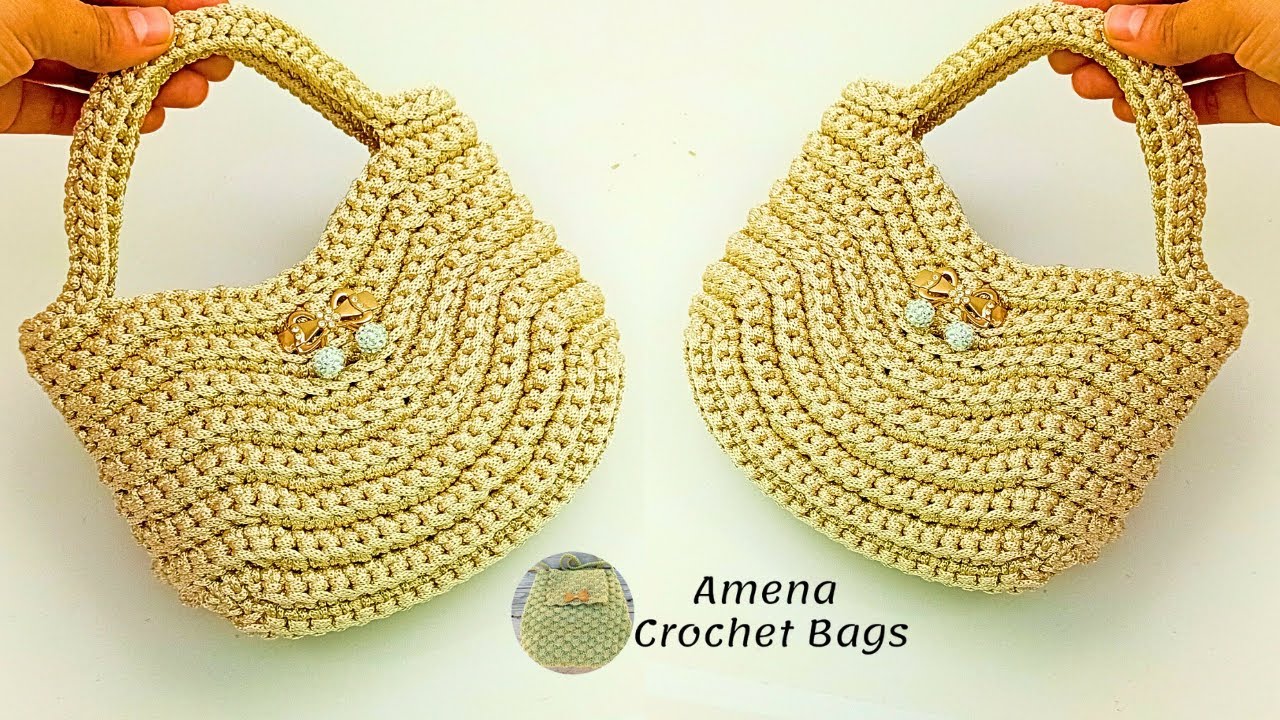
by Here’s a detailed, step-by-step tutorial for making a Small Crochet Bag with a “Sand Waves” Design — perfect for beginners who want something elegant, textured, and stylish.

How to Make a Small Crochet Bag with “Sand Waves” Design
Difficulty: Easy to Intermediate
Style: Elegant textured wave pattern
Technique: Crochet (using basic stitches and wave pattern repetition)
Materials You’ll Need:
-
Yarn:
-
Type: Medium weight (Category 4) cotton or acrylic yarn
-
Colors: Choose 2–3 sand-tone shades (e.g. beige, cream, light brown) for a beachy “sand waves” look
-
Approx. 150–200g total
-
-
Crochet Hook: 4.0 mm (G-6) or size that matches your yarn
-
Notions:
-
Yarn needle (for weaving in ends)
-
Scissors
-
Stitch markers (optional)
-
Lining fabric & zipper/button (optional for finishing)
-

Abbreviations (US Terms)
| Abbreviation | Stitch |
|---|---|
| ch | chain |
| sl st | slip stitch |
| sc | single crochet |
| hdc | half double crochet |
| dc | double crochet |
| st(s) | stitch(es) |
| rep | repeat |
| sk | skip |
| … | repeat instructions within |
Step-by-Step Instructions
Step 1: Make the Base
-
Foundation chain:
-
Ch 41 (or more if you want a wider bag).
-
This will be the bottom width of your bag.
-
-
Round 1 (base oval):
-
Work 1 hdc in 2nd ch from hook and across to the end (39 hdc).
-
In last ch, work 3 hdc to curve around to the other side.
-
Continue working along the opposite side of the foundation chain: 1 hdc in each ch, ending with 2 hdc in last stitch.
-
Join with sl st to the first hdc.
-
-
Round 2–3:
-
Work 1 hdc in each st around, increasing 2 sts at both curve ends each round to keep the base flat.
-
After 3 rounds, you’ll have a neat oval base.
-
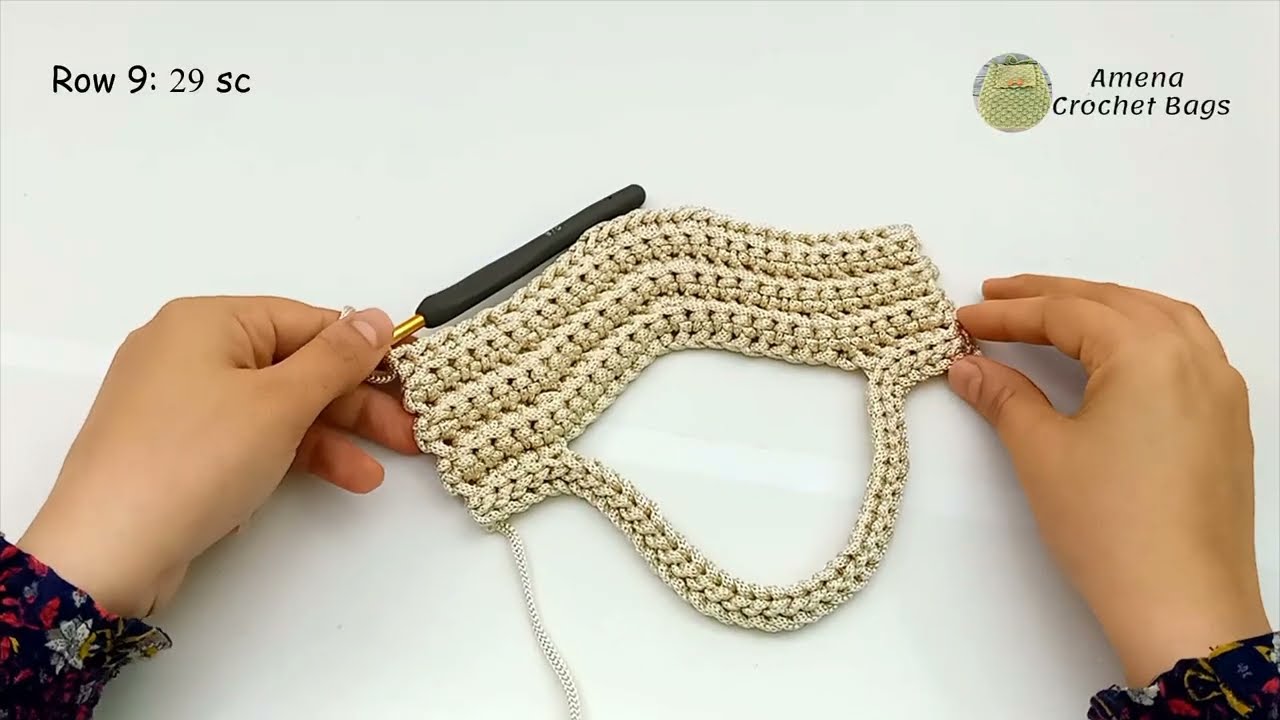
Step 2: Start the Body – “Sand Waves” Pattern
The sand waves pattern uses a combination of dc and sc stitches to create a flowing wave texture.
Pattern Repeat (multiple of 8 sts + 1):
Row 1: ch 2 (counts as dc), 1 dc in next 3 sts, 1 hdc in next st, 1 sc in next 3 sts, 1 hdc in next st — repeat across.
Join with sl st.
Row 2: ch 1, 1 sc in next 3 sts, 1 hdc in next st, 1 dc in next 3 sts, 1 hdc in next st — repeat around.
Join with sl st.
Tip: Alternate colors every 2 rows to enhance the “sand wave” effect. For example:
Rows 1–2: Beige
Rows 3–4: Light Brown
Rows 5–6: Cream
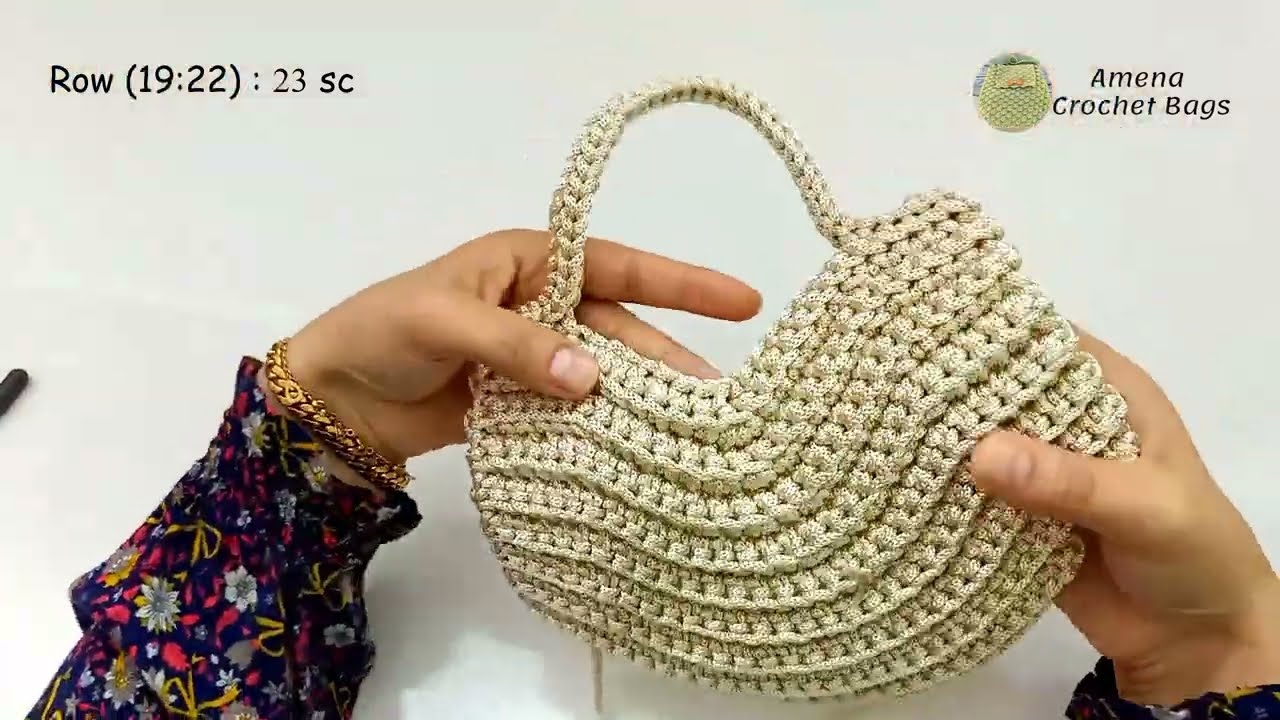
Repeat Rows 1–2 until your bag reaches your desired height (typically 18–20 rows for a small bag).
Step 3: Shape the Top Edge
-
Switch to the main color (lightest shade).
-
Work 2 rounds of sc in each st around to give a firm, clean edge.
-
You can add a decorative border if desired: [sc, ch 1, skip 1] for a subtle lacy finish.
Step 4: Make the Straps
You have a few options:
-
Option A: Simple Crochet Strap
-
Ch 80–100 (depending on desired length).
-
Work 1 row of hdc, then another row of sc for reinforcement.
-
Sew ends securely to the inside of the bag.
-
-
Option B: Braided Cord Handle
-
Make 3 long strands of yarn.
-
Braid them tightly and sew to the bag.
-
Step 5: Optional Lining and Closure
-
Lining (optional):
-
Cut fabric slightly smaller than the bag size.
-
Sew sides, fold the top edge, and stitch inside using a yarn needle.
-
-
Closure (optional):
-
Add a zipper, magnetic snap, or button loop for a neat finish.
-
Step 6: Finishing Touches
-
Weave in all yarn ends.
-
Lightly steam block the bag to shape it and make the “waves” pop.
✨ Tips for Best Results
-
Use contrasting sand-like shades for depth and movement.
-
Keep your tension even; loose stitches make waves droop.
-
You can adjust the width and height easily by changing the starting chain or number of wave repeats.
Optional Variation
If you want a “Beach Tote” version, simply:
-
Increase base chain (e.g. ch 61 instead of 41).
-
Add 6–8 extra rounds of the wave pattern.
-
Use leather straps or wooden handles for a classy touch.
Would you like me to include a crochet chart (diagram) or a written pattern PDF layout version that you can print and follow easily?
Watch video: