 by
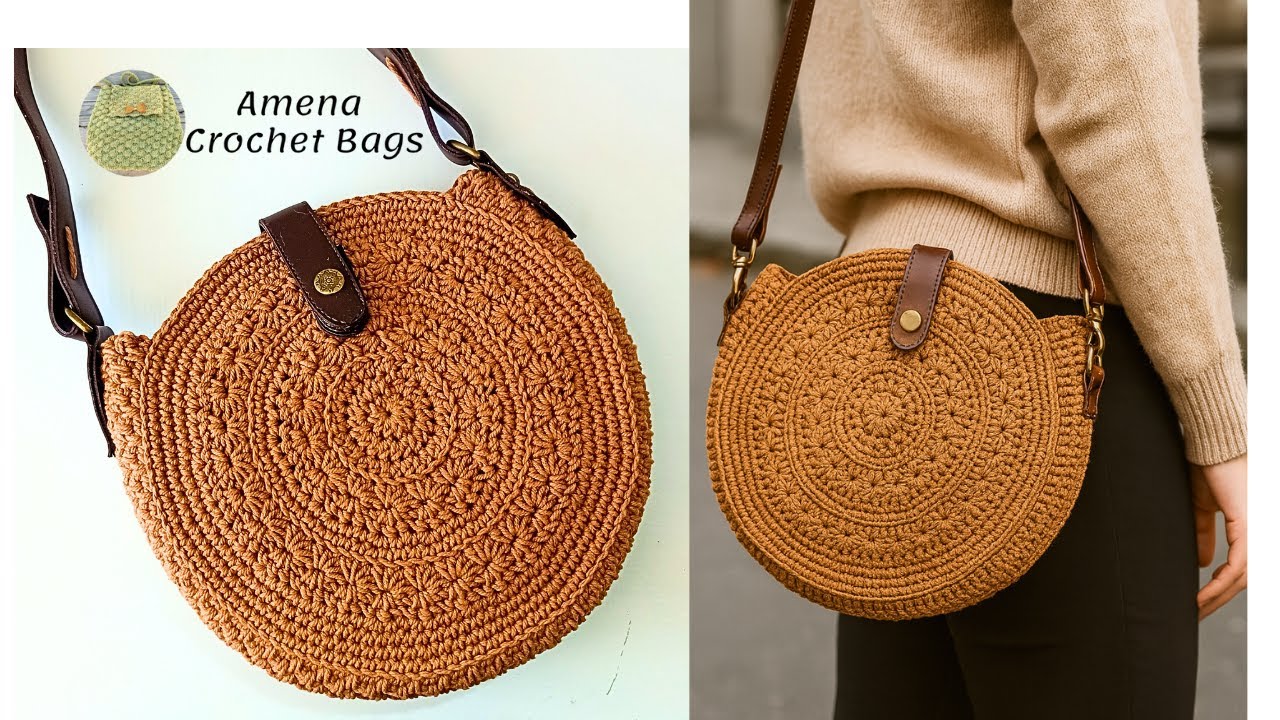
by Absolutely! I can give you a detailed step-by-step guide on making a light and practical round crochet bag with star stitch. I’ll break it down into materials, preparation, stitch explanation, construction steps, and finishing tips.

Materials Needed
-
Yarn:
-
Lightweight cotton or cotton-blend yarn (for durability and ease).
-
Approx. 200–300 grams, depending on bag size.
-
-
Hook:
-
Crochet hook suitable for your yarn (usually 3.5–4 mm for lightweight cotton).
-
-
Accessories:
-
Scissors
-
Yarn needle
-
Stitch markers (optional)
-
Bag lining fabric (optional, for durability)
-
Handles (crochet handles or purchased handles)
-
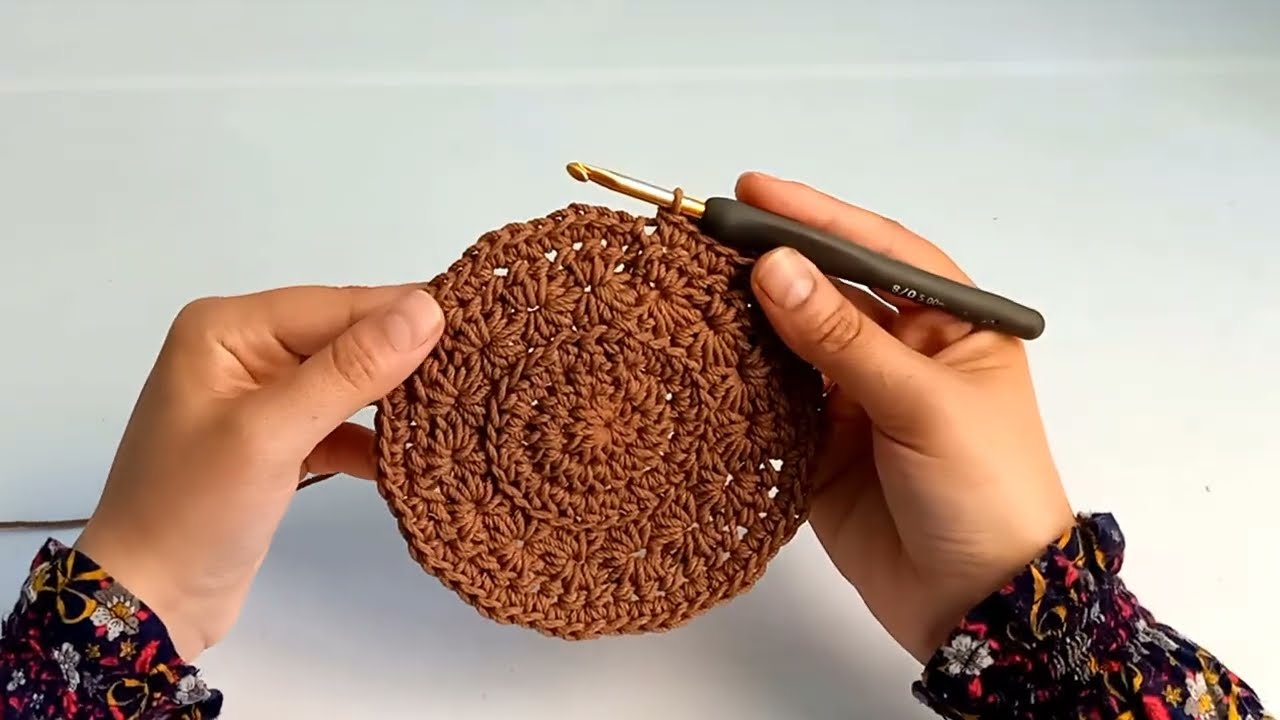
Understanding the Star Stitch (also called Jasmine Stitch)
The star stitch creates a beautiful, dense, and slightly textured pattern. Here’s how it works:
-
Foundation: Work in multiples of 2 stitches + 1.
-
Steps:
-
Insert hook into the second stitch from the hook, pull up a loop.
-
Insert hook into next stitch, pull up a loop (you’ll have 3 loops on the hook).
-
Repeat for 4–5 stitches (depends on variation; usually 5 loops).
-
Yarn over and pull through all loops on hook.
-
Chain 1 to close the star.
-
The star stitch forms a small star/petal shape and gives the bag a textured, airy look while remaining strong.
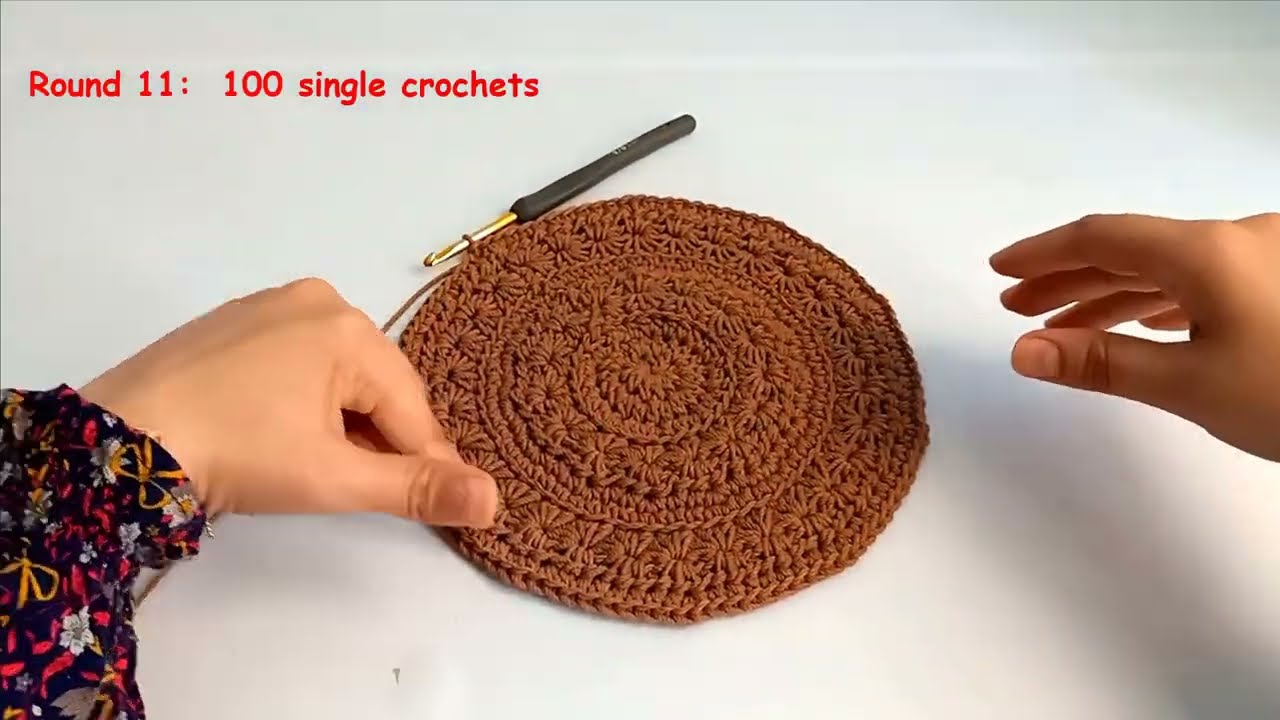
Step 1: Making the Base (Circular)
-
Start with a magic ring (adjustable loop).
-
Round 1: Chain 2 (counts as first half double crochet), then make 8 half double crochets (HDC) into the ring. Join with slip stitch.
-
Round 2: Chain 2, 2 HDC in each stitch around. Join. (You now have 16 HDC.)
-
Round 3: Chain 2, 1 HDC in first stitch, 2 HDC in next stitch, repeat around.
-
Round 4: Chain 2, 1 HDC in first 2 stitches, 2 HDC in next stitch, repeat around.
-
Continue increasing rounds until the base reaches your desired diameter (usually 20–25 cm for a medium bag).
Tip: Mark the start of the round with a stitch marker to keep track.
Step 2: Forming the Sides with Star Stitch
-
Once the base is ready, begin working star stitch upwards in rounds.
-
Round 1 (side start): Work star stitches evenly across the last round of the base. Make sure to align stars to avoid gaps.
-
Continue star stitch rounds until your bag reaches the desired height (usually 18–22 cm).
Tip: Keep stitches snug but not too tight; the bag should have some flexibility.
Step 3: Making the Bag Opening
-
After reaching the desired height, switch to single crochet rounds (or half double crochet) for 2–3 rounds to stabilize the opening.
-
If adding a lining, cut fabric to the same size and sew inside using a needle.
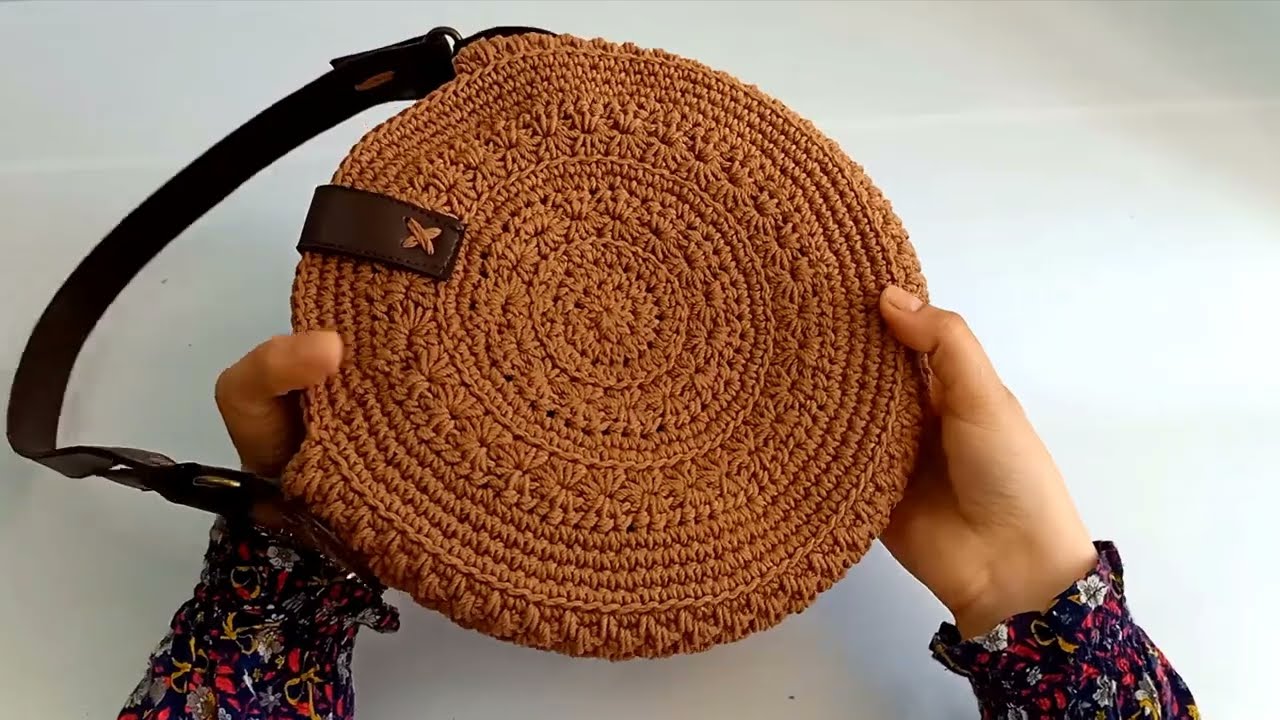
Step 4: Adding Handles
-
Crochet Handles:
-
Chain to desired handle length.
-
Attach to opposite sides of bag with single crochet stitches.
-
-
Or Use Ready-Made Handles:
-
Sew securely to the top of the bag with yarn or strong thread.
-
Tip: Reinforce handles by crocheting a small rectangle around the base of each handle.
Step 5: Finishing Touches
-
Weave in all ends neatly using a yarn needle.
-
Block the bag lightly (dampen and shape) for even edges.
-
Optional: Add a button or drawstring closure.
Tips for a Light and Practical Bag
-
Use lightweight cotton yarn for breathability and reduced weight.
-
Avoid very tight star stitches; slightly loose makes the bag more flexible.
-
Keep the bag round and slightly flat for stability when standing.
-
Star stitch provides natural durability, so a lining is optional but recommended for carrying small items.
If you want, I can also draw a visual diagram showing how to do the star stitch and the round bag construction, which makes it way easier to follow than text alone.
Watch video: