 by
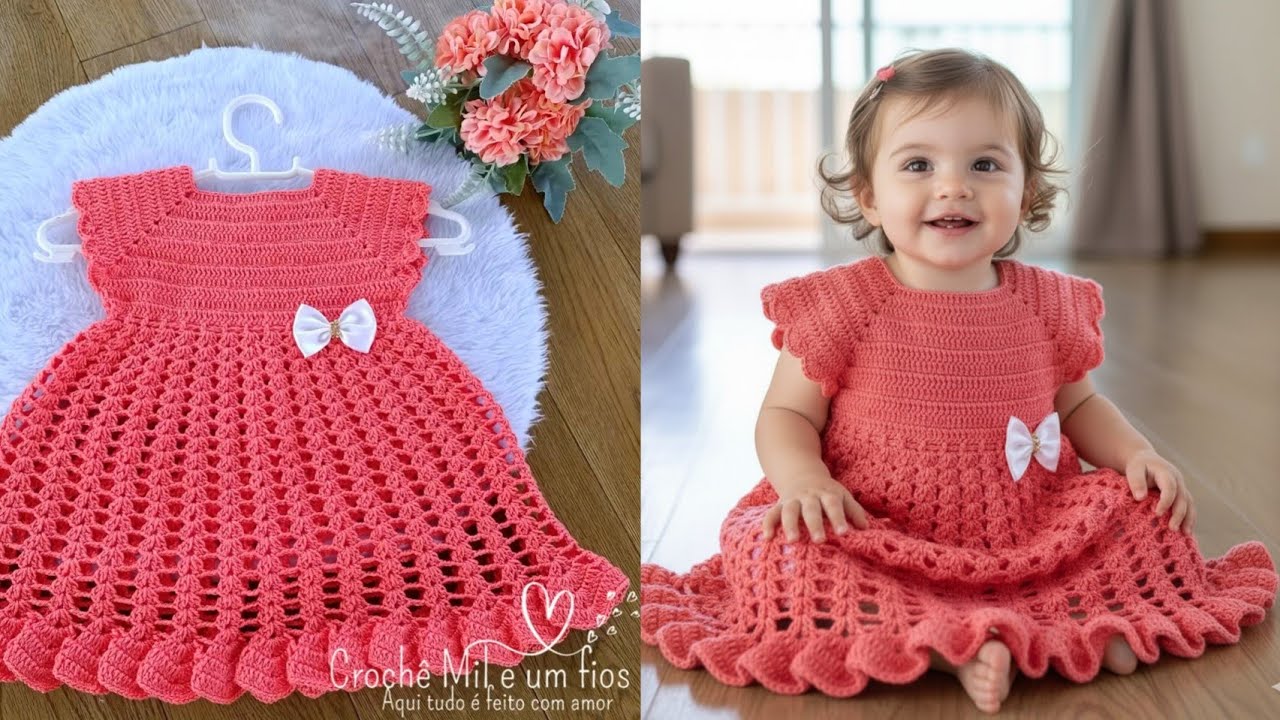
by Below is a detailed, step-by-step tutorial on how to make a crochet dress for children, suitable for newborn to 2 years old. This guide is written for beginners but includes enough detail for more advanced crocheters to adjust sizing, design, and finishing.
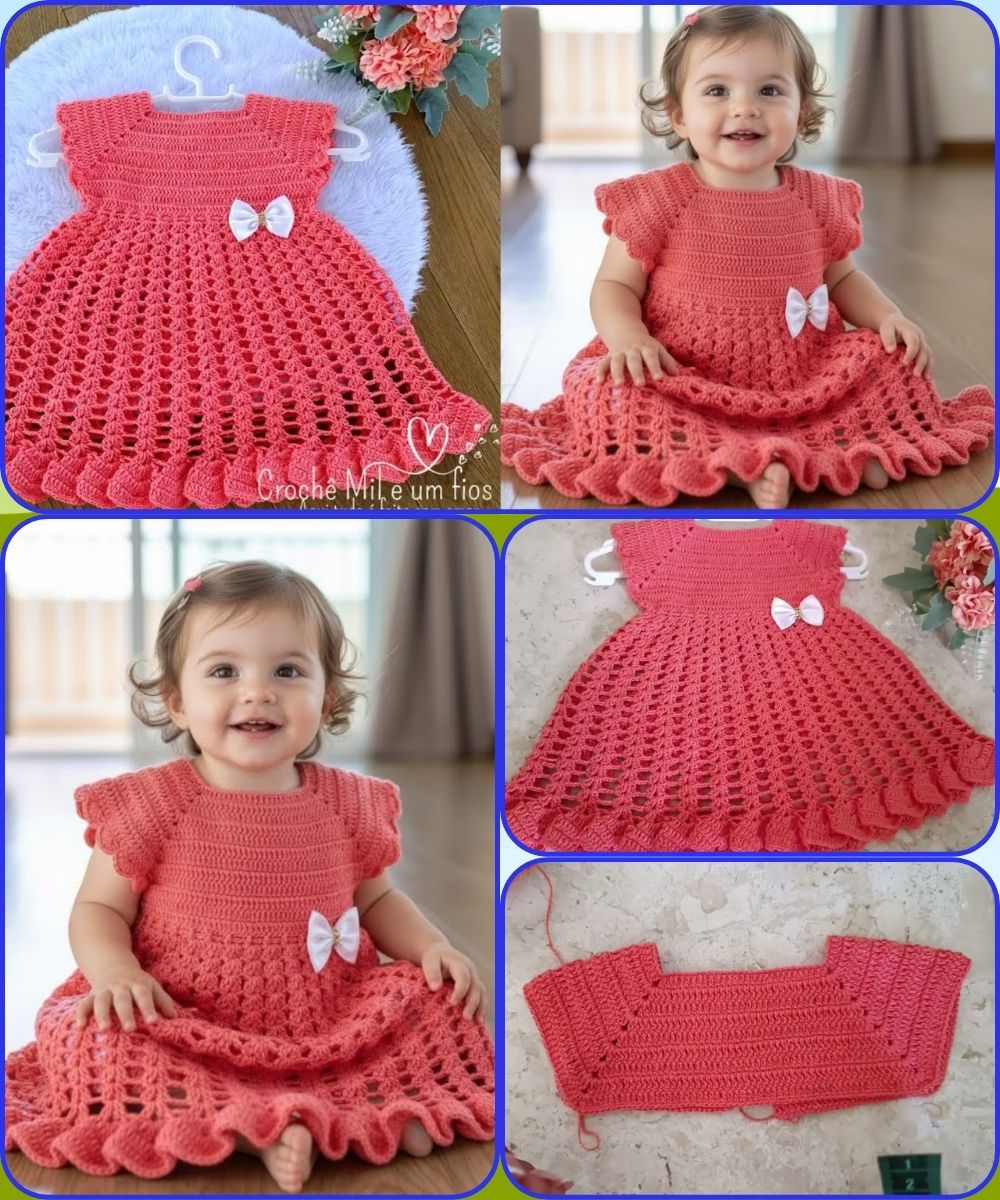
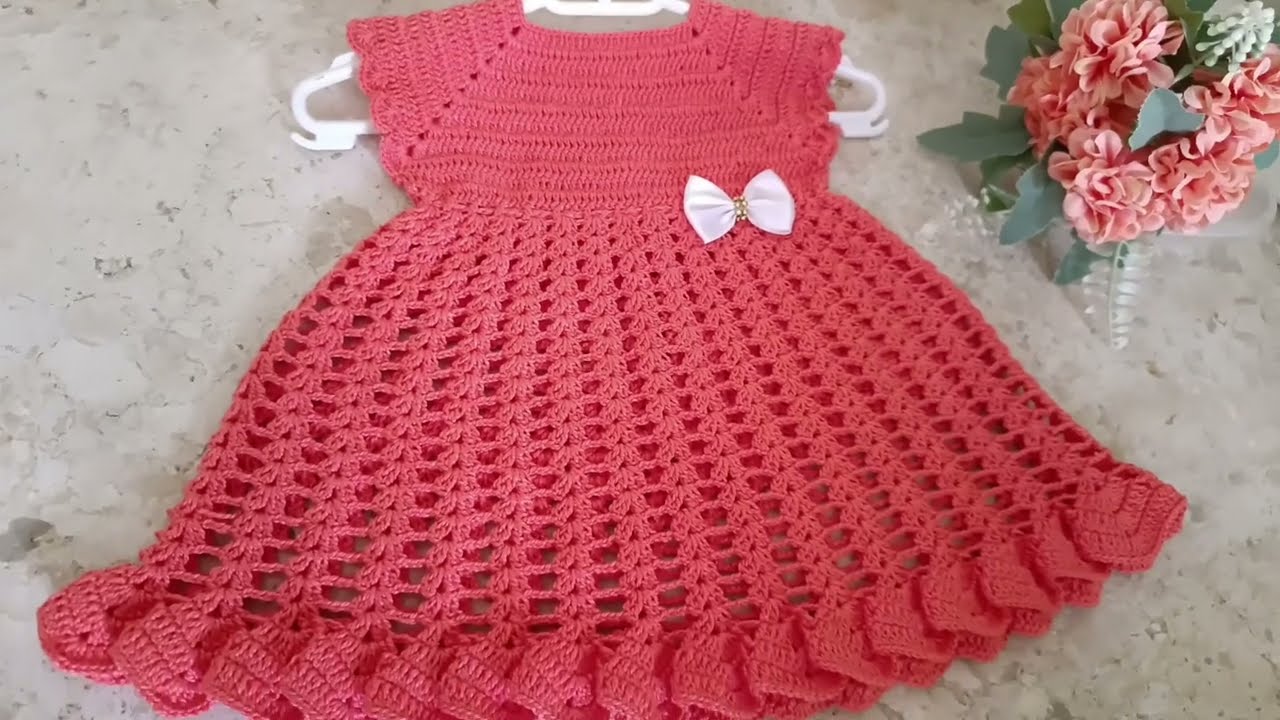
🧶 How to Make a Crochet Dress for Children (Newborn–2 Years) — Step-by-Step Tutorial
This tutorial explains how to make a classic top-down yoke crochet dress, which is one of the easiest and most customizable designs for babies and toddlers.
🧵 Skill Level: Beginner to Intermediate
🎯 Sizing: Newborn, 3–6 months, 6–12 months, 12–24 months
⭐ Materials Needed
Yarn
-
Lightweight (Category 3) DK cotton or soft acrylic yarn
-
Newborn: ~200g
-
3–6 months: ~250g
-
6–12 months: ~300g
-
12–24 months: ~350–400g
-
Cotton-blend yarn is best for babies (soft, breathable, washable).
Hook
-
3.5 mm or 4.0 mm (depending on yarn label & your tension)
Other
-
Scissors
-
Yarn needle
-
Stitch markers
-
Buttons (optional for back closure)
📏 Size Guide (Chest Measurements)
These measurements help ensure your dress fits perfectly.
| Age | Chest Circumference | Yoke Starting Chain |
|---|---|---|
| Newborn | 14–15 in (35–38 cm) | 52 chains |
| 3–6 months | 16–17 in (40–43 cm) | 56 chains |
| 6–12 months | 18–19 in (45–48 cm) | 60 chains |
| 12–24 months | 19–20 in (48–51 cm) | 64 chains |
🪡 STITCHES USED
-
Ch – Chain
-
Sl st – Slip stitch
-
Sc – Single crochet
-
Hdc – Half double crochet
-
Dc – Double crochet
-
V-stitch – (dc, ch 1, dc) in same stitch (used for the skirt)
👗 PART 1: Start the Yoke (Top of the Dress)
This is worked in rows or rounds, depending on whether you want a buttoned back.
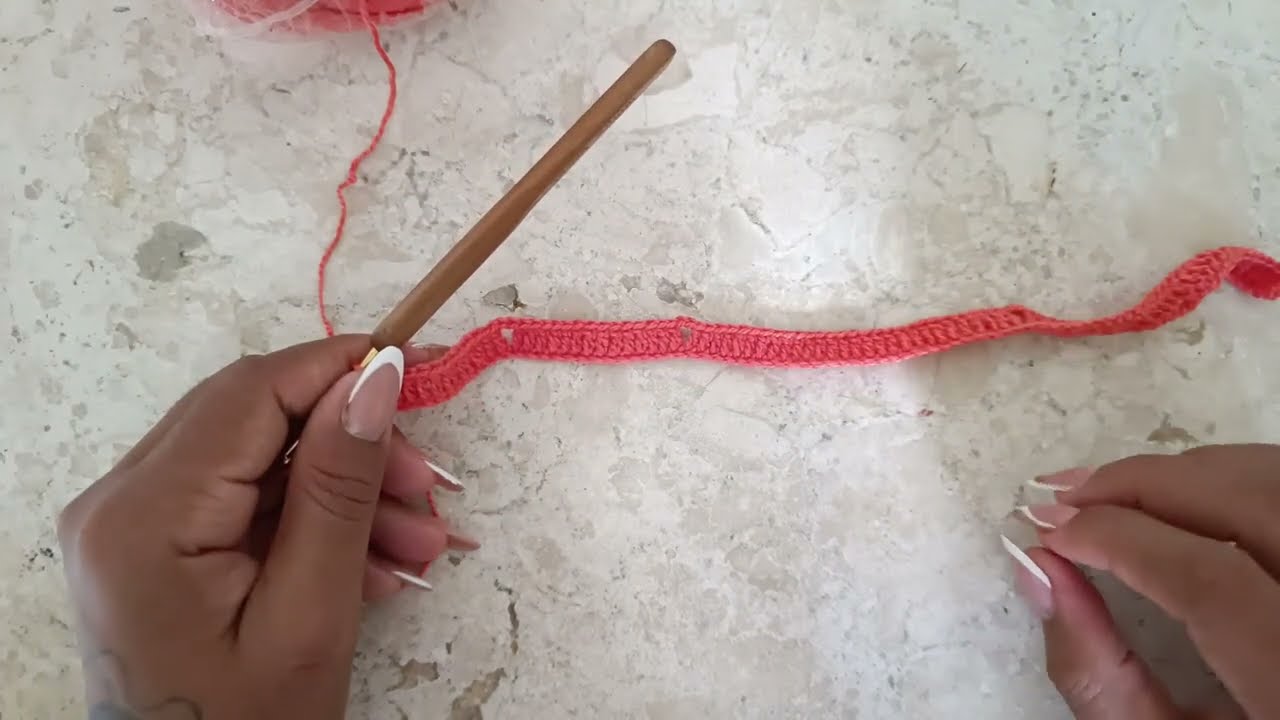
Step 1: Foundation Chain
Make the starting chain for your baby’s size (52–64 chains).
Join with a slip stitch if you want a closed round yoke, OR keep it open if you want to add buttons later.
Step 2: Setup Round (Round 1)
-
Ch 2 (counts as hdc)
-
Hdc in each stitch around
-
Place markers to divide the yoke into 4 equal sections:
-
Front, Back, Left Sleeve, Right Sleeve
-
Example for 60 chains:
-
15 stitches front
-
15 stitches back
-
15 each sleeve
Step 3: Increase Rounds
Work hdc increases at the four marker points:
At each marker:
👉 (hdc, ch 1, hdc) in the marked stitch
Continue rounds until the yoke reaches the following measurements:
| Age | Yoke Depth |
|---|---|
| Newborn | 3.5 in (9 cm) |
| 3–6 months | 4 in (10 cm) |
| 6–12 months | 4.5 in (11.5 cm) |
| 12–24 months | 5 in (13 cm) |
This usually takes 8–12 rounds depending on yarn and tension.
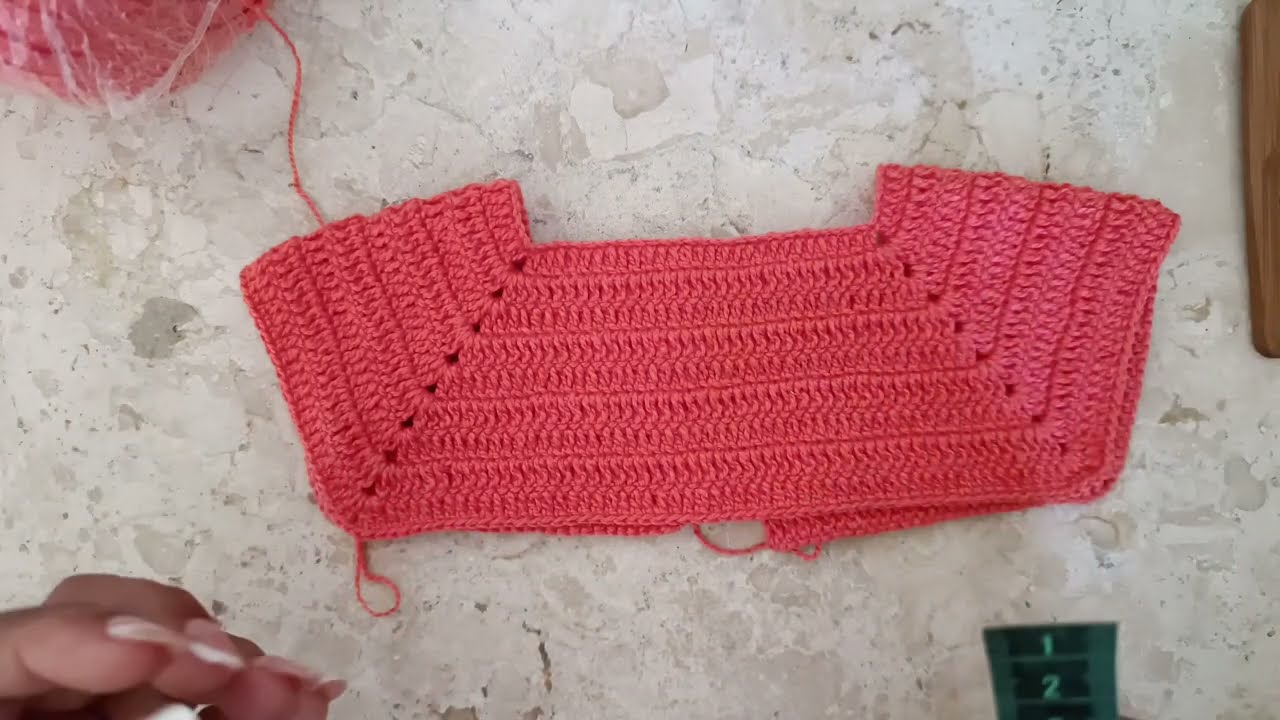
👕 PART 2: Divide for Armholes
Once the yoke is big enough:
-
Crochet across the front
-
Skip sleeve stitches (place them on a stitch holder)
-
Chain 4–8 stitches (creates underarm space)
-
Crochet across the back
-
Skip other sleeve, chain underarm space again
-
Join to complete the torso
Now it forms a basic dress body shape.
👗 PART 3: Crochet the Dress Skirt
This section is where you can get creative!
Option A: Simple Flowy Skirt (V-Stitch Pattern)
Perfect for beginners.
Row Pattern:
-
Round 1: Dc all around
-
Round 2: V-stitch in each 3rd stitch
-
Round 3+: Continue V-stitch repeats
-
Optional: Increase by adding additional V-stitch every 10 stitches if you want extra flaring.
Length Guide
| Age | Skirt Length |
|---|---|
| Newborn | 7–8 in |
| 3–6 months | 8–9 in |
| 6–12 months | 9–10 in |
| 12–24 months | 11–13 in |
Option B: Textured Skirt (Shell Stitch)
-
Skirt Round: 5 dc in same stitch, skip 2, sc, skip 2, repeat
Creates a pretty scalloped look.
Option C: Ruffled Skirt
After Round 1 of dc:
-
Increase heavily by placing 2 dc in each stitch
Creates dramatic ruffles.
🧵 PART 4: Finishing the Sleeves
You may choose:
Option 1: Sleeveless
-
Sc around armhole for 1–2 rounds to create neat edge.
Option 2: Cap Sleeves
-
Join yarn at armhole
-
5 dc shell, skip 2 around top half only
-
Sc along lower curve
Option 3: Full Mini Sleeves
-
Work in rounds using dc or hdc
-
Add small increases for puffiness
🎀 PART 5: Add Finishing Touches
Back Closure (If Not Worked in Rounds)
-
Add 1–3 small buttons
-
Create button loops using chain spaces
Waist Decoration
-
Crochet small bow
-
Add ribbon
-
Make a simple cord using long chain
-
Add flowers or appliqué
Hem Edge
Add a decorative final round:
-
Picot: (sc, ch 3, sc)
-
Shell: 5 dc in one stitch
-
Crabs stitch (reverse sc)
📌 Tips for Success
✔ Check the fit as you go
Babies vary in size — measure often!
✔ Use soft yarn
Avoid scratchy fibers.
✔ Make it washable
Cotton or acrylic blends are easiest for parents.
✔ Adjust hook size
If too tight, go up a hook size.
✔ Keep safety in mind
Sew buttons securely; avoid long dangling cords for newborn sizes.
❤️ Would you like printable instructions?
I can create:
-
A PDF-style condensed pattern
-
A diagram / chart version
-
Patterns for 3 months, 6 months, 1 year, and 2-year sizes
-
Multiple design styles (lacey, puff-sleeve, flared, simple)
-
A matching baby hat or cardigan pattern
Watch tutorial: