 by
by Below is a clear, detailed, step-by-step guide on how to crochet a pullover hoodie for children, including materials, sizing tips, stitches, construction steps, and finishing details. It’s written so that even a confident beginner can follow along.
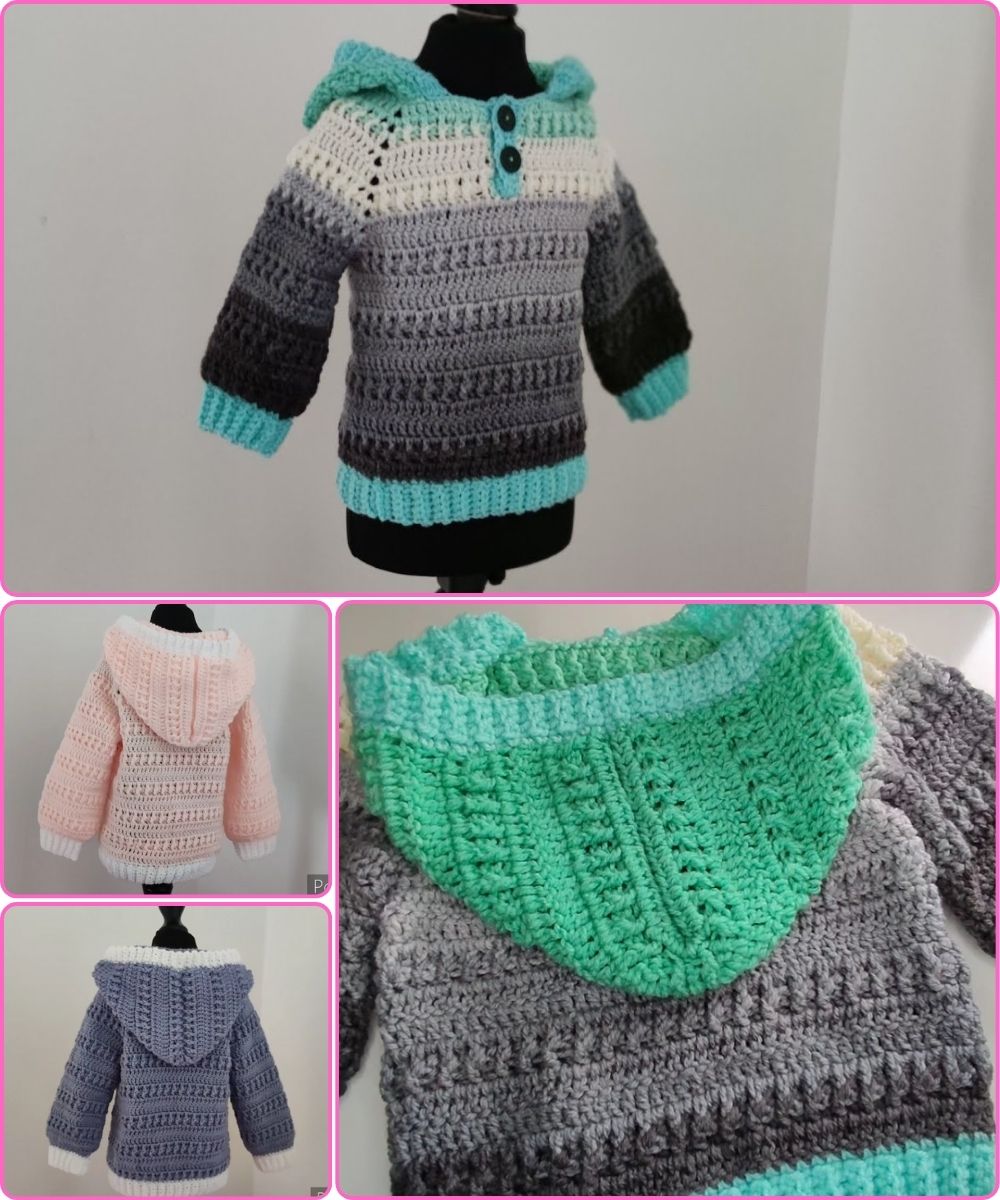
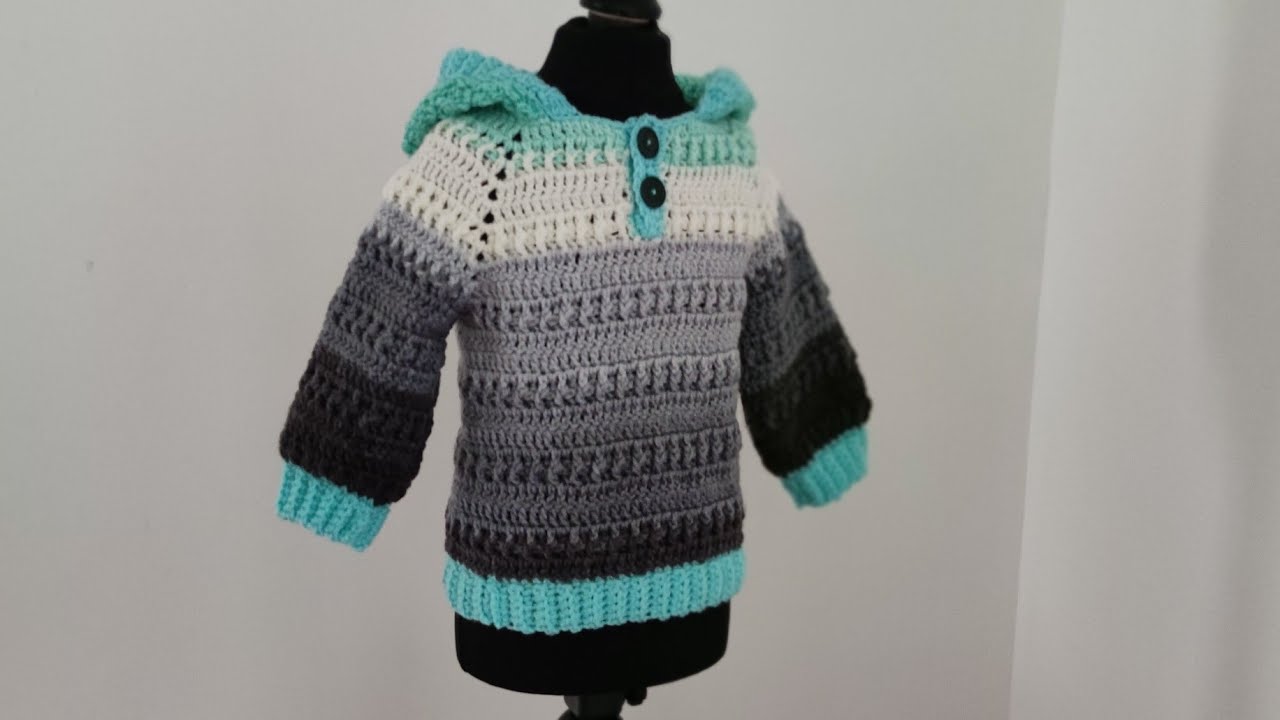
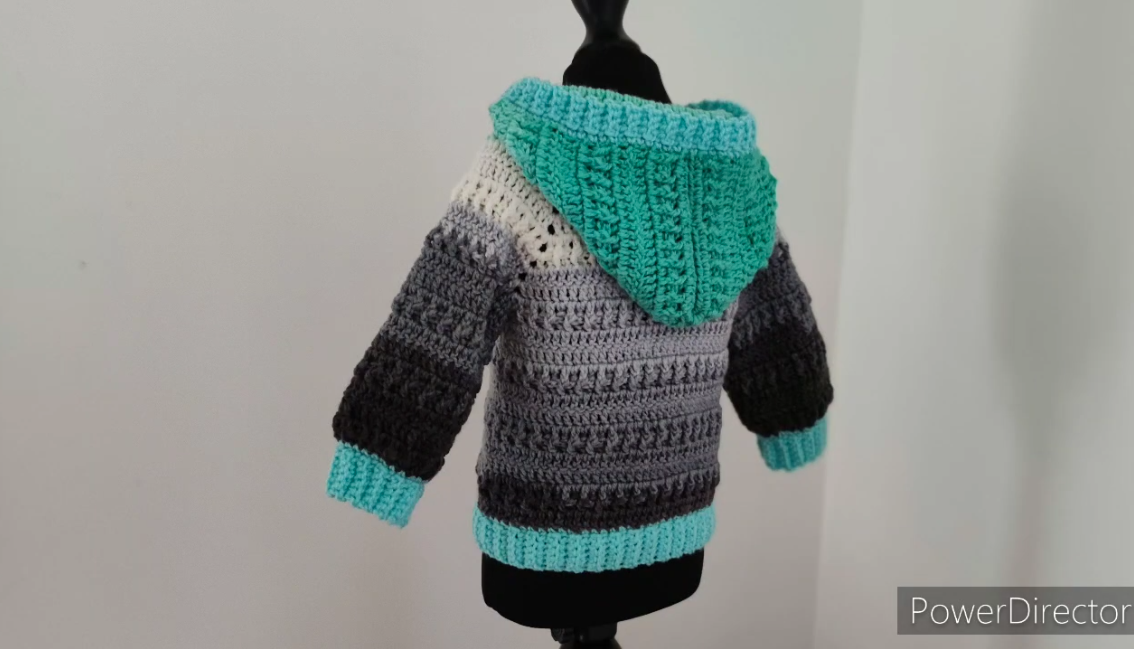
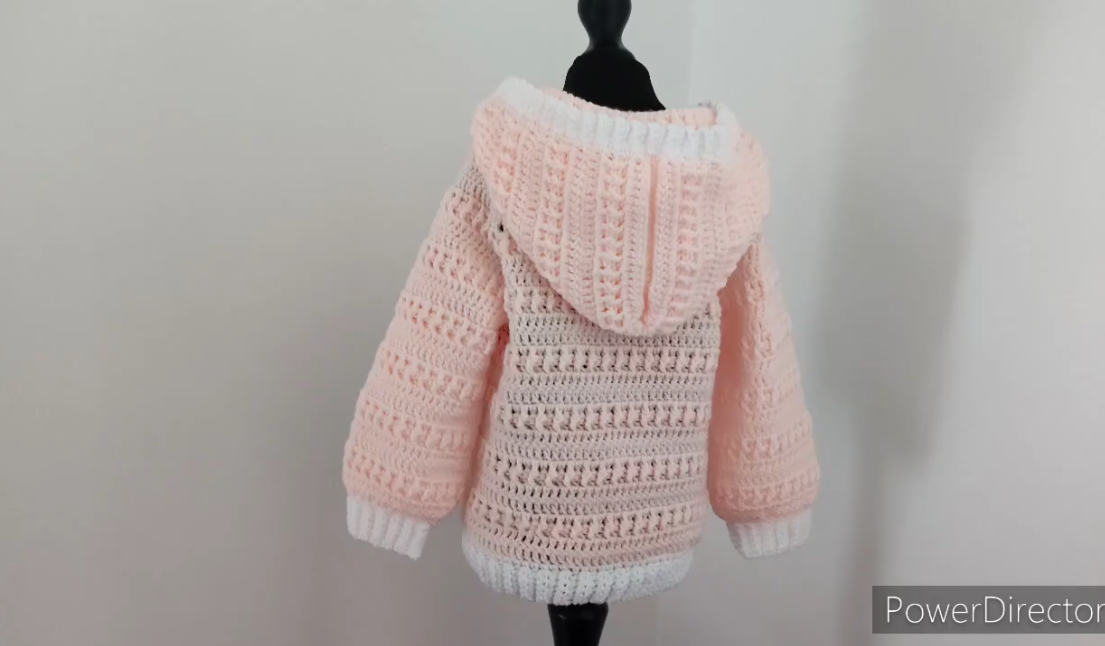
🧶 How to Crochet a Pullover Hoodie for Children — Detailed Guide
⭐ Skill Level: Advanced Beginner / Intermediate
⭐ Construction Style: Bottom-up, raglan or straight-seam, with a separate hood added.
1. Materials You Will Need
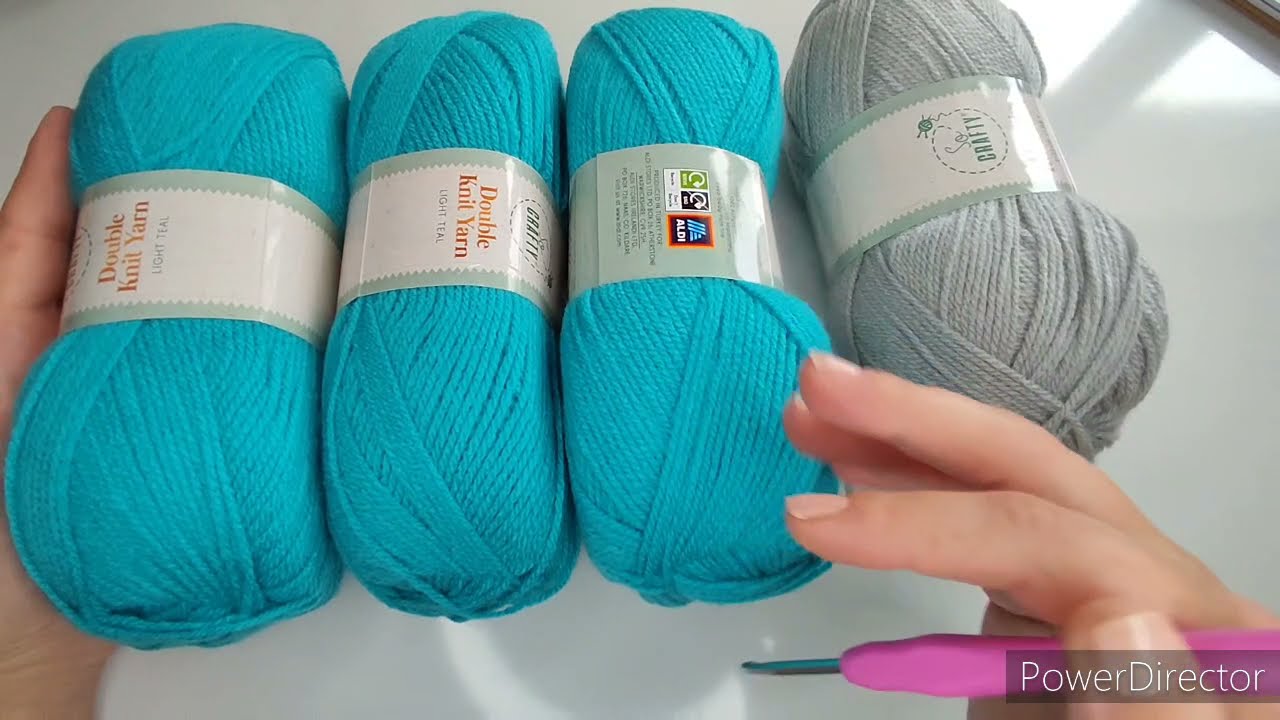
Yarn
-
Weight: Worsted (Medium/4) or DK (Light/3) depending on your climate
-
Yardage:
-
Toddler (2–4 yrs): 500–700 yds
-
Child Small (5–7 yrs): 700–900 yds
-
Child Medium/Large (8–12 yrs): 900–1200 yds
-
Hooks
-
Recommended hook size on yarn label (usually 4.5–5.5 mm for worsted)
-
Optional smaller hook (3.5–4 mm) for ribbing
Notions
-
Stitch markers
-
Tape measure
-
Yarn needle
-
Scissors
2. Stitches Used
-
Chain (ch)
-
Slip Stitch (sl st)
-
Single Crochet (sc)
-
Half Double Crochet (hdc) (common for hoodies because it’s soft and dense)
-
Double Crochet (dc) (optional for faster stitching)
-
Front Post/Back Post Double Crochet (FPdc/BPdc) — for ribbing
3. Measurements to Take
You can follow sizing charts, but measuring improves fit:
-
Chest circumference
-
Hoodie length (shoulder → hem)
-
Sleeve length (underarm → wrist)
-
Armhole depth
-
Hood height (shoulder → top of head)
For a pullover, plan 5–8 cm (2–3 in) of ease so it’s comfortable.
4. Step-by-Step Instructions
🧩 Part 1: Body of the Hoodie (Worked in the Round)
1. Foundation
-
Chain long enough to match the chest measurement ÷ 2.
-
Join to work in the round (be careful not to twist the chain).
-
Or: Work in rows and sew the side seams; easier for beginners.
2. Hem Ribbing (Optional)
-
Switch to the smaller hook.
-
Work FPdc/BPdc ribbing for 4–6 rows.
-
Switch back to main hook.
3. Main Body
-
Work in hdc stitches for a dense, warm fabric.
-
Continue until it reaches the underarm.
4. Divide for Armholes
-
Stop working in the round.
-
Leave stitches unworked on each side to create openings for sleeves.
-
Continue working the front and back separately until reaching the shoulders.
🧩 Part 2: Join Shoulders
-
With the hoodie laid flat, join the front shoulder edges to the back using slip stitch or whipstitch.
-
Leave the neckline opening wide enough for the child’s head.
🧩 Part 3: Sleeves
1. Pick Up Stitches
-
Attach yarn at the armhole.
-
Evenly pick up stitches around the opening.
2. Sleeve Tube
-
Work in the round using hdc.
-
Use stitch markers to track rounds.
-
Decrease 2 stitches every 4–5 rounds for tapered sleeves.
-
Continue until reaching the wrist.
3. Cuff Ribbing
-
Switch to smaller hook.
-
Work 4–6 rows of FPdc/BPdc.
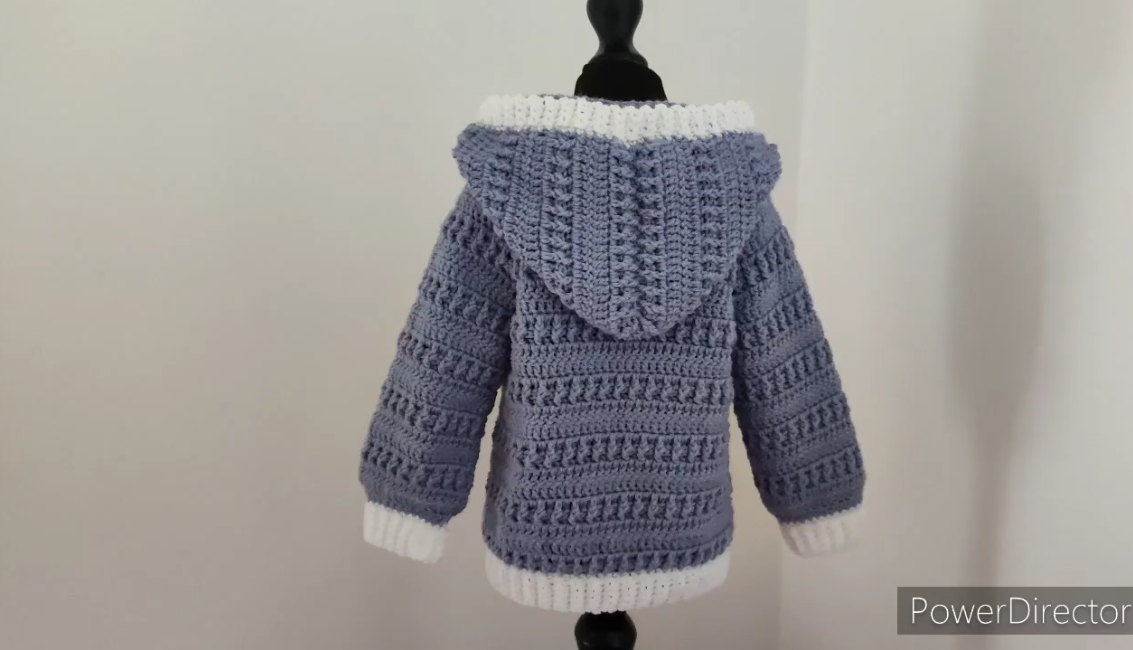
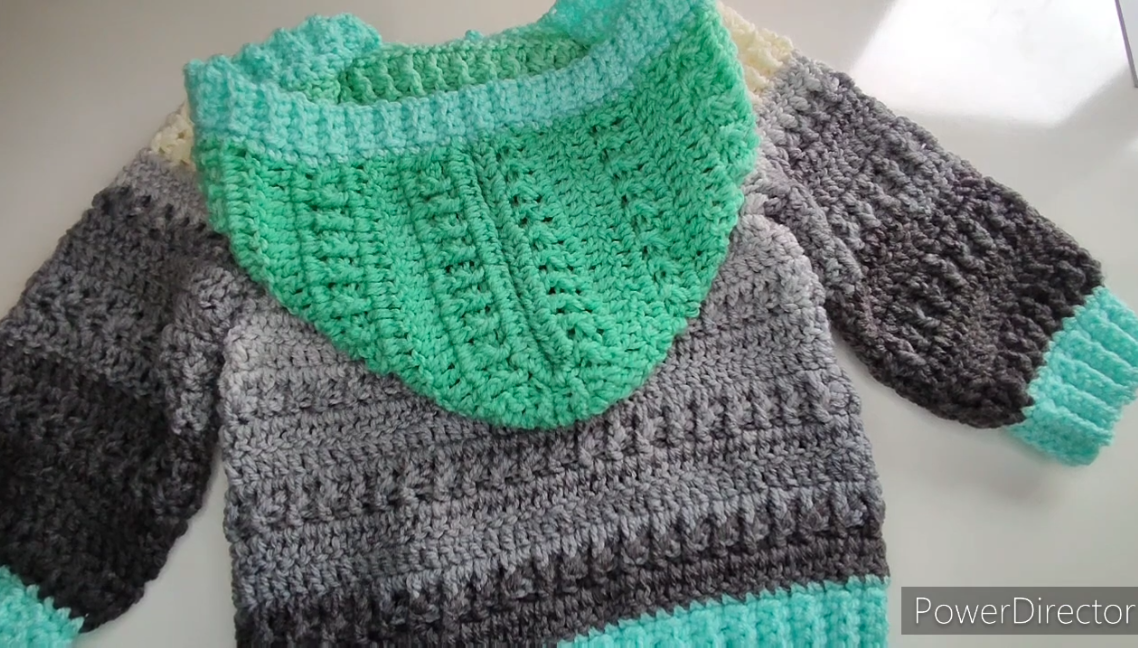
🧩 Part 4: Hood
1. Start from Neckline
-
Attach yarn at neckline.
-
Pick up stitches evenly around the neck opening.
2. Work Upward
-
Crochet in hdc rows back and forth.
-
Keep the edges straight so the hood folds nicely.
3. Shape the Hood
Two options:
A. Straight Hood (Easier)
-
Work until hood height equals the measurement from base of neck to top of head.
-
Fold the hood in half and sew the top closed.
B. Rounded Hood
-
Decrease a few stitches near the top center to gently round it.
🧩 Part 5: Finishing Touches
Add Hood Ribbing or Edging
-
Work 2–4 rows of hdc or ribbing around hood opening.
Optional Drawstring
-
Chain a long string and weave through the hood edge.
-
For kids, safety first:
-
Use short, fixed ties
-
Or avoid drawstrings entirely
-
Weave in All Ends
-
Use a yarn needle to hide all loose ends on the inside.
5. Sizing Adjustments
If the hoodie is too big:
-
Reduce starting chain
-
Use a smaller hook
-
Work fewer rows
If too small:
-
Increase starting chain
-
Add more rows before armholes
-
Add more width at sleeves or hood
6. Tips for Best Results
-
Use stitch markers to track the start of rounds and armhole divisions.
-
Check gauge to ensure your hoodie matches expected size.
-
Choose soft, washable yarn suitable for children.
-
Seam with the same yarn for invisible joins.
7. Optional Enhancements
-
Front pouch pocket (kangaroo pocket)
-
Color blocking (hood one color, body another)
-
Stripes or textured stitches
-
Appliqués (hearts, dinosaurs, animals)
If you want, I can also create:
✅ A printable version
✅ A row-by-row written pattern for a specific age
✅ A diagram or schematic
✅ A beginner-friendly version with fewer techniques
Just tell me the child’s age, measurements, and yarn weight!
Watch tutorial: