 by
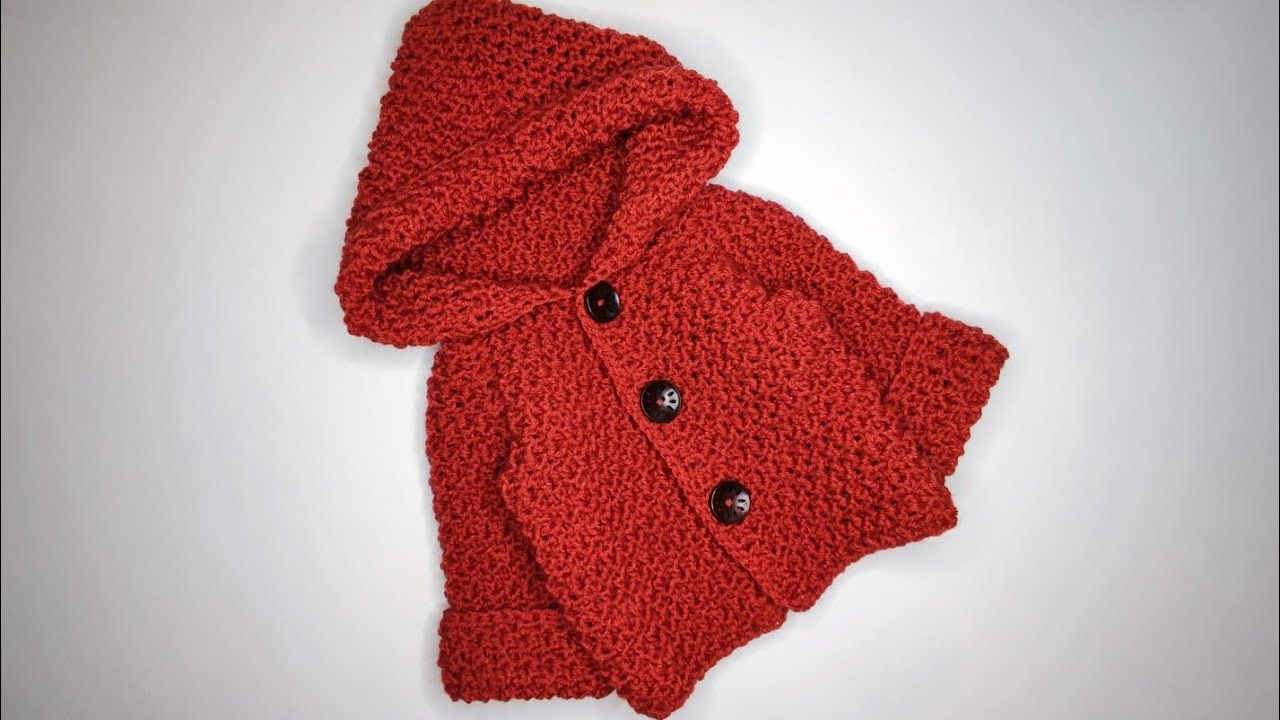
by Below is a clear, step-by-step, beginner-friendly, and detailed guide on how to crochet a very soft baby hoodie—including materials, sizing tips, stitch instructions, and assembly. You can follow this to create a newborn–12 month hoodie.
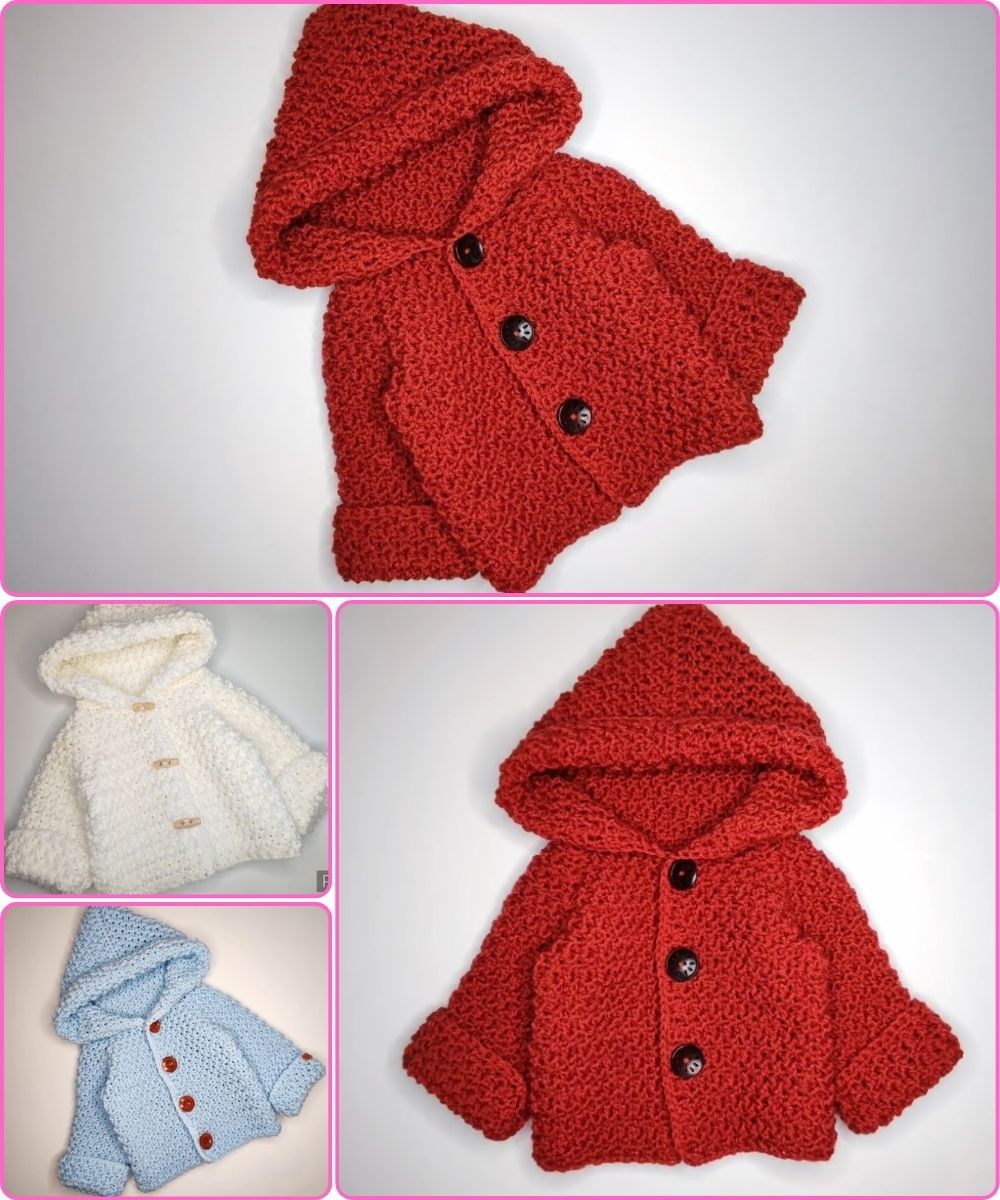
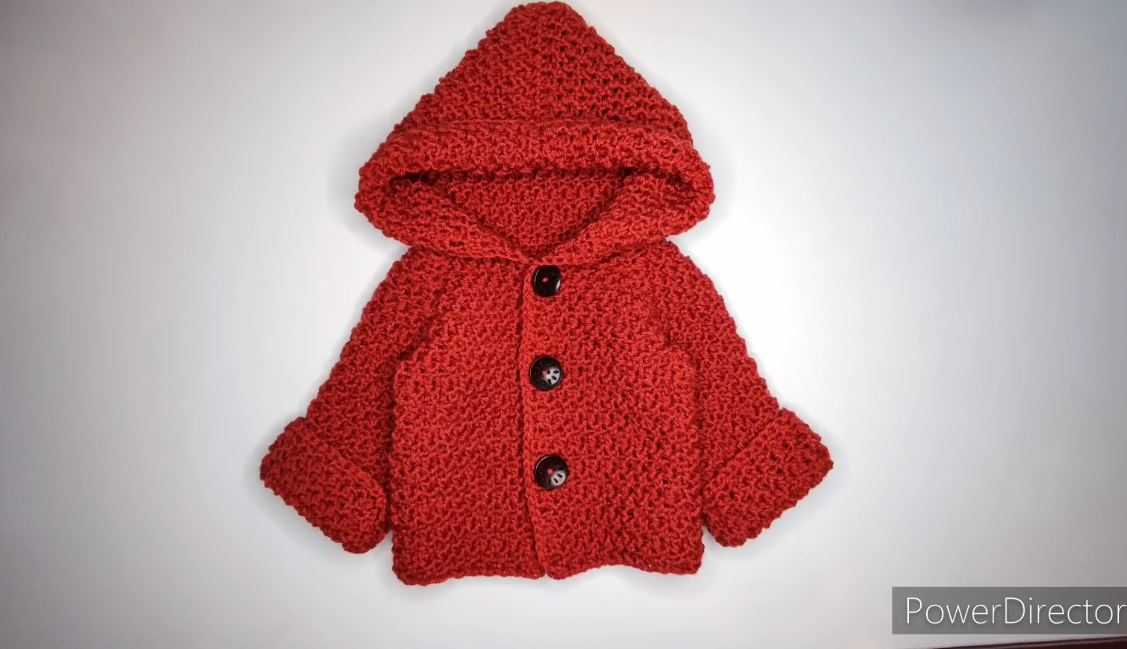
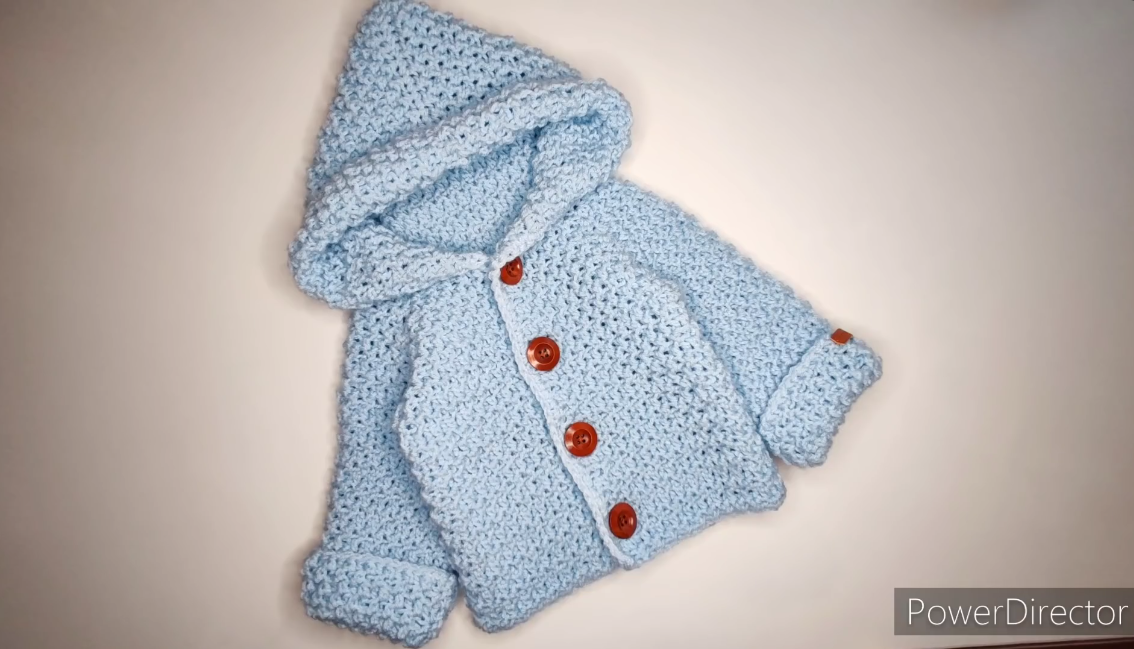
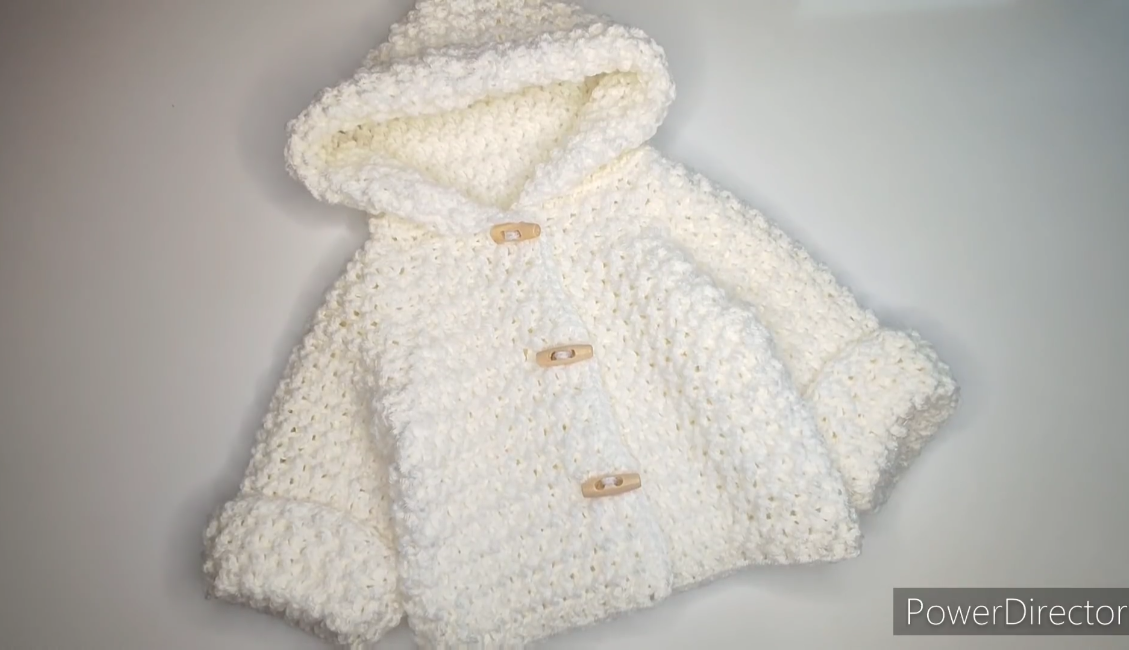
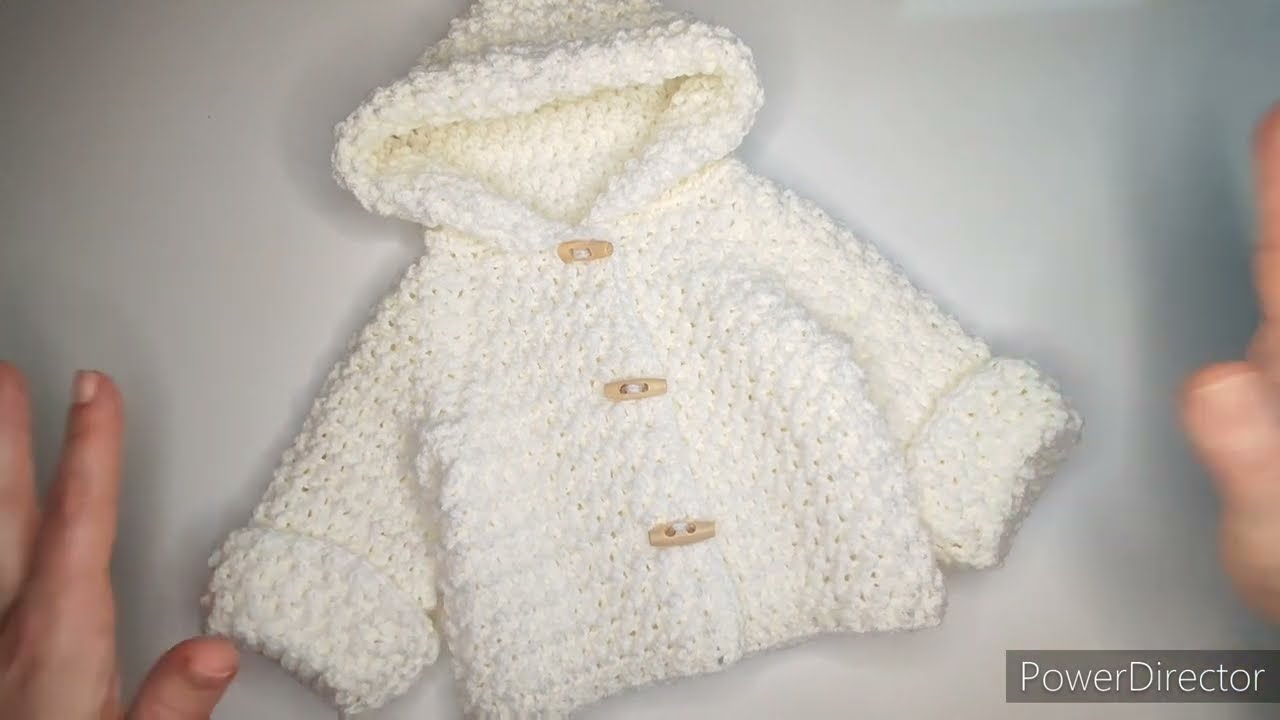
🍼 How to Crochet a Very Soft Baby Hoodie (Detailed Guide)
🧶 Materials You Will Need
-
Yarn: Super soft, baby-friendly yarn. Choose:
-
Category 3 (DK/light worsted) or Category 4 (worsted) baby yarn
-
Acrylic or bamboo blends are soft and washable (e.g., Bernat Softee Baby, Lion Brand Baby Soft)
-
-
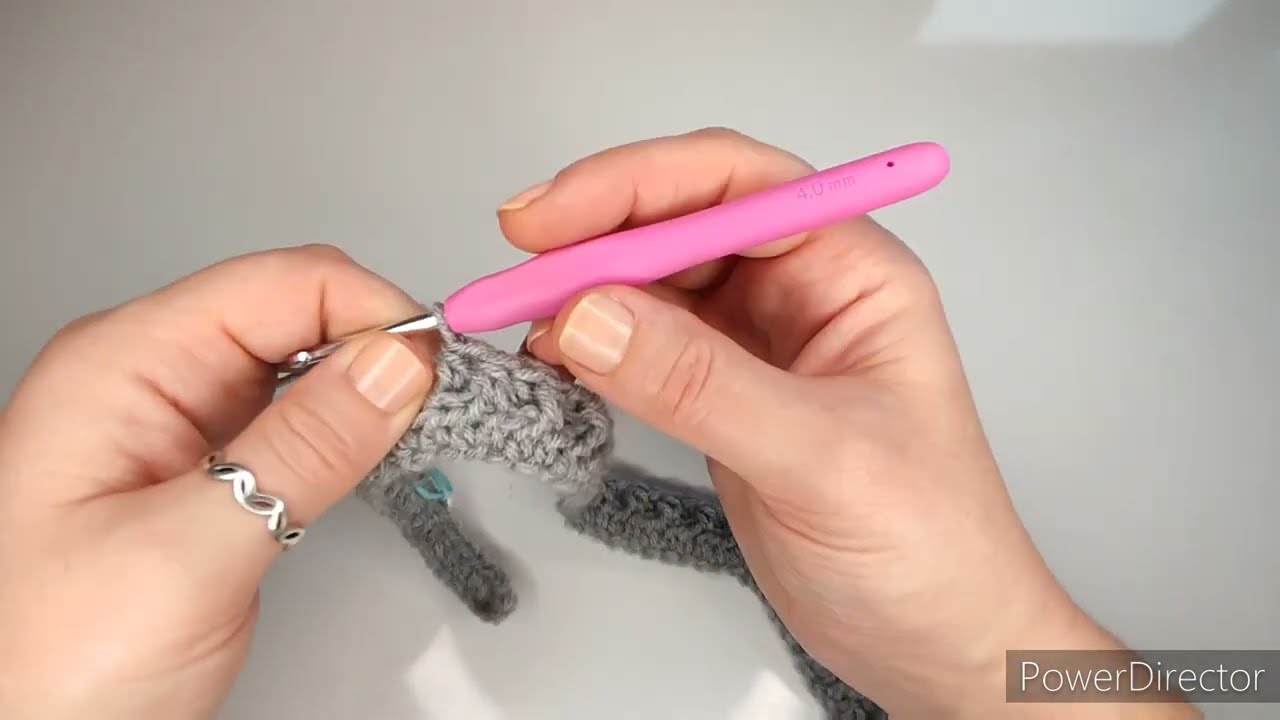
Hook:
-
4.0 mm (G) for DK yarn
-
5.0 mm (H) for worsted yarn
(Use the hook recommended on the yarn label.)
-
-
Stitch markers
-
Yarn needle
-
Scissors
-
Buttons (optional) if you want it to close
👶 Size Guide (Approx.)
You can adapt the hoodie simply by adjusting the starting chain.
| Age | Chest Width | Starting Chain (yoke) |
|---|---|---|
| Newborn | 16–17” | 52–56 chains |
| 3–6 mo | 17–18” | 58–62 chains |
| 6–12 mo | 19–20” | 66–70 chains |
(Instructions below follow 3–6 months size, and adjustments are noted.)
🪡 Stitches Used
-
ch – chain
-
sc – single crochet
-
hdc – half double crochet
-
dc – double crochet
-
sl st – slip stitch
All stitches are standard beginner-level.
☁️ Step 1: Make an Ultra-Soft Raglan Yoke
This method makes the hoodie seamless and very comfortable for babies.
Foundation
-
Chain 60 (for 3–6 months).
-
Join with a slip stitch to form a circle (make sure it’s not twisted).
Round Breakdown
You’ll divide your stitches into 4 sections (front, back, sleeves).
For 60 chains:
-
Back: 18
-
Front: 18
-
Sleeves: 12 each
Use stitch markers at the 4 corners.
Rows 1–10 (or until yoke reaches armpit):
Work in hdc for softness.
-
Hdc around, increasing 2 hdc at each marker (one on each side of the marked stitch).
-
Continue until:
-
Width reaches approx. 6–6.5 inches across the back (for 3–6 months).
-
You will see the yoke forming a rounded square shape.
👕 Step 2: Separate Body from Sleeves
Create the armholes
-
Hdc across front to first marker.
-
Chain 6 (armhole space).
-
Skip all sleeve stitches until next marker.
-
Hdc across the back.
-
Chain 6 again.
-
Skip sleeve #2.
-
Hdc to end.
Now you have a full torso hole for the baby’s body.
🧸 Step 3: Crochet the Body
Rows (Body):
-
Continue working in hdc rows or rounds
-
Add gentle texture if desired:
-
hdc in the back loop only every few rows makes soft ribs.
-
Work 6–8 inches (depending on size).
Finish with:
-
1 row of sc for a neat, soft edging.
🖐️ Step 4: Make the Sleeves (Both)
-
Join yarn at the bottom of the armhole.
-
Work hdc around the armhole, placing ~24–28 stitches evenly.
-
Place a stitch marker at the underarm (for decreases).
Sleeve length:
-
6–7” for 3–6 months (adjust for smaller/older sizes)
Decrease Row (optional):
Every 4th row:
-
hdc2tog under the arm to taper sleeve slightly.
Finish with:
-
2 rows of sc for a clean cuff.
🥰 Step 5: Crochet the Hoodie Portion
A soft hoodie is usually a rectangle that folds and sews at the top.
Hood Base
-
Reattach yarn at the neckline.
-
Work hdc evenly around neckline.
-
Chain 1, turn.
Height of Hood:
-
8–9” tall for 3–6 months.
Shape:
-
Work in rows (back and forth) to create a rectangle.
-
When done, fold the hood in half lengthwise.
-
Seam the top edge using a whip stitch or slip-stitch seam (softest option).
🎀 Optional: Add a Soft Border
Work sc around the entire hoodie opening (including hood) for a smooth finish.
If adding buttons:
-
Place 2–3 buttons on the front.
-
Crochet small button-loop chains on the opposite side.
🧻 Step 6: Finishing Touches
-
Weave in all ends using a yarn needle.
-
Steam block lightly (optional, but helps smooth edges).
-
Wash in baby-safe detergent to maximize softness.
🌸 Tips for Maximum Softness
-
Use yarn labeled “baby”, “soft”, or “anti-pill.”
-
Avoid cotton for newborns; it can feel stiff.
-
Work with slightly loose tension.
-
Avoid bulky yarns—they’re warm but not soft for a baby’s skin.
❤️ Want a Printable PDF or a Simple Pattern Chart?
I can format everything into:
-
A 1-page quick pattern
-
A printable PDF
-
A row-by-row written pattern for any size
-
A video-style step sequence
Just tell me which you prefer!
Watch tutorial: