 by
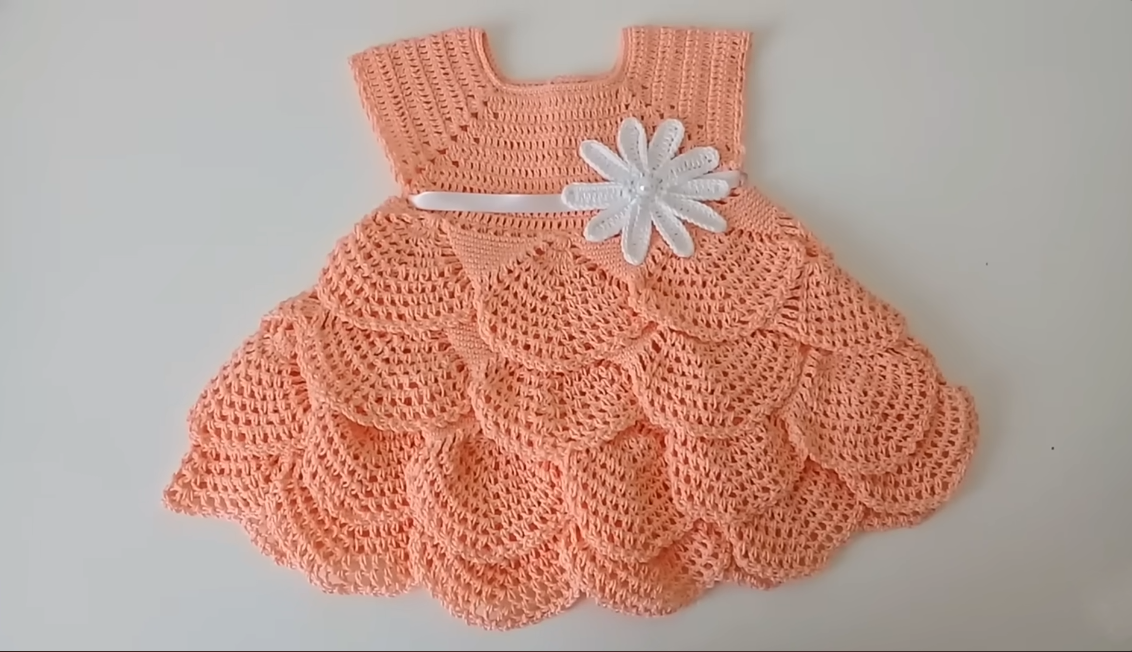
by Below is a clear, detailed, step-by-step guide for how to crochet a baby dress with ruffles suitable for 3–6 months. The pattern is written in standard crochet terms and designed for beginners-to-intermediate level.
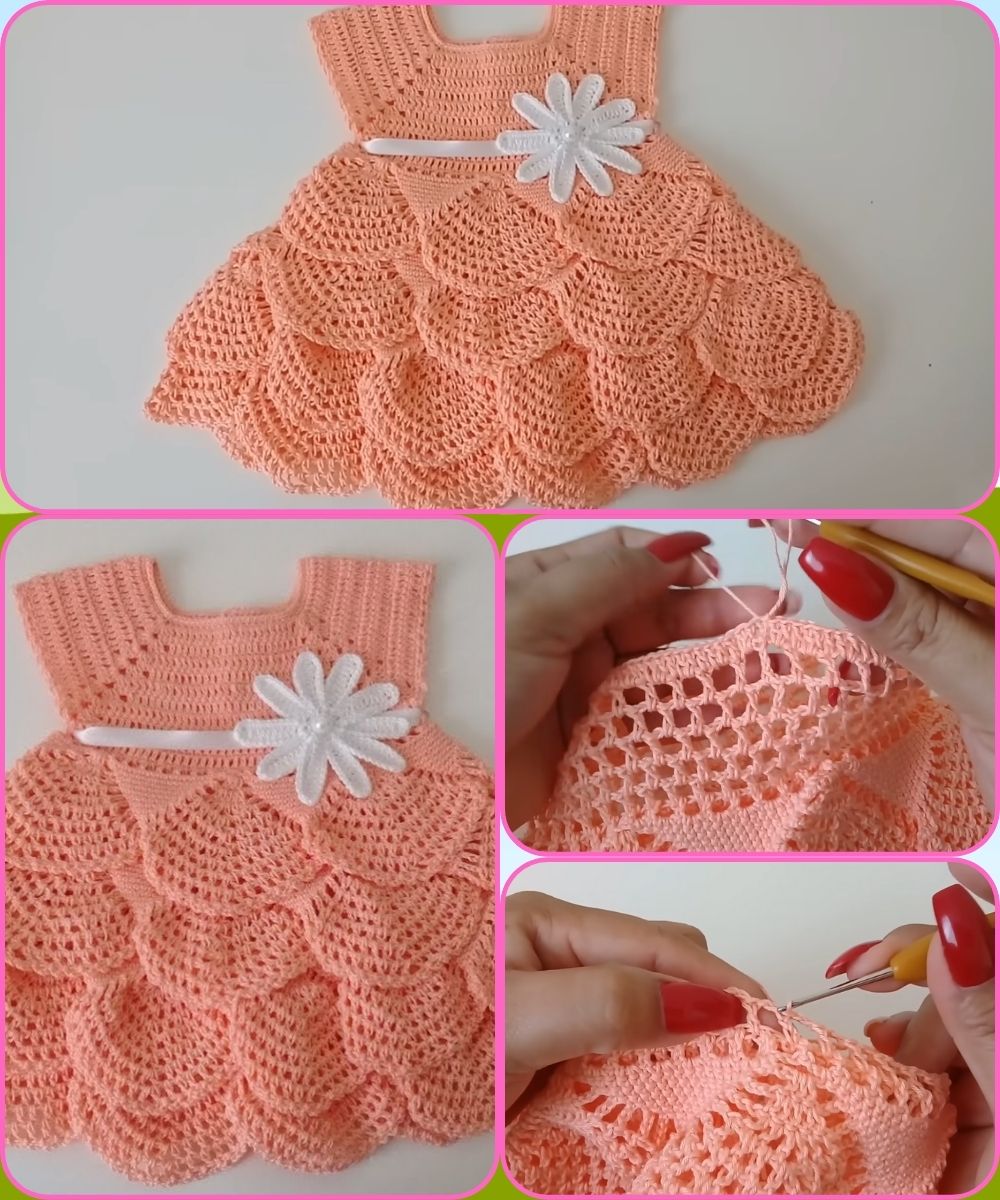
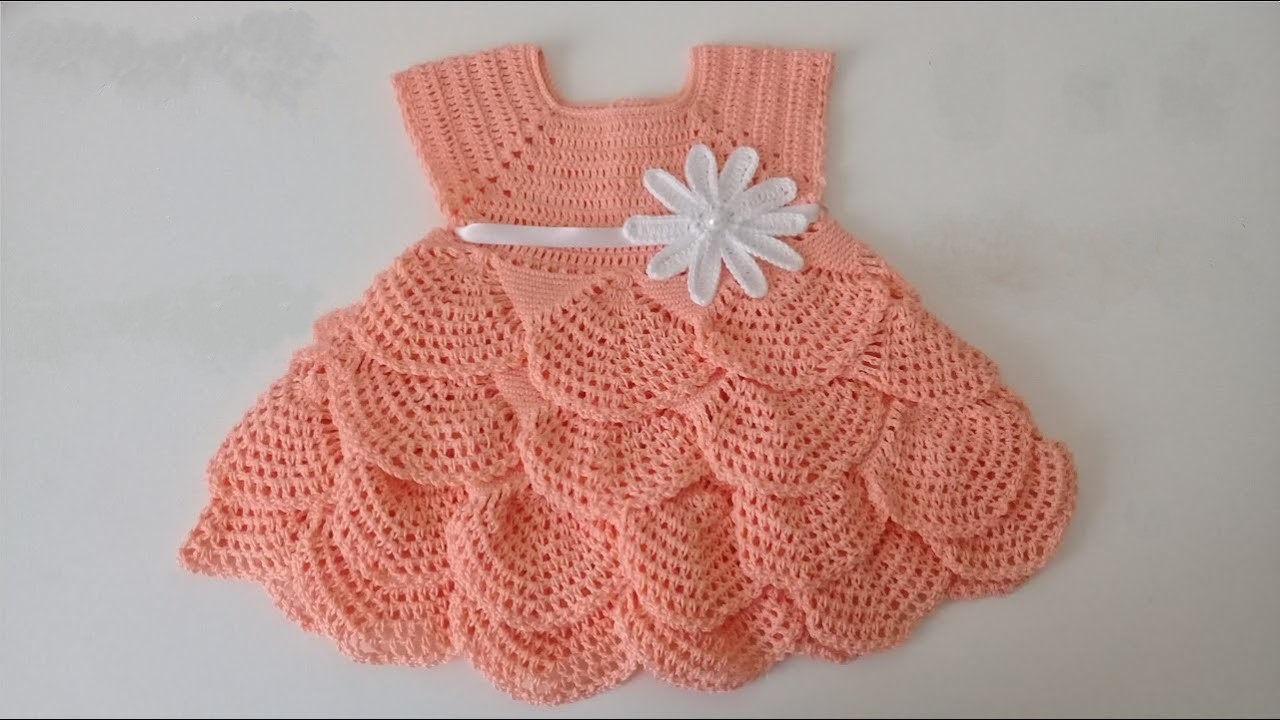
🧶 How to Crochet a Baby Dress (3–6 Months) – With Ruffles
⭐ Size
3–6 months (approx. chest width 18–19 in / 46–48 cm)
⭐ Materials
-
Yarn: Light worsted / DK (Category 3) – 200–250 g
Cotton blends are soft for babies. -
Hook: 4.0 mm (G/6)
-
Tapestry needle
-
Stitch markers
-
Scissors
-
Buttons (2–3) for back closure (optional)
🧵 Stitches & Abbreviations
-
ch – chain
-
sl st – slip stitch
-
sc – single crochet
-
hdc – half double crochet
-
dc – double crochet
-
V-stitch: (dc, ch 1, dc in same stitch)
-
Inc: increase (2 stitches in same stitch)
👗 PART 1 — Yoke (Top of Dress)
Foundation
-
Ch 60 (this makes 3–6 month size).
-
Join with sl st to form circle if making pullover, or do NOT join if you want a back opening (recommended for babies).
Row 1
-
Ch 2 (counts as hdc), hdc in each st across.
-
If left open in back, turn. If in the round, join.
Row 2 — Begin increasing for yoke
-
Ch 2, hdc in same st,
-
(hdc in next 7 sts, Inc) repeat across.
-
Join/turn.
Row 3–6
Repeat increase row:
-
Add an Inc every 7–8 stitches, expanding evenly.
By Row 6 you should have: -
Approx. 84–90 stitches total.
-
Piece should measure 3.5–4 inches tall.
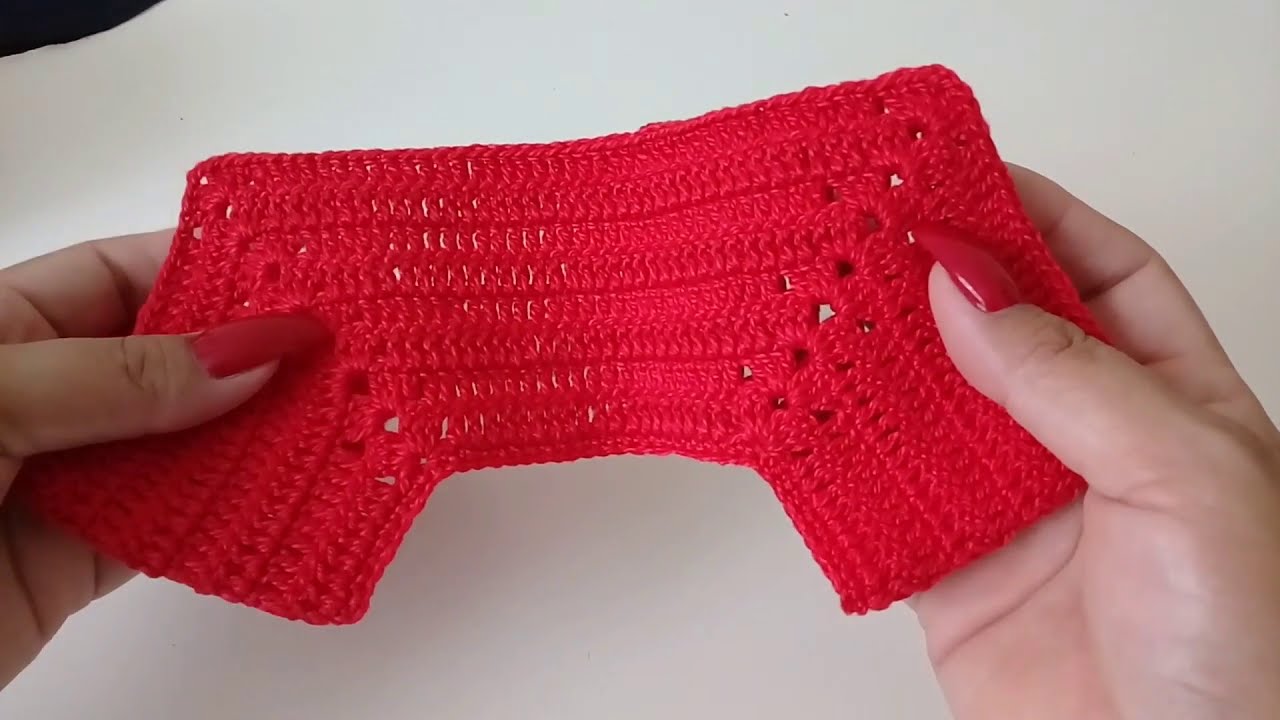
👗 PART 2 — Divide for Armholes
Row 7
Work as follows:
-
Front: hdc in first 16–18 sts.
-
Armhole: skip next 12 sts, ch 6
-
Back: hdc next 16–18 sts
-
Armhole: skip next 12 sts, ch 6
-
Continue hdc to end.
Now you have a circular body with holes for sleeves.
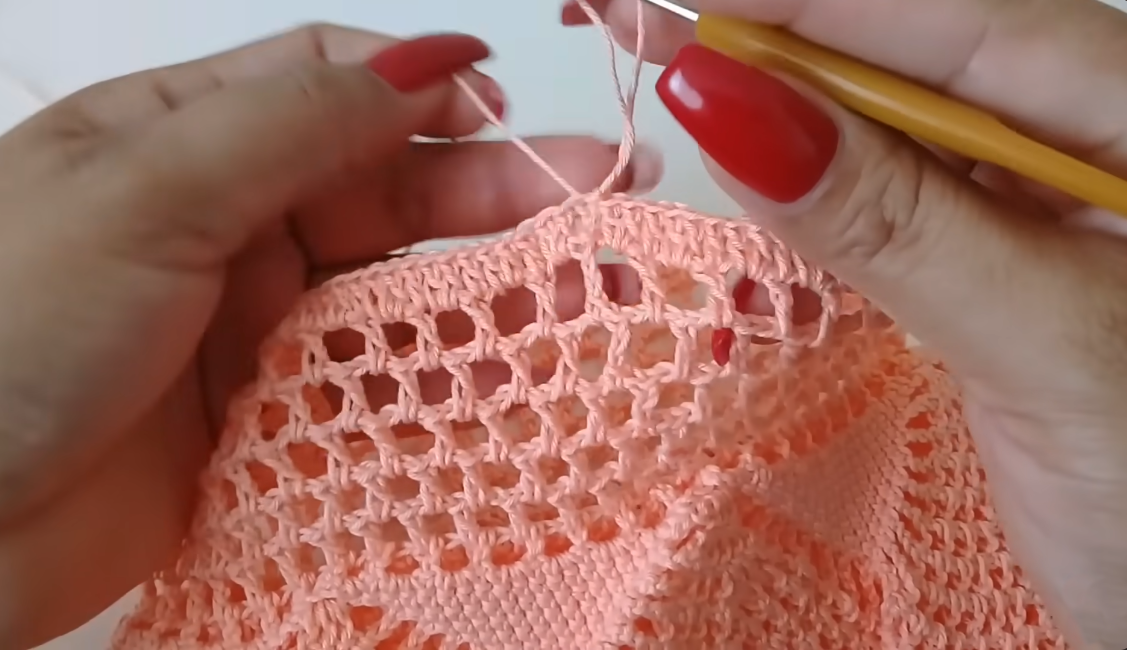
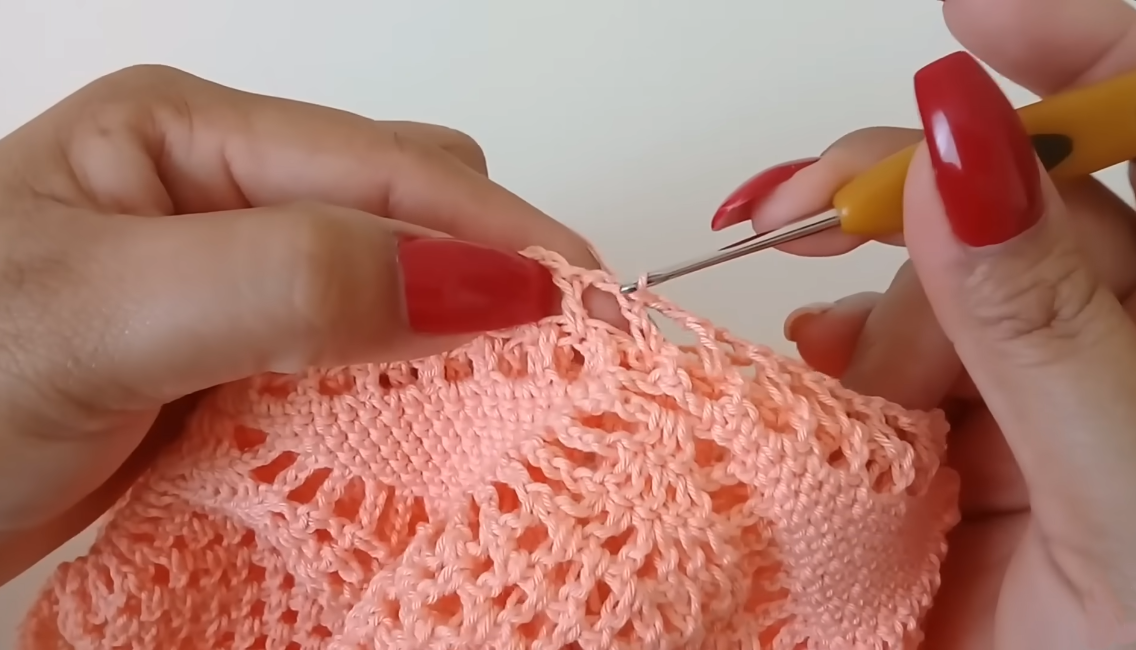
👗 PART 3 — Dress Body (Begin Ruffles)
Row 8
-
Work dc around entire body, join.
-
Total stitches should be even.
Row 9 — Start Ruffle Increase
-
(2 dc in each stitch) all the way around.
This doubles stitches, creating fullness.
Row 10
-
dc in each stitch.
Row 11 — Add first ruffle layer
-
(dc, ch 1, dc) in each stitch around (V-stitch in every stitch).
This gives a wavy, ruffled effect.
🌸 OPTIONAL — Make a 2nd or 3rd Ruffle Layer
Repeat:
-
dc row
-
increase row (2 dc in each stitch)
-
V-stitch row
You can add multiple tiers to make the dress more fluffy.
👗 PART 4 — Finishing the Top (Straps & Edging)
Back Opening
If you kept the back open:
-
Add 3 rows of sc along each edge.
-
Attach 2–3 buttons on one side
-
Add button loops (ch 6 loops) on the other side.
Neckline
-
Crochet sc evenly around neckline.
-
Optional picot edge: (sc, ch 3, sc in next stitch) around neckline.
👶 PART 5 — Armhole Edging
-
Attach yarn to armhole.
-
Work 1 row sc, then 1 row sl st for a clean finish.
-
Optional: small ruffle around armhole using (sc, ch 2) repeat.
🎀 Optional Embellishments
-
Crochet bow
-
Small flower appliqués
-
Contrasting color edging
-
Pearl buttons (secure well for baby safety)
📏 Finished Measurements
-
Length: 12–14 in (30–36 cm)
-
Chest: 18–19 in (46–48 cm)
-
Fits average 3–6 month baby
❤️ Would you like:
✅ A print-friendly PDF?
✅ Step-by-step photos for this pattern?
✅ A video tutorial script?
Watch tutorial: