 by
by Below is a detailed, beginner-friendly, step-by-step guide on how to crochet a romper/jumpsuit with a hood and animal ears in various sizes (newborn–adult). This guide includes sizing notes, stitch counts, construction options, and finishing steps.
🧶 How to Make a Crochet Romper or Jumpsuit with Hood and Ears
Step-by-Step Tutorial • Customizable Sizes
⭐ Skills Needed
-
Chain (ch)
-
Single crochet (sc)
-
Half double crochet (hdc)
-
Double crochet (dc)
-
Increase and decrease
-
Working in rows & rounds
-
Sewing pieces together with yarn needle
🧵 Materials
-
Yarn: Worsted or chunky weight (depending on desired warmth)
-
Hook size:
-
Worsted: 4.5–5.0 mm
-
Chunky: 6.0–6.5 mm
-
-
Yarn needle
-
Stitch markers
-
Buttons or zipper (optional front closure)
-
Scissors
-
Tape measure
📏 Sizing Notes (Important!)
This pattern can be adapted to any size by following these 3 rules:
1. Chest Width
Measure around the chest/torso → divide by 2 → that equals the romper front/back panel width.
Approx widths:
| Size | Chest Width (half) |
|---|---|
| Newborn | 8″ / 20 cm |
| 3–6 mo | 9″ / 23 cm |
| 6–12 mo | 10″ / 25 cm |
| Toddler | 11–12″ / 28–30 cm |
| Child | 13–15″ / 33–38 cm |
| Adult S–M | 17–18″ / 43–46 cm |
| Adult L–XL | 19–21″ / 48–53 cm |
2. Torso Length
Measure shoulder → crotch.
3. Leg Length
Measure from crotch → ankle (or desired length for shorts version).
🧵 PATTERN OVERVIEW
The romper is worked in four parts:
-
Front panel
-
Back panel
-
Hood
-
Ears
-
Sleeves + Legs (optional)
You then join the pieces and add closures.
🪡 1. FRONT PANEL
Foundation Chain
Make a chain equal to desired chest width.
Example:
-
Baby: ch 40–50
-
Child: ch 60–70
-
Adult: ch 80–95
👉 The exact number doesn’t matter; just meet your measurement.
Rows 1–? (Torso)
Work in hdc or sc for a firm fabric.
Repeat rows until piece measures shoulder to crotch height.
🪡 2. BACK PANEL
Make the same as the front panel but 1–2 rows longer for better fit.
🪝 3. JOINING THE PANELS (Sides & Shoulders)
Shoulders
Sew the top 2–3 inches (5–7 cm) of both panels together on each side, leaving a neck opening.
Side Seams
Sew or slip stitch sides together, leaving armholes.
Armhole sizes (approx):
-
Baby: 3.5″ / 9 cm
-
Toddler: 4.5″ / 11 cm
-
Child: 6″ / 15 cm
-
Adult: 7–9″ / 18–23 cm
🧦 4. ROMPER LEGS
Once the torso tube is formed, divide bottom into two leg openings.
Leg Openings
Attach yarn at crotch.
Work in the round:
-
Round 1: sc evenly around leg opening
-
Rounds 2–10 (or desired length): hdc or dc
For long pants, continue to desired length.
For shorts, stop early.
Optional: Add ribbing
-
Front/back post dc ribbing for stretch.
👕 5. SLEEVES (Optional)
With yarn at armhole:
Round 1: sc evenly around
Rounds 2–10+: hdc or dc to desired sleeve length.
Optional: Add ribbing at wrist.
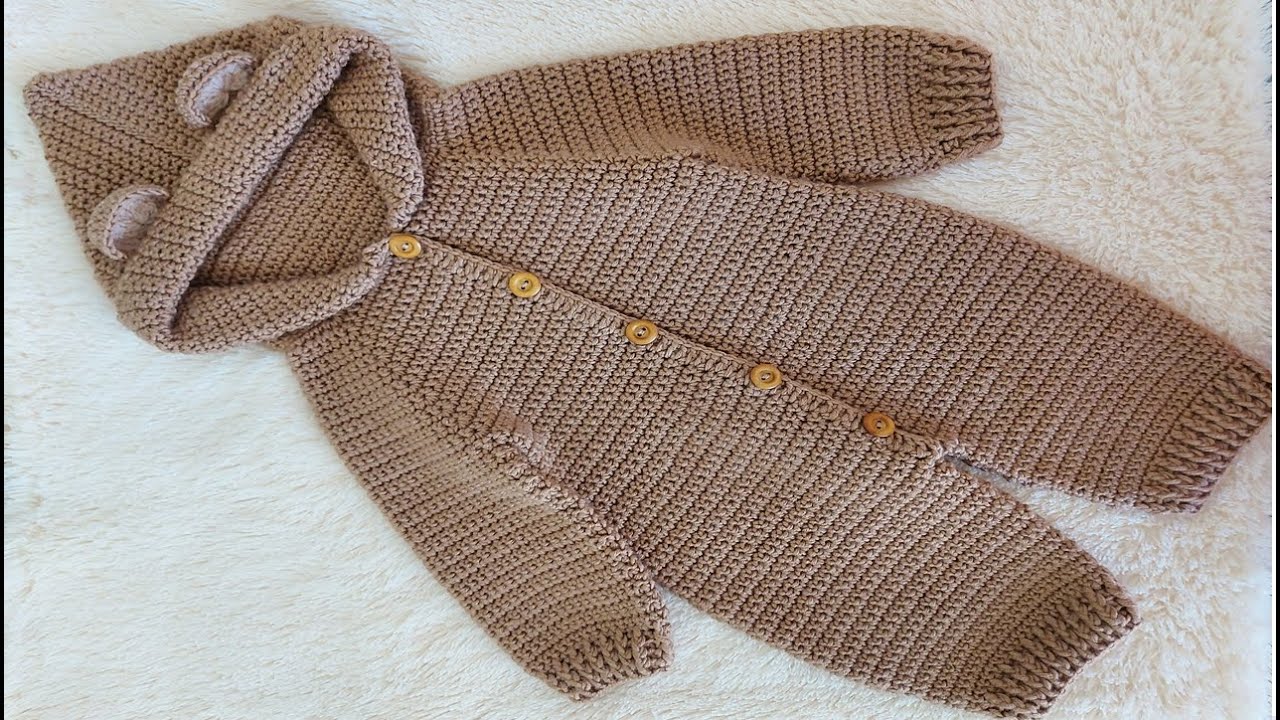
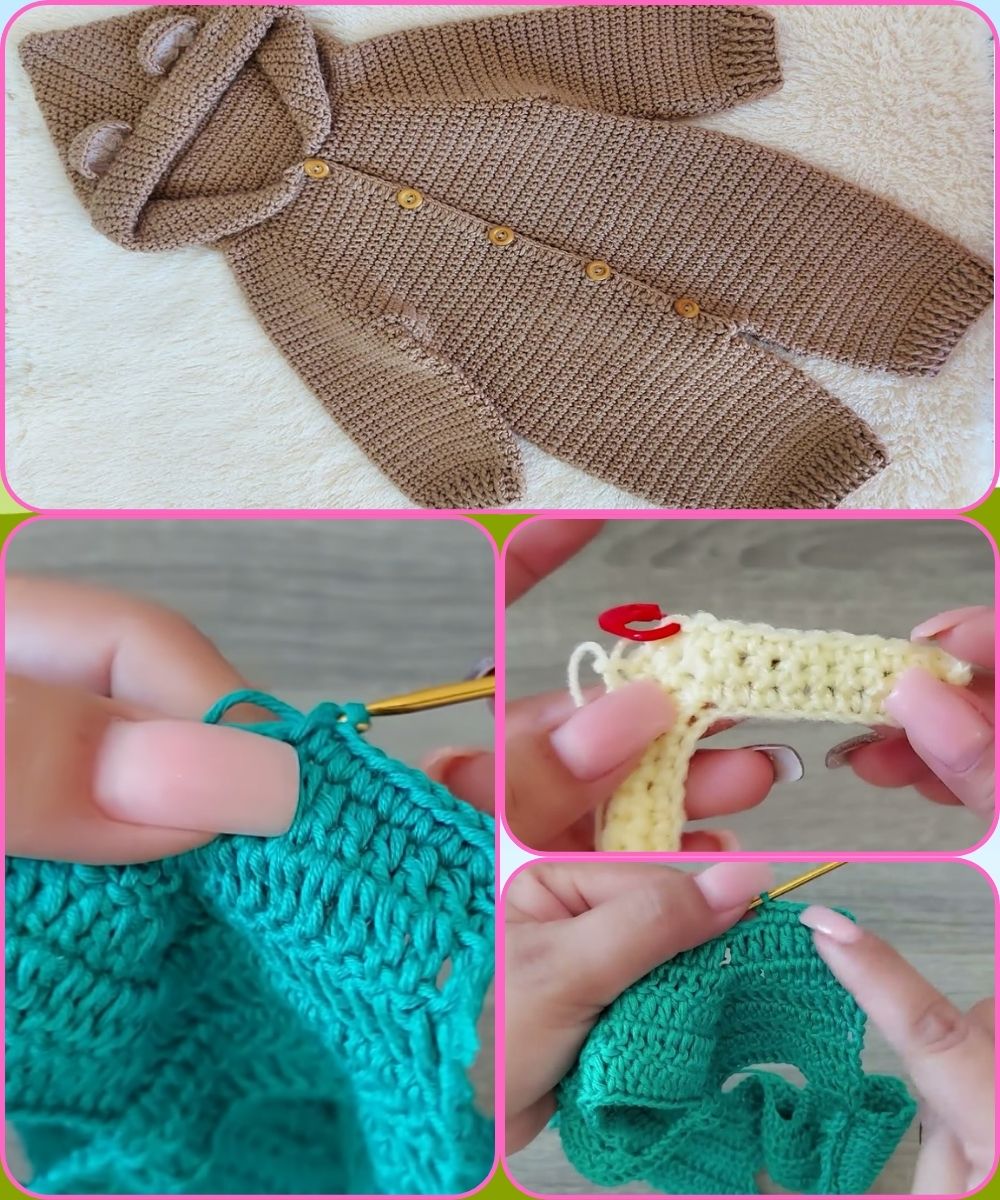
🐻 6. HOOD WITH EARS
📌 Hood Construction
Attach yarn to neckline.
You can make the hood two ways:
Method A: Hood Worked Side-to-Side (Rectangle Method)
✔ Easiest for beginners
✔ Works for all sizes
Row 1
Chain from front of neck opening to other side (~8–14 inches depending on size).
Rows 2–?
Work hdc rows until piece reaches top of head (6–13 inches depending on size).
Fold & Seam
Fold the rectangle in half and sew the top closed → hood shape.
Method B: Hood in the Round (More Tailored)
Round 1: sc evenly around neckline.
Rounds 2–?: hdc around, increasing at back center until hood height reached.
Fold and sew top if needed.
🐰 7. MAKING EARS (Any Animal)
🐰 Bunny Ears
-
Make 2 pink inner ears, 2 white outer ears.
-
Long oval shape:
-
Row 1: ch 10
-
Row 2–10: sc across, increase at ends for curved shape
Sew pink to white, fold base, attach to hood.
-
🐻 Bear Ears
-
Make 2 circles (increase in rounds 2–3)
-
Fold slightly and sew to hood.
🐱 Cat Ears
-
Triangle shape:
-
Row 1: ch 2
-
Row 2: sc 2
-
Each row: increase in first st, sc to end
-
Continue until desired size.
-
🐶 Puppy Ears (floppy)
-
Long oval shape, no stiffening.
🧵 8. ATTACH THE HOOD & EARS
Sew hood onto neckline using mattress stitch.
Position ears symmetrically and sew securely.
🔘 9. CLOSURES
Choose one of these:
Button-Up Front
-
Add button band with sc rows
-
Sew buttons on opposite side.
Zipper (Most polished)
-
Sew zipper up front of torso using needle and thread.
Side Buttons (Baby-friendly)
-
One shoulder opens with buttons for easy dressing.
🎀 10. EDGING & FINISHING TOUCHES
-
Add ribbing around hood edge:
Row of sc → front/back post dc for 3–4 rows -
Add cuffs to sleeves and legs
-
Add a tail (for animal theme)
-
Optional: embroider whiskers or nose
📐 Approximate Stitch Counts by Size
(Using worsted yarn + 5 mm hook)
| Size | Foundation Chain (front/back) | Hood Chain | Ear Size |
|---|---|---|---|
| Newborn | 40 | 45 | small |
| 6–12 mo | 48 | 55 | small-medium |
| Toddler | 54 | 60 | medium |
| Child | 65 | 70 | medium-large |
| Adult | 80–95 | 85–100 | large |
You can always adjust by measuring as you go.
🎉 You’re Finished!
You now have a customizable crochet romper or jumpsuit with an adorable hood and ears. This pattern is intentionally flexible so you can adapt it to any yarn, any size, and any animal style (bear, bunny, fox, cat, puppy, dragon, etc.).
If you want, I can also create:
✅ A printable PDF pattern
✅ A version with exact stitch counts for one specific size
✅ A chart / diagram
✅ A video-style step-by-step script
✅ Specific animal variations (bear, bunny, fox, cat)
Watch tutorial: