 by
by Below is a clear, beginner-friendly, step-by-step guide on how to make a crochet hat with the “Waffle” pattern, focusing on how to make the process easy and quick. I’ll include materials, stitch explanations, and a simple pattern you can follow.
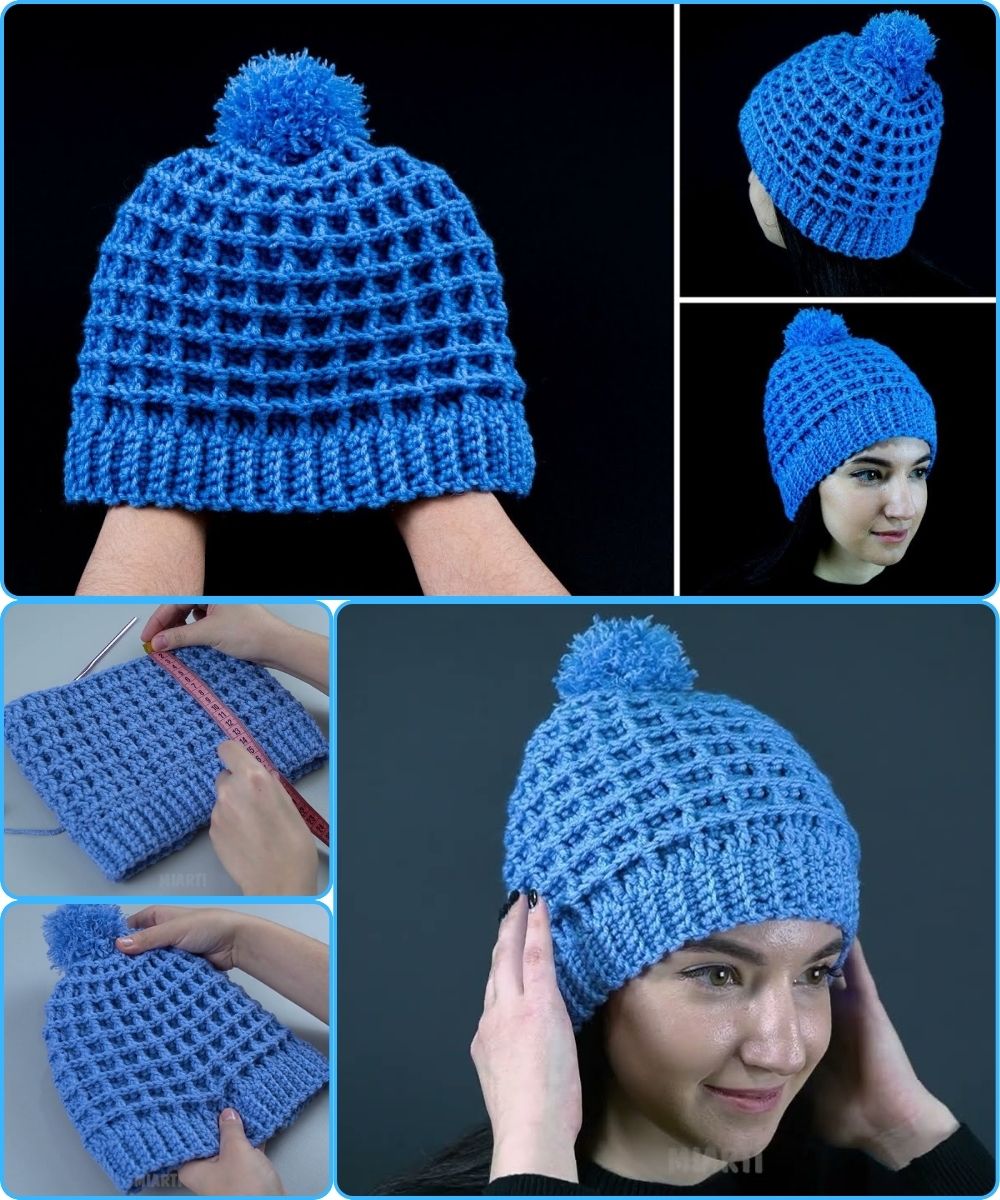
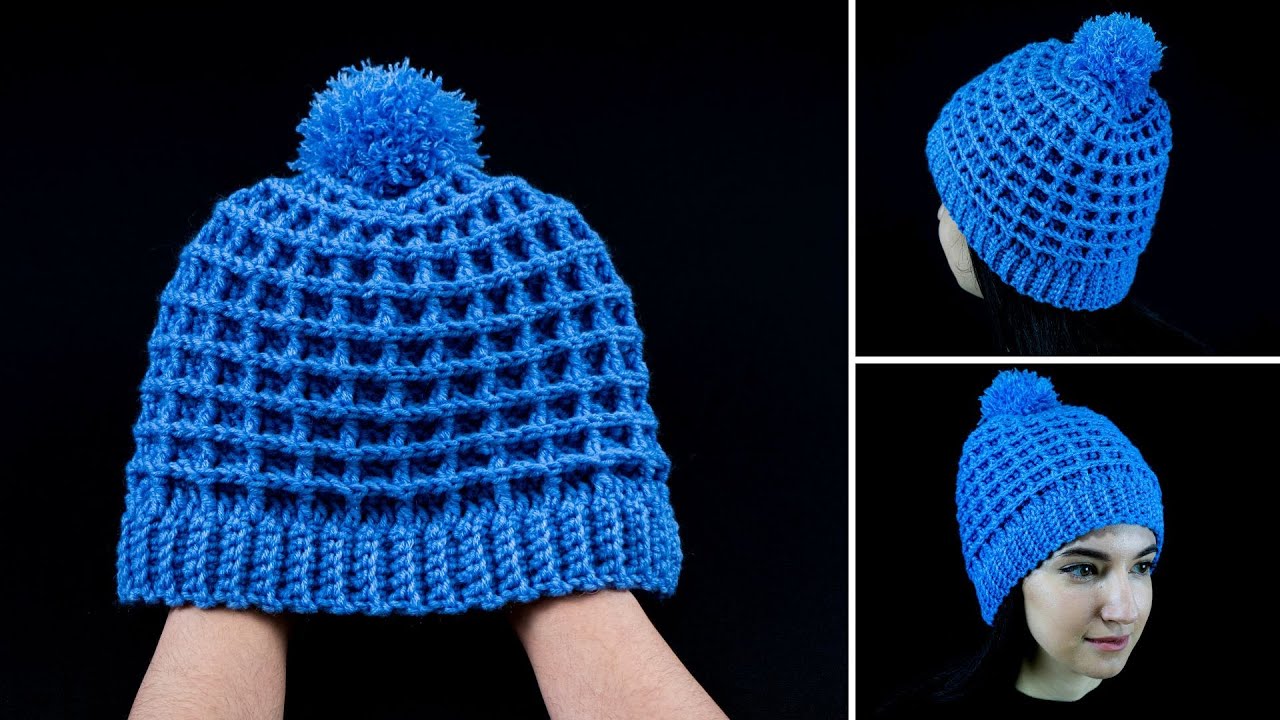
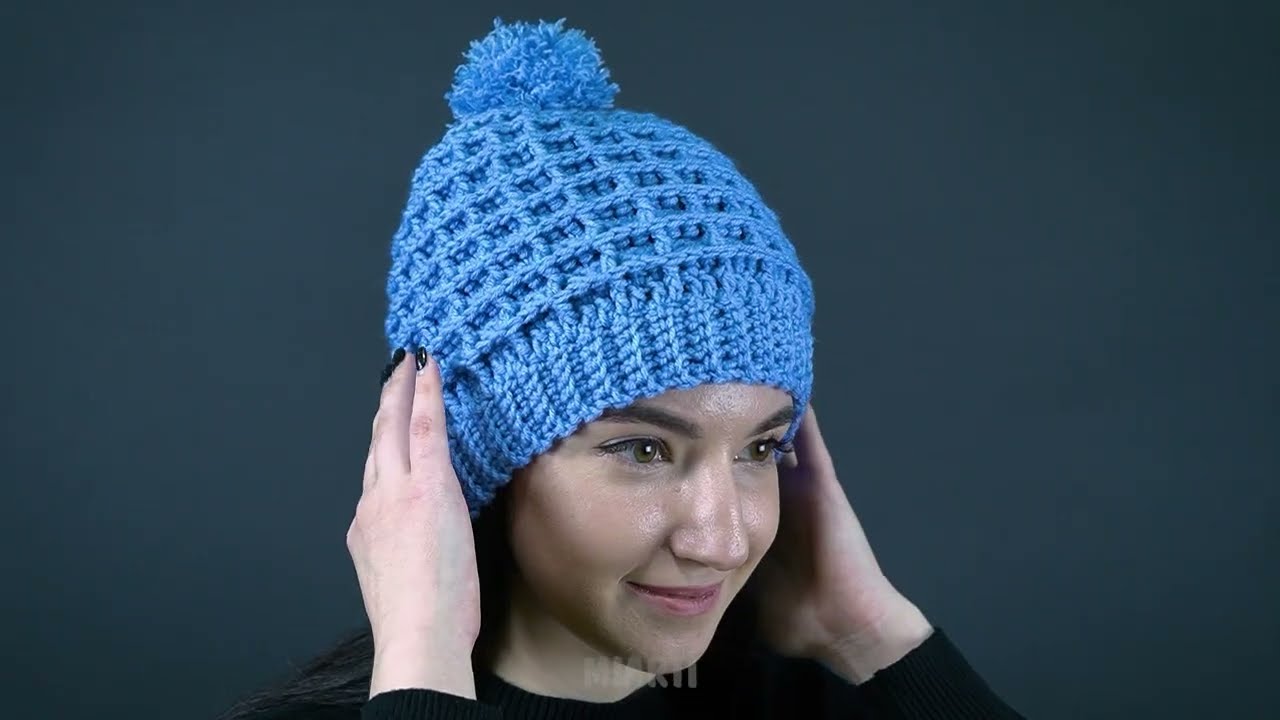
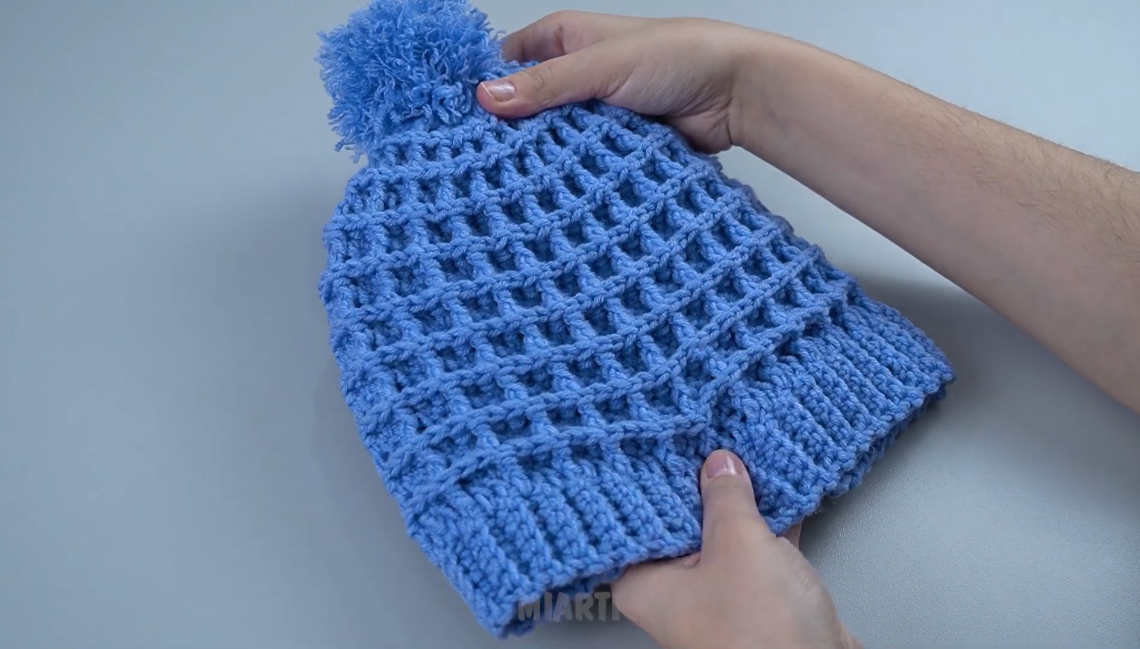
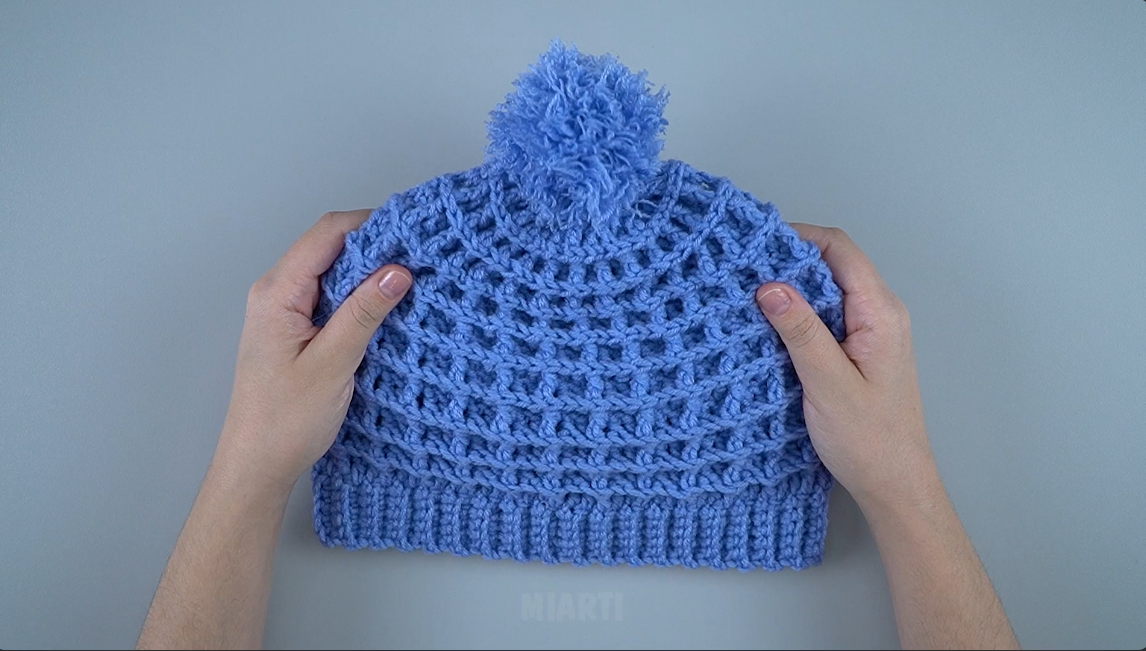
🧶 How to Easily & Quickly Crochet a Waffle-Stitch Hat (Beginner Friendly!)
The waffle stitch looks beautifully textured but is surprisingly easy once you understand front post stitches. This guide simplifies the process so beginners can follow along without stress.
⭐ Why This Hat is Easy for Beginners
-
Uses basic stitches (double crochet + front post double crochet)
-
Worked in the round from the top down—easy to adjust size
-
Only one stitch pattern repeat
-
Chunky/bulky yarn makes it quick (1–2 hours!)
🧵 Materials You Need
-
Bulky weight yarn (5) — 100–150g
-
Crochet hook 6.0 mm / J–10 (use what fits your yarn)
-
Scissors
-
Yarn needle
-
Optional: Pom-pom
📘 Stitches You Need to Know
If you’re a beginner, these are the only stitches involved:
Magic ring (or chain 4, join to form circle)
Chain (ch)
Double Crochet (dc)
Yarn over, insert hook, pull up loop, yarn over, pull through 2 loops twice.
Front Post Double Crochet (FPDC)
Go around the post of the stitch from front to back to front, then finish like a normal dc.
👉 FPDC is what creates the waffle texture.
🍽 Waffle Stitch Pattern (Simple Repeat)
The waffle texture comes from a 2-row repeat:
-
Row A: 1 FPDC, 1 DC, 1 DC
-
Row B: 1 FPDC, 2 FPDC
But for hats, this is adapted to work in the round, shown below.
🎩 EASY WAFFLE STITCH HAT PATTERN (Beginner Level)
1. Crown (Top of Hat)
Round 1:
Magic ring, 10 dc into ring.
Join with slip stitch. (10)
Round 2:
Ch 2, 2 dc in each stitch around.
Join. (20)
Round 3:
1 FPDC around first stitch, 1 dc in next stitch — repeat around.
Join. (20)
Round 4:
1 FPDC around FPDC from previous row, 1 dc in next stitch, 1 dc in next
Repeat around. (30)
Round 5:
1 FPDC around FPDC, 1 dc in next 2 stitches, 1 dc in next
Repeat around. (40)
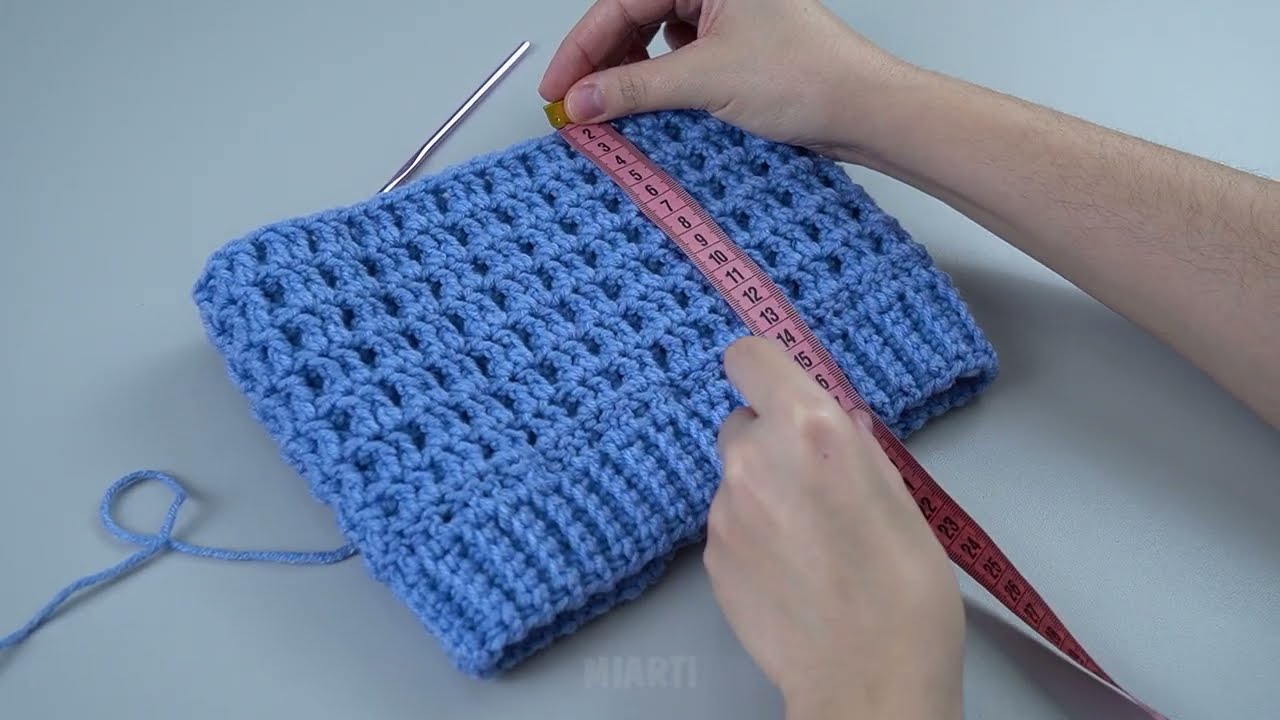
✔️ Continue increasing this way until the circle reaches:
-
6.5 inches (16.5 cm) for adult
-
6 inches (15 cm) for teen
-
5.5 inches (14 cm) for child
🧱 2. Waffle Body of Hat
Once the crown is wide enough:
Round Pattern Repeat
You will now alternate:
Round A:
FPDC around FPDC, dc in next 2 stitches.
— gives the vertical waffle lines
Round B:
FPDC around FPDC, FPDC around next dc, dc in next stitch.
— deepens the waffle squares
Repeat Rounds A & B for:
-
10–12 rounds (or until length is right)
✔ TIP: Pull slightly on your work; waffle stitch grows in texture and height.
🪢 3. Brim (Optional Stretchy Rib)
Switch to ribbed edging:
Round 1:
1 FPDC, 1 BPDC around (back post double crochet).
Repeat for 3–5 rounds.
Creates a neat stretchy brim.
🎀 4. Finishing
-
Fasten off.
-
Weave in ends with yarn needle.
-
Add a pom-pom if desired.
⚡ Tips to Make It Easier & Faster
✔ Use chunky yarn
Creates texture quickly and hides beginner mistakes.
✔ Keep FPDC loose
A tight front-post stitch is hard to insert hook into.
✔ Mark your rounds
A simple stitch marker prevents confusion.
✔ Practice the FPDC on a small swatch first
Just 10 stitches → FPDC row → repeat.
✔ Don’t worry about perfection
The waffle texture disguises uneven tension nicely!
📌 Want me to create:
✅ A printable PDF?
✅ A left-handed version?
✅ Step-by-step pictures?
✅ A video-friendly script?
Just tell me!
Watch tutorial: