 by
by Below is a clear, beginner-friendly, detailed tutorial on How to Make an Easy Crochet Beret Hat. No web search needed—this is a craft tutorial, not time-sensitive.
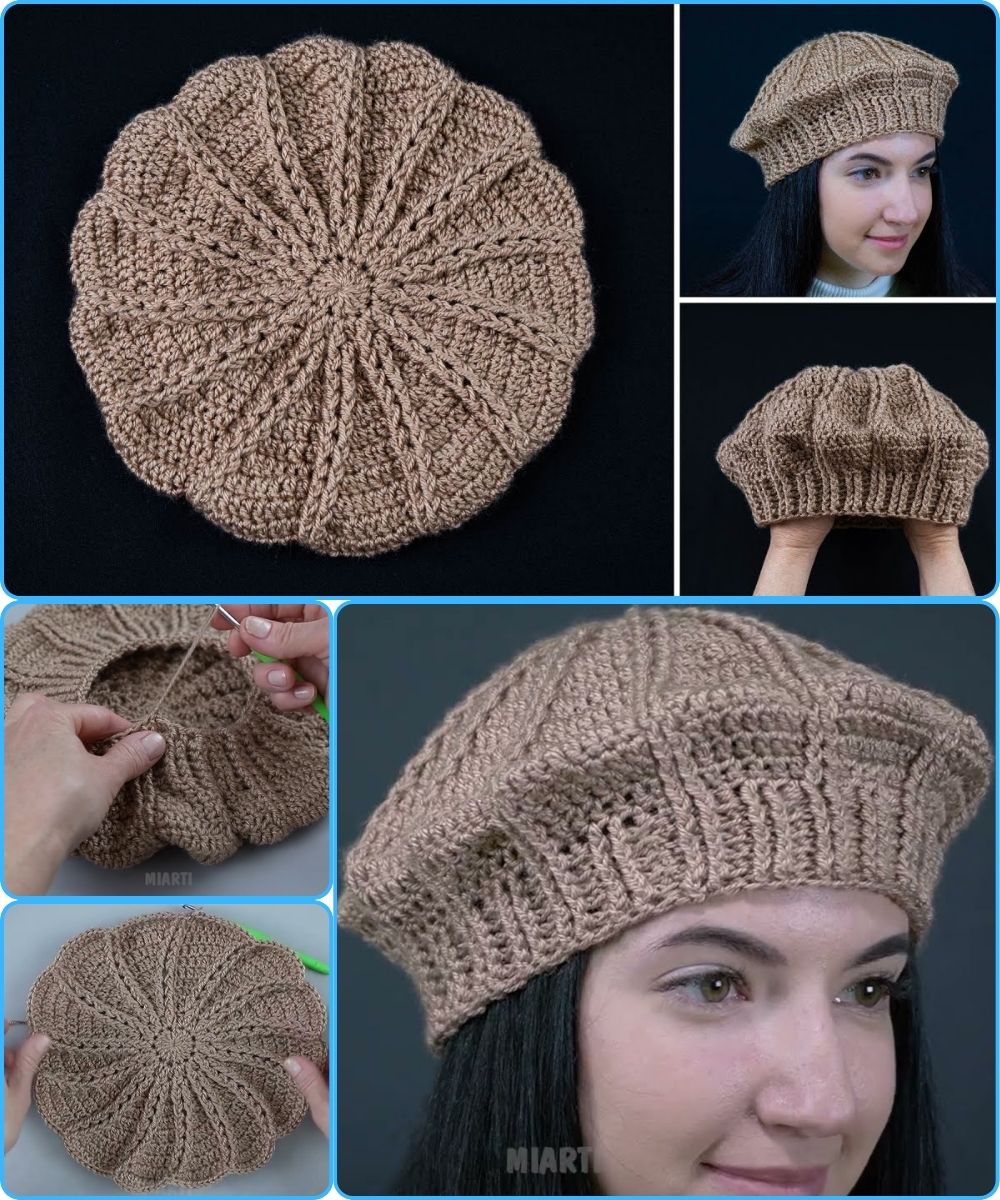
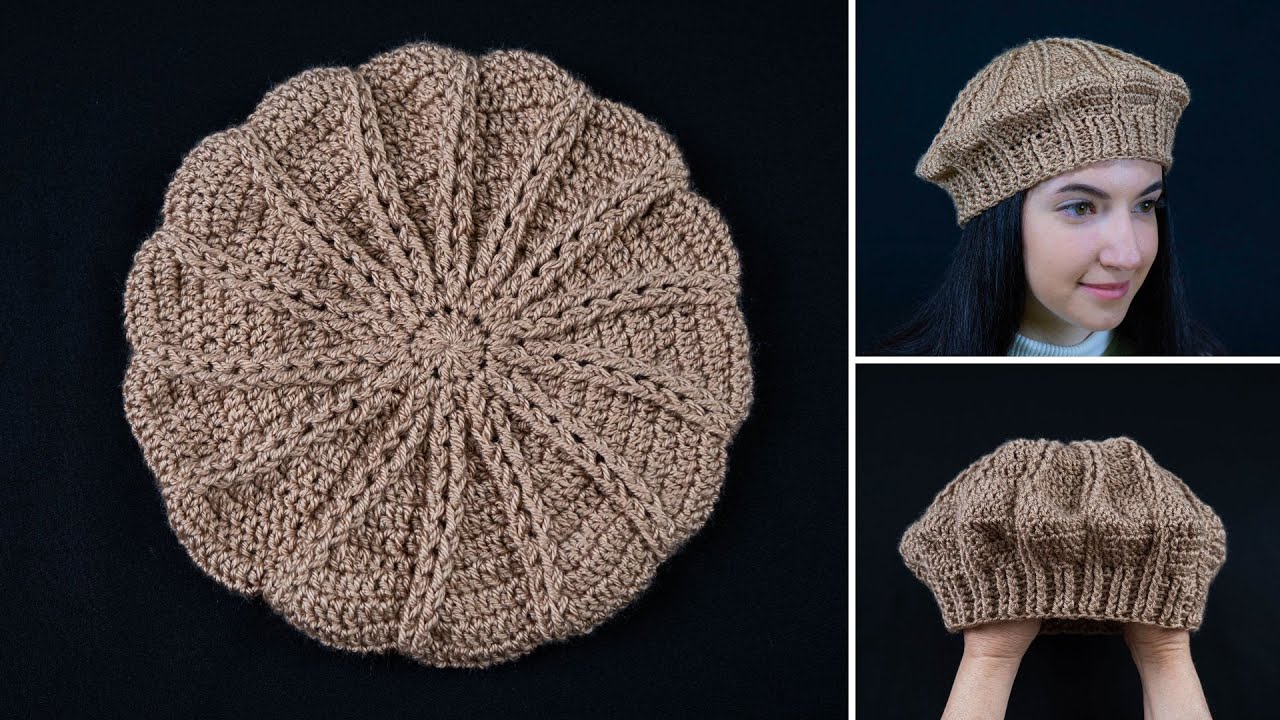
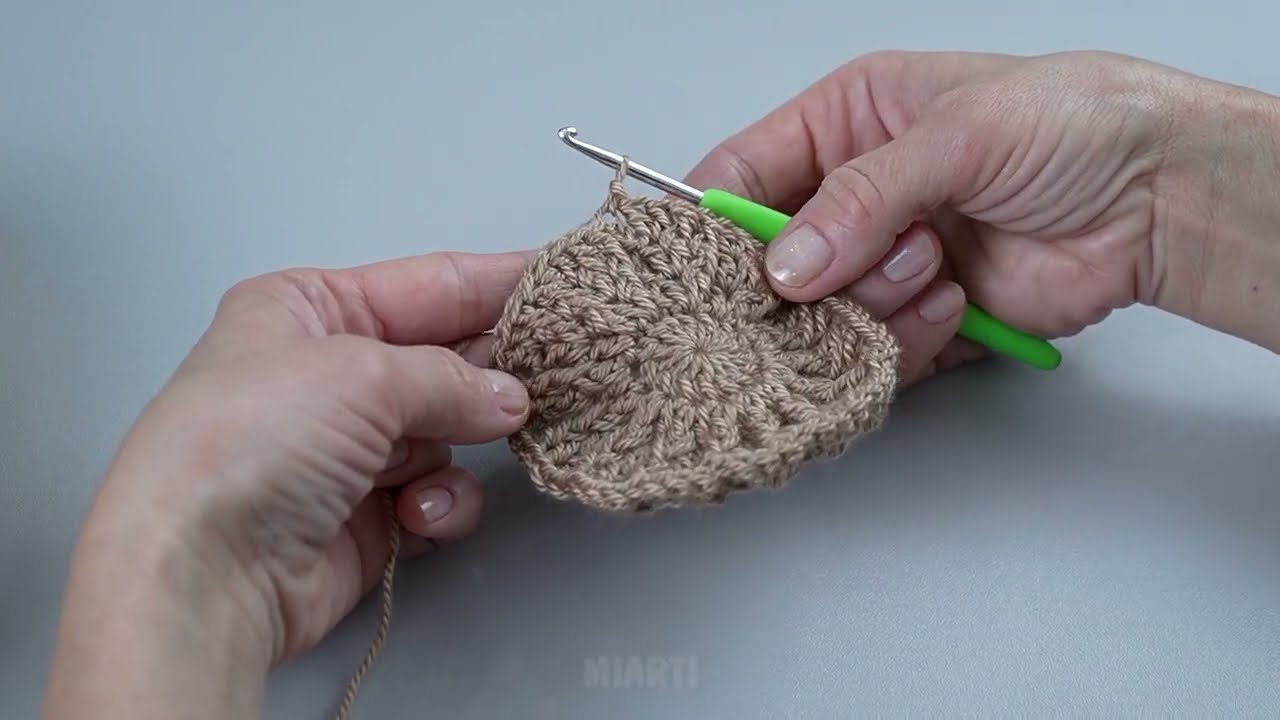
🧶 How to Make an Easy Crochet Beret Hat — Detailed Step-by-Step Tutorial
This tutorial is perfect for beginners and uses simple stitches. You’ll learn how to crochet a classic, slightly slouchy beret that you can customize in any color.
⭐ Materials You’ll Need
-
Worsted weight yarn (Category 4) – about 120–150 yards
-
Crochet hook: 5.0 mm (H) or size recommended on your yarn label
-
Yarn needle for weaving in ends
-
Scissors
-
Tape measure (optional)
🧵 Skill Level
Beginner +
You only need to know:
-
Magic ring (or chain 3, join to form ring)
-
Single crochet (sc)
-
Half double crochet (hdc)
-
Slip stitch (sl st)
-
Working in the round
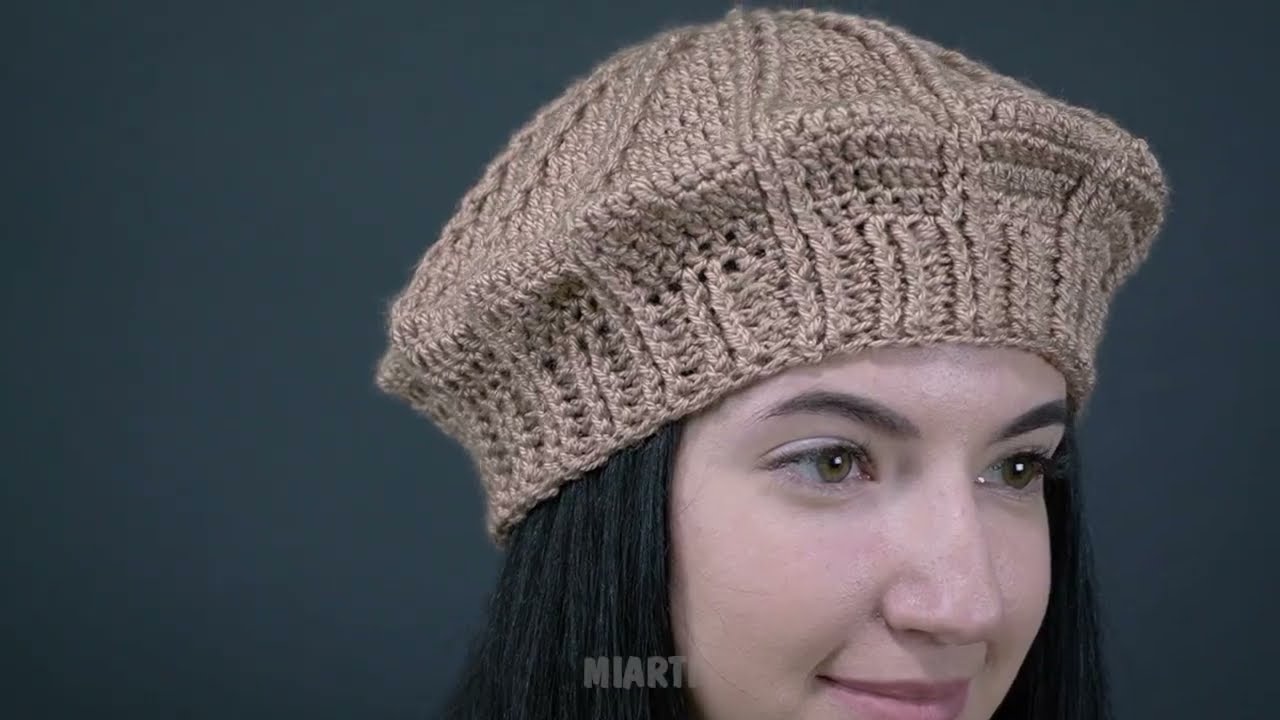
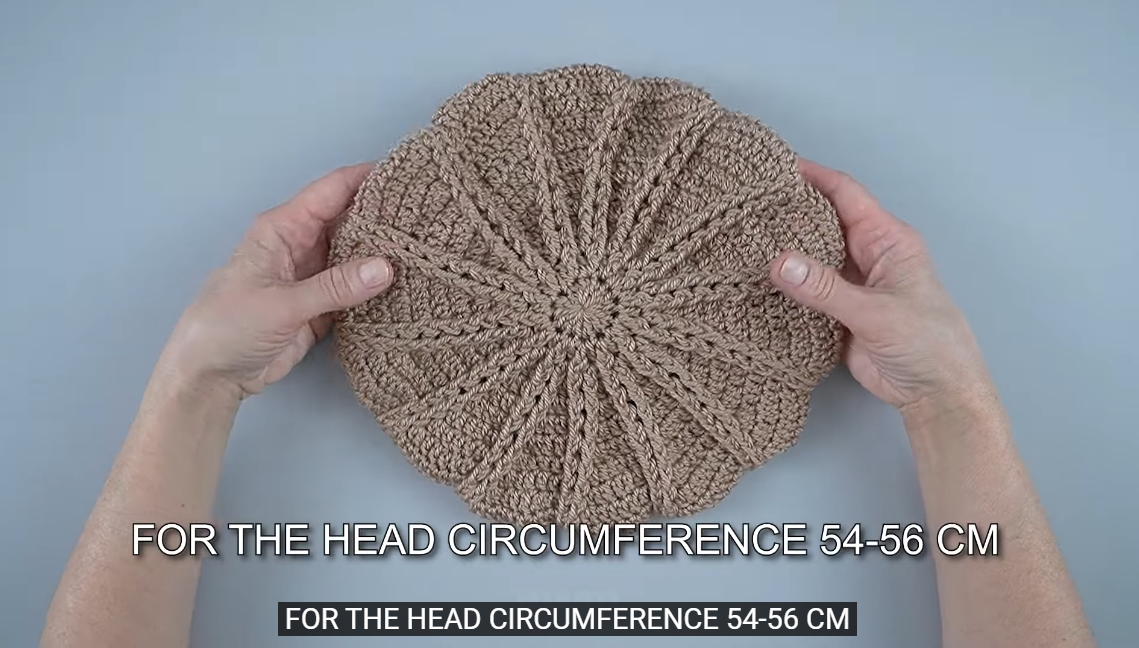
🟣 Finished Size
Fits most teens/adults
Crown: ~10.5–11 inches across
Head opening: ~20–22 inches (stretchy)
🪡 Stitch Abbreviations
| Abbrev. | Meaning |
|---|---|
| ch | chain |
| sl st | slip stitch |
| sc | single crochet |
| hdc | half double crochet |
| inc | increase (two stitches in the same stitch) |
| st | stitch |
| rnd | round |
🎨 Step-by-Step Instructions
🟡 1. Start the Crown (Magic Ring)
Rnd 1:
Make a magic ring.
Work 10 hdc into the ring.
Pull tight. Join with sl st to the first hdc.
(10 sts)
🟡 2. Begin Increasing to Form the Beret Shape
Rnd 2:
Ch 1. Hdc inc in each stitch around.
Join. (20 sts)
Rnd 3:
Ch 1. Hdc in next st, hdc inc in next. Repeat around.
Join. (30 sts)
Rnd 4:
Ch 1. Hdc in next 2 sts, hdc inc in next. Repeat.
Join. (40 sts)
Rnd 5:
Ch 1. Hdc in next 3 sts, hdc inc in next. Repeat.
Join. (50 sts)
Rnd 6:
Ch 1. Hdc in next 4 sts, hdc inc in next. Repeat.
Join. (60 sts)
Rnd 7:
Ch 1. Hdc in next 5 sts, hdc inc in next. Repeat.
Join. (70 sts)
Rnd 8:
Ch 1. Hdc in next 6 sts, hdc inc in next. Repeat.
Join. (80 sts)
👉 At this point, your circle should measure 10–11 inches across.
If you want a more slouchy beret, continue increasing one more round:
Optional Rnd 9:
Hdc in next 7 sts, hdc inc in next. (90 sts)
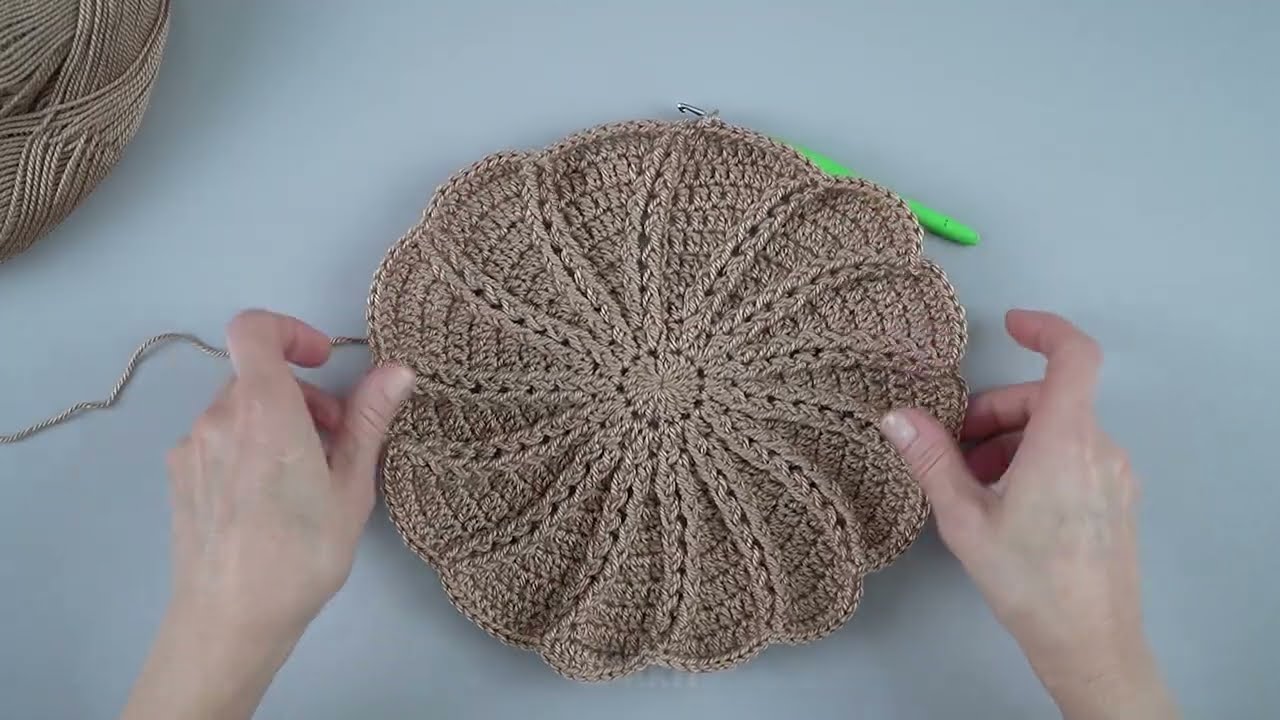
🟡 3. Create the Sides of the Beret (No Increases)
Now that the beret is wide enough, crochet even rounds.
Rnd 9 (or 10 if you did extra):
Ch 1. Hdc in each st around. Join.
Repeat this round 4–7 more times, depending on how slouchy you prefer.
(5–8 total “even” rounds)
Tip: The more rounds you work here, the puffier the beret.
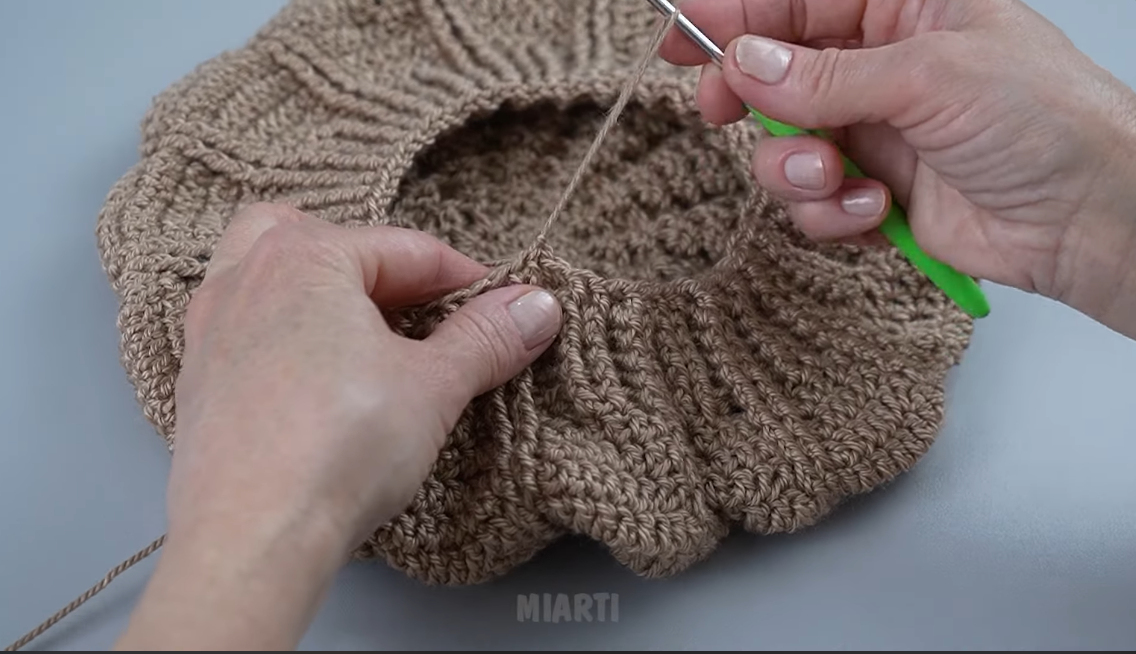
🟡 4. Begin Decreasing Toward the Headband
We’re gently tightening the hat so it hugs the head.
Next Rnd:
Ch 1. Hdc in next 6 sts, hdc2tog (decrease). Repeat.
Join.
Next Rnd:
Ch 1. Hdc in next 4 sts, hdc2tog. Repeat.
Join.
Next Rnd:
Ch 1. Hdc in next 2 sts, hdc2tog. Repeat.
Join.
Stop when the opening measures 22–23 inches around (stretch included).
🟡 5. Create the Headband
Switch to single crochet for a firmer band.
Rnd (Headband):
Ch 1. Sc in each stitch around. Join.
Repeat the round 4–6 times, depending on how wide you want the band.
Optional (for a tighter, stretchy edge):
-
Use a 4.5 mm hook for the band
-
Work the last round in reverse single crochet (crab stitch)
🟡 6. Finish
-
Fasten off.
-
Weave in all ends neatly using your yarn needle.
-
Lightly block or steam for an even shape if desired.
-
Place the beret on your head and gently flatten the top for the classic look.
🌟 Customization Ideas
-
Add a small pom-pom on top.
-
Use velvet yarn for a plush beret.
-
Add a row of puff stitches for texture.
-
Make it in stripes or color blocks.
🎉 You’re Done!
You’ve made a beautiful, classic crochet beret using simple stitches. This pattern is perfect for gifts, markets, or personal style.
If you’d like, I can also:
✨ Make this into a printable PDF
✨ Write a version using chunky yarn
✨ Create a child-size or oversized version
✨ Add step-by-step diagrams or drawings
Just tell me!
Watch tutorial: