by
by Below is a step-by-step, beginner-friendly tutorial on how to make an easy crochet hat, using just basic stitches. This guide is written so even someone picking up a hook for the first time can follow along!
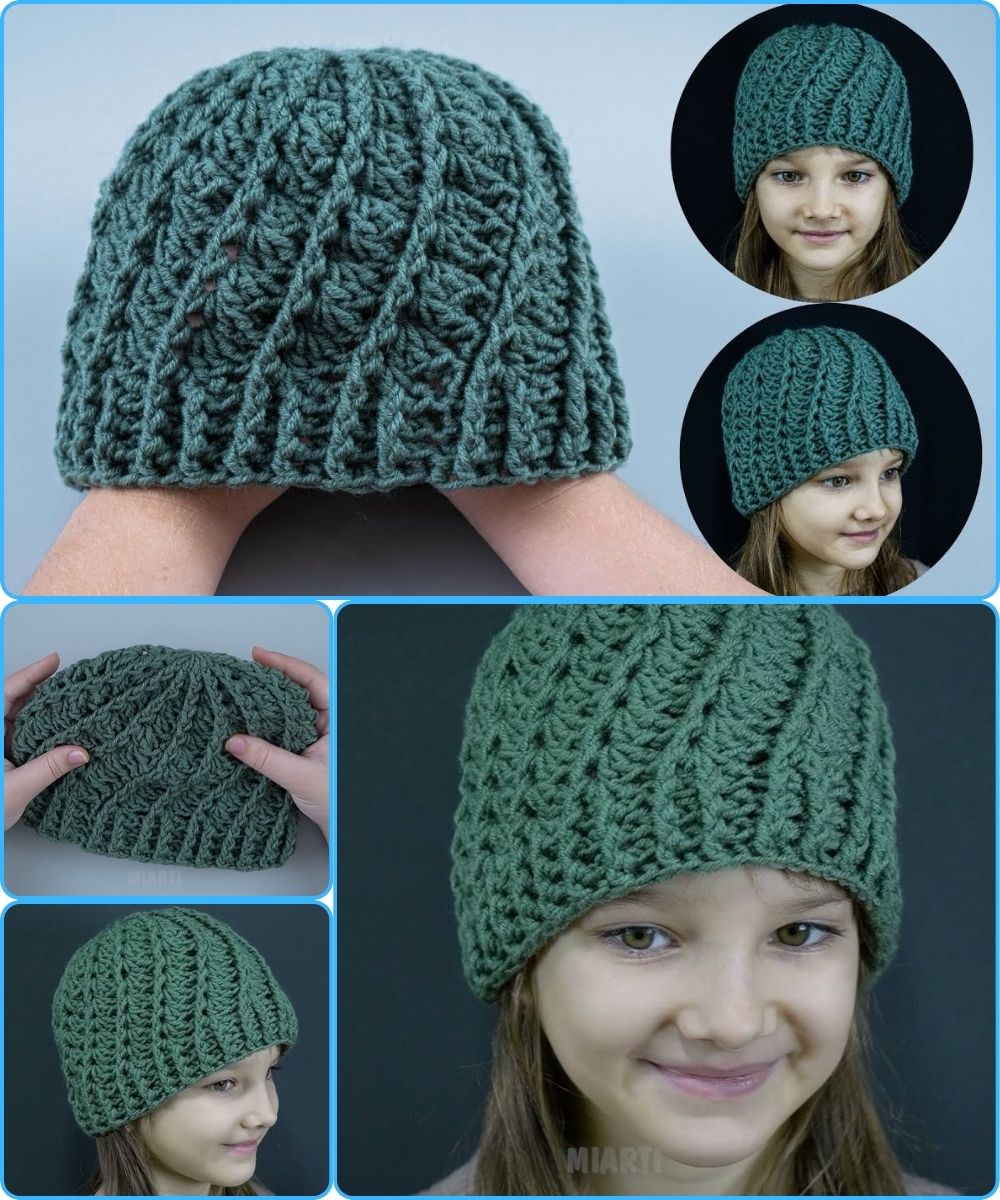
🧶 How to Make an Easy Crochet Hat (Beginner-Friendly Tutorial)
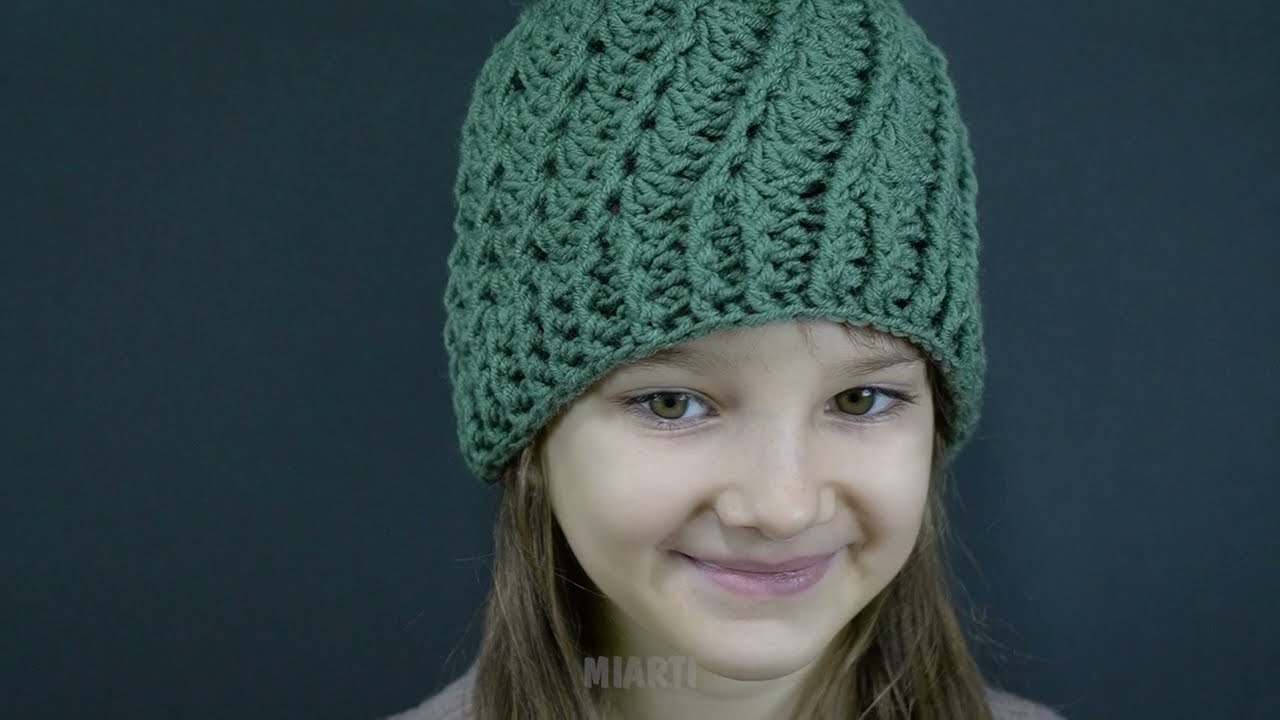
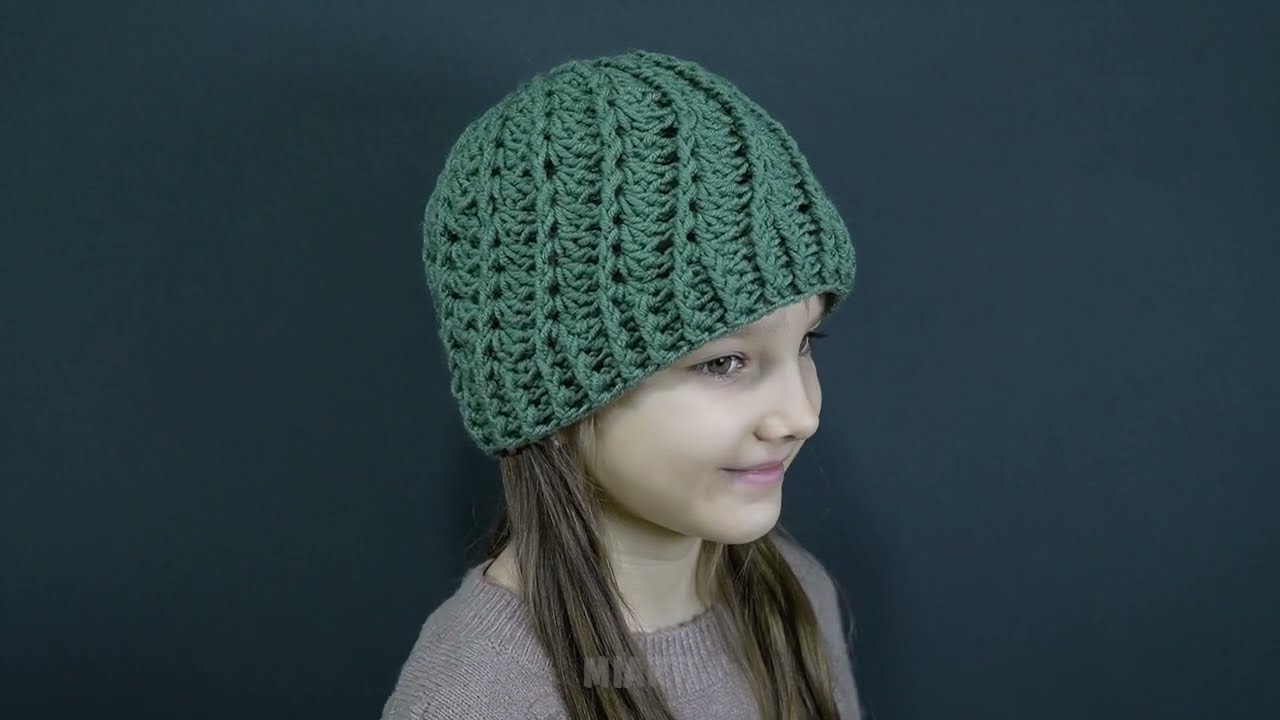
This pattern creates a soft, stretchy beanie using simple stitches: slip stitch, chain, and half-double crochet (hdc). It’s customizable for any head size.
🌟 Materials You Need
-
Worsted weight yarn (medium #4) – about 150–200 yards
-
Crochet hook size H/5.0 mm or I/5.5 mm (pick what matches your yarn label)
-
Yarn needle for weaving in ends
-
Scissors
-
Optional: pom-pom
📏 Before You Start: Sizing Guide
For an adult hat, aim for:
-
Crown diameter: 6–6.5 in (15–16.5 cm)
-
Hat height: 8–9 in (20–23 cm)
For kids or babies, follow size charts (if you want, I can generate one for you).
🧶 Method 1: Crochet Hat From the Top Down (Easiest for Beginners)
This is the most beginner-friendly method because the hat grows outward like a circle, then straight down.
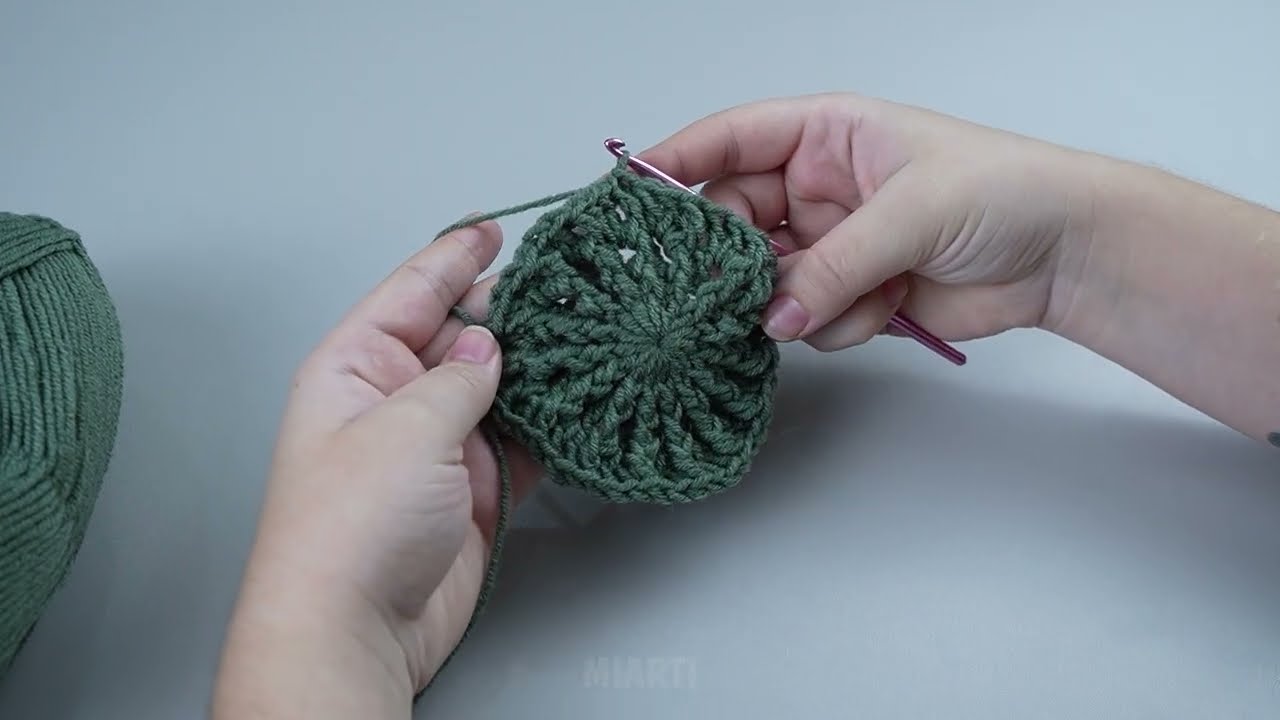
✨ Step 1: Make a Magic Circle
The magic circle helps keep the top of the hat tight.
-
Wrap the yarn loosely around two fingers to form a loop.
-
Insert your hook into the loop, yarn over, and pull up a loop.
-
Chain 2 (this does not count as a stitch if using hdc).
👉 If magic circles confuse you, no worries — you can chain 3 and slip stitch to join into a ring instead.
✨ Step 2: Round 1 — Start the Crown
-
Work 10 half-double crochet (hdc) into the circle.
-
Pull the circle tight.
-
Slip stitch to the first hdc to join.
You now have a small circle — the top of your hat!

✨ Step 3: Round 2 — Increase
-
Chain 1 (doesn’t count).
-
Work 2 hdc in each stitch around.
-
Join with slip stitch.
You should have 20 stitches now.
✨ Step 4: Round 3 — Increase Again
-
Chain 1.
-
Repeat: 1 hdc in the first stitch, 2 hdc in the next stitch.
-
All the way around.
-
Join.
You should have 30 stitches.
✨ Step 5: Round 4 — More Increasing
-
Chain 1.
-
Repeat:
-
1 hdc in each of the first 2 stitches
-
2 hdc in the next stitch
-
-
Repeat around.
You’ll have 40 stitches.
✨ Step 6: Continue Increasing Until the Crown Is Big Enough
General increasing pattern:
👉 For each round, add one more regular stitch between increases.
Example for the next rounds:
-
Round 5: 1 hdc in next 3 stitches, 2 hdc in next → repeat
-
Round 6: 1 hdc in next 4 stitches, 2 hdc in next → repeat
Stop when the diameter of the circle equals the target crown size (about 6–6.5 inches for adults).
✨ Step 7: Crochet the Body of the Hat
Once your crown is wide enough:
-
Chain 1.
-
Work 1 hdc in each stitch around.
-
Slip stitch to join.
Repeat these “no-increase” rounds until the hat measures:
-
8–9 inches from crown to bottom for adults
-
(I can provide height measurements for other sizes)
This creates the straight sides of the beanie.

✨ Step 8: Add the Ribbed Brim (Optional but Looks Great!)
Use this easy technique:
-
Chain 1.
-
Work 1 half double crochet in the back loop only (hdc BLO) around.
-
Join.
This creates a stretchy ribbed edge.
Repeat this round 4–6 times, or until the brim looks how you want.
✨ Step 9: Finish
-
Cut yarn, leaving a 6-inch tail.
-
Pull through to secure.
-
Use your yarn needle to weave in ends.
-
Add a pom-pom if you like!
🧶 Tips for Beginners
-
Keep your tension relaxed — too tight makes it hard to insert the hook.
-
Count your stitches at the end of rounds to avoid lopsided hats.
-
If you see the hat ruffling, you may be increasing too much.
-
If it cups or curls, you may need more increases.
🎉 Want Variations?
I can also write:
-
A child or baby size version
-
A chunky yarn 1-hour beanie
-
A flat rectangle sewn into a hat (super beginner method)
-
A ribbed, slouchy, or folded-brim version
Just tell me what style you want!
Watch tutorial: