 by
by Below is a detailed, beginner-friendly guide on how to crochet a high-neck coat for a girl. This includes materials, measurements, stitch explanations, construction steps, shaping, assembly, and finishing techniques. You can follow this as a pattern outline and customize it for any age or size.
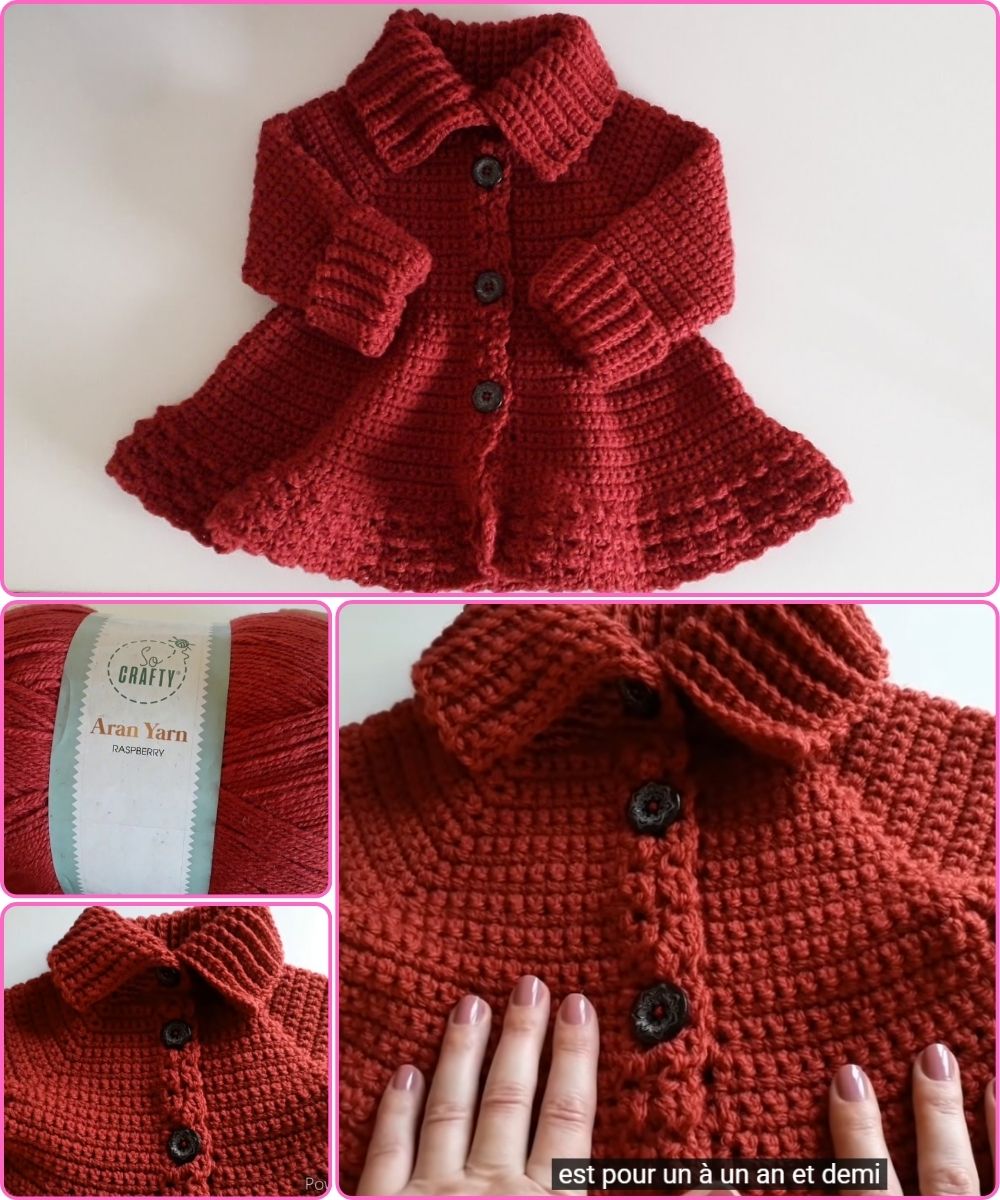
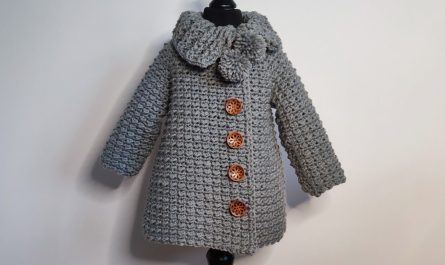
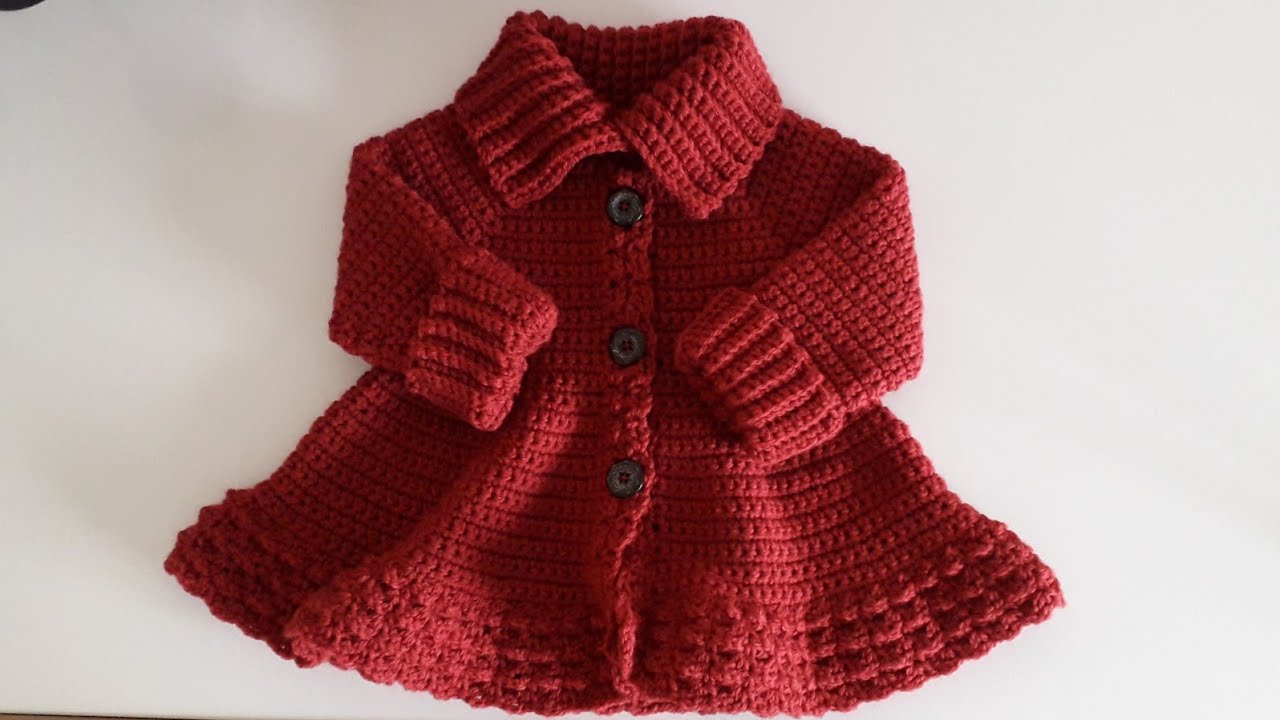
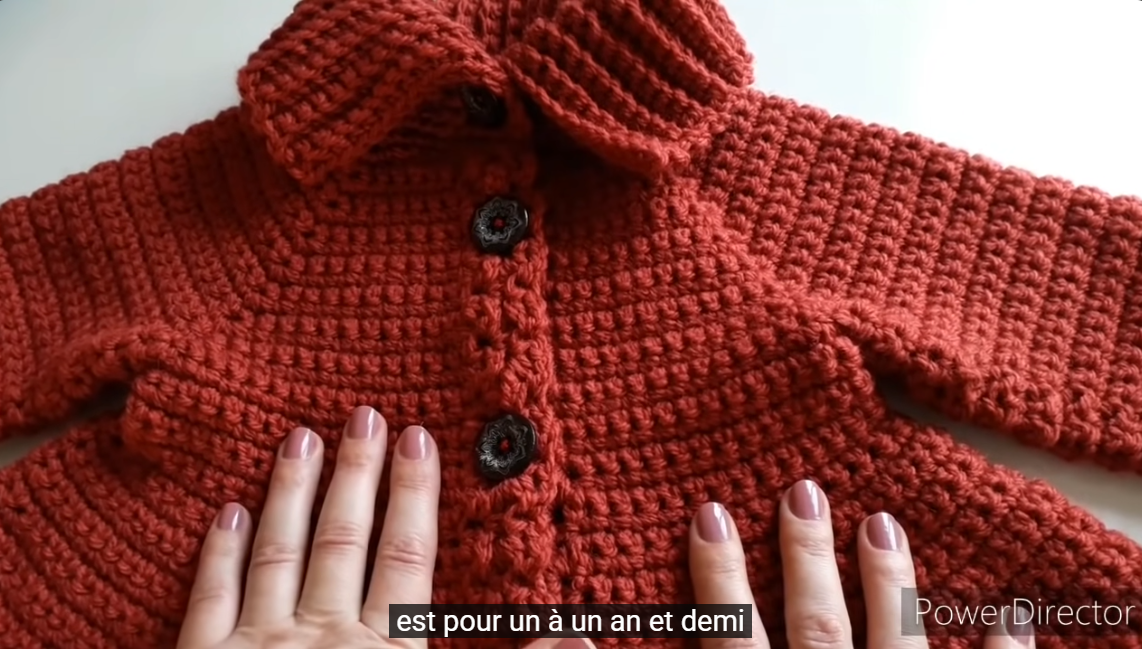
🧵 How to Crochet a High-Neck Coat for a Girl
(Comprehensive Step-by-Step Guide)
✔️ Skill Level:
Advanced Beginner – Intermediate
✔️ Construction Style:
Top-down or Panel-based (both explained)
🌸 1. Materials You Will Need
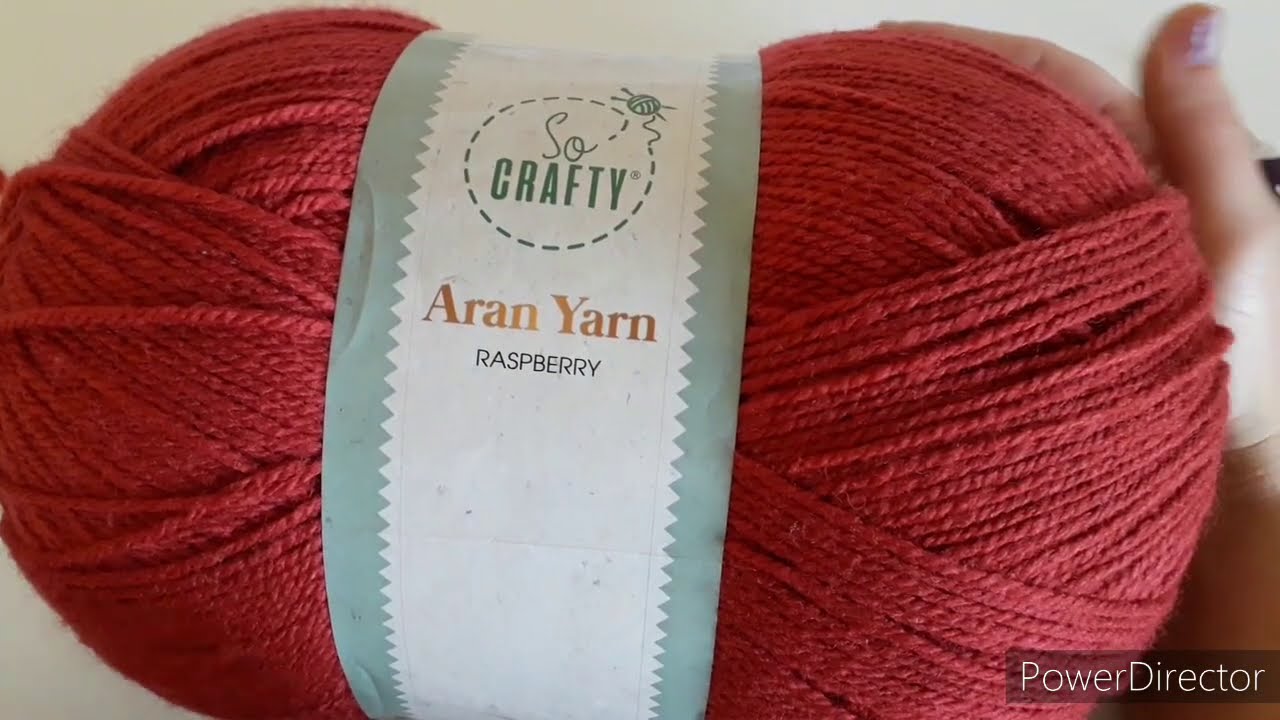
Yarn
-
Medium Weight (Category 4) acrylic or wool-blend
(Durable, warm, and easy to wash)
Hook Size
-
5.0 mm (H) for the body
-
4.0 mm (G) for ribbing, cuffs, and neckline
Notions
-
4–6 buttons (1–1.5 inches)
-
Stitch markers
-
Tapestry needle
-
Scissors
-
Measuring tape
👧 2. Measurements You Need
(Coat length and width depend on size)
| Age | Chest Circumference | Coat Length | Sleeve Length |
|---|---|---|---|
| 3–4 yrs | 22–23 in (56–58 cm) | 16–18 in | 12–14 in |
| 5–6 yrs | 24–25 in | 18–20 in | 14–16 in |
| 7–8 yrs | 26–28 in | 20–22 in | 16–18 in |
Tip: Always crochet to the child’s measurements for perfect fit.
🧶 3. Stitches and Abbreviations
-
ch – chain
-
hdc – half double crochet
-
dc – double crochet
-
sc – single crochet
-
sl st – slip stitch
-
fpdc/bpdc – front/back post double crochet
-
inc – increase (2 stitches in one stitch)
🧥 4. Choosing a Construction Method
You can crochet this coat in two main ways:
A. Top-Down Raglan (No sewing, easiest for beginners)
or
B. Panel Method (Fronts, Back, Sleeves sewn together)
Below is the most popular version: Top-Down Raglan Coat.
🧶 5. Step-by-Step: Top-Down High-Neck Coat
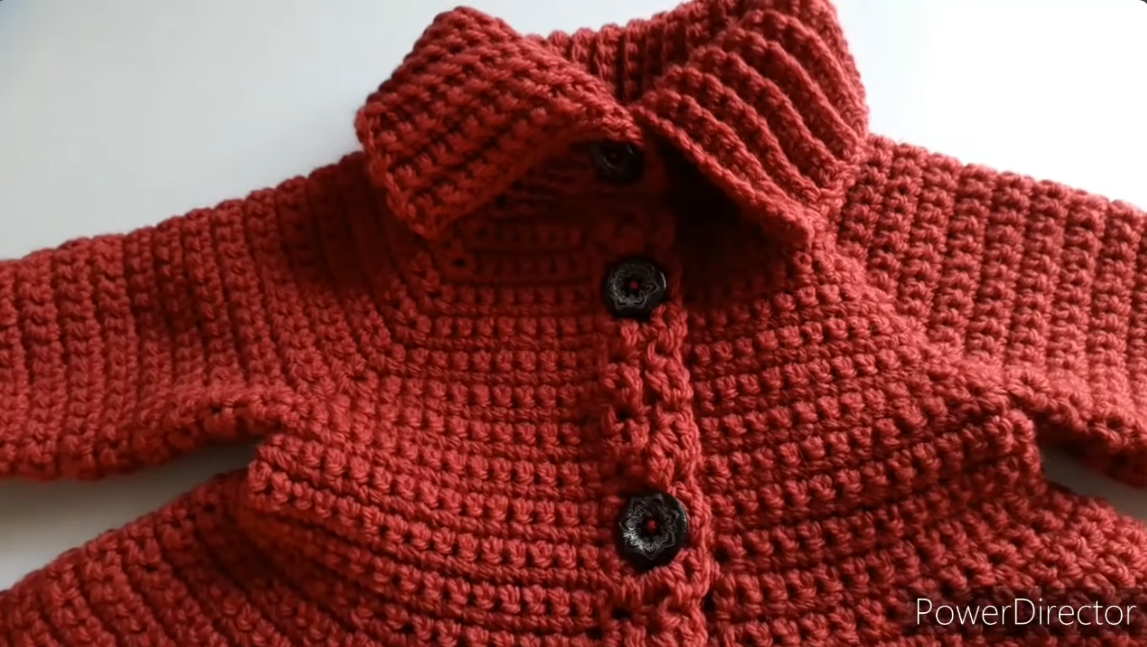
⭐ Step 1: Start the High Neck
Use a smaller hook (4.0 mm).
-
Ch 60 (for 5–6 yrs; adjust by ±4 stitches per size).
-
Join to form a round (do not twist).
-
Work 5–7 rows of FPDC/BPDC ribbing.
-
This creates the tall, stretchy high neck.
-
For a more dramatic collar, add more rows (10–12).
⭐ Step 2: Begin Raglan Yoke
Switch to 5.0 mm hook.
You will divide the round into:
-
1 Back
-
2 Fronts
-
2 Sleeves
-
4 Raglan increase points
Example stitch distribution (total 60):
-
10 (Front) – 1 (Marker) – 15 (Sleeve) – 1 (Marker) – 16 (Back) – 1 (Marker) – 15 (Sleeve) – 1 (Marker) – 10 (Front)
Row Pattern (worked in dc):
-
Increase at each marker: (dc, ch1, dc) in the marked stitch
Repeat rows until:
-
Chest width matches desired size
(Usually 20–24 total rows)
⭐ Step 3: Separate the Sleeves
When the yoke reaches mid-armpit:
-
Work the front, skip all sleeve stitches (place on stitch holders),
-
Continue across back, skip next sleeve,
-
Continue across front.
Add 6–10 chains under each arm for comfort.

⭐ Step 4: Crochet the Body of the Coat
Work evenly in dc or hdc for:
-
10–14 inches length depending on age.
Optional:
-
Add waist shaping:
-
decrease 2 stitches at each side every 3 rows (2–3 times).
-
-
Add flare:
-
increase 2 stitches at each side every 4 rows.
-
⭐ Step 5: Create the Button Band
The coat is open in front, so add a border.
Work sc rows along the left and right fronts.
For buttonholes:
-
On the right band, create buttonholes by:
-
sc 3, ch 2, skip 2 (repeat every few rows)
-
Add 3–5 rows to stabilize.
⭐ Step 6: Crochet the Sleeves
Put sleeve stitches back on the hook.
-
Attach yarn at underarm.
-
Work in rounds using dc or hdc.
-
Decrease 2 stitches every 5 rows for a tapered shape.
-
When at desired length, make ribbed cuff:
-
5–7 rows of FPDC/BPDC.
-
⭐ Step 7: Add the High Neck Extension
If you want the neck taller or folded:
-
Reattach yarn at the neckline
-
Add 4–8 more ribbing rows
This makes the classic high-neck coat style.
✨ 8. Optional Design Features
✔️ Pockets
Work two small rectangles and sew to the front.
✔️ Belt
Crochet a long strap and add belt loops to the coat.
✔️ Decorative Edges
Use:
-
shell stitch
-
crab stitch edging
-
picot border
✔️ Hood (if desired)
Crochet a rectangle, fold, and seam the top—attach to neckline.
🧼 9. Finishing
-
Weave all ends with tapestry needle
-
Sew on buttons
-
Lightly block the coat (steam block recommended for acrylic)
-
Check fit and adjust if desired
🎀 10. Tips for a Perfect Coat
-
Always check gauge before starting.
-
Use stitch markers to avoid losing track.
-
Choose soft yarns so the neck is not itchy.
-
Add a fabric lining if you want extra warmth.
💬 Want me to turn this into a full written pattern for a specific age (e.g., 5–6 years, 7–8 years)?
I can also include:
-
stitch counts
-
row-by-row instructions
-
illustrations
-
printable PDF style layout
Just tell me the child’s age/size!
Watch tutorial: