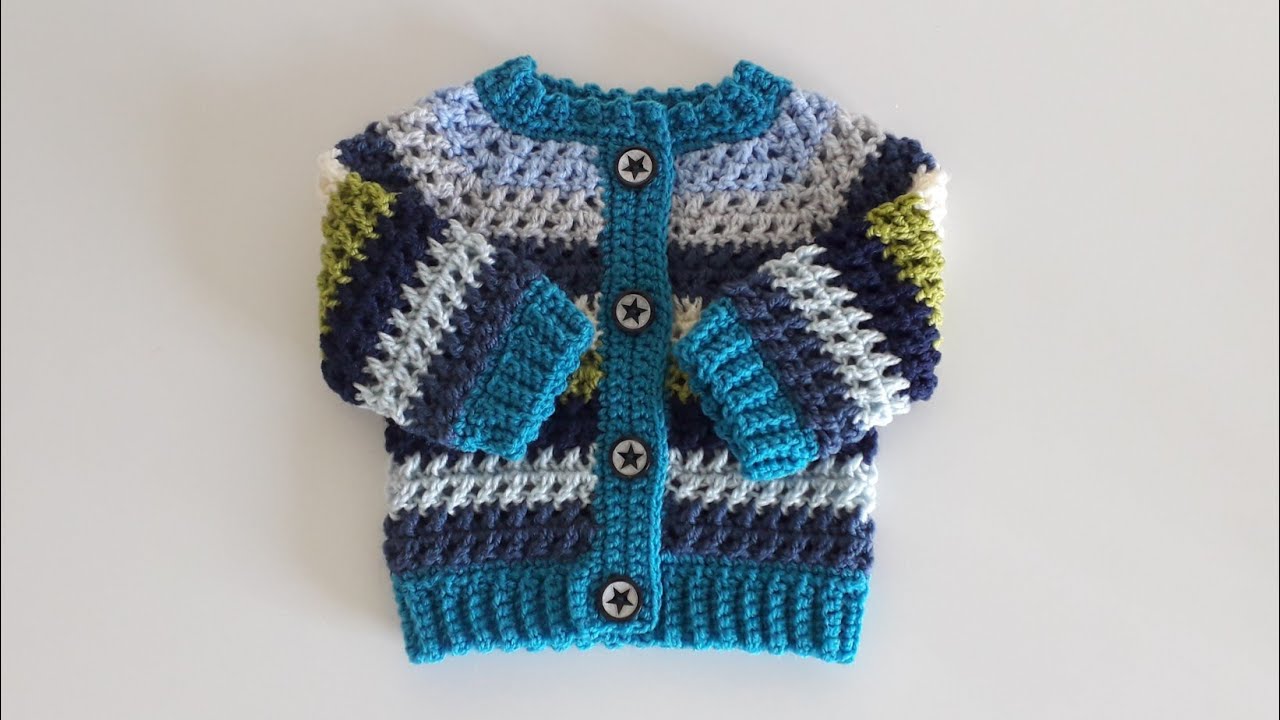
 by
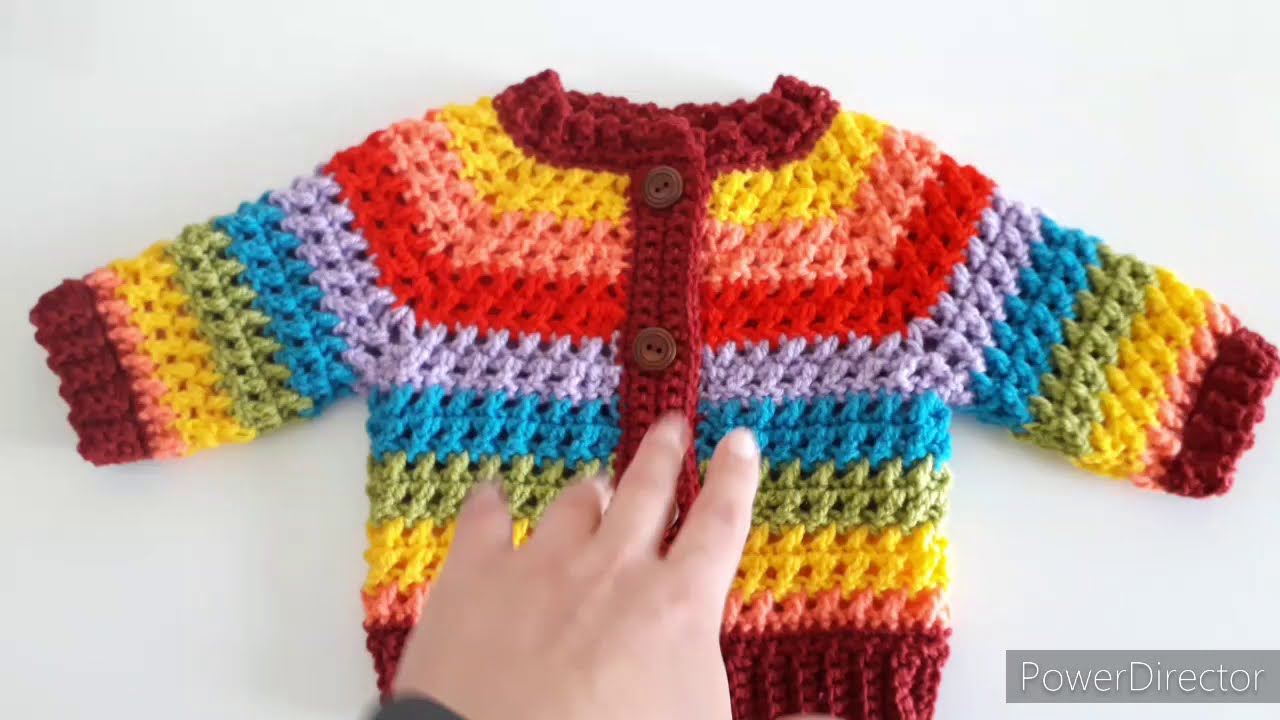
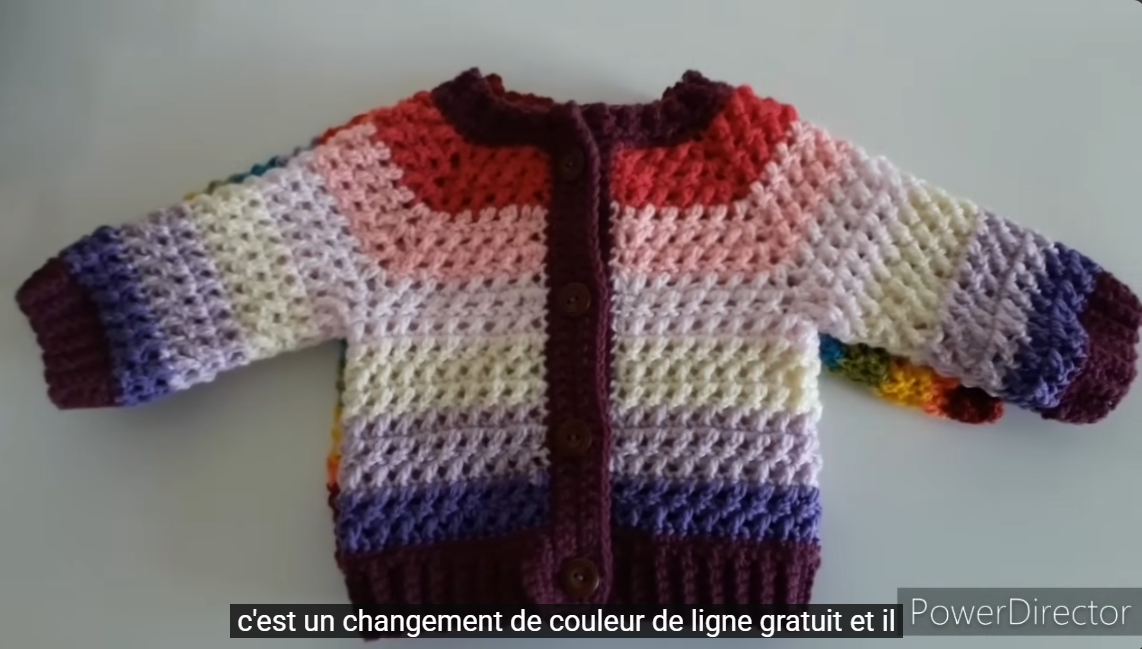
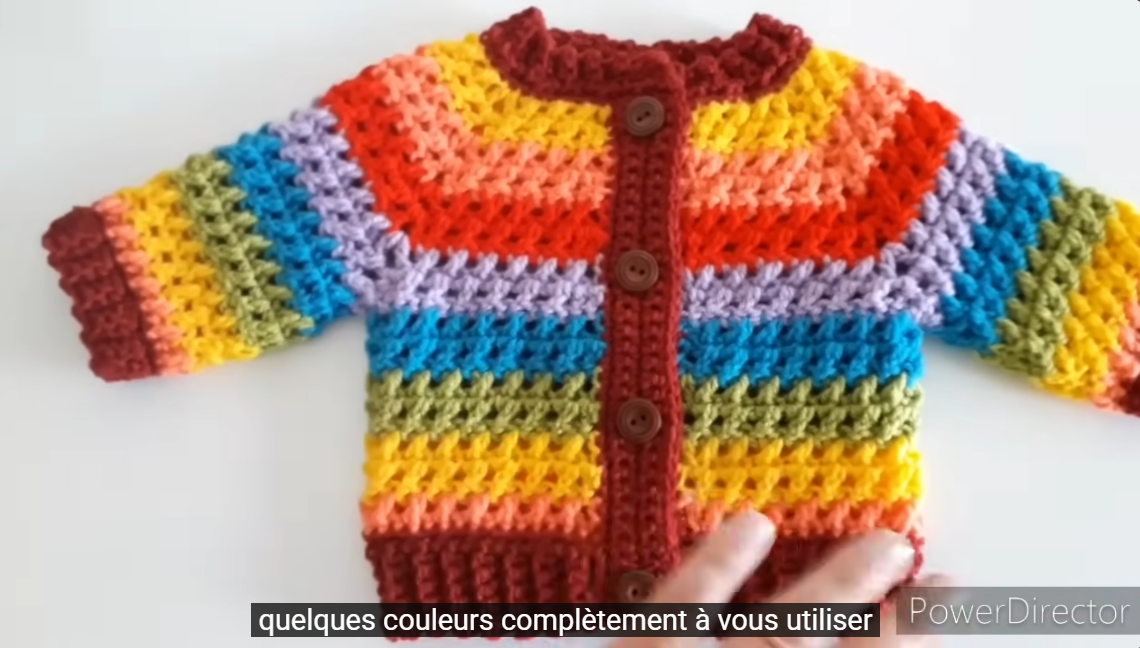
by Below is a clear, step-by-step, detailed guide on how to crochet a baby cardigan “Kriss Cross”, inspired by the popular criss-cross stitch texture. This is not tied to any specific copyrighted pattern, but provides full instructions you can follow to create your own adorable cardigan.
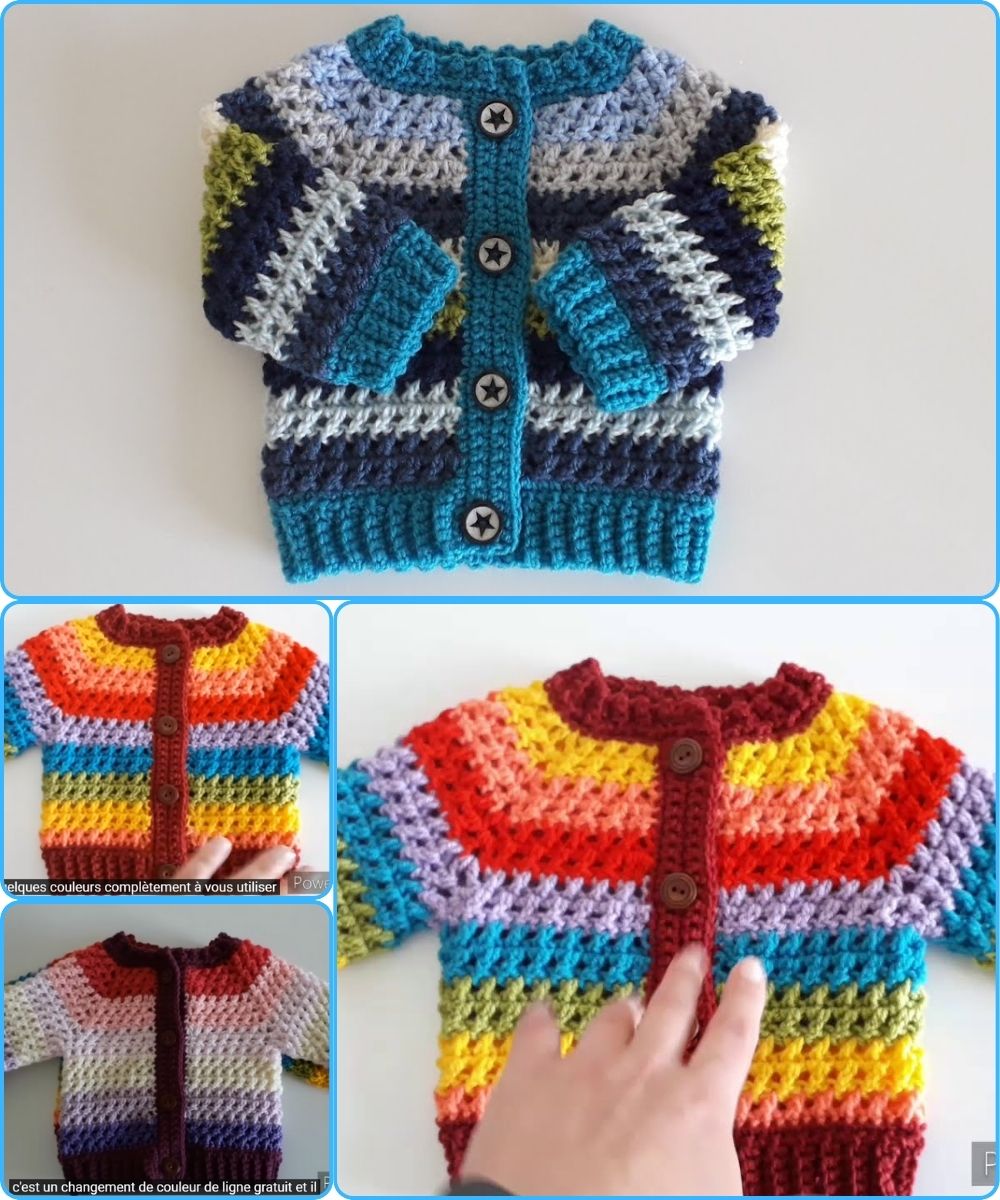
🧶 How to Crochet a Baby Cardigan “Kriss Cross”
Size: 0–6 months (adjustable)
Skill level: Confident Beginner / Intermediate
Stitch focus: Criss Cross Stitch (also called Crossed Double Crochet)
⭐ Materials
-
Yarn: DK or Light Worsted (Category 3), approx. 150–200 g
-
Hook: 4.0 mm (US G) or size needed for gauge
-
Notions:
-
Scissors
-
Yarn needle
-
3–5 small buttons (optional)
-
Stitch markers
-
⭐ Gauge (Important)
12 dc × 7 rows = 10 cm × 10 cm (4″x4″)
⭐ Stitches Used
-
ch – chain
-
sc – single crochet
-
dc – double crochet
-
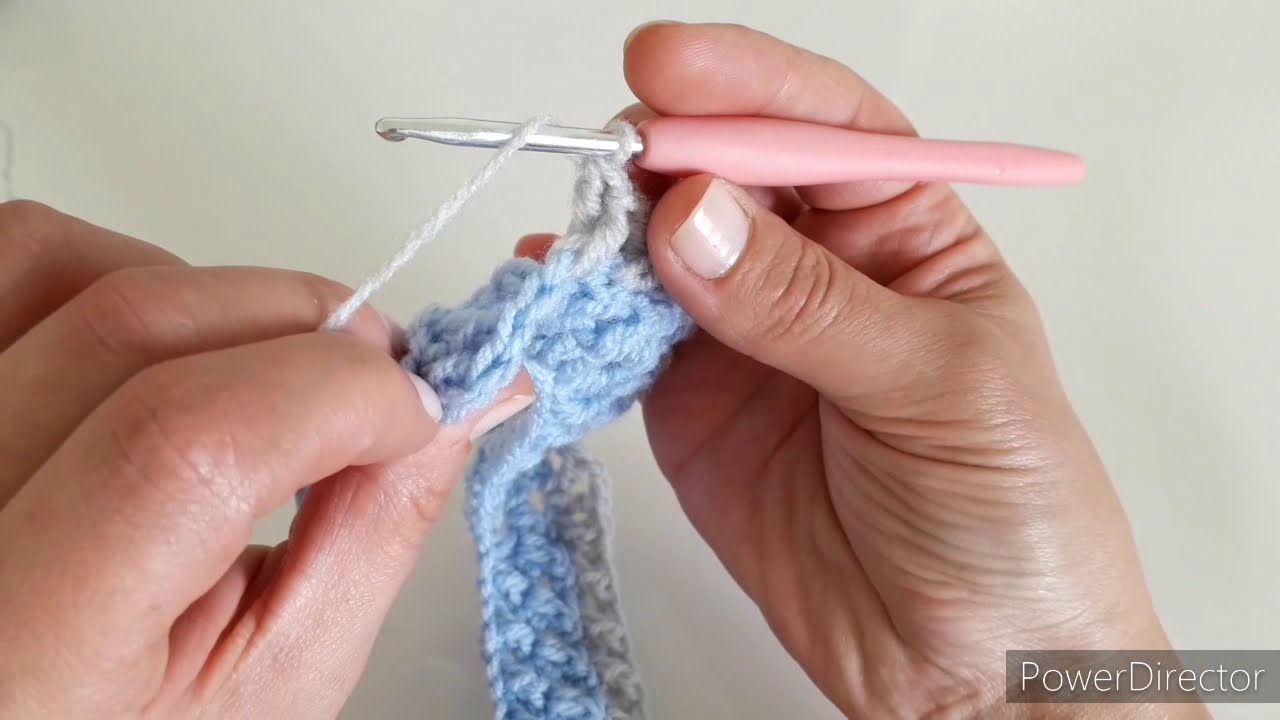
x-st (criss cross stitch):
-
Skip 1 st, dc in next st
-
Go back and dc into skipped st
(This forms the criss cross “X”.)
-
🧵 Construction Overview
This baby cardigan is worked top-down, yoke first, then split into body + sleeves. No seaming required except for sleeve joining (if done in the round).
📝 Step-by-Step Instructions
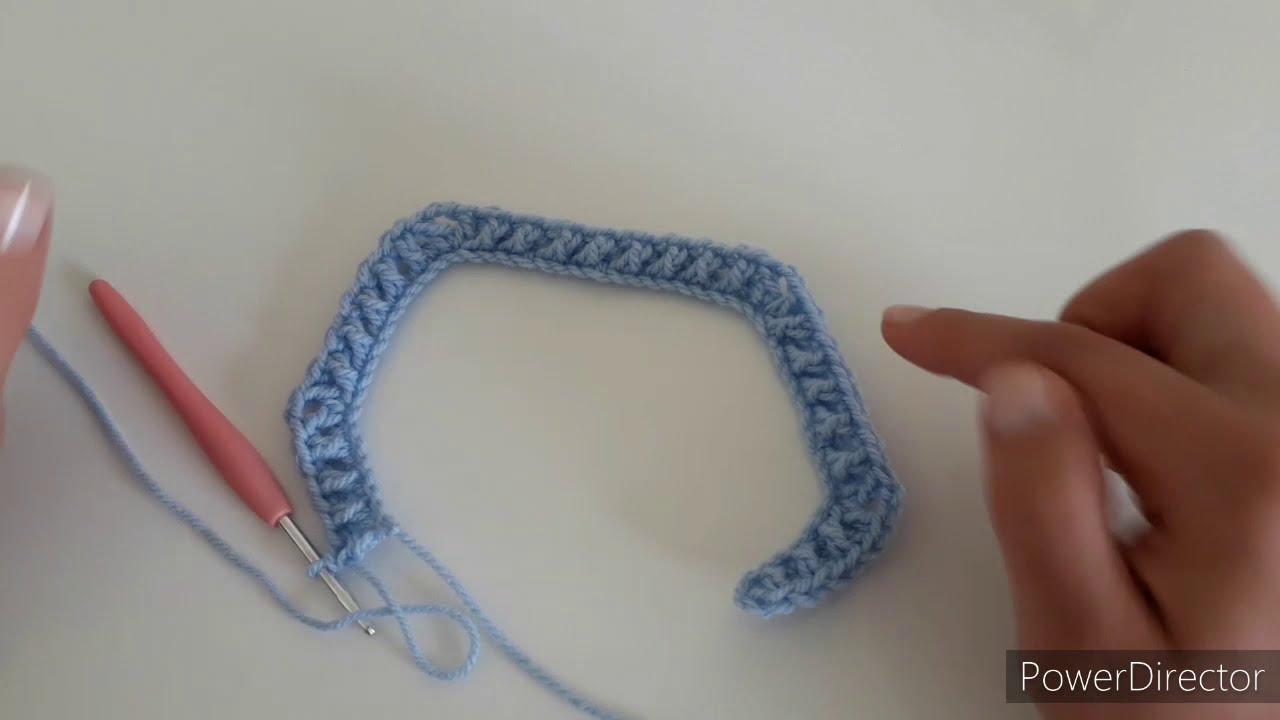
1️⃣ YOKE
Foundation Chain
Ch 60 (0–6 months).
This creates the neck and stitch count for raglan lines.
Row 1: Set-Up Row
Dc into the 3rd ch from hook and across.
You should have 58 dc.
Mark raglan points:
Stitch markers in stitches: 10, 20, 38, 48
(Your yoke sections will be: 10 – 10 – 18 – 10)
2️⃣ Row 2 and onward: Begin Criss Cross Pattern
Repeat rows increasing at each raglan point.
Row 2
-
Ch 2 (counts as dc)
-
Work x-st (criss cross) across until 1 st before first marker
-
2 dc in st before marker, dc in marked st, 2 dc in next st
-
Repeat this at all four raglan markers
-
Continue x-st to end
Rows 3–12 (approx.)
Repeat Row 2, always:
-
Maintain criss-cross texture in each section
-
Add 4 increases per row (one at each raglan)
Stop when:
-
The yoke reaches 10–12 cm deep
-
Sleeve stitches fit comfortably around baby’s arm
3️⃣ SEPARATE BODY & SLEEVES
You now divide into:
-
Left front
-
Right front
-
Back
-
Two sleeves
Row 13
-
Work x-sts across left front
-
Ch 4 (to bridge the armpit)
-
Skip sleeve stitches
-
Work across back using x-sts
-
Ch 4
-
Skip sleeve 2
-
Continue across right front

4️⃣ BODY (work straight down)
Rows 14–28
Continue working criss-cross stitch:
-
Ch 2, work x-sts all along the row
-
No more increasing
-
Add length (approx. 15–18 cm total from armpit)
Optional edging
Finish bottom with:
-
1 row sc
-
1 row dc
-
1 row sc
5️⃣ SLEEVES
Reattach yarn at armhole
Work in rounds or rows.
Rounds 1–12 (approx.)
-
Work criss-cross stitches evenly around
-
Decrease one stitch every 3–4 rounds for shaping
-
Stop when sleeve reaches 10–12 cm
Cuff
Finish with 2–3 rows of single crochet.
Repeat for the other sleeve.
6️⃣ FRONT EDGING & BUTTON BAND
Right Front Edge
-
Work 1 row sc, spacing stitches evenly
-
Repeat 2–3 rows for a neat band
Left Front Edge (Buttonholes)
-
Work 1 row sc
-
On the next row, create buttonholes:
-
sc 3, ch 2, skip 2, sc 4 (adjust spacing to taste)
-
-
Work 1–2 more rows sc
Neckline
Work 1–2 rows sc around neck to neaten.
7️⃣ Finishing
-
Sew on buttons
-
Weave in all ends
-
Block lightly to relax stitches
⭐ Tips for Success
-
Keep raglan increases aligned—use stitch markers.
-
If your criss-cross stitches lean too much, loosen your tension.
-
Adjust size by increasing early yoke rows or using a thicker yarn.
-
Add a cute trim (shell stitch, picot, or ribbing) for a custom look.
💗 You now have a cozy handmade baby cardigan with a beautiful “Kriss Cross” texture!
If you want, I can also make:
✅ A printable PDF
✅ Step-by-step diagram
✅ Video-style explanation
✅ Larger sizes (6–12m, 12–18m, 2T, etc.)
Just tell me!
Watch tutorial: